This is a sort of "part 2" to the DIY improve bolt lift thread. There are some great videos of pro bedding jobs in the gunsmithing section, I thought I would post a few tricks I use to help the DIY perform a professional looking bedding job with some pretty basic tools and skills. We will be starting with a donor Rem 700 action and a inletted McMillan A5 stock. This stock already had pillars installed, so I will not include info in this thread on bedding pillars, and it is a little more advanced than I intended this thread to be.
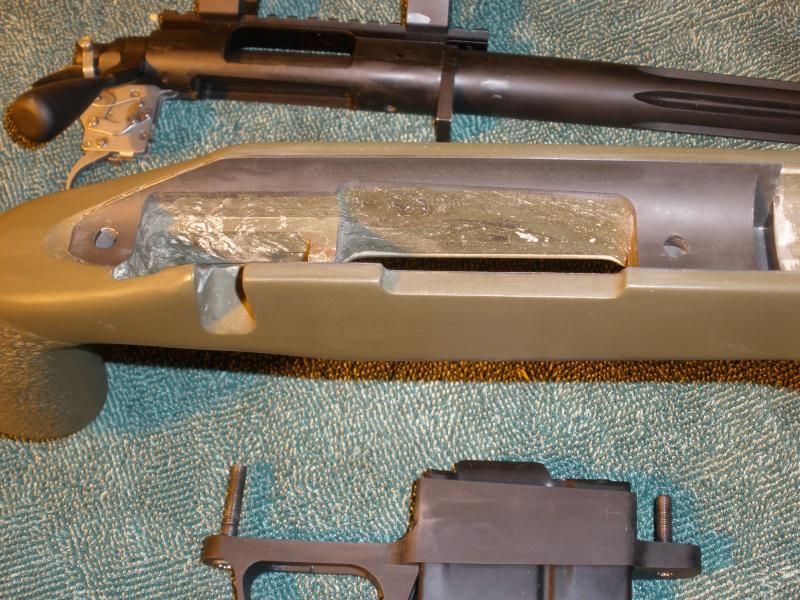
1. First step is to ensure the action functions properly in the stock, check proper mag height and bottom metal relation to the action. It is not critical that the bottom metal be perfectly flush, so long as function is good.
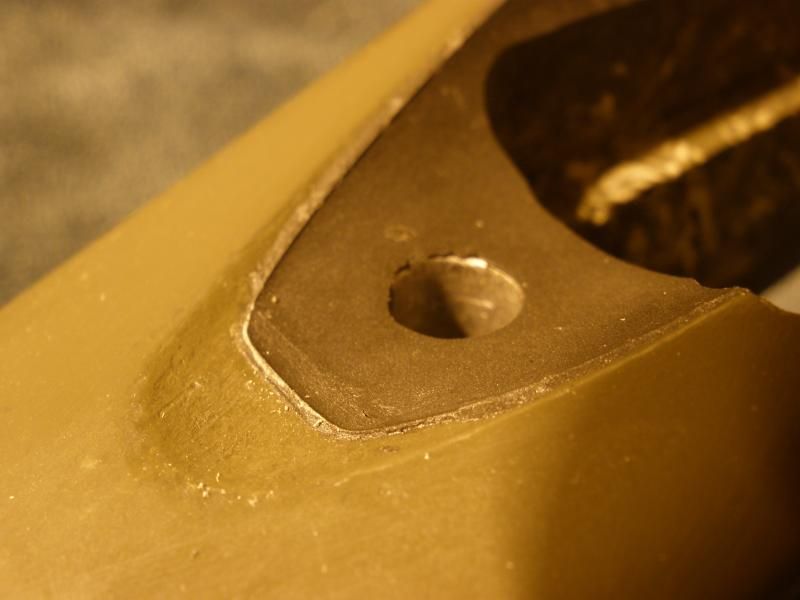
2. Second step is to prepare the stock and action, a good bedding job starts and ends with proper prep, I can't stress this enough. First step in prep is to remove the trigger, this is a very simple task, for Remington you are simply pushing out the 2 trigger retaining pins,the trigger will come out in a complete unit. Pay attention to how the bolt release is installed. Next step in prep is to plug all the holes in the action, I use modeling clay for all my bedding projects, which is available at craft stores.
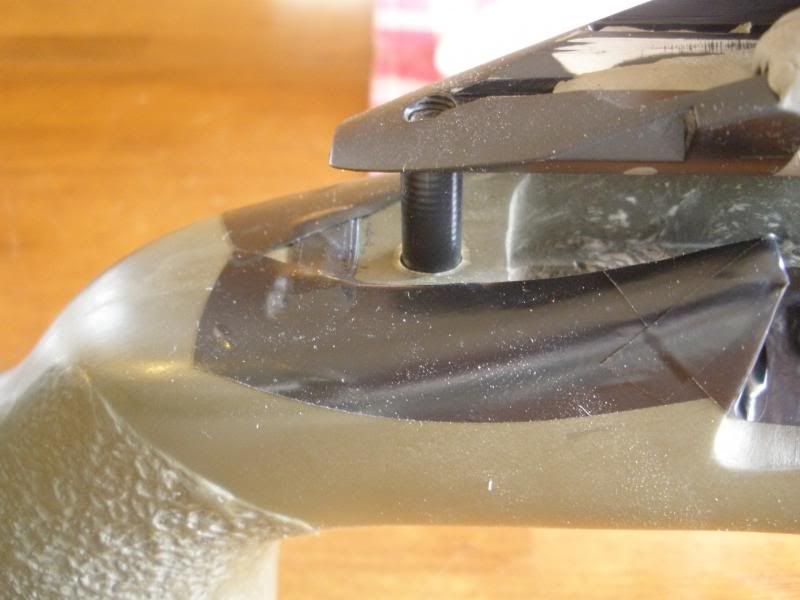
Many smiths will use the bottom metal and action screws during bedding, I prefer a different approach which consists of taking full length threaded bolts that I have cut the heads off of. One of the benefits of this method is you can thread them into the receiver prior to placing the action into the stock after bedding is applied, which will ensure no bedding material gets into the pillars, it also helps align the action into the stock. I place electical tape around the threads just below the receiver so the diameter is close to the pillar opening.
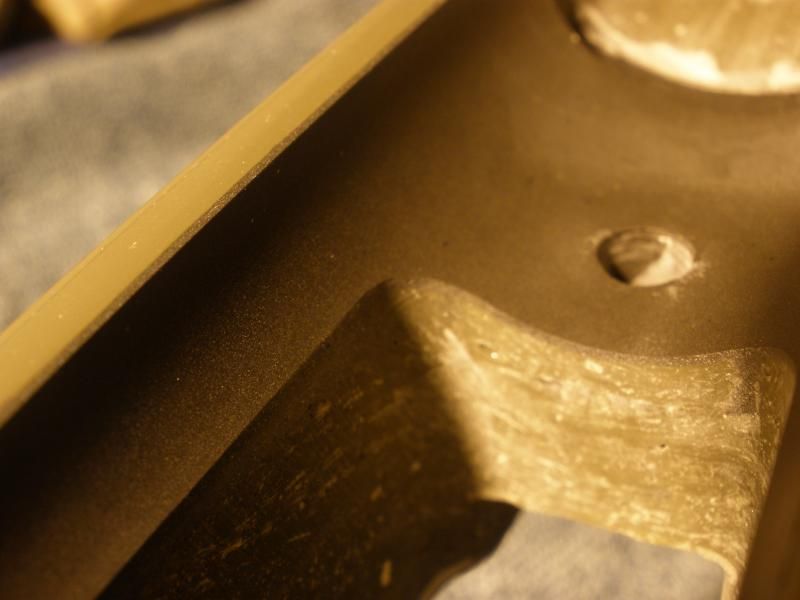
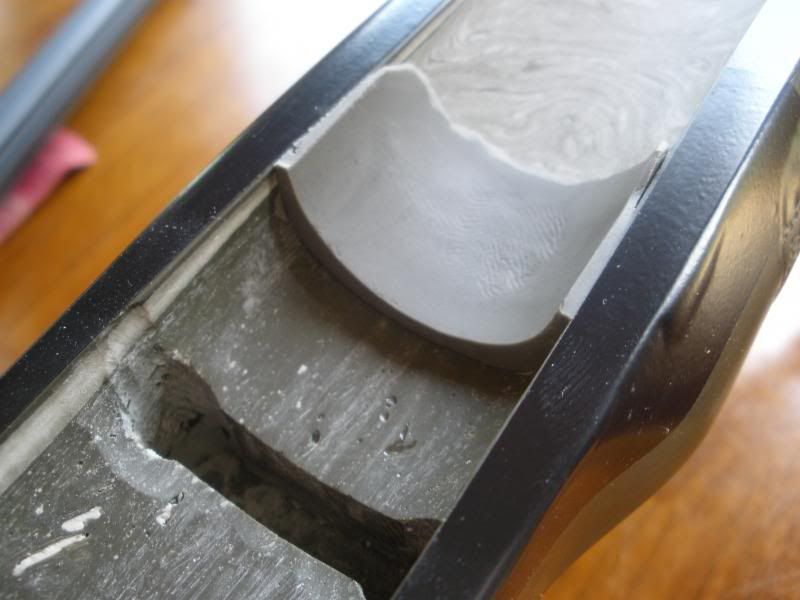
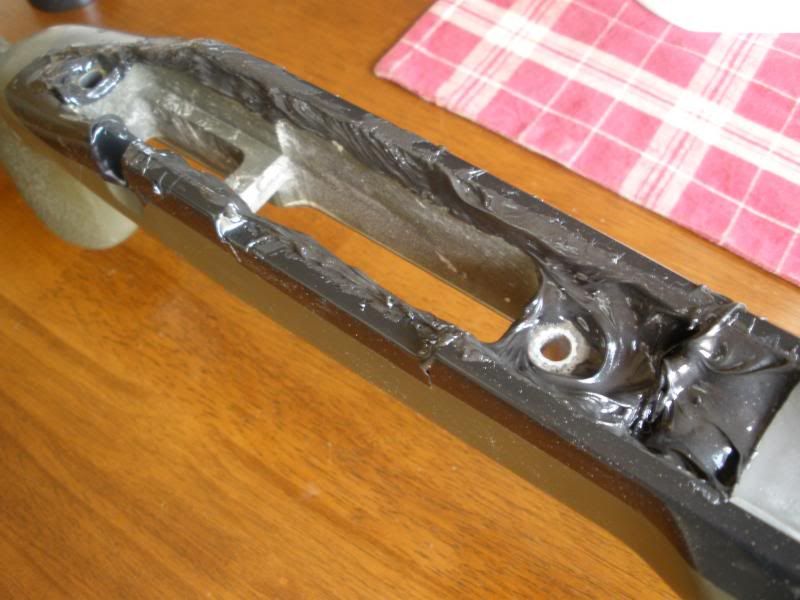
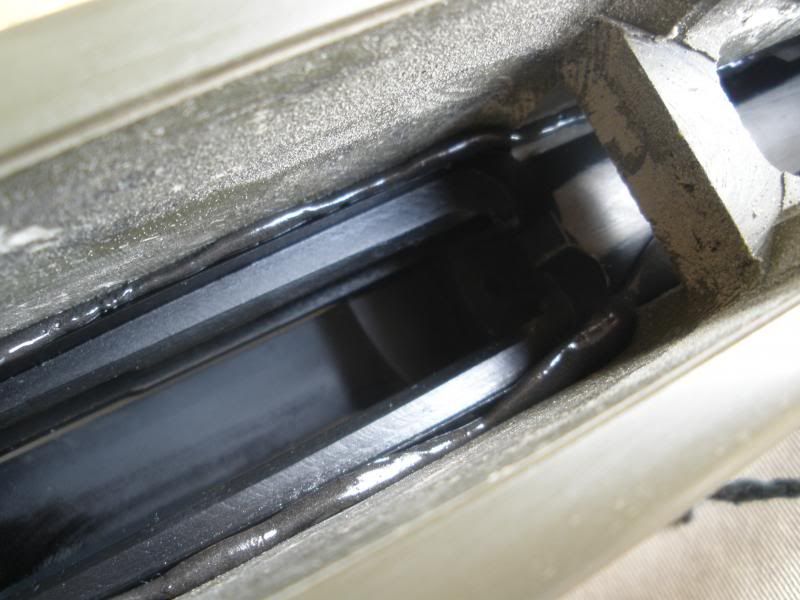
Use a clay dam to stop the bedding at the desired point. Some bed up to the lug, some bed a few inches in front of the lug under the barrel. I vary the method based on the barrel profile. You will also notice in the pic the use of tape to protect the stock, this prevents excess bedding from getting on the stock. You can also follow the line of the rear receiver tang to keep bedding off the stock. You will also want to place a layer of electical tape or similar tape to the FRONT of the recoil lug facing the muzzle, not the rear. We want the rear of the lug to make full contact with the bedding.
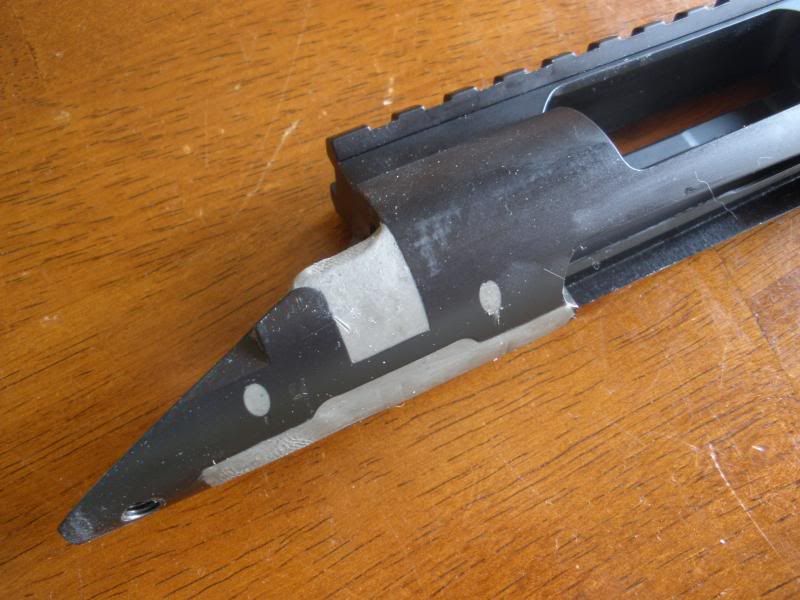
Next step is to wax the action to prevent any bedding material from sticking. I use mold release wax, apply multiple coats of wax allowing it to setup and wipe off excess. You can never use too much wax, this is critical to allow the action to release from the bedding after curring. Some have had good luck with Kiwi wax and shoe polishes. I recommend not to stray too far from these waxes, its a PITA when your action gets bonded to the stock and won't release, I have been there.
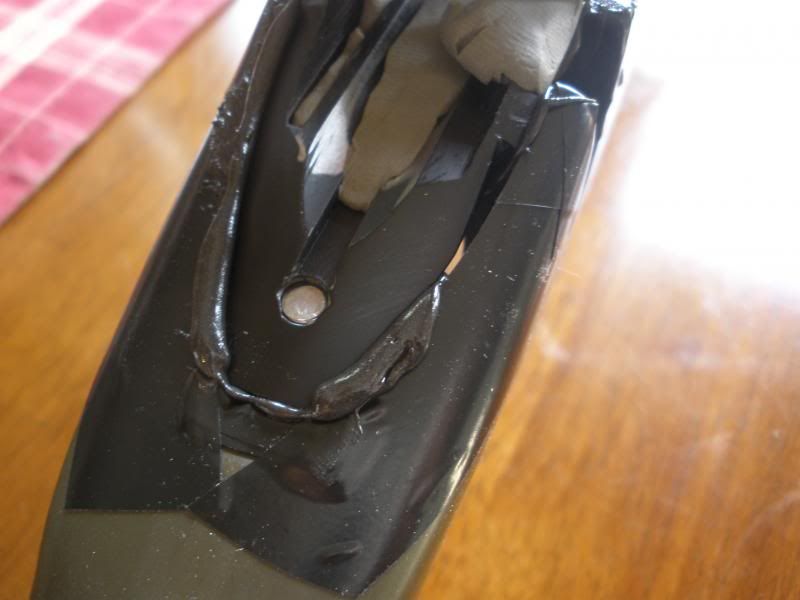
Now that we have preped the stock and action, we are ready for some bedding, I will be using Marine Tex on this job. This may be the part that makes most people nervouse, it looks messy but remember, as long as we used proper preperation, everything will turn out. Place epoxy on all the receiver contact areas, you want to use enough so you do not have any voids, any excess can be removed. Avoid putting epoxy into the pillars, once our acion with allignment bolts go into the pillars, the tape will prevent epoxy from migrating into the pillars.
Now its time to set the action into the bedding, the allignment bolts we placed in the action screw holes will help us. Once we get the action set in, its time to place the nuts on the action screw guides. You don't need to worry about proper torque, just snug them down and the excess bedding will start to flow out. You will have approximately 30-45 mintues of "work time" before the epoxy starts to set, this time is critical for clean up. You can remove the larger excess epoxy with a old CC or similar spreader, mixing sticks work well.
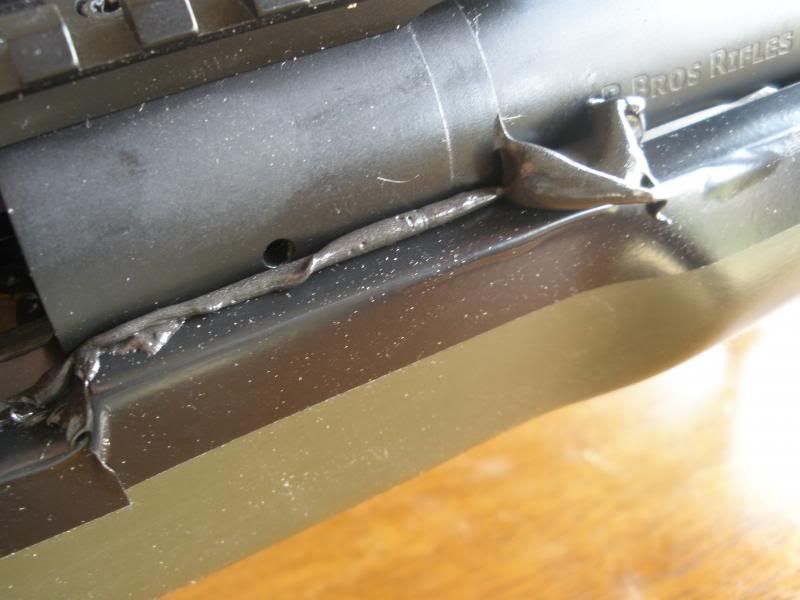
Once we have removed the excess uncured bedding, we will start the detailed cleanup. For this, I have found using WD-40 and a abundance of Q-tips, it cuts right through the wet epoxy. Remember, once the epoxy dries, there is no removing it which is why this clenup step is important.
Once we have cleaned up excess bedding between the action and stock, we can remove the tape. I don't worry too much about the excess bedding under the action, only worry about removing large spills of excess, we will be cleaning up this area in the next section.
1. First step is to ensure the action functions properly in the stock, check proper mag height and bottom metal relation to the action. It is not critical that the bottom metal be perfectly flush, so long as function is good.
2. Second step is to prepare the stock and action, a good bedding job starts and ends with proper prep, I can't stress this enough. First step in prep is to remove the trigger, this is a very simple task, for Remington you are simply pushing out the 2 trigger retaining pins,the trigger will come out in a complete unit. Pay attention to how the bolt release is installed. Next step in prep is to plug all the holes in the action, I use modeling clay for all my bedding projects, which is available at craft stores.
Many smiths will use the bottom metal and action screws during bedding, I prefer a different approach which consists of taking full length threaded bolts that I have cut the heads off of. One of the benefits of this method is you can thread them into the receiver prior to placing the action into the stock after bedding is applied, which will ensure no bedding material gets into the pillars, it also helps align the action into the stock. I place electical tape around the threads just below the receiver so the diameter is close to the pillar opening.
Use a clay dam to stop the bedding at the desired point. Some bed up to the lug, some bed a few inches in front of the lug under the barrel. I vary the method based on the barrel profile. You will also notice in the pic the use of tape to protect the stock, this prevents excess bedding from getting on the stock. You can also follow the line of the rear receiver tang to keep bedding off the stock. You will also want to place a layer of electical tape or similar tape to the FRONT of the recoil lug facing the muzzle, not the rear. We want the rear of the lug to make full contact with the bedding.
Next step is to wax the action to prevent any bedding material from sticking. I use mold release wax, apply multiple coats of wax allowing it to setup and wipe off excess. You can never use too much wax, this is critical to allow the action to release from the bedding after curring. Some have had good luck with Kiwi wax and shoe polishes. I recommend not to stray too far from these waxes, its a PITA when your action gets bonded to the stock and won't release, I have been there.
Now that we have preped the stock and action, we are ready for some bedding, I will be using Marine Tex on this job. This may be the part that makes most people nervouse, it looks messy but remember, as long as we used proper preperation, everything will turn out. Place epoxy on all the receiver contact areas, you want to use enough so you do not have any voids, any excess can be removed. Avoid putting epoxy into the pillars, once our acion with allignment bolts go into the pillars, the tape will prevent epoxy from migrating into the pillars.
Now its time to set the action into the bedding, the allignment bolts we placed in the action screw holes will help us. Once we get the action set in, its time to place the nuts on the action screw guides. You don't need to worry about proper torque, just snug them down and the excess bedding will start to flow out. You will have approximately 30-45 mintues of "work time" before the epoxy starts to set, this time is critical for clean up. You can remove the larger excess epoxy with a old CC or similar spreader, mixing sticks work well.
Once we have removed the excess uncured bedding, we will start the detailed cleanup. For this, I have found using WD-40 and a abundance of Q-tips, it cuts right through the wet epoxy. Remember, once the epoxy dries, there is no removing it which is why this clenup step is important.
Once we have cleaned up excess bedding between the action and stock, we can remove the tape. I don't worry too much about the excess bedding under the action, only worry about removing large spills of excess, we will be cleaning up this area in the next section.
Last edited: