• Watch Out for Scammers!

    We've now added a color code for all accounts. Orange accounts are new members, Blue are full members, and Green are Supporters. If you get a message about a sale from an orange account, make sure you pay attention before sending any money!

Anti-Sniper rifle...The German WWII Volkssturm VG1-5...FINISHED w/Shooting Video

buffalowinter

Freer of the Oppressed
Supporter
Full Member
Minuteman
  • Mar 17, 2014
    3,263
    12,182
    106
    Llano, TX
    And by Anti-Sniper I mean the antithesis of a sniper rifle. The Gewehr VG1-5 was one of Hitler's last ditch weapons intended for distribution to the Volksswehr...or people's army, made up of men over 60 and boys 16 and under...all other men already being required for national service. The VG1-5 was a semi-auto only rifle in 7,92x33 Kurz, using the same magazine and cartridge as the MP44.
    1498.jpg
    156037724_2074148159386727_6134017740343041012_o.jpg
    Bundesarchiv_Bild_183-J28787,_Volkssturmbataillon_an_der_Oder.jpg


    Allegheny Arsenal makes a copy of this for $4500. I tried to get on the waiting list for one but was told they aren't really taking any more people for the waiting list. So I'll have to make my own. I'm not going to make a clone...that would be far too complicated. Allegheny Arsenal/Gun Lab has been working on theirs for the past several years and only finished the first five last year. I will make something visually similar. I have decided to base it around the Sten MKII due to the availability of parts.

    The VG1-5 is pretty much a straight blow back operated rifle. There are four holes in the forward part of the barrel that vent gas into a barrel shroud to retard blow back. These four holes aren't really necessary. At first i was going to use the 7.92x33 cartridge but I would have had to open up the bolt face and change the extractor. Since I'm not making an exact clone...or even a close clone...I decided to make it in 9mm. Way cheaper, way easier. To aid in the visual deception i purchased an Airsoft Mp44 to serve as a parts donor. The airsoft gun is made of pot metal, but I was mainly interested in the magazine housing. The magazine is made of steel and appears to be a replacement mag for the MP44 rifle that has had the follower removed. I could interchange my real MP44 mag with the airsoft mag with no problem.
    DSCN4093.JPG


    I also decided to use Sterling magazines, which are superior to the ordinary Sten mags. They have a double roller follower which makes for smooth loading. I cut the base plate of the Sterling and welded it so it would fit inside the Airsoft Mp44 mag.
    DSCN4090.JPG
    DSCN4085.JPG


    I welded a Sterling mag assembly to the Sten tube. I'll cut the mag well off the Airsoft MP44 and will weld it to the Sten tube. When finished, the mp44 mage will have the upper most portion of the Sten mag slide into the Sten mag well which sits inside the Mp44 mag well. The Mp44 mag well will hold the mag in place and utilize the Mp44 mag release. The Sten mag well will be cut down from what is shown in the photo. It will not be visible when done, shrouded by the Mp44 mag well.

    DSCN4084.JPG
    DSCN4086.JPG


    I made a stock out of Birch, like the original, and fabricated a close copy of the front sight.
    DSCN4091.JPG
    DSCN4092.JPG


    Now I am waiting on my tubing to fabricate the reciprocating barrel shroud which also serves as the charging handle.
     
    Last edited:
    Problem after problem. First the firing pin wasn't hitting the primer. Finally remembered that the little spring for the firing pin in the kit wasn't for show. Had the same problem on the last Sten type build but I had forgotten. So I replaced the howitzer spring in the kit with a lighter one. Bang, bang, then nothing. So I welded up the firing pin to lengthen it. Bang, bang then no firing pin hit again. Upon sitting down to figure out what the hell was going on I noticed that the barrel tenon had broken its weld and moved forward, so of course the firing pin wasn't hitting. Nor was it extracting which is what let me to look at the barrel. Upon welding the tenon back in place, I got overzealous, as in in "you ain't never coming out" and screwed up the threads. Now I have to wait for a new tenon. Not too mention I had to cut off a section of the tube to get the tenon out. I think I'll be OK as the tenon will be covered by the barrel shroud that I am making. Also, upon examination of historical photo's, I became unhappy with the stock I made as it was too thin. The original guns are surprisingly big and bulky. So I am laminating some more Beech onto the original stock to make it the correct width. Also, while test firing, I realized my shortened. Sten magazine conversion just wasn't going to cut it as it only held 10 rounds. The Sterling magazines wouldn't work because the feed lips are different. I tried welding the top of a Sten magazine to a Sterling body but the difference in body size and follower type was just too great to make it practical. I started thinking about what magazine might work and decided to try the PPS-43. So I cut the top off a Sten Mag and bottom of a PPS mag, filed away the hump in the Sten mag, modified the PPS-43 follower, welded the two halves together, did a lot more tedious filing on the inside of the mag to smooth it out, reshaped the MP44 mag, and came up with a pretty neat mag that looks like the original when it is locked in the mag well. Now to make 4 more.

    Laminating the Beech stock to get it the correct thickness. It is not easy to find Beech. These started life as stair risers.
    DSCN4100.JPG
    DSCN4101.JPG


    Shortened Sten magazine next to welded up PPS/Sten
    DSCN4097.JPG


    Welded up Sten/PPS
    DSCN4098.JPG


    Sten/PPS in MP44 mag body which will be completely hidden by mag well when inserted in gun
    DSCN4096.JPG


    This is how many mags I ran through trying to solve this problem. Total battle loss: 1 Sten and 1 Sterling.
    DSCN4099.JPG
     
    My goodness, you really like challenging projects(!). Good luck with that project.
     
    Finished the improved laminated stock. Tubing arrived and now to work out final design. The telescoping barrel shroud also serves as the charging handle. The crude tack welded handle on the shroud pulls the whole telescoping shroud backwards to charge the gun. The shroud reciprocates when you shoot.
    DSCN4104.JPG


    The Sten charging handle will be cut off flush with the charging handle guide slot. the charging handle stub will be drilled and tapped to attach to the telescoping shroud. Pull back the shroud will charge the gun.
    DSCN4103.JPG


    This is an actual VG1-5 This gives you an idea of how big and heavy...10.12 lbs...the gun really is.
     
    Last edited:
    To make the ribbed rear dust cover generally would require making a custom die and using a hydraulic press to stamp the sheet metal. Here is my solution: Donor reproduction German gas mask can, $31. Double bonus, the original VG1-5 sling was actually a re-purposed gas mask canister carrying strap.
    1614995813751.png
    1614996607101.png
     
    Last edited:
    Today I cut and put the shrouds in place and checked they worked to charge the gun...all good. Made the fore-end barthat will get welded to the barrel trunnion and secure the wooden fore-end panels Now I'm back to waiting on a piece of rectangular steel for the receiver, the barrel trunnion and muzzle trunnion. Guess I'll mount the sights and sling. Then I'll make and attach the charging handle to the barrel shroud. Probably start on a mock-up of the wood fore-end using pine. Doesn't sound like much, but probably a day's work tomorrow.
    DSCN4105.JPG
    DSCN4106.JPG
    DSCN4108.JPG
    DSCN4107.JPG


    Beginning to look like a VG1-5. Shroud is cut extra long at this time and will probably be about 2 inches shorter when done.
    DSCN4109.JPG
     
    Last edited:
    Cut out the clearances for the ejection port and fore-end lug.


    Rear shroud with clearance for charging handle screw so the bolt can be removed.
    DSCN4110.JPG
    Bolt closed
    DSCN4111.JPG


    Bolt open
    DSCN4112.JPG


    Bolt all the way to rear at full recoil, empty cartridge case had already been ejected.
    DSCN4113.JPG


    Now to fabricate the safety...just for show.
    DSCN4114.JPG


    1615135337007.png
     
    Barrel trunnion done. Needs a little squaring up, then time to mount the front sight. Managed to set myself on fire while grinding, OK, just lost the shirt. Only noticed when the flames obscured my vision of the piece.
    DSCN4123.JPG


    All my wife did was laugh and take pictures. Actual, un-retouched photo.
    1615396293737.png
     
    Last edited:
    Barrel trunnion done. Needs a little squaring up, then time to mount the front sight. Managed to set myself on fire while grinding, OK, just lost the shirt. Only noticed when the flames obscured my vision of the piece.
    View attachment 7578284

    All my wife did was laugh and take pictures.
    View attachment 7578294

    Done that more than once? Oily tshirt and grinder sparks. No. Fun. At. All.

    Sirhr
     
    • Haha
    Reactions: sandwarrior
    Teat Firing the VG1-5 bare receiver. 9mm Wolf steel cased ammo. Works pretty well. I believe my steel rectangular tubing for the receiver cover will arrive today. Have to fiddle with the barrel shroud. Should be complete and ready for the final finish on Sunday.
     
    Building stuff like this is like building a castle in a swamp...


    Test fired the rifle last night and all was ok till the aluminum barrel shroud ripped away from the bolt. The aluminum just wasn't strong enough for the forces involved. Plus, I was worried about the shroud being too heavy in its final form. So on to finding a solution. I could use a steel shroud but that would definitely be too heavy. I could make a steel sleeve around the rear of he shroud to re-enforce the connection...but I would still have the weight problem. I finally decided on making a steel shroud that would just act as a charging handle and not reciprocate. That would solve several problems. So on to fabrication. I cut out the channel and it all works. Now I have o attach the sights, charging handle, and muzzle trunnion. Still need to make the receiver cover, finish parts, do final assembly, and then final finish. Also worked on the fore-end. New finish time is later next next week.

    Steel barrel shroud. Spings on table are to return the shroud to battery after charging.

    DSCN4128.JPG


    Receiver without shroud
    DSCN4127.JPG


    Guide rails for the shroud. Like the original.
    DSCN4129.JPG


    Applying stain to the fore-end.

    DSCN4126.JPG
     
    Getting close. Test fired and works fine. The only major thing left is to fabricate the rear receiver dust cover out of a German gas mask can. Still trying to figure out the best way to do that, have a couple of ideas. I have to do a little bit of cosmetic work on the lower receiver and then apply a battleworn Cerakote finish. The last thing is to permanently attach the fore-end, which is how the originals were done.

    DSCN4130.JPG
    DSCN4131.JPG


    German gas mask can sacrifice for the dust cover.
    DSCN4133.JPG


    My detailed plans taken from the book "Desperate Measures".
    DSCN4132.JPG
     
    Last edited:
    Fabricated the receiver dust cover today...sort of been dreading it...but it came out great, no hassles. Made from a repro WWII German Army Gas mask cannister.
    DSCN4134.JPG


    Also made a new sling hook, can't find a pic of an original to save my life. I've seen a couple but I suspect they were not original as they appeared to be like a modern key ring.

    DSCN4135.JPG


    I would think an original looked something like what I made, a simple triangle or something like this, on the VG1-98
    '
    1615843239431.png
    vg-98 sling. jpg.jpg


    I was having a hell of a time getting the magazine to work yesterday, The follower would stick at the weld where the body went from curved to straight. The point of this was to get feed lips that worked with the bolt. I worked on this for hours. I shot the gun with an original Sten mag to make sure it was my mag and not the gun. The gun worked perfectly with the original mag. So I sat down to try to figure out what to do. As I sat there, I looked at the MP44 mag sticking out of the mag well. That is a huge magazine, I ought to be able to stuff a complete Sten mage in there. I had originally tried that but found I had to shorten the Sten Mag by 50%. I tried it again, and managed to get a whole mag in there...it did change the angle of the MP44 mag in the gun a little bit, but nothing very obvious. So, mag problem solved. Reliable magazine function traded off for a slightly steeper magazine angle. I did shorten the mag by about 1 inch and have to weld in a new floorplate.

    A couple more holes to drill to attach the receiver dust cover and trigger dust cover. One more final test fire tomorrow before final assembly and application of a battleworn Cerakote finish. I'm going to re-do the fore-end as I got some angles wrong and it is a little small, but that will be done after Cerakote as the fore-end is a permanent installation.

    Lessons learned and re-learned.
    1. Occam's razor...the simplest solution is the best solution...holds true time and time again.
    2. I can build the perfect pencil...but no one is going to pay me $20 for it. Good enough is good enough.
    3. Even the best "clone" is still a fake. No need to obsess. Allegheney Arsenal is making an excellent copy of the VG1-5 and selling it for $4K...but even that has a totally different trigger than the original.
    4. Adapt, improvise, and overcome.
    5. If it blows up, start over.
     
    Last edited:
    I followed your other thread, and now I'll follow this one as you have some very cool projects.
     
    Very cool project, great to see something put together like this. Now, go take the damn key out of your lathe chuck!!!!!
    :) Nope...too old to give a fuck anymore. If I keep it there, I won't loose it. I spend 10 % of my day looking for shit I misplaced and another 20% crawling around looking for shit that fell on the floor.:)


    1615934314119.png
     
    Last edited:
    :) Nope...too old to give a fuck anymore. If I keep it there, I won't loose it. I spend 10 % of my day looking for shit I misplaced and another 20% crawling around looking for shit that fell on the floor.:)


    View attachment 7583140

    Oh, you just may care a tiny little bit when you turn that thing on and get thumped in the head by a flying chuck...lol
     
    • Haha
    Reactions: sandwarrior
    Phase 1 base coat of Custom CeraKote. Graphite Black mixed with Gunmetal Grey. Next is applying Battleworn finish using CeraKote mix of Stainless and Glacier Silver. I like a Battleworn finish...you really can't mess it up as messing it up is part of the process.

    DSCN4140.JPG
     
    Battleworn finish applied.
    DSCN4141.JPG


    Beech wood arriving by UPS today. Below is the first iteration fore-end. Too small and wrong angles. Above it is the second iteration in pine without the final shaping, just to get height, width and angles correct. Final iteration in Beech to follow.
    DSCN4142.JPG
     
    • Like
    Reactions: crackerbrown
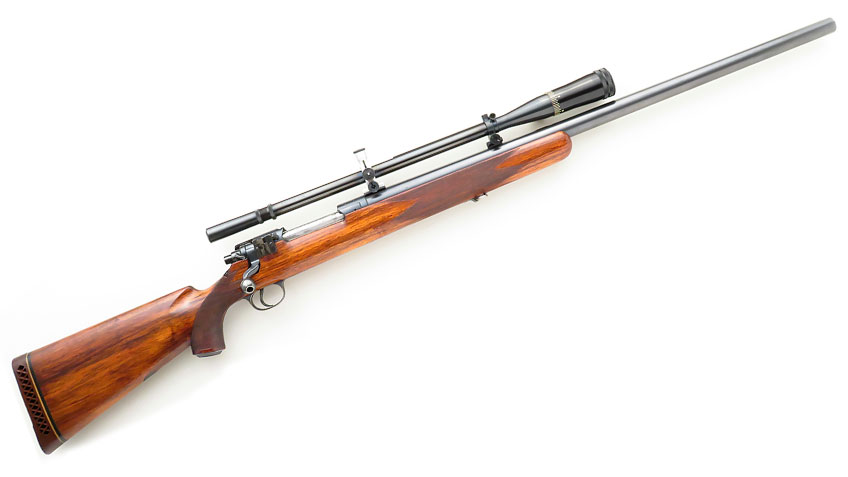
    I'm still working on my .300 H&H Magnum single shot bull gun, as used by Ben C. Comfort in winning the Camp Perry 1935 Wimbledon Cup. Built on a Remington 30-S Express action.
    View attachment 7585152

    Also working on a Last Ditch Neu Munster Gerat MP3008

    View attachment 7585158


    I think @Calfed owns that Ben Comfort gun or I saw someone on the CMP forum post as owning it.

    They found it in a pawn shop or something like that.

    Dont recall exactly I remember an article where the family was allowed to shoot the rifle.
     
    I think @Calfed owns that Ben Comfort gun or I saw someone on the CMP forum post as owning it.

    They found it in a pawn shop or something like that.

    Dont recall exactly I remember an article where the family was allowed to shoot the rifle.
    I would love to own Ben Comfort's Wimbledon cup rifle, but alas...

    I do own a Griffin and Howe heavy barrel target rifle. G&H was primarily known for their superb sporting rifles and heavy barrel G&H target rifles are rare. In researching my rifle, I found some information about Ben Comfort's Wimbledon Cup "bull gun" and noticed the similarities to my rifle. I posted pictures of both rifles to demonstrate that similarity.
     
    Last edited:
    :) Nope...too old to give a fuck anymore. If I keep it there, I won't loose it. I spend 10 % of my day looking for shit I misplaced and another 20% crawling around looking for shit that fell on the floor.:)


    View attachment 7583140

    You and me both. No one touches my lathes. I keep the key where I want it. sirhr
     
    Going to add a Meopta ZF-4. Might as well be able to see what I'm shooting at. The swept back scope mount and Meopta ZF-4 are period correct and nothing would have prevented an enterprising Volkssturmann from doing this.

    DSCN4166.JPG
     
    • Like
    Reactions: sirhrmechanic
    Concerning Ben Comfort....sure you found these