• Watch Out for Scammers!

    We've now added a color code for all accounts. Orange accounts are new members, Blue are full members, and Green are Supporters. If you get a message about a sale from an orange account, make sure you pay attention before sending any money!

DIY flush cup install

BoilerUP

Supporter
Supporter
Full Member
Minuteman
Jan 16, 2011
3,989
2,336
40
Floyd Co, IN
After a few months of thinking, hesitation, doubt and worry about buggering up an expensive piece of equipment...I broke down yesterday and installed flush cups on a McMillan A5.

Bottom line: if my dumbass can do it, you can too!

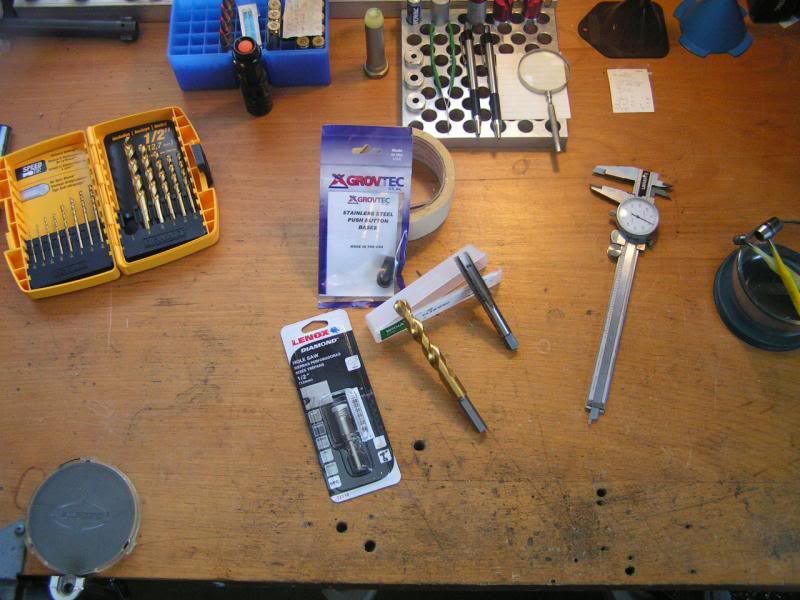
After a little bit (okay, a lot) of practice on a 2x4 and a fairly ugly install on a Boyd Tacticool rimfire stock, I decided to use a 9/16" spade bit and a cordless drill. First, I used a Dremel and significantly shortened the long tip of the spade bit. This might not be necessary, but I wanted to limit the amount the bit penetrated into the stock beyond the required depth for the cup.

Then, I spent a lot amount of time on the internet, seeing every which way folks had installed cups on their McM A5s and Manners T2/T4s. I eventually found locations that I liked, took a bunch of measurements, then marked the stock with a sharpie.

After taking a deep breath, I started the hole on the left buttstock first. After getting to approximate depth, I removed the bit and blew out the filler dust in the whole. I then took a regular 1/2" bit and 'cleaned up' the bottom of the hole a little, which gave me a few thousands more depth than the spade bit.

Wash & repeat on the left forearm. With the cordless drill and the rifle laying on carpet, the shortened spade bit worked up slightly and caught a bite just above the wide part of the forearm. With a longer or unaltered spade bit, I think more precise drilling on the forearm would be easier.

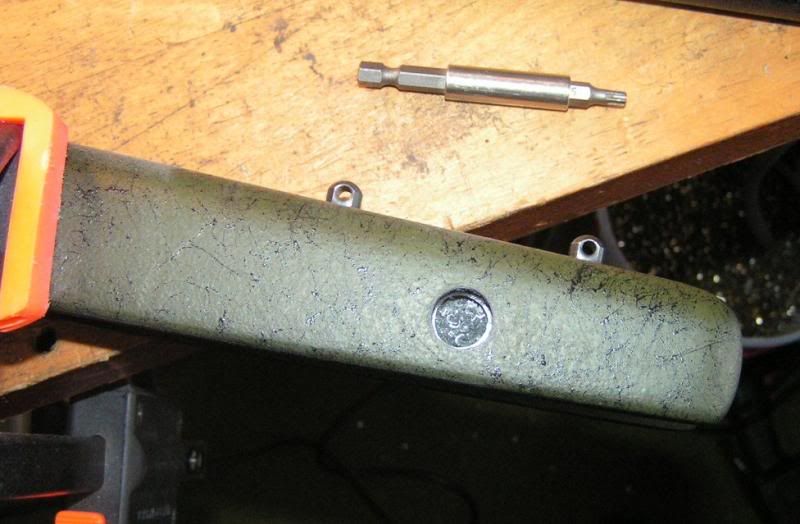
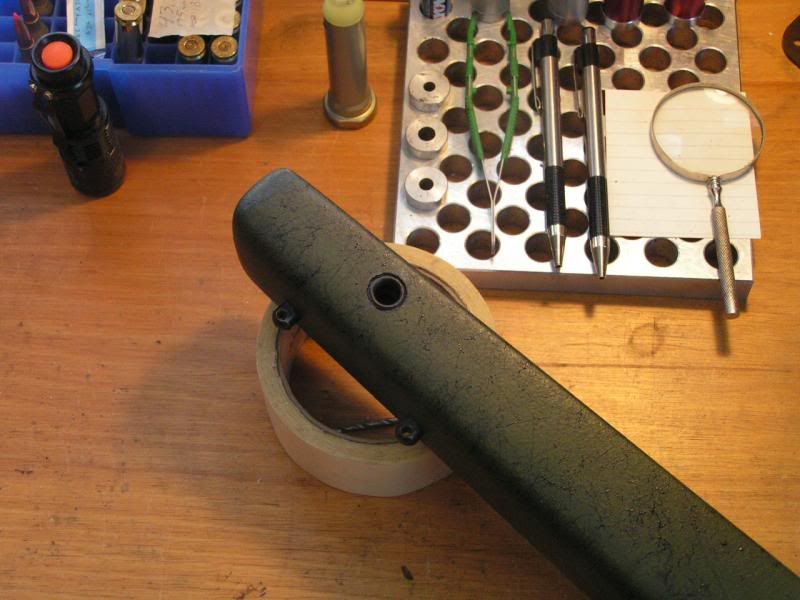
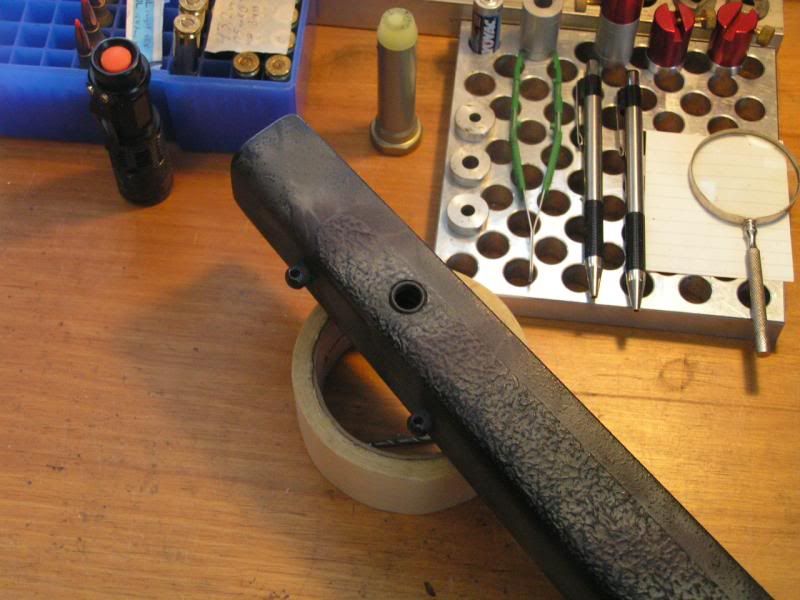
I then mixed up some JB weld, coated the sides & bottom of the holes, then inserted threaded Grovetec cups into each hole. With a hex wrench preventing the compound from seeping into the bottom of the cup, I could not get the cup seated flush...so I removed the hex head and simply pushed each cup flush with the stock. Wiped up the excess JB weld with a cloth and left the rifle to set up.

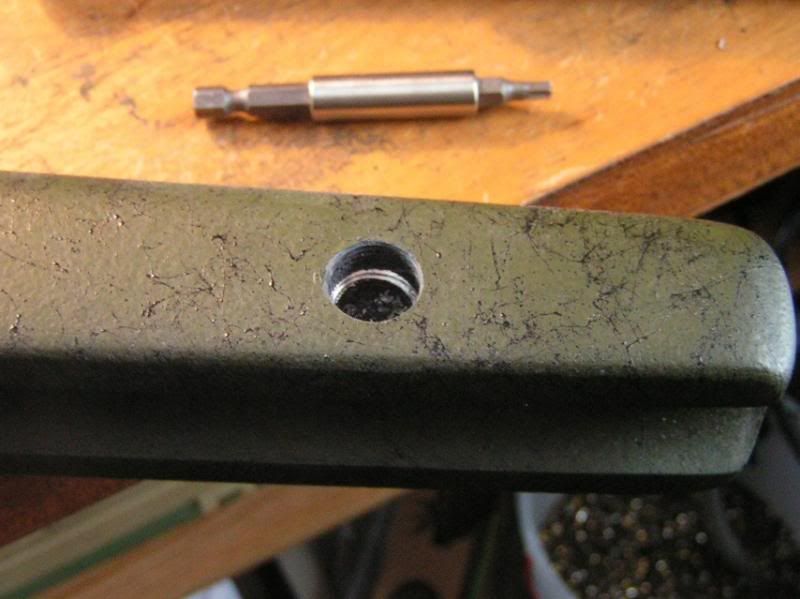
This morning, I chucked up a 3/8" bit and very slowly drilled out the hardened compound in the bottom of the cups.

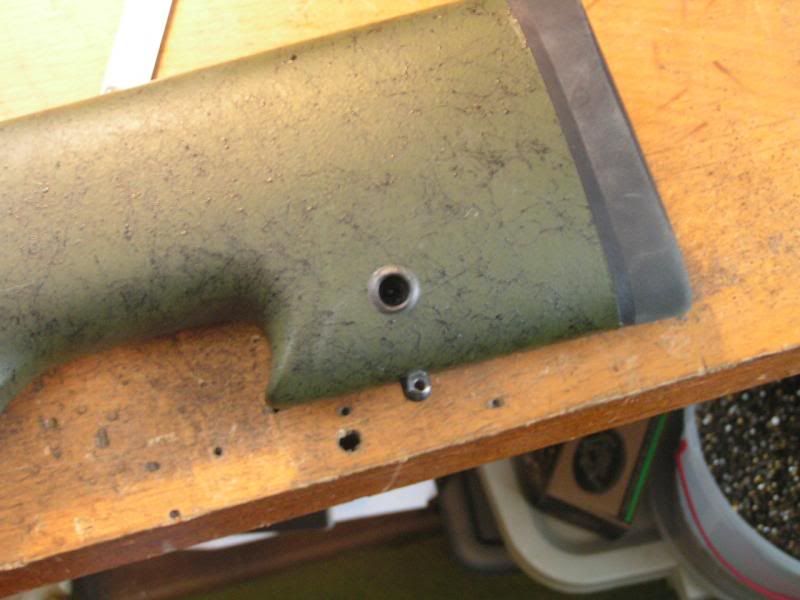
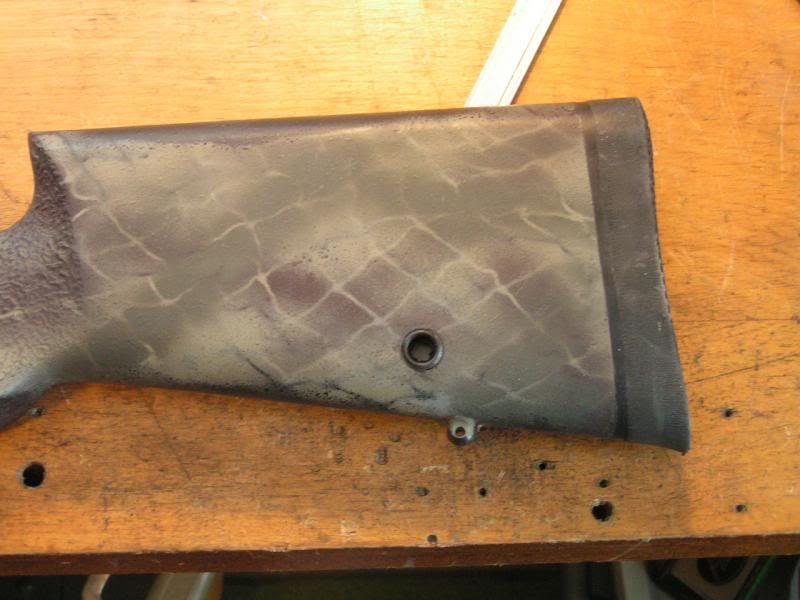
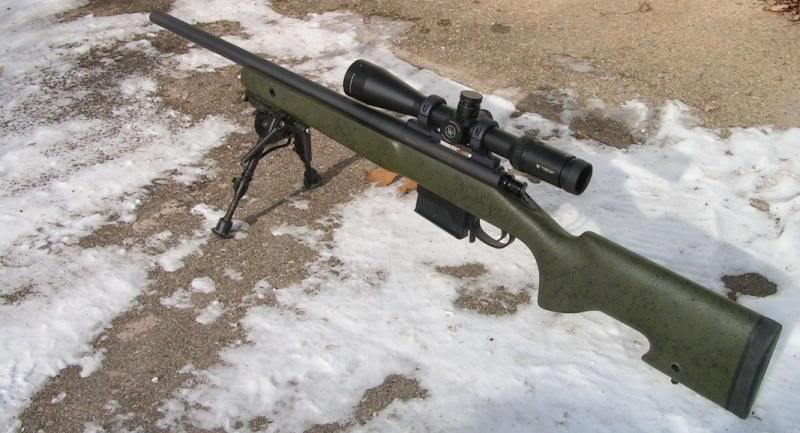
Insert the swivel into the cup and....both worked just great!

Just finished my other McM A5...I'll let it cure overnight, bore out the material at the bottom of the cups tomorrow, and then have both stocks ready to use.

Its not as clean or "pretty" an install as I'm certain any gunsmith on the Hide can produce...but the shell of both stocks resisted chipping.
 
Turrible iPhone pictures...the mess ain't anything Kyrlon can't fix :D

IMG_08661_zpsea8a10cd.jpg


IMG_08681_zps0aa41108.jpg
 
I got the cups directly from Grovetec...something like $15 shipped for 10 cups. Very nice lady took a credit card over the phone and I had them 5-6 days later.
 
Use the correct tap next time. It makes a very clean job. The tap is a bitch to find but worth the trouble.
 
+1 on drilling/tapping the hole for the flushcup. That way, it is very easy to set the depth of the FC, and it also relieves the epoxy of the duty to resist the FC from pulling out. The epoxy only needs to stop the FC from turning. If you tap to the proper depth, the FC will be coming up tight and require a little torque just as it's depth is correct.

The tap size is 9/16-18

I bought my tap at a local ACE hardware store.

I usually drill 1/2", then run the tap in/out several times to make for a slightly sloppy threadfit, to give the epoxy some room to get all up in there.
 
Yes, but a little blue tape saves having to do anything. Works even on the textured area.

Indeed...lesson learned and applied on the second stock I did, which did not have the same 'mess' as the one pictured.
 
hey should I think about the non-rotating cups for any particular location (maybe right side forend for sling shooting)? Just curious what situations the non-rotating ones would shine in
 
+1 on drilling/tapping the hole for the flushcup. That way, it is very easy to set the depth of the FC, and it also relieves the epoxy of the duty to resist the FC from pulling out. The epoxy only needs to stop the FC from turning. If you tap to the proper depth, the FC will be coming up tight and require a little torque just as it's depth is correct.

The tap size is 9/16-18

I bought my tap at a local ACE hardware store.

I usually drill 1/2", then run the tap in/out several times to make for a slightly sloppy threadfit, to give the epoxy some room to get all up in there.

Thanks for the info
 
Started this myself after finding an older thread about this last year. I bought the threaded cups and found the correct tap from Brownells when I was getting some other goodies. Planning to do a couple more stocks in coming weeks. I was able to find the correct size bit for the 9/16-18 tap (cant remember size right now) at Home Depot and didnt have to use a modified paddle bit. I practiced some on a scrap of hardwood in hopes of not screwing up a fancy stock.
 
so here I am looking at my really nice A3 stock that just needs some flush cups.

I have a fresh 33/64" drill bit, & a 9/16-18 tap.

How hard can it be? Somebody hold my beer and watch this :rolleyes:
 
so here I am looking at my really nice A3 stock that just needs some flush cups.

I have a fresh 33/64" drill bit, & a 9/16-18 tap.

How hard can it be? Somebody hold my beer and watch this :rolleyes:

Just make sure the drill bit goes all the way through to the other side, cleans the hole out real nice 8)

Sent from my DROID RAZR HD using Tapatalk
 
I decided to follow suit...

Tools used: sharpie pen, small drill bit (for a pilot hole), 1/2 inch drill bit, 1/2 hole cutter bit, 9/16 18 TPI tap, allen key to match flush cup size, devcon plastic steel and last a hand held drill.

DBMampflushcups005.jpg


Tool that would have been VERY handy: Drill Press

First up was a B&C stock my R700 Tactical 308 lives in. I used the sharpie to mark where I wanted the center of the hole and then I drilled a pilot hole with the small bit just deep enough to punch through the hard shell. Next I followed it up with the 1/2 bit until I was deep enough to use the hole cutter bit without it walking. *Something to note here, I could have done this without the hole cutter but I was fearing the shell splintering as I drilled through the exterior shells and that was the reason for using it... That turned out to be a non-issue on the B&C, Manners and McMillan stocks as long as I took my time. But I do think it may produce a cleaner hole, YMMV*

On the B&C I ran into the aluminum frame in the forearm before reaching a 1/2 inch depth and had to switch to the 1/2 inch drill bit to get to the depth I needed to fully seat the flush cup. I then followed this up with the 9/16-18 tap and test fit the flush cup.

DBMampflushcups003.jpg


DBMampflushcups004.jpg


All of the rest of the holes were done the same only I didn’t run into any more aluminum. The reason for the low off center holes on the rear of the stock is because I use a stock pack on these rifles for a cheek riser and the attachment straps would be in the way anywhere else.

With all the holes drilled (8, one on each side of the forearm on the Manners and McMillan for positional shooting with a sling) I mixed my devcon compound and added it to the threaded area inside the stock and the last few threads of the flush cup and screwed them in. Left to cure over night and this is how they turned out... I may follow up later with some more compound to get rid of the small gap surrounding the cup. Had I let the cups protrude a little more this would likely look better and not need filling.

DBMampflushcups007.jpg

DBMampflushcups006.jpg

DBMampflushcups008.jpg

DBMampflushcups009.jpg


All in all it turned out pretty nice. A drill press would have made this job a little more uniform and controlled, especially when trying to put two (one on each side of the forearm) with equal placement.

001-8-1.jpg
 
Looks like the drill bits you guys used worked well enough. I've got a 1/2" Forstner bit I'm gonna try. Should keep nice square edges on the hole. We will see......


Nevermind..found a tap
 
Last edited:
I have done this on few stocks as well. I believe I used the 33/64" drill bit and the 9/16-18 tap. Then I just put some JB Weld on it when I threaded the flush cup in, and it worked pretty well.
 
Have y'all used these flush cups with a sling for shooting as opposed to sling for carrying with no problems as far as pulling them out? I have a couple mcmillans and a B&C that I want to try it with.

Ryan
 
Have y'all used these flush cups with a sling for shooting as opposed to sling for carrying with no problems as far as pulling them out? I have a couple mcmillans and a B&C that I want to try it with.

Ryan

Properly installed, I'd be damned surprised if you pulled them out

Sent from my XT1080 using Tapatalk
 
I've shot slung up (though admittedly I'm no expert or even had formal instruction at that) and had no issues.

They have worked great so far with no issues.
 
I did my HS PSS tonight. Drilling the finish did not chip. Tapping chipped the edge very slightly. Any ideas on what I can do to avoid this on the next one?

Ryan
 
I am looking at doing this to my MCMillan HTG but am concerned about having enough material in the fore end to drill into. It looks like it may go through to the barrel channel. Has anyone got experience with doing these in an HTG?

Ryan
 
Punisher, I just installed flush cups in my HTG this past weekend. On the forend I drilled the left side, lined up in the middle of the two bottom sling swivel studs. I set it below the centerline of the forend (judged it by eye and used a friends drill press). No protrusion into the barrel channel.

Re; chipping- I used the recommended 1/2 inch forester bit and blue painters tape. I used a 9/16-18 Plug tap to start the hole, the followed up with the Bottom tap. Made everything nice and clean, then I screwed up the hole in the buttstock when the Grovetec install tool shifted in the wrench and slightly cross-threaded the hole. Didn't weaken the mount, just pissed me off.
Oh well, still works. It's small enough to miss if it's not pointed out.

I hope this makes sense.
I'll try to post pics tomorrow.

I'll be trying this within the next few days. What did you use the tape for? did you tape over the area of the hole before you drilled??
 
Darkside, yeah I covered the spot with tape and drilled through it. I found that tip somewhere, I think it was here on SH, I could be wrong. I think it helped keep the drilled hole cleaner, at least I know it didn't hurt. I used a Plug tap to start the threads, it starts the threads deeper in the hole. This helps keep the tap lined up straight to the hole, you'll need to follow-up with a Bottom tap or else the threads won't reach the bottom of the blind hole you've drilled.
The Plug tap was from Home Depot, the Bottom tap had to be ordered online.

If guys are interested, I'd be willing to start a Pass-Around for the tools. That's both taps, the forestner bit and the Grovetec insertion tool. You'd have to supply your own drill press.

Here's a couple of pics showing where I placed the forend cup on my McM HTG. No protrusion into the barrel channel.


Last edited:
Well I just did my install. the rear cup at the but stock was a piece of cake. The one on the for arm got fucked up. I used a hand drill and 3/4 of the way down I hit aluminum and the drill walked causing the hole to widen out a lot. I bono the shit out of it with JB weld and let dry. Should be good after it's done curing. A little fine sanding and some touch up paint and should be good......I hope! :)
 
Does anyone have a part number for these? I can't seem to find them just by searching for flush cups or QD sockets.
 
Hey all
I've ordered all the parts and pieces I'm gonna need to install these onto 2 of my rifles. But, I've got a question for you guys. I've seen the pics in the thread, the flush cups are being put on the left side front and rear. I've noticed in a couple videos I just watched, that the front mount was on the right side and the rear on the left. Is this mostly done for when your gonna be shooting with the sling only or does it help to keep the rifle in a better position while it's slung and your just carrying it? Or is it just personal preference?
 
Great info on how to DIY! Here is my crack at it. Opted to do the rear cup close to palm swell cause of more material in area. Sits comfortable with Tab Gear Biathlon sling. ImageUploadedByTapatalk1407664230.776631.jpg
 
Thanks for sharing this. I put 4 of them in my B&C after seeing your thread and they turned out great. Thumbs up to whoever mentioned the forstner drill bit. It cuts a perfect 1/2 hole with a flat bottom