• Watch Out for Scammers!

    We've now added a color code for all accounts. Orange accounts are new members, Blue are full members, and Green are Supporters. If you get a message about a sale from an orange account, make sure you pay attention before sending any money!

Got a couple questions, CZ isn't grouping like it should..

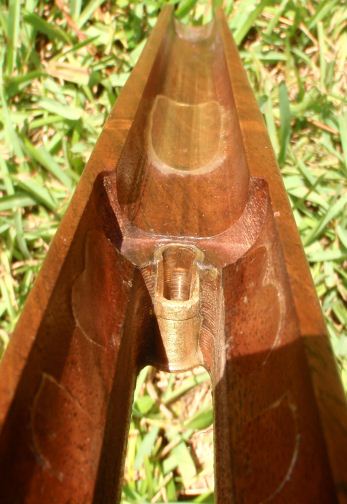
The air pockets come from 2 things how you mix it and how you apply it. If you mix it by stirring it in a cup and then kinda plop it into the stock you will have air pockets. I mix mine on a flat board (non porus) plactic, metal, glass, sealed wood, even stiff cardboard or card stock will work using a wide blade mixer like a putty knife keeping the mix thin during the last of the mixing. If you have ever made biscuits its the same you fold the mix not stir it. Then when you apply it you also need to work it into the area not just daub it in. I hope this helps.

Also look into how much force or crushing pressuer can be generated with an action screw at 30-40 lbin. There is a formula for it that I have forgotten, it will blow your mind. You are getting the bedding over the pillar either because your pillar is too deep in the stock (the action is hitting somewhere else first) or the action isn't being pulled down to the pillar when it is being bedded. Kinda common sense but maybe it will help you figure it out.
 
I figured that much, but I installed the rear pillar just as you did in your 455 thread. Maybe I am not removing enough material to start with. And I have been stirring it in a cup, but once it is in the stock I do work it in as best as I can.

Ben
 
Well I am slowly but surely getting the bedding cleaned up. Been a hectic past few days, dremel is working ok, but I REALLY need to get back to work around that mill, it's make things SOOO much easier.

In the mean time I have actually had a chance to play around in SolidWorks a bit with my "mini-chassis" idea.

10zwtxf.jpg

2cysdw8.jpg


I want you honest opinions here. I went with the rounded inlet instead of the "V" because I wanted the tang to be supported where it would be much less supported with the "V".

So, what say you?

Ben
 
Stop thinking so small. If I had the skills and access to a machine shop,
do you really think I'd limit myself to a bedding block? I'd be turning a billet of aluminum
into one solid custom stock milled specifically to fit the trigger/action/barrel I wanted.
But I don't have the skills or access to a mill, so you'll have to do it instead.

kinda like this...

hg_on_rest_3.jpg


If you're gonna dream, dream big!
 
Last edited:
Stop thinking so small. If I had the skills and access to a machine shop,
do you really think I'd limit myself to a bedding block? I'd be turning a billet of aluminum
into one solid custom stock milled specifically to fit the trigger/action/barrel I wanted.
But I don't have the skills or access to a mill, so you'll have to do it instead.

Oh trust me, that is in the think tank! I am trying to figure out something like the AIAX chassis, with the tube forend and folding stock. Alot more brainstorming needed. This will show me if it works or not without dumping much money or (unnecessary)time into it.

Ben
 
If you are going to do that then float the action entirely and use a barrel block. I am just not sure how to make it feed out of a magazine well.
 
The guys that get the line on their pillars like you see bedded the pillars to the stock and receiver at the same time! If you bed the pillars and then the receiver, you will always have some epoxy on top of the pillar.
 
If you are going to do that then float the action entirely and use a barrel block. I am just not sure how to make it feed out of a magazine well.

Could you please explain to me why? I have very little experience with this, but personally it seems like alot of work and mostly for benchrest type guns which this will never be.

The guys that get the line on their pillars like you see bedded the pillars to the stock and receiver at the same time! If you bed the pillars and then the receiver, you will always have some epoxy on top of the pillar.

I am starting to understand this... I think from now on I am going to do both at the same time.

I think today or tomorrow I may get it onto the mill and finished up. Hopefully I can get it out before this weekend and do some shooting.

jbell I do have a question for you, that 455 that you did, was it completely stress free? How did you hold the action into the epoxy? The way I did this one I had two zip ties on the action front and back and then one at the end of the forend around the barrel. All of them just snug not tight. Had threaded rods with tape around them lining it up in the pillars. However, I think there is still some stress in the front of the action, because the barrel moves ever so slightly when I tighten or loosen it. Just wanna know if there is anything I am not doing... Thanks

Ben
 
Barrel block is more accurate due to the mechanical balance, harmonic dampening.
No leverage caused by the barrel length acting upon the receiver. No tuning fork effect.
Barrel starts and finishes in the same position every time you send a round.

How do I know? Serious research and personal testing with all 4 barrels of my 455 Varmint.

vise4.JPG
 
Could you please explain to me why? I have very little experience with this, but personally it seems like alot of work and mostly for benchrest type guns which this will never be.

I am starting to understand this... I think from now on I am going to do both at the same time.

I think today or tomorrow I may get it onto the mill and finished up. Hopefully I can get it out before this weekend and do some shooting.

jbell I do have a question for you, that 455 that you did, was it completely stress free? How did you hold the action into the epoxy? The way I did this one I had two zip ties on the action front and back and then one at the end of the forend around the barrel. All of them just snug not tight. Had threaded rods with tape around them lining it up in the pillars. However, I think there is still some stress in the front of the action, because the barrel moves ever so slightly when I tighten or loosen it. Just wanna know if there is anything I am not doing... Thanks

Ben


Basically what Justin just said. I was more or less just joking but it is where you will get the most accuracy hands down. The only limitations are with weight and space.


I check the "stress" in a bedding system by looking for barrel movement like you said. Basically I will attach a dial indicator base to the barrel and then measure off the stock with the barrel pointed almost vertical. You just don't want gravity to be the force moving the barrel when doing this test so I eliminate that by holding the rifle parallel to the ground with the stock on the bottom and then rotate the muzzle up about 80 degrees or so. Then loosen and tighten the front and rear action screws one at a time. I like to see 0 movement and usually do but I am ok with up to 0.002" or so, much over 0.004" on a precision rifle I will fix it.

I actually will install the pillars first on a stock that has a good inlet meaning the action sits at the right height and straight in the stock as it. Doing this I can use the existing stock as a guide if you will to set the action depth into the stock. After the pillars are installed I will then remove about 0.050" or so of material from the stock where I want to bed it and then fill it with bedding compound. I then will use the same threaded rod wrapped with tape to get a good snug fit into the pillars and drop the action into the stock with bedding compound in place. I then use nuts to just snug the action against the pillars, I mean just snug too basically good and finger tight with no torque multiplication from a nut driver, wrench, ratchet ect... I use a socket on an knurled extention. I think I posted pics of this in that thread where I did BM11's 455.

Keep in mind I am not saying this is the best way or even proper, it just works for me. I have bedded many many rifles like this from 340 Norma hunting rifles all the way to 6mmBR benchrest rifles and have always had good results. Feel free to PM me if you need to knock some ideas around I will give you my phone #. Like I said I am not an expert just a guy who likes to figure out what works and what don't on my own. I do have a little mechanical back ground (I am a heavy duty truck engine mechanic who works for a Caterpillar dealer) and have been tinkering on firearms for 20 years. So you may want to seek professional help instead ;) but the offer is on the table for anyone who wants to take me up on it, I love doing this stuff...
 
That is a big help, I guess I skipped over the part in that thread about snugging up the nut on under the stock, I'll give that a try on my next job, which may be in the not too distant future.

I'm going to see how the gun shoots from the previous bedding job, but will most likely redo it either way mostly for cosmetics. I greatly appreciate all of the help I have received from you guys! This loss of accuracy is sure making me learn alot! I may take you up on the offer for a chat someday, I am always tinkering with some kind of gun project. The .308 is next and then the .22-250!

Ben
 
Well actually got out and shot it just a bit ago. I'm pretty impatient...

I only shot 20 times, 5 were getting it sighted in again. I noticed that it was grouping more constantly, which is awesome.

The groups still weren't where they should be. But it was pretty gusty winds outside so I wasn't sure if it was the wind, me or the rifle. Too many variable to tell so I decided instead of wasting more ammo that I would just wait until the wind has died down some to shoot. Still a couple of things to check and redo, but I think the gun is on the road to recovery. I want to thank everyone who has helped me with this.

I will try and get picture of the gun uploaded soon and maybe a range report to follow.

Ben
 
Good to hear, best of luck! I hope it starts drilling holes... Let us know.
 
Well I went out and shot a little today, and I think the gun is going to be ok! 1st 2 groups were ok at best, a lot of it is still me I think. The third group would have been an AMAZING 5 shot group, but cold fingers and a light trigger got the best of me and I screwed it up... Then the wind started to pick up and was getting pretty gusty so I called it a day.

I think I am going to try some some different torque values as well as some better ammo. I think Eley Target is certainly low end match ammo. I know it will shoot well with it tho and it is what I have at the moment. I think in the future I might try some Lapua CenterX as I have heard many great things about this ammo. I am also going to try and work on my skills more and more.

And I promised pictures as well.
120koxj.jpg


Ben
 
Last edited:
Stop second guessing yourself. It's a rimfire, not a .308.
Take the rifle as is to the range and shoot it, see how it works.
If I can get away with pillars and epoxy shims, you oughta be fine.

pillar-shims.JPG

Justin..a little off topic...what did you use to cut the relief in the front pillar? Dremmel? thanks
 
this settles it....I have heard NOTHING but bad accuracy results after a Cerekote treatment. Proper maintanence, and the gun will not rust. Riflemen have been doing this for centuries without it. Honestly, maybe if I kept if off the action and just did my barrel, but I feel for the guy, especially when he was holding so little MOA prior. My bet it was 100% the Cerekote, as that is the only thing different.
 
what did you use to cut the relief in the front pillar?

I've done it 4 different ways now. (4 CZ 455's)
First time used a 3/8 diameter dremel stone.
Second time touched the pillar to the wheel on my bench grinder.
Third time was with an abrasive blade on my cut off tool.
Fourth time I filed it. Filing gives best finish and most control.
Just learning as I go.
 
It's it possible the cerakote changed the wave form of the barrel?

Sent from my SCH-I535 using Tapatalk
 
There is a lot of good advise in this thread, but I have a couple of questions.

Isn't the locking lug on the 455 on the bolt handle?

How thick was the Cerakote applied?

If the Cerakote was applied to both the bolt handle (locking lug) and the locking surface on the action, could that affect headspace slightly? (Cerakote thickness X 2)
 
If you clean your barrel, then expect to shoot any types of small groups, you are mistaken. I have a friend who cleaned his kid's 3P gun, it took about 300 rounds for it to get back to what it was before.
Everyone here, you are shooting lead by the most part. It self laps the barrel. My Uncle's 1930's Eric Johnson Winchester Mod 52 out shoots anything I own. It is a 6 groove barrel. To my knowlege, it has never been cleaned by him or me, with the exception of the bolt face, and chamber. Just my opinion....

That is quite misleading, and what you're describing sounds more like improper cleaning put a burr (or similar) in the bore, as that's really the only thing that takes that long to smooth out. As it is, new barrels can take a few boxes to fully lap. Wax mixing should be avoided but it isn't the final word in accuracy as you've observed, and my 40x will shoot SK Std. + or Wolf MT into tiny holes at 50y on top of an Eley coat, but mix Eley Sport (made by Aguila) and Eley and Eley won't shoot great. YMMV for wax mixing, but a new layer of wax should come in 5-25 rounds, anything more and there's probably something going on with your barrel. Try both and see if your rifle and ammo combinations like each other, if not you know you need to clean. It took a fair bit of experimentation for me to figure out what I need

This is what was imparted to me by a previous US Olympic Team armorer/gunsmith for Nesika/Anschutz, and was backed up by a USAF shooting team member, ARNG shooting team member, and pretty much every other competitive SB shooter.