

Judging from his statement of it being the clipIR, its maybe not even the clipIR-LR? Maybe I missed it.That’s pretty impressive 20x image quality considering it’s not the xELR.
Night Vision EOTECH CLIP ON THERMALS ( Full details)
- Thread starter DownRangeThermal
- Start date
You are using an out of date browser. It may not display this or other websites correctly.
You should upgrade or use an alternative browser.
You should upgrade or use an alternative browser.
I was planning on using a 5-20 with the ELR, but based on this picture I may go up to the 4-28.
Im blind, clearly! I think the clipIR-lr will work perfectly out front my zco420.It’s the LR, based on the picture labels
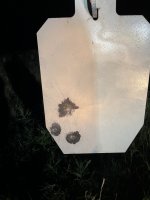
306 yds
224v gas gun
shot prone
Illumated the 2/3 ipsc and heated with torch
Fired 2 rds with day optic only. Those 2 impacted same place ( top impact)
Mounted clipir-LR used same hold and fired two rounds. Bottom two impacts
224v gas gun
shot prone
Illumated the 2/3 ipsc and heated with torch
Fired 2 rds with day optic only. Those 2 impacted same place ( top impact)
Mounted clipir-LR used same hold and fired two rounds. Bottom two impacts
Attachments
Food for thought:
Your day scope isn’t limited to available pixels which means you have a more defined aiming point. You can see a 1/4” dot as a 1/4” at 100 yards.
Ideally this would be the same with a thermal, but we know that you’re limited to 640 pixels in most cases. Because of this, a single pixel needs to be measured with margin of error since it is unlikely that each pixel measures 1/4” at 100 yards. Those same 1/4” dots could be 1” pixels or larger (scope dependent).
All of this is to say, it’s extremely rare to have the exact same POA or POI because of pixel limitations. You simply don’t have the exact same information feeding your eye that a day scope delivers. Variance will almost always exist, even with the very best MWIR.
The best way to measure variance is by removing parallax variables which rules out LPVOs for the most part.
Food for thought:
Your day scope isn’t limited to available pixels which means you have a more defined aiming point. You can see a 1/4” dot as a 1/4” at 100 yards.
Ideally this would be the same with a thermal, but we know that you’re limited to 640 pixels in most cases. Because of this, a single pixel needs to be measured with margin of error since it is unlikely that each pixel measures 1/4” at 100 yards. Those same 1/4” dots could be 1” pixels or larger (scope dependent).
All of this is to say, it’s extremely rare to have the exact same POA or POI because of pixel limitations. You simply don’t have the exact same information feeding your eye that a day scope delivers. Variance will almost always exist, even with the very best MWIR.
The best way to measure variance is by removing parallax variables which rules out LPVOs for the most part.
That’s all great info!!!!

I just messaged Dan at DRT and he explained to me how he sets parallax on a clip on. When I get a chance I’ll try that and report back
I’ve always maximized the magnification so I can see the screen pixels, then adjusted the day optic parallax until the pixels look very sharp, reasoning that I am getting the most focused view of the screen that way. Then I just run focus adjuster on the clip-on after that. Happy to learn a better way though…
Remember that the poi shift from clip ons is generally caused by 2 things....
1. The image is not truly unity. Typically you see this with cheaper commercial units. When you come off the center of the display with your day reticle it's not 1 to 1 vs the real world. This can also be caused by light refraction differences on the eyepiece. Demag eyepieces can have edge distortion when your day optic is not centered up behind the clip on. This edge distortion can cause non unity conditions as well but not typically large ones. I've seen this a little with UTC when large height discrepancy is introduced or large angular differences.
2. Parallax offset between day optic and clip on. This is the most common since it is entirely user induced. They best way to eliminate this is to do the following.
1. Turn on the reticle in the Clip On.
2. Align the clip on reticle with your zeroed day optic reticle.
3. Move your head around the eye-box and look for relative movement between the two overlaying reticles and adjust Parallax on day optic until they stay in alignment. The proper Parallax setting will be used for all distances once confirmed....only the clip on objective focus will be used as distances change. At this point the reticle can be left on or turned off if it is a distraction....I leave mine on. (The movement you see between the two reticles is your poi shift!)
Edit to add...if you don't have a reticle to reference on your clip on you can zoom in and do the same with a pixel relative to your day reticle or some text on screen....just need something to test parallax between the two optics.
I was told the eyepiece Parallax on the ClipIR stuff was set to 100m....which is nice because many lpvo without parallax adjustment use that fixed distance. But again, use the above procedure and it will eliminate a large portion of poi shift issues. If your clip on has a diopter adjustment ( clip ir does not) that's another level to add in here.
Lastly, one thing to keep in mind with any Thermal is pixel drift.(why we nuc)
NUC it often until it gets up to operating temperature.....especially in a cold environment.
Last edited:
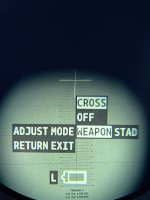
Do the ClipIR units have a reticle? It seems like the xELR wouldn’t since it’s been confirmed it doesn’t have a stand-alone mode.
Exactly.2. Parallax offset between day optic and clip on. This is the most common since it is entirely user induced. They best way to eliminate this is to do the following.
1. Turn on the reticle in the Clip On.
2. Align the clip on reticle with your zeroed day optic reticle.
3. Move your head around the eye-box and look for relative movement between the two overlaying reticles and adjust Parallax on day optic until they stay in alignment. The proper Parallax setting will be used for all distances once confirmed....only the clip on objective focus will be used as distances change. At this point the reticle can be left on or turned off if it is a distraction....I leave mine on. (The movement you see between the two reticles is your poi shift!)
Edit to add...if you don't have a reticle to reference on your clip on you can zoom in and do the same with a pixel relative to your day reticle or some text on screen....just need something to test parallax between the two optics.
I had well over a mil of parallax (reticle shift from moving your head) with my Yoter-C/1-10 G3 Razor combo. That's a minimum of a 4" shift at a 100yd target just from moving your head.
The purpose of a parallax adjustment is to ensure that the reticle is on the same plane as the image so that there is no shift when viewed from different angles. (Try holding a finger up while focusing on a distant object while closing each eye for an example.) Scopes are designed to minimize parallax at normal ranges. Viewing a screen only a few inches in front of their reticle greatly exaggerates the shift.
Early word was that the closer range one (caller “ir” by some and “mr” by others, as well as the LR, do have reticles and stand alone modes.
I’ve always maximized the magnification so I can see the screen pixels, then adjusted the day optic parallax until the pixels look very sharp, reasoning that I am getting the most focused view of the screen that way. Then I just run focus adjuster on the clip-on after that. Happy to learn a better way though…
That will work fairly well (as you know), but there’s a better way:
On tactical scopes, it’s not a focus knob, it’s a parallax knob. Parallax will usually be fairly minimal when the image is focused and the image will usually be fairly focused when the parallax is removed, but they rarely coincide exactly.
So your method is actually not addressing parallax (except by accident getting close). Yes, you’ll get the best image, but at the expense of not necessarily aiming your crosshairs at what you think you are.
Your focus method is also inconsistent, because there’s a range of movement on the knob in which the image looks subjectively focused to your eye.
Using the method outlined by DRT (head movement to check parallax just like you would with only a day scope) actually removes parallax and is more repeatable and no longer subjective. With almost every scope out there, the image will still appear focused so it’s a win win.
On clip ons without reticles, just do the same process by comparing the day scope reticle to a specific pixel and removing movement of the reticle.
All good points, and makes good sense. I work with microscopes a lot, so I feel I’ve always had a pretty good sense of when the pixels are perfectly focused, so I think I have applied my method pretty consistently. But I can understand that perfect focus does not always mean perfect minimization of parallax, though with quality optics I suspect the two points are often fairly close to each other. Otherwise you could end up being forced to use a day optic parallax setting which significantly compromised the image quality to achieve correct parallax, and I don’t think serious end-users would be OK with that.
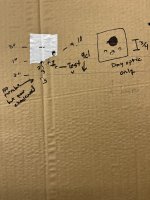
So after an informative discussion with @DownRangeThermal this morning about the importance of setting the parallax as precise as possible with thermal clipon’s and how to do it along with shooter induced errors if a guy isn’t getting a repeatable cheek weld in different shooting positions (clipon thermals exaggerate it) I put a few more rds down range.
For this test I switched to factory 75 tmj ammo vs the 60 gr vmax I’ve been using.
So on my Leupold mk5 3-18 I was previously running parallax at infinity and after turning the reticle on and fine tuning parallax I found the 750yd setting to be the best per what Dan described to me
Fired 5 rds with day optic only then proceeded to put a few rds through with the clipir-LR
Shots 1-4 I focused on keeping a solid cheek weld.
Shot 5 I adjusted parallax to 100 and used a sloppy higher than normal cheek weld
I fired a couple more rds at another target with just the day optic messing with different than normal cheek welds and I couldn’t get my POI to change as much as it did with the clipon in use.
Shot 9 and 10 I adjusted the bipod lower than I usually do at my 100 yd range and moved over to an inverted sloped part to test the cheek weld deal.
So it appears that my clipir-LR has roughly a .55 moa low and .4 moa right shift.
I shoot a decent amount of PRS and NRL type stuff so I feel like my fundamentals are good and weren’t in play to much on previous tests (but who knows )
)
I ran a couple more tests not shown here and it is very apparent that if parallax isn’t fine tuned it exaggerates POI between clipon and no clipon.
Now I’m guessing a few of you already knew all this and I had a rough idea but I sure didn’t realize the extent or the extreme importance of it all.
For this test I switched to factory 75 tmj ammo vs the 60 gr vmax I’ve been using.
So on my Leupold mk5 3-18 I was previously running parallax at infinity and after turning the reticle on and fine tuning parallax I found the 750yd setting to be the best per what Dan described to me
Fired 5 rds with day optic only then proceeded to put a few rds through with the clipir-LR
Shots 1-4 I focused on keeping a solid cheek weld.
Shot 5 I adjusted parallax to 100 and used a sloppy higher than normal cheek weld
I fired a couple more rds at another target with just the day optic messing with different than normal cheek welds and I couldn’t get my POI to change as much as it did with the clipon in use.
Shot 9 and 10 I adjusted the bipod lower than I usually do at my 100 yd range and moved over to an inverted sloped part to test the cheek weld deal.
So it appears that my clipir-LR has roughly a .55 moa low and .4 moa right shift.
I shoot a decent amount of PRS and NRL type stuff so I feel like my fundamentals are good and weren’t in play to much on previous tests (but who knows
)I ran a couple more tests not shown here and it is very apparent that if parallax isn’t fine tuned it exaggerates POI between clipon and no clipon.
Now I’m guessing a few of you already knew all this and I had a rough idea but I sure didn’t realize the extent or the extreme importance of it all.
Attachments
Very interesting that your optimal parallax setting was 750yd. My completely uninformed assumption would have been that it would be made for somewhere around 100yd. Closer to infinity is surprising, but makes some sense. Unfortunate for those using optics without adjustable parallax. Thanks for taking the time to share your results!
I’m pretty sure Dan told me the xELR model was setup for a 100yd/m parallax setting. He needed to double check on the LR model.
One thing I’ve noticed on parallax in general though is the numbers on the side usually don’t actually correlate to the actual setting a user needs at that particular distance. I might have known a guy that received a brand new TT when the gen3xr reticle came out that would focus past 600yds. It sucks to have to send a brand new scope back around the Christmas holidays
@SkyScrapin and @wigwamitus what have you guys found on parallax?
I’m pretty sure Dan told me the xELR model was setup for a 100yd/m parallax setting. He needed to double check on the LR model.
One thing I’ve noticed on parallax in general though is the numbers on the side usually don’t actually correlate to the actual setting a user needs at that particular distance. I might have known a guy that received a brand new TT when the gen3xr reticle came out that would focus past 600yds. It sucks to have to send a brand new scope back around the Christmas holidays
@SkyScrapin and @wigwamitus what have you guys found on parallax?
I'm not usually looking at the parallax knob to see where it lines-up, but will remember to do so next outing. Usually I'm glued to the cheek piece until it's setup perfectly since it only needs to be setup once for the clip-on device.
I always assumed it was just set it to infinity and roll but I’m thinking when I read that it was more directed toward NV clipon knowing what I know now
Thermal clipon is definitely a different deal after Dan explained it in detail.
Thermal clipon is definitely a different deal after Dan explained it in detail.
So far I’ve used it on a leupold mk5 3-18 and a ZCO 420. When I get time I’ll try it in front of a mk8 cqbss and vortex 1-10.
I will probably throw a paint marker dot on the correct setting to make it repeatable.I'm not usually looking at the parallax knob to see where it lines-up, but will remember to do so next outing. Usually I'm glued to the cheek piece until it's setup perfectly since it only needs to be setup once for the clip-on device.
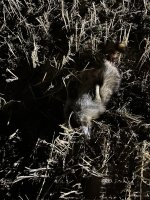
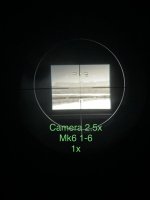
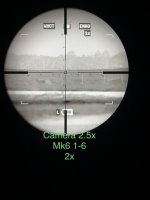
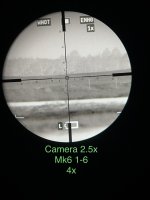
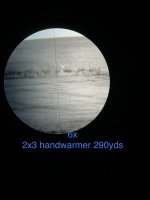
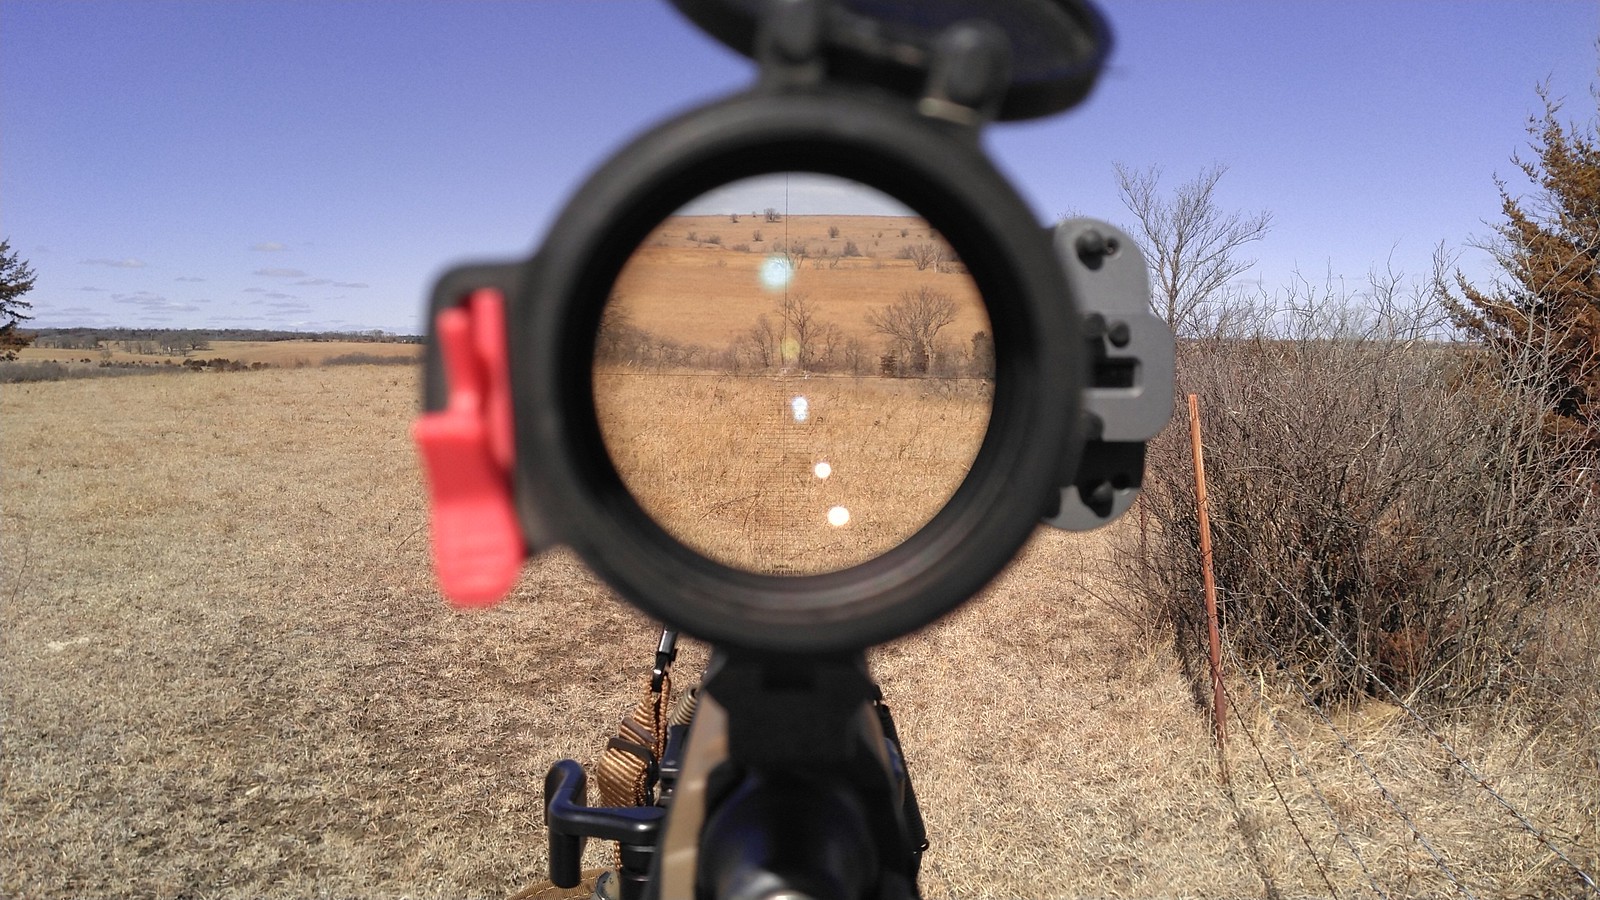
Clipir-LR
Leupold mk6 1-6
Tree line 600yds roughly. It was hot today and thermal conditions weren’t great yet tonight. Probably be a bit better if I waited to take pictures an hour later as some objects cooled off.
Turned the reticle on to check parallax and it wasn’t perfect unity but it was pretty dang good.
To me 2x was perfect. Walking around doing 360° scans was awesome. Decent field of view and awesome image. For being more of a long range unit it would definitely fit a walk and stalk roll I think. Had it on a mid weight 12.5” carbine and the weight of the clipir was noticeable but not bad really.
Attachments
Last edited:
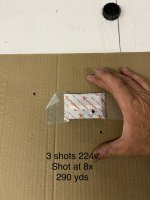
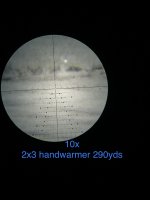
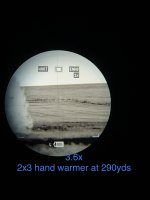
Double checking dope tonite. 224v gas gun, mk5 3-18, 60vmax, 290yds, off a tripod, 2x3 handwarmer
Attachments
Will take some pictures/video here this coming week through a test unit from @Stricklyoffensivekit.
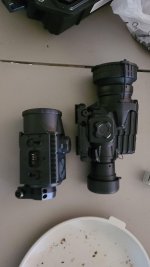
First impressions: well built but CHUNKY. The menu system is intuitive and how the contrast works reminds me of the TigIR (being that it's baked into the color pallet technically and not available as a sole adustment option). EDIT: contrast can be independently adjusted per Preston. Has a quick off for the display....a feature I wish more US thermals had.
Manual focus is nice. Image seems to be nice as well. You don't cut corners on the display with a Vortex 1-10x24 razor until about 3.5x optical mag....so that's a good sign. Based on this, it should easily support 10x magnification.
Going to be testing this more tonight woth some coming videos soon!
For now, here's a picture comparing it to the Puslar FXG50 for size reference.
Attachments
Last edited:
For now, here's a picture comparing it to the Puslar FXG50 for size reference.
it would be a better comparison with a skeetir
I'll get a picture with it too!it would be a better comparison with a skeetir
Well look at the upside.First impressions: well built but CHUNKY.
Can keep you warm on them cold winter nights like a CHUNKY woman.

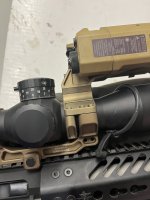
Had to add a spacer on the Badger C1 raptar picatinny rail to get enough clearance for the laser and rangefinder to “see” over the Clipir-LR. 3.6”-3.75” looks to be roughly how high you need to be from the top of the picatinny rail the Clipir is mounted to, to the top of raptar picatinny mount.
Looks like for spuhr mounts a guy needs the following:
A-0029 with 10mm spacer A-0015
A-0029B
Looks like for spuhr mounts a guy needs the following:
A-0029 with 10mm spacer A-0015
A-0029B
Attachments
I'm a little concerned about the xELR with my Raptar even though I have the high Spuhr diving board.
As of a few years ago, I started running rangefinders on 9 o'clock to lower the profile.

Last edited:
Do you run the QD mount on the Raptar? Looks like @Bravo6niner direct mounts theirs.I'm a little concerned about the xELR with my Raptar even though I have the high Spuhr diving board.
With the med height rail and the Raptar QD, the laser clears a PVS27. Anyone have a height comparison of that with the xELR?
Last edited:
I did not remove the QD mount from the factory. These devices look considerably higher than a PVS-27 though, thanks to the gooseneck.
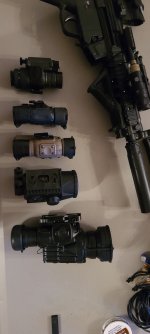
I picked up a CLIP LR & Nox18 today. First impression on the LR, she's THICK, but well built, aside from the cheap mount. The retention lever on the mount just looks like it will pop free with continued usage. The rear objective cap was poorly thought out, due to the fact that it's difficult to remove. Is anyone using some other aftermarket cap? I love the manual focus, and the image is NOICE. You have to love the "Made in America" logo on the case. I thought that they were made in the EU, and imported by Eotech. I'll try to run it through the paces this weekend. She's a little thick, but I wouldn't dare kick her out of bed.
Last edited:
lol so which part is Made in America, the case?I picked up a CLIP LR & Nox18 today. First impression on the LR, she's THICK, but well built, aside from the cheap mount. The retention lever on the mount just looks like it will pop free with continued usage. The rear objective cap was poorly thought out, due to the fact that it's difficult to remove. Is anyone using some other aftermarket cap? I love the manual focus, and the image is NOICE. You have to love the "Made in America" logo on the case. I thought that there were made in the EU, and imported by Eotech. I'll try to run it through the paces this weekend. She's a little thick, but I wouldn't dare kick her out of bed.
Or the sticker that says "Made in America"lol so which part is Made in America, the case?
In today's world where men can identify as women and women as men, maybe the Unit identifies as Merican. LOL
Anything goes these days in certain circles.
Anything goes these days in certain circles.
HAHA....yes it must mean the CASE. Funny.
We have 5 more ClipIR- LR and a couple 12 degree CLipIR units that just arrived.
We have 5 more ClipIR- LR and a couple 12 degree CLipIR units that just arrived.
Shot a little video comparison of the Clip LR to the Super yoter C using a NF NX 8 2.5-20x50.
Shot a little video comparison of the Clip LR to the Super yoter C using a NF NX 8 2.5-20x50.
Well done on the Video!
I actually did adjust the focus on the LR, you can see it between the 25, 50, and 100 yard targets the mostAs you said the Yoter remains the budget option to beat (Steiner?) but it’s just asking too much of it to go against the ClipLR. Great video. I notice you never adjusted the focus on the ClipIR, in your testing did you feel it made much difference to image quality?
Shot a little video comparison of the Clip LR to the Super yoter C using a NF NX 8 2.5-20x50.
Thank you for taking the time to make this video!
Thanks for the feedback boys! Hope you all enjoyed. Trying to make the videos more high quality as I go (learning to edit and all of that jaz is fun... like a colonoscopy) and the trigger cam SOK is going to send me for future videos will help with that. I'll do a video table top review here soon stating my final thoughts as well before the unit goes back.
Similar threads
- Replies
- 4
- Views
- 173
- Replies
- 42
- Views
- 3K
- Replies
- 0
- Views
- 63
- Replies
- 22
- Views
- 3K