Thanks, that helps a lot. Your process sounds like what I need to be aiming for.
One more question, though a little off topic. I've realized I may have the wrong Forster sizing die. I watched
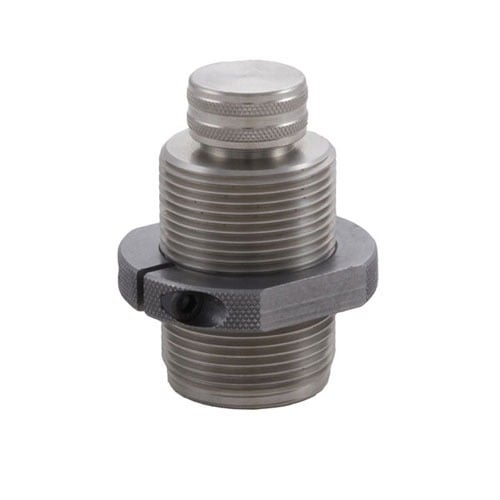
this video and discovered that Forster has 3 different sizing dies - the "FL Sizing Die", the "Bushing Bump Neck Sizing Die", and the "Bushing FL Sizing Die". I have just the "FL Sizing Die", which I believe means it doesn't accept bushings and only has an expander ball. Do you have any insight as to whether I would get inferior results using this die for sizing, with just an expander ball followed by the -.002 mandrel I'd be looking to get vs getting the proper bushing FL sizing die? The confuse things further, I saw some chatter on older posts that says "expander balls are just as good as mandrels", etc.
As with most things... "it depends".
The plain old Forster F/L sizing die (no bushings) actually works surprisingly well. The expander is located differently on the decapping stem than on other brands, so (in theory) the case is a little better supported when the expander is pulled back through the neck.
For me, and a lot of other people, the problem with the way factory F/L sizing dies and their expanders work is they squeeze the neck down a little *too* small (they have to account for *every* kind of brass on the market, and some have thinner neck walls than others) and then pull the expander ball back out to open things back up. Best case scenario, it's going to over-work the necks a bit more than really necessary, and could (in theory) lead to early onset of split necks (assuming no annealing) or cause the neck (and shoulder) to be pulled/stretched back out, undoing some of what you just accomplished by F/L sizing and bumping the shoulder back.
If you can, do a little experiment: F/L size some cases, with no expander. You should be able to remove the expander ball from the stem, and leave it in for decapping-only. Adjust the die so that you get the desired shoulder bump. Measure the neck wall thickness, and the neck OD and ID, shoulder bump / headspace dimension, and write all that down. Pay particular attention to the ID number, relative to the nominal bullet diameter.
Next, without changing anything else, put the expander ball back on the stem, and put it back in the die. Size some more cases. Take the same measurements, and write them down as well. What values changed?
Do the same thing again, but put a bit of lube inside the case neck ID. Imperial dry neck lube works well, and won't have any adverse effects on the powder later, but for the sake of this experiment, pretty much anything will work. LIttle bit of case lube on a q-tip, if nothing else. Worry about making the process 'scale' later. Same measurements, again writing it all down. Notice any difference?
Now, if you have an appropriately sized mandrel, say 0.002 under nominal bullet diameter, we can try that. Take those cases from the first step, where you took the expander ball out of the F/L sizing die, and run them over the mandrel (little bit of lube here won't hurt). Again, measure and record.
In general, you'll probably see that the results from the first test give you very much undersized necks - enough so that it'd probably be hard to actually seat a bullet in the case, without damaging one or the other. After the second test, you'll probably see the neck ID is a bit closer to the nominal bullet diameter, minus 2-3 thou. *BUT*... the shoulder may have been pulled forward, and the case OAL might be longer as well. After test #3, you should see the neck ID about the same, but less stretching of the neck/shoulder. Maybe none at all, or perhaps there'll still be a little, but it'll be more consistent. And for the last test, the case head space should stay right where you originally set it, and the neck ID will be pretty close to the mandrel diameter, maybe a hair (half thou to a thou) smaller, due to brass spring back. Some of this will depend on a few things: how thick the necks were to begin with, how hard the particular alloy is, whether the cases have been annealed or not, etc.
If, after test #4 you like the overall results, but want a little smoother feel - and to work the brass less - you can call Forster and send the die in to get the neck 'honed' to a specific diameter. That is going to be somewhat brass dependent. I'd say take the neck OD after expanding them with the mandrel, minus 2-3 thou. The process is fairly inexpensive, with usually decent turn-around times.
As an example, I have a Forster .308 Win 'National Match' F/L sizing die with the neck honed to 0.333". For the brass I typically use (Lapua), that works out just about perfect. Out of the box, the brass is 14.5-15.5 thou neck thickness. If it's some stuff that I used for my FTR match gun, it's probably neck turned to 14 thou even. Loaded round neck diameter with the neck turned stuff is about 0.336", and my match chambers are 0.343" and fired cases come out @ 0.341-0.342". So sizing the necks down to 0.333" in the die generally yields necks that are 0.333-0.334" (usually there's a tiny bit of spring back, even with annealing), and running them over a 0.306" mandrel typically nets me necks that will pass a 0.3055- gage pin, just about perfect.
Apologies for speaking in .308 Win, rather than 6mm-whatever, but it's the cartridge I've spent the most time fussing over so the numbers come readily to mind. Hopefully you can interpolate what I'm saying to your application.
Using a F/L die that uses neck bushings allows you to experiment a little with the bushing size. Maybe go a size smaller, so that with the combined spring back when necking down, and expanding up, you end up with a slightly snugger grip on the bullet. Or maybe go the other way. The problem with the Forster bushing dies is that they don't use 'standard' sized neck bushings that most of the rest of the industry does ie LE Wilson 0.500" dia. x 0.375" tall bushings. Whidden, Redding, SAC, BC Micron and others all use that same size. But not Forster. It's not that what they use won't work, just that they're not interchangeable with anything else.
In theory, using a non-bushing F/L sizer does have one advantage - there's less risk of donuts forming at the neck/shoulder junction, where the bushings can't really get to effectively. Personally, I've had very little to no issues with that *actually* being an issue in real-world use, but that may be cartridge/case dependent. If it is something you worry about, you have the OG shoulder bushing dies by Neil Jones, in which the neck bushings has part of the shoulder angle built into it. The SAC Modular F/L sizer, and the Cortina die are (much) newer versions that use the same idea - but again, with their own bushings that are not interchangeable with anything else. Again, they all work, they just kind of lock you in to that one supplier's ecosystem.
Well, that turned into more of a War-n-Peace novel than I intended. Hopefully some of it's actually useful
")