I've had a 3D filament based printer for a few years and have made a bunch of different items. It is great for making tweaks on things that you need that either are a pain to get or don't exist. I'm not a designer and I only use the most rudimentary CAD tools. I have three or four gun part projects that I've done and I thought I'd post them here. I thought I'd share some of my items and experiences.
The first one is born out of frustration. An S&W MP 15-22 magazine that wasn't feeding because of some FOD. At the range and I remove the baseplate and fumble a bit and the retainer part gets launched somewhere into the dirt and scrub. It has to be a $0.01 item. When I'm home and I pull one from another mag, it is a simple part. I mic it up and make a change so that there is a small hole in the long ridge so that the spring can thread through it and be captured. The first one I print is too big. A common issue with filament printers is that small (1-3mm) features are often not rendered correctly. Holes shrink and walls/ridges get thicker. Makes fitting things tightly together a real nightmare as you design holes/slots big and the male features smaller. I made the size corrections.
First- a printer is nothing more than a robot glue gun. It traces a layer in 2D and then moves the nozzle up and prints another layer. That means that any new layer needs material under it, or at least near it, to build up. You can also 'bridge' between two areas if your printer, material and gap size allow it. If no support, the layer falls down and the print is ruined. You can use a support setting to print material under unsupported layers, but you then have to clean this up. I'm not a fan of printing with supports.
The issue is that this part has a lot of overhangs and I need a part to lay flat on the printing surface and any layer. So there is one flat area, so what I did is split the part half way through this flat area, not I have a top and bottom part with a flat area that I can then print the two parts easily.
You can see the progression from right to left of all the simple parts I used to make the part, the complete part, and then it divided in half for printing.
View attachment KR-b-0qqchN7cRXmDg_gH8REb915r_290SoPP3JTluNj6QwoY6SBnWf-C8j6X_vyqJ2hWLMQcBfhg1Mlc-_8pOq9z0h-3nGrYG_-
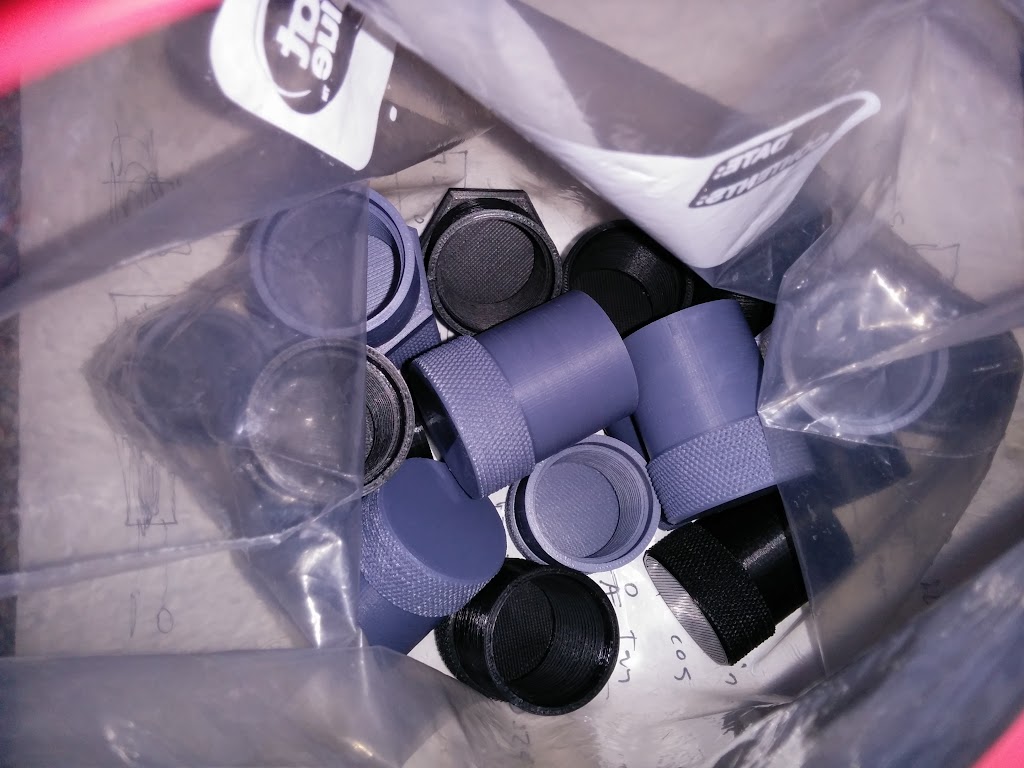
I then printed out a bunch of them: View attachment vPwZ1_H0R2JlkGHOSeeFUv_cG5npFqNlw4m4XRU0RmkF4nX77RVfJwHz-DLeSZYGXY8b8YLiw8vp9gatw5aN5gEJ9622RrhlWolT
[IMG2=JSON]{"data-align":"none","data-size":"full","src":"https:\/\/photos.google.com\/photo\/AF1QipOkuAti-lDy_Uv_hHjr3302QvubnPieuD6yQU97"}[/IMG2]
[IMG2=JSON]{"data-align":"none","data-size":"full","src":"https:\/\/www.snipershide.com\/shooting\/core\/image\/gif;base64,R0lGODlhAQABAPABAP\/\/\/wAAACH5BAEKAAAALAAAAAABAAEAAAICRAEAOw=="}[/IMG2]
Here you can see the top and bottom halves:
View attachment NrYZfQblHzxrV5zbeEsH4Gi6fKfp0hpPLDwgtMwa8hYssl2wuKkiKv33pELQb2RGDvJLusflGPET6p2WwyFSn7JNMiACKnImqqus
I then glued them together. On the left I use standard gorrilla glue and on the right I used the super glue version. I like standard because it foams and fills and I think it sticks better to materials. The foaming needs to be trimmed off later, kind of a pain. The super glue version seems to work pretty well on these perfectly flat pieces. The plastic is Taulman T-Glase which is a PET derivative, think soda bottles. It seems to make pretty good bonds and doesn't have any clean up.
Put them in clamps to cure. The super glue version is cured in minutes. With either, I wipe one side on a moist paper towel to ensure reactions.
View attachment uM6cSuMeIr1rPi13MA7fBF_fK_knt4tyUCYlMuxpCSeNZXGCQ26tcWKXBQl6HZeByGSpS-zLroaiNiUYWbHwUfX9kCYL3FPA_Hi5
Here are two completed ones to show top and bottom.
View attachment -QTIHCVLtLp1csJt_R-wKDCoMf9bCSJKUVRCWnCkFNo63TQemO00TJmEclRy6Jwy3hv1H7JwdadbL1WdC_qwL6jmhrPzeQnMaSvw
And how they compare to standard retainer.
View attachment caUQPE5SKwJjwL0HYLxGKyX5bkmWkPwocyfuDkkWOK5rnA_Uad0flf3eD4zY793lcYfhDrR0OysG8eRbJlU4fqpx_BIMF-FVOcyk
And then the retaining function:
View attachment 2KGJshKqspxEIB7eOhK9YSGMbD0uC7nEftqoNLE9LO2Y4DnOQuW4Iq5Bu96MN_lXN8H2m-DxCRfjiDVe7vUBMHlMYTDeTcAQ9tb2
View attachment oX9uVqvqifaxL_R8waQS1LAZnXNc1LM9OhVRweKS3mecel2Mk7kfcJYpWN3iap4TpAgH9j8yVcEtq4_F9gVkZGK1GLCICxO7A1mb
And then what it looks like installed:
View attachment 8SLFXcixbdTm0iHucNNafi2KS5NvggoWZ6WbjMtv5u0UsoHZ8W3x8WjMc-bfum-J6n2VPJkHUgVPUoTBrBmLA9kiOqH14ptCWYyD
As you can see I've printed off a bunch of them. If you are interested in trying out a couple, drop me a PM and I'll put a couple in an envelope for you. Im interested to see how well they work in different people's mags and how they hold up. The two different glues and the T-Glase resin. The retainer is a non-critical part since the mag is usable with out the retainer. I've ran the gun a few outings and probably 2-300 rounds through the mag before my ejector died and I had to send the MP15-22 back to home for repairs.
I have a couple of other gun related projects I'm working on. I'll try to post one every week or so. I'm by no means an engineering genius, a good designer or have an expensive machine. I think my experience is pretty close to what a regular gun guy could expect from the technology.
Regards,
PS- the STL files to print these are stored at Thingiverse:
https://www.thingiverse.com/thing:2485357
The first one is born out of frustration. An S&W MP 15-22 magazine that wasn't feeding because of some FOD. At the range and I remove the baseplate and fumble a bit and the retainer part gets launched somewhere into the dirt and scrub. It has to be a $0.01 item. When I'm home and I pull one from another mag, it is a simple part. I mic it up and make a change so that there is a small hole in the long ridge so that the spring can thread through it and be captured. The first one I print is too big. A common issue with filament printers is that small (1-3mm) features are often not rendered correctly. Holes shrink and walls/ridges get thicker. Makes fitting things tightly together a real nightmare as you design holes/slots big and the male features smaller. I made the size corrections.
First- a printer is nothing more than a robot glue gun. It traces a layer in 2D and then moves the nozzle up and prints another layer. That means that any new layer needs material under it, or at least near it, to build up. You can also 'bridge' between two areas if your printer, material and gap size allow it. If no support, the layer falls down and the print is ruined. You can use a support setting to print material under unsupported layers, but you then have to clean this up. I'm not a fan of printing with supports.
The issue is that this part has a lot of overhangs and I need a part to lay flat on the printing surface and any layer. So there is one flat area, so what I did is split the part half way through this flat area, not I have a top and bottom part with a flat area that I can then print the two parts easily.
You can see the progression from right to left of all the simple parts I used to make the part, the complete part, and then it divided in half for printing.
View attachment KR-b-0qqchN7cRXmDg_gH8REb915r_290SoPP3JTluNj6QwoY6SBnWf-C8j6X_vyqJ2hWLMQcBfhg1Mlc-_8pOq9z0h-3nGrYG_-
I then printed out a bunch of them: View attachment vPwZ1_H0R2JlkGHOSeeFUv_cG5npFqNlw4m4XRU0RmkF4nX77RVfJwHz-DLeSZYGXY8b8YLiw8vp9gatw5aN5gEJ9622RrhlWolT
[IMG2=JSON]{"data-align":"none","data-size":"full","src":"https:\/\/photos.google.com\/photo\/AF1QipOkuAti-lDy_Uv_hHjr3302QvubnPieuD6yQU97"}[/IMG2]
[IMG2=JSON]{"data-align":"none","data-size":"full","src":"https:\/\/www.snipershide.com\/shooting\/core\/image\/gif;base64,R0lGODlhAQABAPABAP\/\/\/wAAACH5BAEKAAAALAAAAAABAAEAAAICRAEAOw=="}[/IMG2]
Here you can see the top and bottom halves:
View attachment NrYZfQblHzxrV5zbeEsH4Gi6fKfp0hpPLDwgtMwa8hYssl2wuKkiKv33pELQb2RGDvJLusflGPET6p2WwyFSn7JNMiACKnImqqus
I then glued them together. On the left I use standard gorrilla glue and on the right I used the super glue version. I like standard because it foams and fills and I think it sticks better to materials. The foaming needs to be trimmed off later, kind of a pain. The super glue version seems to work pretty well on these perfectly flat pieces. The plastic is Taulman T-Glase which is a PET derivative, think soda bottles. It seems to make pretty good bonds and doesn't have any clean up.
Put them in clamps to cure. The super glue version is cured in minutes. With either, I wipe one side on a moist paper towel to ensure reactions.
View attachment uM6cSuMeIr1rPi13MA7fBF_fK_knt4tyUCYlMuxpCSeNZXGCQ26tcWKXBQl6HZeByGSpS-zLroaiNiUYWbHwUfX9kCYL3FPA_Hi5
Here are two completed ones to show top and bottom.
View attachment -QTIHCVLtLp1csJt_R-wKDCoMf9bCSJKUVRCWnCkFNo63TQemO00TJmEclRy6Jwy3hv1H7JwdadbL1WdC_qwL6jmhrPzeQnMaSvw
And how they compare to standard retainer.
View attachment caUQPE5SKwJjwL0HYLxGKyX5bkmWkPwocyfuDkkWOK5rnA_Uad0flf3eD4zY793lcYfhDrR0OysG8eRbJlU4fqpx_BIMF-FVOcyk
And then the retaining function:
View attachment 2KGJshKqspxEIB7eOhK9YSGMbD0uC7nEftqoNLE9LO2Y4DnOQuW4Iq5Bu96MN_lXN8H2m-DxCRfjiDVe7vUBMHlMYTDeTcAQ9tb2
View attachment oX9uVqvqifaxL_R8waQS1LAZnXNc1LM9OhVRweKS3mecel2Mk7kfcJYpWN3iap4TpAgH9j8yVcEtq4_F9gVkZGK1GLCICxO7A1mb
And then what it looks like installed:
View attachment 8SLFXcixbdTm0iHucNNafi2KS5NvggoWZ6WbjMtv5u0UsoHZ8W3x8WjMc-bfum-J6n2VPJkHUgVPUoTBrBmLA9kiOqH14ptCWYyD
As you can see I've printed off a bunch of them. If you are interested in trying out a couple, drop me a PM and I'll put a couple in an envelope for you. Im interested to see how well they work in different people's mags and how they hold up. The two different glues and the T-Glase resin. The retainer is a non-critical part since the mag is usable with out the retainer. I've ran the gun a few outings and probably 2-300 rounds through the mag before my ejector died and I had to send the MP15-22 back to home for repairs.
I have a couple of other gun related projects I'm working on. I'll try to post one every week or so. I'm by no means an engineering genius, a good designer or have an expensive machine. I think my experience is pretty close to what a regular gun guy could expect from the technology.
Regards,
PS- the STL files to print these are stored at Thingiverse:
https://www.thingiverse.com/thing:2485357
Attachments
Last edited: