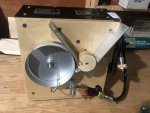
Amazon for the PVC rod and cake pan, eBay and slow boat from from China for the electronics and clamps, hardware store for case material, angle aluminum, U bolt. Here's mine.
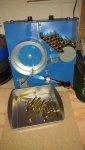
View attachment 7267381 Here you can see the prox sensor that should theoretically run the case feeder only when it senses there isn't a case present, I wish I could get it working but without it you just have to adjust the case feeder speed to be a little slower than the rotor. It seems to switch states and voltages properly, but maybe the current on the signal line isn't sufficient. In the rotor you can see that little triangle I can thread onto the case stop to adjust for short cases like Grendel to keep the shoulder area sticking off the rotor.


 haha. Thanks!