
Not sure if this falls under "Equipment" or "Gunsmithing" so I apologize in advance.
Keep in mind that you do not want to heat up the rifle bolt to high; slow and steady with the grinding and welding so that you can avoid excess heat.
I wanted to use one of the many tactical bolt knob replacements that are available. Unfortunately I don't have a machine shop or a big bank account to pay someone else to do the work... so I thought I would attempt it in my garage.
I knew that I didn't have a way to thread the bolt handle if I did grind down the original knob. So I went with cutting off the knob altogether and attack it from another direction.

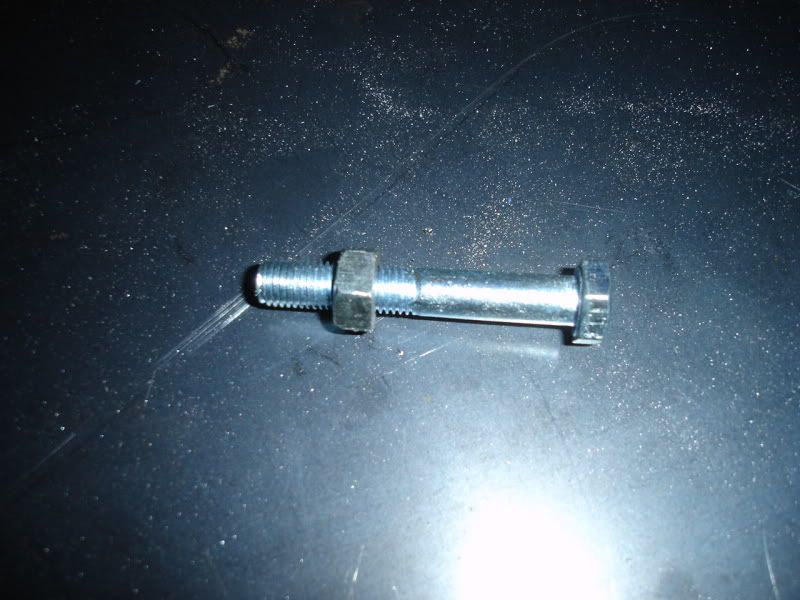
I have the thread information for the knob I ordered; 5/16-24. I went to the local hardware store and spent $1.15 on a grade-5 bolt and nut.
Cut the hex head off the bolt and chucked it up into the drill press. With a flat file, I cut a notch into the unthreaded part of the bolt just beyond the threads with the drill press spinning the bolt while I held the file up to it.
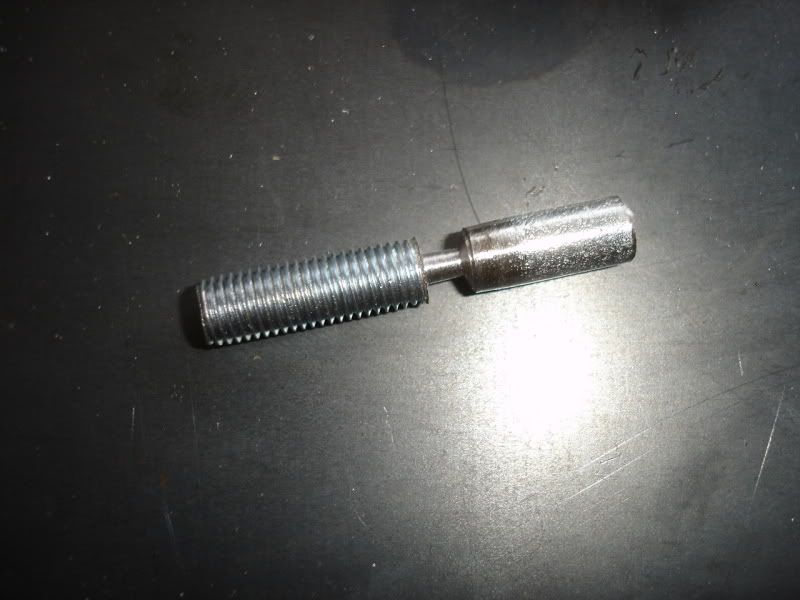
Next I took my hacksaw and held it up to the notch I had just made in the grade-5 bolt and cut it by letting the drill press run and held the hacksaw blade up to it. This way everything would be centered on the grade-5 bolt.
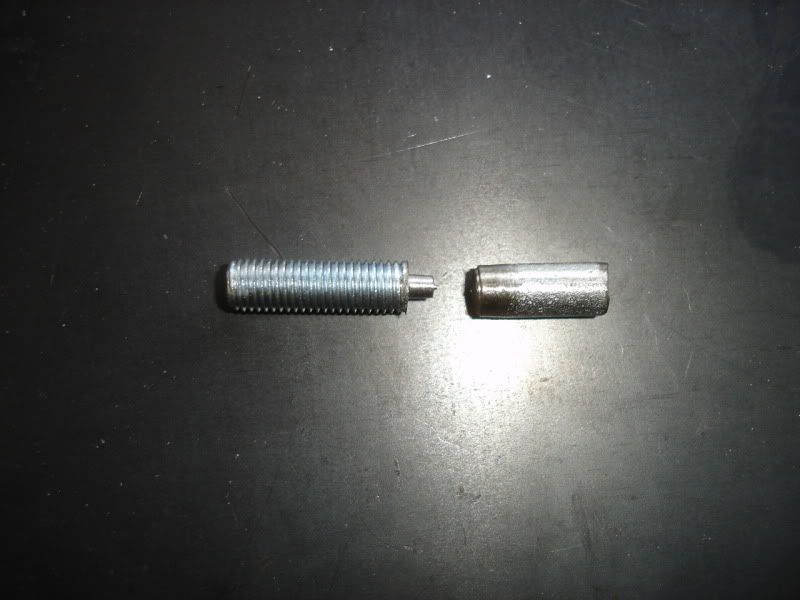
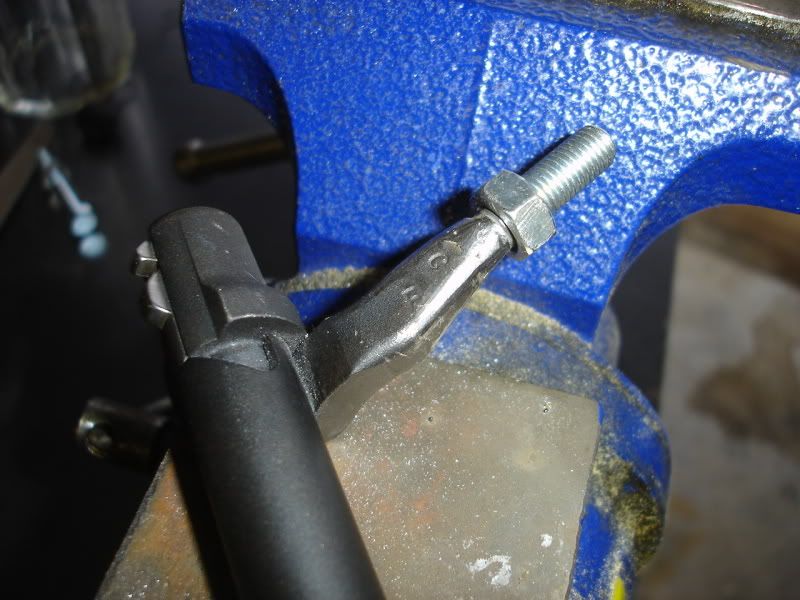
Put the rifle bolt into the vice and carefully cut off the factory knob as straight as I could. Then it was back to the drill press where I drilled into the rifle bolt, using the same size bit as the newly notched grade-5 bolt. Now the two parts fit together snugly.
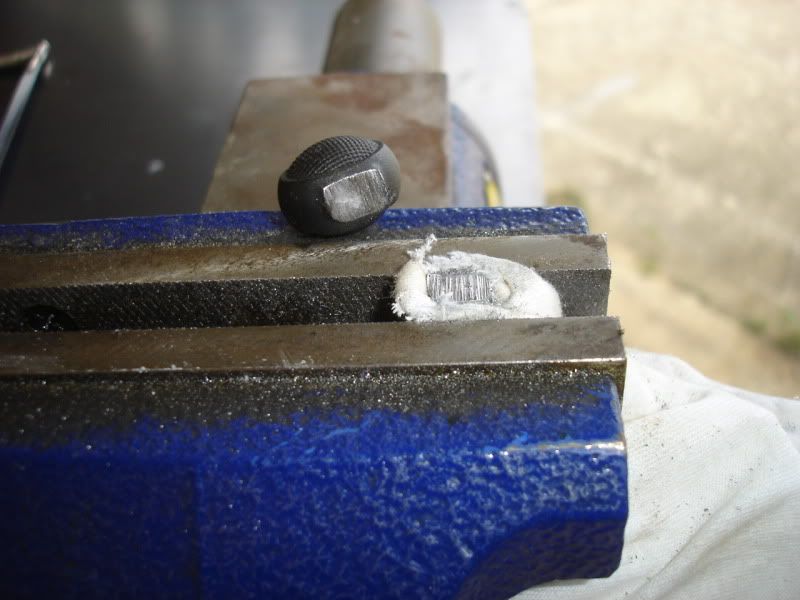
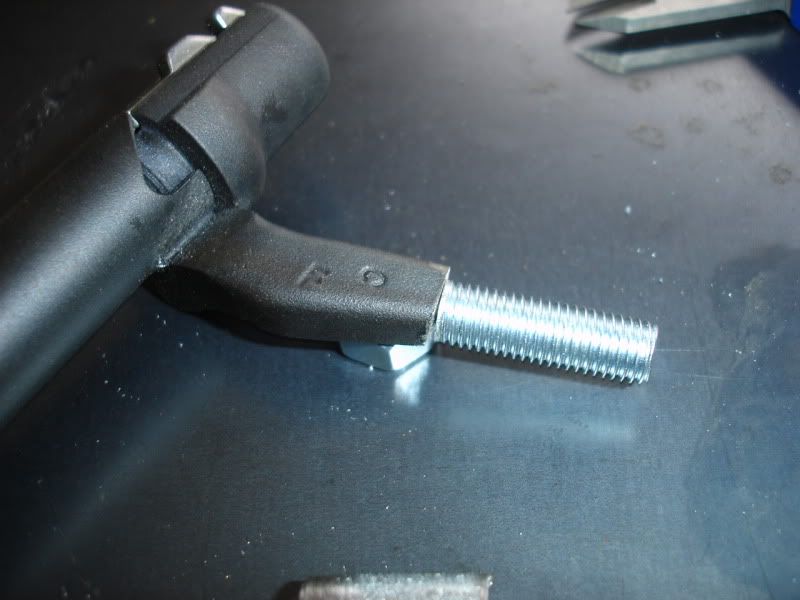
Next I used a bench grinder and tapered down the freshly cut rifle bolt so there would be a shoulder leaving room to actually weld the two parts together without having to weld the threads of the grade-5 bolt. Following a lot of flat file work I ended up with this (the nut protects the threads).
Still leaves me needing to re-coat the bare metal and for UPS to deliver my new bolt knob.
Keep in mind that you do not want to heat up the rifle bolt to high; slow and steady with the grinding and welding so that you can avoid excess heat.
I wanted to use one of the many tactical bolt knob replacements that are available. Unfortunately I don't have a machine shop or a big bank account to pay someone else to do the work... so I thought I would attempt it in my garage.
I knew that I didn't have a way to thread the bolt handle if I did grind down the original knob. So I went with cutting off the knob altogether and attack it from another direction.
I have the thread information for the knob I ordered; 5/16-24. I went to the local hardware store and spent $1.15 on a grade-5 bolt and nut.
Cut the hex head off the bolt and chucked it up into the drill press. With a flat file, I cut a notch into the unthreaded part of the bolt just beyond the threads with the drill press spinning the bolt while I held the file up to it.
Next I took my hacksaw and held it up to the notch I had just made in the grade-5 bolt and cut it by letting the drill press run and held the hacksaw blade up to it. This way everything would be centered on the grade-5 bolt.
Put the rifle bolt into the vice and carefully cut off the factory knob as straight as I could. Then it was back to the drill press where I drilled into the rifle bolt, using the same size bit as the newly notched grade-5 bolt. Now the two parts fit together snugly.
Next I used a bench grinder and tapered down the freshly cut rifle bolt so there would be a shoulder leaving room to actually weld the two parts together without having to weld the threads of the grade-5 bolt. Following a lot of flat file work I ended up with this (the nut protects the threads).
Still leaves me needing to re-coat the bare metal and for UPS to deliver my new bolt knob.
