• Watch Out for Scammers!

    We've now added a color code for all accounts. Orange accounts are new members, Blue are full members, and Green are Supporters. If you get a message about a sale from an orange account, make sure you pay attention before sending any money!

Gunsmithing CDI Precision Install

dhutch

Sergeant
Full Member
Minuteman
Jan 14, 2010
156
0
Frisco, TX
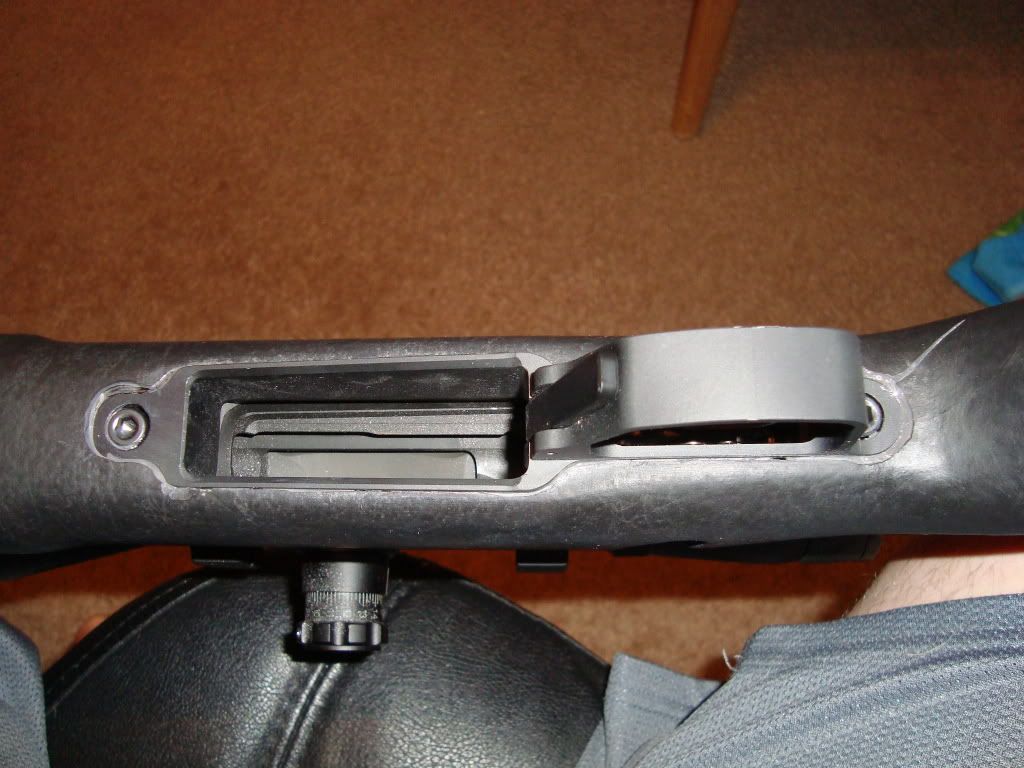
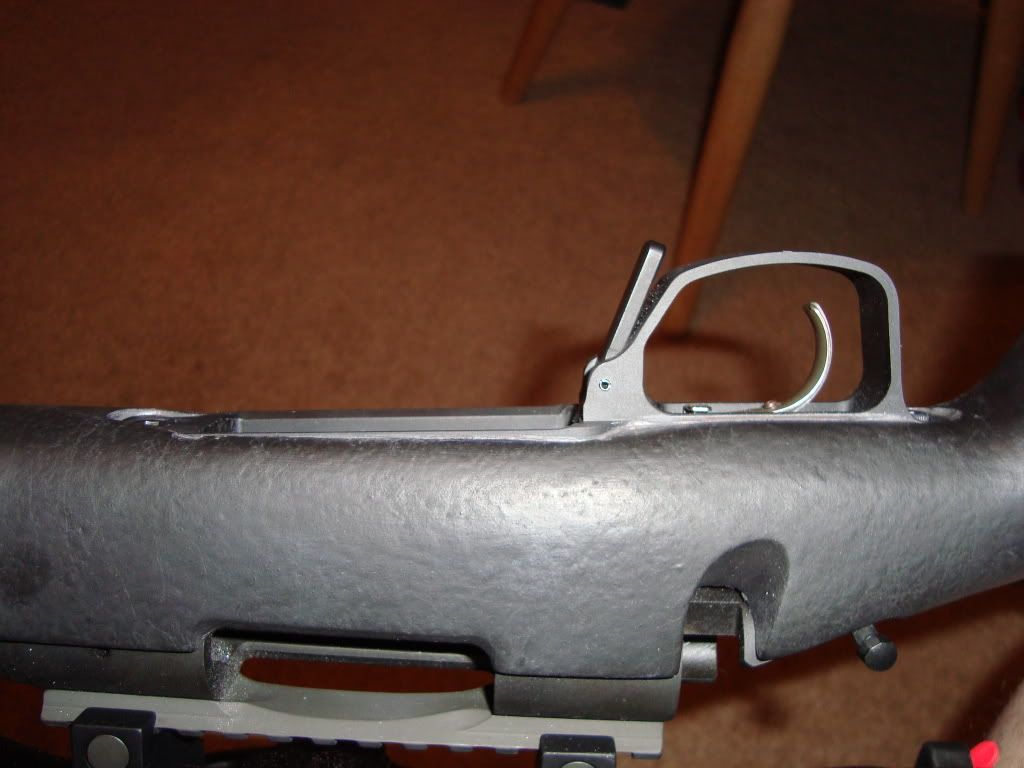
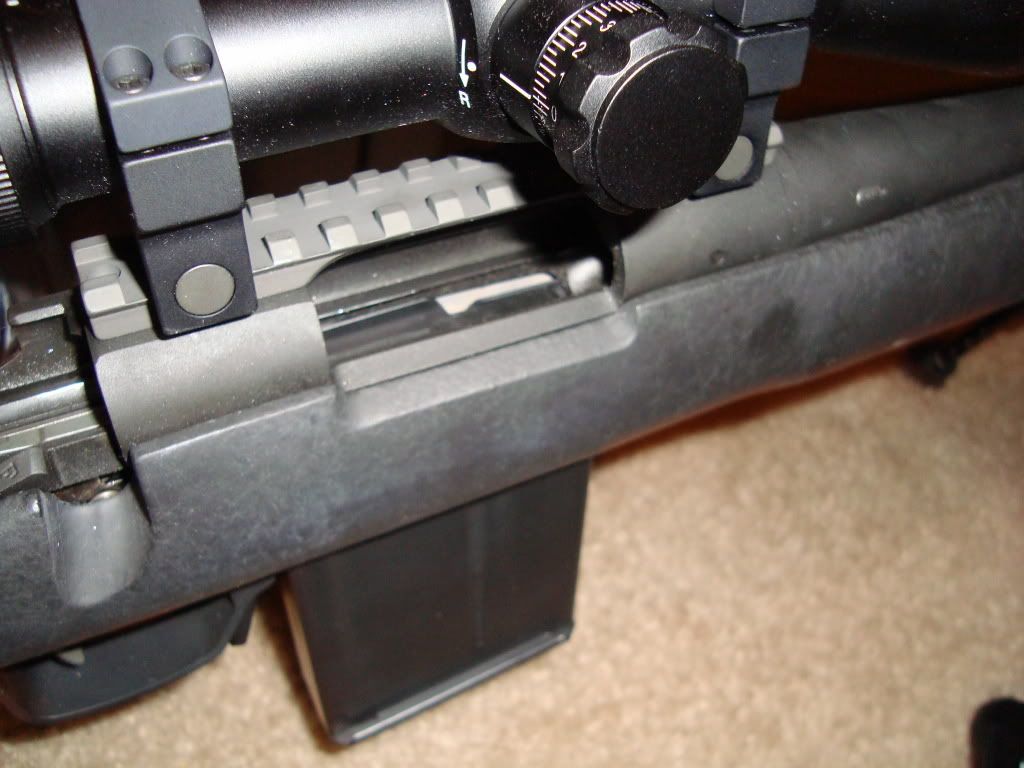
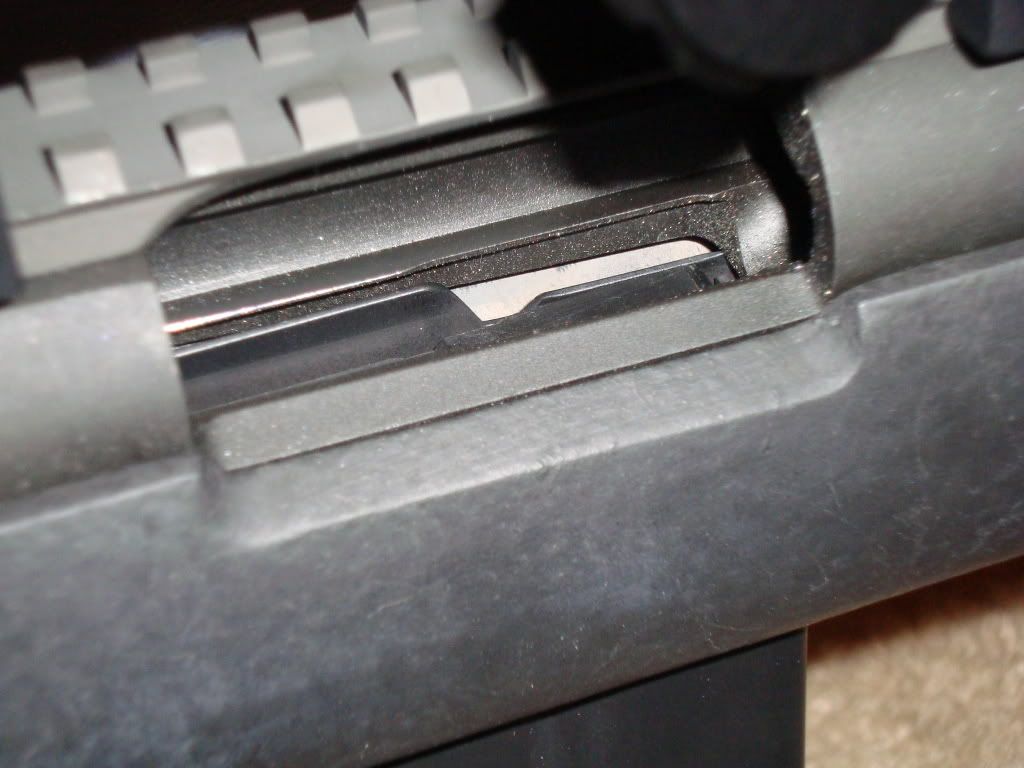
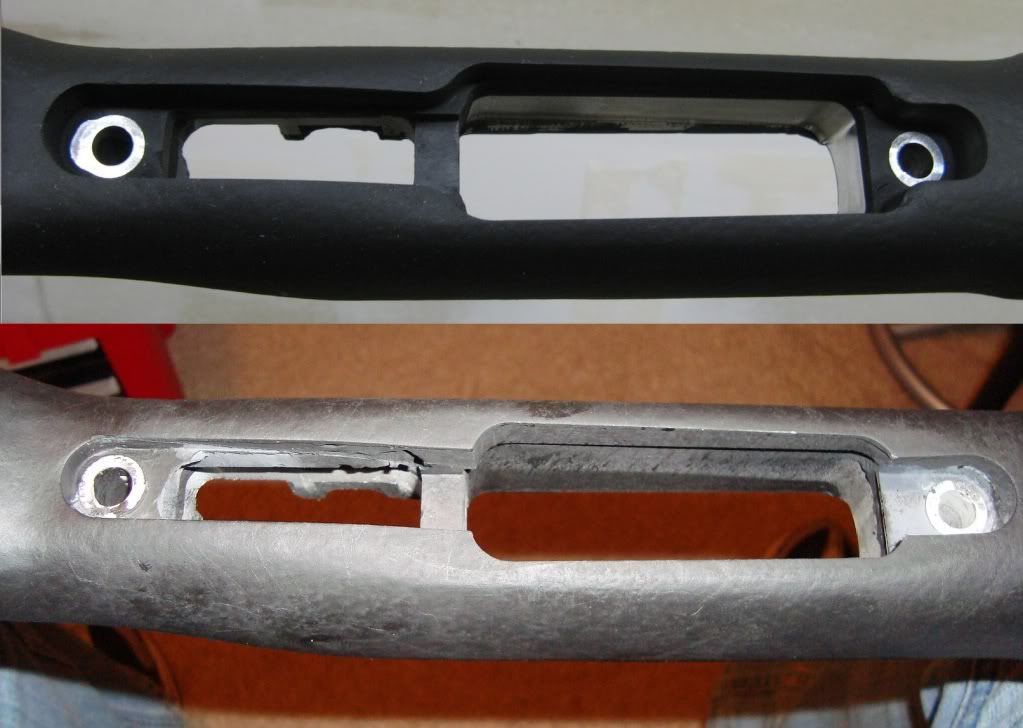
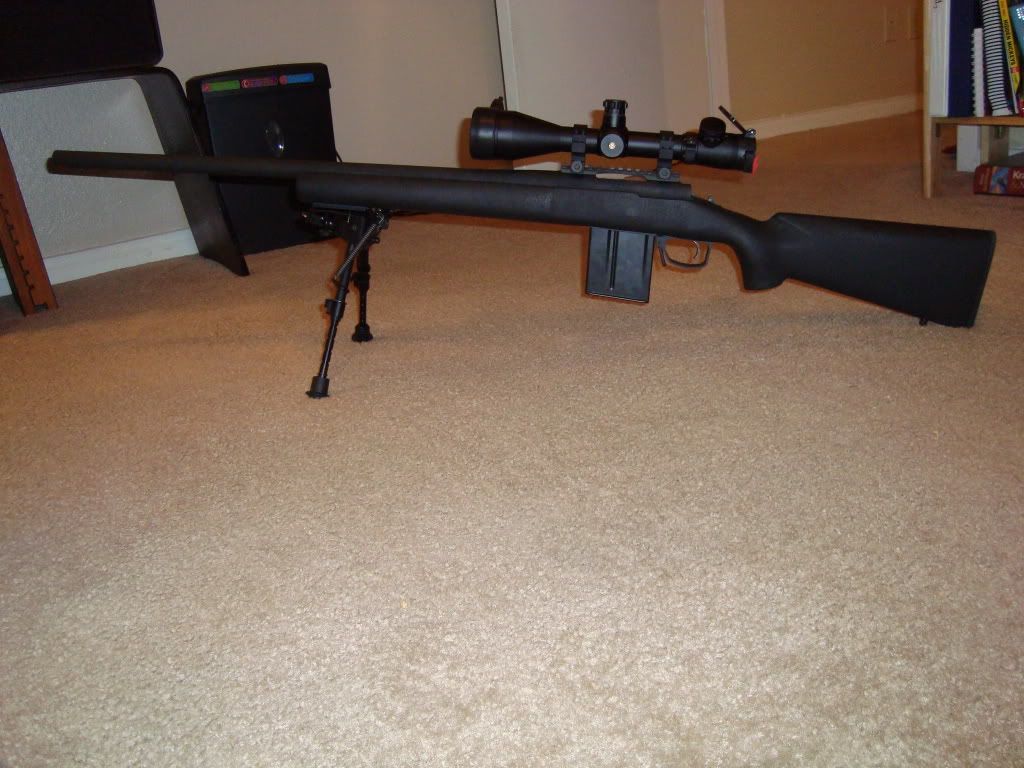
I put in my order today with Jeff for my bottom metal and two mags. I wanted to try my hand at installing it myself in my Rem 700P in H&S Precision stock. I found a thread with the how to, but the pictures are gone now
frown.gif

http://www.snipershide.com/forum/ubbthreads.php?ubb=showflat&Number=1156032

Does anyone know of any how to threads with pictures or have those pictures saved?
 
Re: CDI Precision Install

I'm not sure of the procedure for your REM, but I just installed one on my Savage and it was very straight forward. Jeff supplied the prints for the distance off the bottom of the receiver to the bottom metal. I didn't have to adjust anything, I hope your's goes on as easy as mine did.
IMG_2596.jpg
 
Re: CDI Precision Install

We can hope, Jeff didnt make it sound too hard when we talked this afternoon.
 
Re: CDI Precision Install

i think savages are lucky. Jeff said in the fcp with factory dbm, its a drop in fit except some internal removal of some material. others may require additional inletting
 
Re: CDI Precision Install

I think I've tracked down the pictures from the previous link. Fordsoldier is emailing them to me!
 
Re: CDI Precision Install

Still waiting on an email from Fordsoldier. He's probably at work just like the rest of us. I will post them up once I receive them, with ford's permission.

As well, I will be taking pictures as I do my install as well. Hopefully I will receive the DMB and mags early next week. Jeff said they were going out today.
 
Re: CDI Precision Install

OK guys sorry for the delay, I am loading the pics back into photobucket as we speak.
 
Re: CDI Precision Install

Ok guys Its been awhile so, the stock was a HS precision stock from a remington 700 that I sent to jeff at CDI to mill out for me and send back to me with the proper depth for the CDI bottom metal


Here is the bottom metal.
Picture009-1.jpg


Here is the stock that Jeff milled out for me

Picture008-1.jpg


On the action itself I had to file a bit of the receiver away circled in red here. this helps the magazine fit properly. Just a slight angle to give the right clearance, I used a bastard file to take the metal off.

CopyofPicture007.jpg


I also took my dremal and rounded out the back of the magazine to help with any action clearance issues there might be, go slow on this part you dont want to take to much off because the round will slide though the back if you take to much off.

CopyofPicture006.jpg
 
Re: CDI Precision Install

The next step is to properly size the magazine release circled in red, Take your time and go slow.

CopyofPicture012.jpg


Once you have everything set put the action and bottom metal together, tourque to specs and your magazine should lock into place with no problem

Picture013.jpg


I made a dummy round to make sure it would cycle with no problem.

Picture015.jpg


Now that everything is together and cycles fine. take a pic and enjoy.

Picture002-1.jpg
 
Re: CDI Precision Install

Guys, I got everything removed from the Stock today. My DBM didn't arrive today because of President's Day, but will be here tomorrow. I went ahead and took a picture of the beginning product and put it next to the finished product....check it out.

Picture008-1.jpg
 
Re: CDI Precision Install

Install is done fellas.....

DSC00542.jpg


Ok....so what we learned....

PAY JEFF MONEY TO DO YOUR INLETTING JOB FOR YOU! IT WILL BE WORTH THE $60 HE CHARGES AND THE 1 DAY TURN AROUND!!!!

Okay, sorry had to get that off my chest. I had one hell of a time doing the milling with a Dremel, and it turned out pretty good. Aint the prettiest thing on the underside, but nothing a little epoxy cant fix up. I had to do remove some material from my receiver as well just like Fordsoldier did. If you dont grind the circled piece above, your mag will hit and will never seat. I was lucky and did not have to file down my mag release.

All in all, I'm glad I did the install myself, as I learned a lot. I was a little over my head, and now see that paying Jeff $60 would have been a wise decision. The DBM is a work of art, and look forward to taking this bad boy to the range next week.
 
Re: CDI Precision Install

fordsoldier ,

A couple things.

I got mine stock back from Jeff yesterday and the only think I had to do for the install was to fit the bolts, I'm wondering why you had to shave the action and do the cut out on the back of the magazine.

Also, Your lever is longer than mine and dhutch's. Was that an option I missed?
 
Re: CDI Precision Install

there's 2 mounting holes in the release lever. depending on which one you use it'll be a little longer or shorter. i elected to install mine using the bottom hole so there's less to snag on anything. took a bit longer to trim the top of lever, but wasn't a big deal.
i will also send Jeff the next stock i do and let him CNC it. that damned dust gets everywhere. just thinking about it makes me itch.
 
Re: CDI Precision Install

<div class="ubbcode-block"><div class="ubbcode-header">Originally Posted By: MudBug</div><div class="ubbcode-body">fordsoldier ,

A couple things.

I got mine stock back from Jeff yesterday and the only think I had to do for the install was to fit the bolts, I'm wondering why you had to shave the action and do the cut out on the back of the magazine.

Also, Your lever is longer than mine and dhutch's. Was that an option I missed?</div></div>

We had to shave the receiver because the mags were hitting that small bevel. Shaving that bevel down a little allows the mag to go up higher into the receiver and actually engage the mag release. If we were to just shave down the mag release, and leave that bevel, the round would not be high enough for the bolt to strip it. Hope this helps answer your question.
 
Re: CDI Precision Install

hmmm, Mine doesn't hit that at all with my 5 round mags, but I just found that it does hit it 2/3rds of the time when using the 10 round mags. I guess I will bevel it a bit.

I didn't have to file anything off the mag catch at all.
 
Re: CDI Precision Install

Yeah my mag catch didn't need any modifying, nor did my mags. I guess we got lucky.....
 
Re: CDI Precision Install

sounds too complicated when u could just buy a badger m5 and no hassle. but i really do like the cdi bm and hopefuly will try out on my next project with in the next 6 months
 
Re: CDI Precision Install

Cool, great job and posts..:)

The newer DBM systems I moved the mag cutout slightly forward to avoid having to trim the receiver. I was originally trying to move it as back as far as possible, and have less to trim from the feed ramp(sometimes the rounds hook the feed ramp, a slight scallop there fixes that as well). Easy as pie..:)

Great job guys..;)
 
Re: CDI Precision Install

<div class="ubbcode-block"><div class="ubbcode-header">Originally Posted By: pat4668</div><div class="ubbcode-body">sounds too complicated when u could just buy a badger m5 and no hassle. but i really do like the cdi bm and hopefuly will try out on my next project with in the next 6 months</div></div>

Pretty sure the install of a Badger M5 on a H&S Precision stock is the same amount of work as it is to install the CDI BM.
 
Re: CDI Precision Install

<div class="ubbcode-block"><div class="ubbcode-header">Originally Posted By: dhutch</div><div class="ubbcode-body"> Yeah my mag catch didn't need any modifying, nor did my mags. I guess we got lucky..... </div></div>

I did have to take about 0.220 off my front screw and about 0.10 off my rear screw.

Took me 20 - 30 minutes.
 
Re: CDI Precision Install

DSC00543.jpg

DSC00544.jpg

DSC00546.jpg

DSC00547.jpg


Here's a few pics.....you see my inletting wasn't the prettiest thing, but it works! I learned a lot and I'm glad I did the install myself.
 
Re: CDI Precision Install

<div class="ubbcode-block"><div class="ubbcode-header">Originally Posted By: dhutch</div><div class="ubbcode-body">
DSC00543.jpg

DSC00544.jpg

DSC00546.jpg

DSC00547.jpg


Here's a few pics.....you see my inletting wasn't the prettiest thing, but it works! I learned a lot and I'm glad I did the install myself. </div></div>

fill it in just a tiny bit and paint it...it'll look perfect. good first try