• Watch Out for Scammers!

    We've now added a color code for all accounts. Orange accounts are new members, Blue are full members, and Green are Supporters. If you get a message about a sale from an orange account, make sure you pay attention before sending any money!

Gunsmithing Custom Stock/Gun Project

WVguy59

Supporter
Supporter
Minuteman
Jan 7, 2023
29
21
West Virginia
Hey guys, don’t know if this is the correct forum to post this in but just wanted to share a project that I am working on. I’ll probably have some questions later down the line as I progress through it.

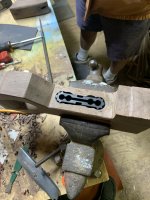
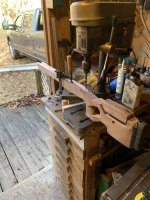
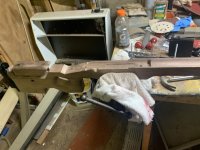
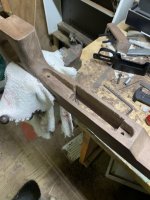
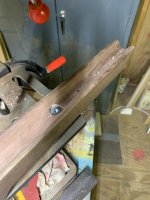
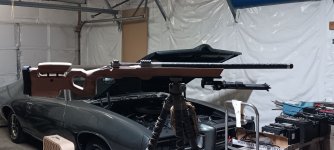
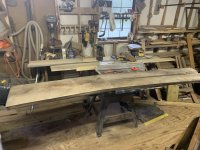
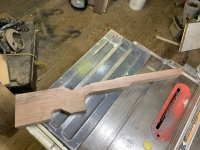
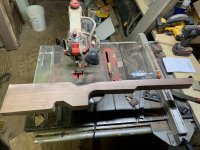
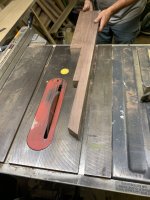
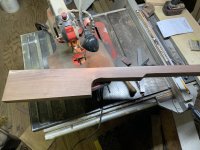
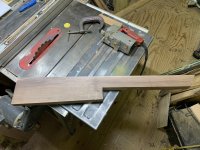
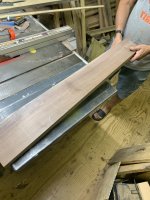
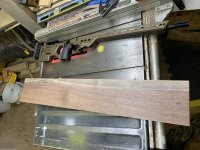
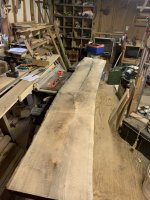
As of now here’s what I’ve done so far. I got a black walnut slab from a buddy at work that has been drying for the past couple years. I’m gonna build a 300 PRC with it. Here’s the build list so far
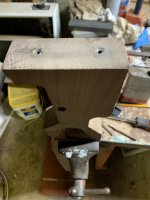
•custom stock
- going to have a KMW loggerhead adjustable check riser
- Area 419 Arca rail
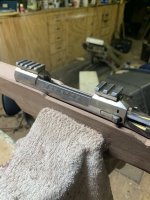
- Hawkins M5 CIP+ bottom metal
- Haven’t decided what I’m going to do with the buttplate (I’m open to suggestions)

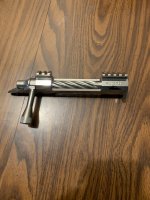
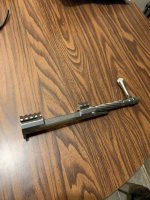
• Action: Defiance GA Hunter- should be arriving at my FFL next week!

• Trigger: TT Diamond single stage

•Muzzle Break: muzzle breaks and more CF Beast II

• haven’t decided on the barrel yet. Can’t decide if I am just gonna buy a proof prefit or send the action to a gunsmith like Southern Precision and have a barrel made up. But I have decided to go with a Carbon Barrel because I think it would look awesome in a Walnut stock.

• I haven’t decided on a scope yet either. Probably something like a Mark5 5-25, NF 4-32 or similar

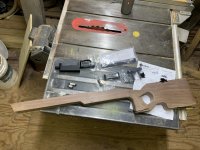
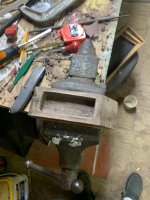
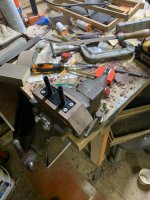
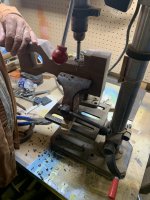
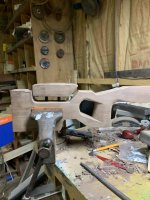
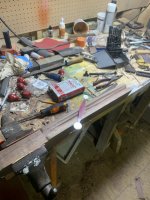
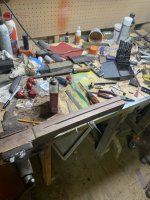
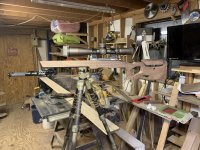
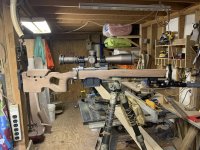
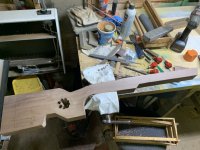
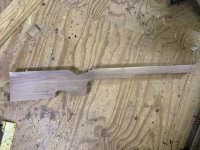
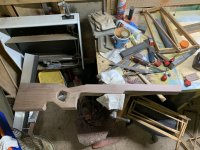
I’m not going to go much in detail about the woodwork I’ve done because I don’t want to make this post a mile long, but if you have any questions or comments feel free to let me know! My Dad has been a big help with this project as well. I currently work 2 hours from home so I only get to work on it on select weekends, but I’ll be updating the post with pictures periodically.

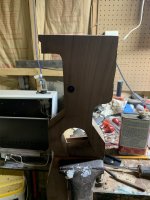
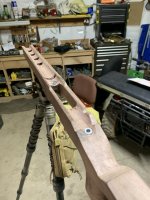
Here’s what I have done so far. I’m kind of going for a hybrid between a MPA Matrix and a Foundation Genesis 2:
 

Attachments

  • 5629C1D5-33BF-4C0E-8236-F99C57B30D22.jpeg
    5629C1D5-33BF-4C0E-8236-F99C57B30D22.jpeg
    435.5 KB · Views: 122
  • 41C960CF-D4D7-4A03-B7F7-00F7A63FB21B.jpeg
    41C960CF-D4D7-4A03-B7F7-00F7A63FB21B.jpeg
    415.3 KB · Views: 118
  • 3E5D042F-2985-49F0-A6B4-DB35A9F66BEB.jpeg
    3E5D042F-2985-49F0-A6B4-DB35A9F66BEB.jpeg
    575.2 KB · Views: 106
  • BE95F205-DF9A-48F1-ABF7-422866CD0AF0.jpeg
    BE95F205-DF9A-48F1-ABF7-422866CD0AF0.jpeg
    510.9 KB · Views: 103
  • 1EAE9465-E60F-4CA0-94DB-76440A935EA7.jpeg
    1EAE9465-E60F-4CA0-94DB-76440A935EA7.jpeg
    456.8 KB · Views: 100
  • 142B174A-63B0-412E-A83A-D2716A462413.jpeg
    142B174A-63B0-412E-A83A-D2716A462413.jpeg
    465.7 KB · Views: 101
  • A6557AA7-2956-4DAF-8627-02A81B1967AE.jpeg
    A6557AA7-2956-4DAF-8627-02A81B1967AE.jpeg
    443.7 KB · Views: 97
  • 2DB788F1-24C5-4F4D-80F4-027275832345.jpeg
    2DB788F1-24C5-4F4D-80F4-027275832345.jpeg
    521.4 KB · Views: 98
  • 033E6644-65F5-48B7-AC96-E907552C2910.jpeg
    033E6644-65F5-48B7-AC96-E907552C2910.jpeg
    545.3 KB · Views: 94
  • D15D49CD-45F2-4A10-80A7-FB2623F3D9F7.jpeg
    D15D49CD-45F2-4A10-80A7-FB2623F3D9F7.jpeg
    423.9 KB · Views: 91
  • 54C4C118-BE23-438F-8AC9-8CB90BFCF887.jpeg
    54C4C118-BE23-438F-8AC9-8CB90BFCF887.jpeg
    444.5 KB · Views: 97
  • 7DB155B2-5624-4F7D-B761-974AAB5FD9CE.jpeg
    7DB155B2-5624-4F7D-B761-974AAB5FD9CE.jpeg
    522.8 KB · Views: 100
  • 214C3580-55D8-4AE7-89F6-81A7880A226D.jpeg
    214C3580-55D8-4AE7-89F6-81A7880A226D.jpeg
    448.6 KB · Views: 105
  • 4A4E2D49-8CE5-4648-AF0F-69B62D558BCB.jpeg
    4A4E2D49-8CE5-4648-AF0F-69B62D558BCB.jpeg
    504.2 KB · Views: 116
Last edited:
Looks good so far , i probably would laminate the blank so that you gain a bit of stability, wood stocks move all the time, and laminated ones move less .
 
Looks good so far , i probably would laminate the blank so that you gain a bit of stability, wood stocks move all the time, and laminated ones move less .
I plan on putting pillers in and bedding the stock with Marine Tex once I have all the inletting done/components together, and putting polyurethane on the stock as a finish to seal everything up. That’s the plan anyway.
 
  • Like
Reactions: camocorvette
I plan on putting pillers in and bedding the stock with Marine Tex once I have all the inletting done/components together, and putting polyurethane on the stock as a finish to seal everything up. That’s the plan anyway.
Pillars and bedding do not change that , wood twists and bends reagardles.
 
Yeah, but what do you know about making thumbhole wood stocks anyways Chad???


🤣🤣🤣🤣


@WVguy59 - I dont do FB and look up LRIs wood stocks they have done.
They are OK I guess…..

Your stock looks pretty sweet so far.
Looking forward to seeing more pics of it and the process.
 
Just an update from this past weekend. A lot of the parts have came in so I was able to start carving out the cheek piece and start fitting the KMW hardware. (Also shout out to Terry Cross. Had a hand written thank you note in the invoice, which goes a long way in my book) I also trimmed down the vertical grip and probably will thin it a little more for a more perfect fit later on.

I chiseled out the top piece for the hardware and then used a drill press for the bottom portion of it. I still have to drill a 9/16 hole for the cross bolt and epoxy it into the stock. Although it’s a pretty tight fit the way it is now. I still have a lot of shaping to do for the cheek piece and need to sand/file and straighten everything up.

I also ran into an unseen knot right is the middle of the cheek piece, and I went too fast when cutting it out and kinda screwed up the back of the cheek piece. But my grandpa always said “A good wood worker screws up too, he just knows how to fix it” 😂

Also got my Defiance Ruckus in this week and that thing is slick!
 

Attachments

  • 3CFEA7C5-1953-4286-BDA6-5071C9B33A0D.jpeg
    3CFEA7C5-1953-4286-BDA6-5071C9B33A0D.jpeg
    505.1 KB · Views: 71
  • 855A376C-DBAE-48AC-9C34-3B4B57BBD97C.jpeg
    855A376C-DBAE-48AC-9C34-3B4B57BBD97C.jpeg
    432 KB · Views: 60
  • D5702951-69B5-4F38-A805-4CDF2D301EEA.jpeg
    D5702951-69B5-4F38-A805-4CDF2D301EEA.jpeg
    451.9 KB · Views: 58
  • 4DEAE107-0C5C-48B2-81AF-C5E1615EA4DD.jpeg
    4DEAE107-0C5C-48B2-81AF-C5E1615EA4DD.jpeg
    357.5 KB · Views: 63
  • 867F4D05-AB30-440B-BFCF-B150BBFE9577.jpeg
    867F4D05-AB30-440B-BFCF-B150BBFE9577.jpeg
    389.8 KB · Views: 60
  • F88798A6-F157-4A02-9CE3-2B1D1B8261FC.jpeg
    F88798A6-F157-4A02-9CE3-2B1D1B8261FC.jpeg
    443.5 KB · Views: 62
  • 2952E5E7-A3FB-4E0A-8B76-B6E061C33BFE.jpeg
    2952E5E7-A3FB-4E0A-8B76-B6E061C33BFE.jpeg
    449 KB · Views: 62
  • 7E3D1124-7BA5-47D7-9771-BA6D8591829D.jpeg
    7E3D1124-7BA5-47D7-9771-BA6D8591829D.jpeg
    422.1 KB · Views: 74
  • 33B8EB12-F136-457B-B2C2-45BFCD056A86.jpeg
    33B8EB12-F136-457B-B2C2-45BFCD056A86.jpeg
    389.9 KB · Views: 72
  • 321B8E09-46AE-40B4-B769-FA9A3F7819A8.jpeg
    321B8E09-46AE-40B4-B769-FA9A3F7819A8.jpeg
    397.5 KB · Views: 77
  • FFA67D79-00C3-4555-A8D3-673194265CEA.jpeg
    FFA67D79-00C3-4555-A8D3-673194265CEA.jpeg
    563.6 KB · Views: 70
Last edited:
Well here’s the update from last weekend. I got my buttpad in the mail from MDT. I didn’t know if it was going to fit/work, but I ended up making it fit. Just had to break out the grinder and cut some off of the bottom portion a little bit because it was too long for the stock.

Once I got that done I found a bolt that I drilled and tapped for the buttpad screws and then cut the bolt in half and drilled and tapped the stock and glued them in place and it worked like a charm. Screwed the buttpad in and sanded the back of the stock to taper flush with the buttpad

I also drilled the cross bolt hole for the KMW Loggerhead and got it finished up. I just need to epoxy the base in place now. Now I’ve started the barrel channel. I got more done than the picture shows but I forgot to take pictures before I left for work last Sunday.

If anyone has any advice on how to inlet for the action that would be great because I am procrastinating the inletting.
 

Attachments

  • 6FBDBA2C-6ECC-4CD3-B075-4D31195D8D73.jpeg
    6FBDBA2C-6ECC-4CD3-B075-4D31195D8D73.jpeg
    446 KB · Views: 55
  • 5792C0DA-353B-42F4-AC07-2EE94242403E.jpeg
    5792C0DA-353B-42F4-AC07-2EE94242403E.jpeg
    433 KB · Views: 56
  • 73B4AAC4-A2CA-4CA0-A8F1-CCE1B2423C9C.jpeg
    73B4AAC4-A2CA-4CA0-A8F1-CCE1B2423C9C.jpeg
    387.5 KB · Views: 58
  • 2B5B54C8-D003-4B77-B6CF-2D9286E8F6EA.jpeg
    2B5B54C8-D003-4B77-B6CF-2D9286E8F6EA.jpeg
    507.7 KB · Views: 57
  • EBB17D76-A8DB-4159-B27F-4FEB77C73506.jpeg
    EBB17D76-A8DB-4159-B27F-4FEB77C73506.jpeg
    329.2 KB · Views: 56
If anyone has any advice on how to inlet for the action that would be great because I am procrastinating the inletting.
What tools do you currently have, and plan to use for inletting for the action?
 
Been a little while since I updated. I’m not the greatest at keeping up to date and with not being able to work on it as much with holidays and work but I’m getting closer to it being completed! Since I posted last I’ve gotten the lions share of the work done. I have the action and barrel inletting done, action screw holes lined up and pillars installed with marine tex, the Hawkins M5 bottom metal carved out and installed, and installed a 419 arca rail.

I just recently got my 26” Bartlien M24 Carbon barrel that I had Southern Precision Rifles (SPR) chamber up for me, and got it screwed in to see what it will look like finished.

I have been contemplating cutting off the wood in front of the magazine well and making it flush with the bottom metal. I was hoping to get some of your guys opinions because I can’t make up my mind on what I want to do, but I’m leaning towards cutting it and making it flush.

I’ve had a lot of enjoyment with this project so far and have a few things left on my to do list. Next thing up is getting the action bedded to the stock with Marine Tex.
 

Attachments

  • IMG_1627.jpeg
    IMG_1627.jpeg
    556.9 KB · Views: 38
  • IMG_1632.jpeg
    IMG_1632.jpeg
    431.9 KB · Views: 32
  • IMG_1644.jpeg
    IMG_1644.jpeg
    387.2 KB · Views: 33
  • IMG_1720.jpeg
    IMG_1720.jpeg
    400.1 KB · Views: 31
  • IMG_1724.jpeg
    IMG_1724.jpeg
    320.6 KB · Views: 33
  • IMG_1727.jpeg
    IMG_1727.jpeg
    512.7 KB · Views: 39
  • IMG_1730.jpeg
    IMG_1730.jpeg
    506.5 KB · Views: 34
  • IMG_1816.jpeg
    IMG_1816.jpeg
    368.4 KB · Views: 35
  • image000000.jpeg
    image000000.jpeg
    146.1 KB · Views: 35