

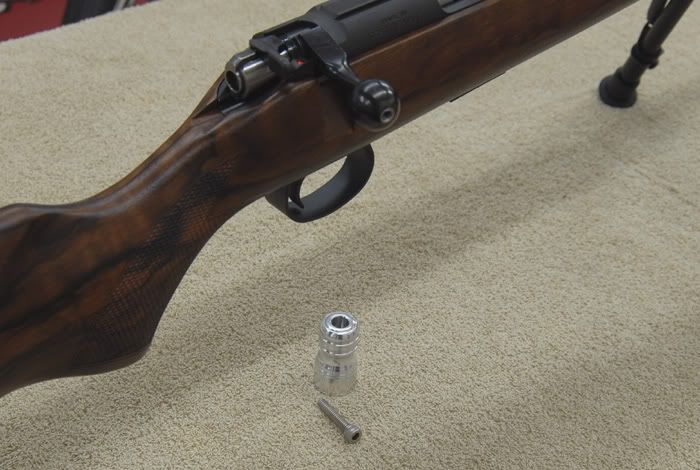
I just wanted to show an easy quick fix for those out there like me who have the CZ452 Varmint with scope and had trouble hitting your thumb on the scope everytime you lifted the bolt to re-load. The bolt is just too short to use once you mount a scope, without a scope no problem, with a scope the bolt almost hits the scope and just plain becomes an irritating issue.
So I decided I'd fix that little problem right quick like.
Anyone that wants to do the same, all you need is a mill and a lathe, or a buddy with them, and a little time to kill.
First off, I have my own private machine shop and lots of jigs and what not lying around which made this go fast, but anyone can quickly fashion some jigs to do the same. I first took a piece of 1" 6061 billet aluminum rod and turned it down to .8500 then lathed out the shape you see and drilled a hole down the center with a drill #9 for the use of a 10-24 stainless allen head bolt (you see it also). On the inside I used a .7500 ball mill to cut a perfect ball pocket on the inside, this will fit snug and like a glove over your CZ ball on the bolt as it is a .7500 ball anyway.
Next I placed the new piece on the gun over the bolt to position it where I wanted it. I chose to have it continue on the angle the small section of the bolt already was going and marked it there. I took a red paint marker, very thin edged one and drew all the way around the bolt.
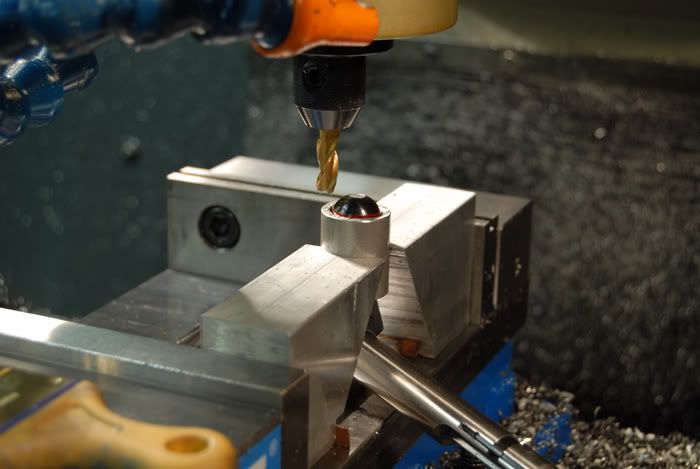
Then, next I took a piece of 1" aluminum tube, with a wall thickness of .120, seamless, and cut off a piece about 1.5 inches, then cut a slot with a band saw down the lenght of it to allow it to compress. I then set up the jig you see here, and placed the bolt in this tube and clamped it in the mill. The red lines gave me the level to place the bolt so the drilled hole will be exactly centered on where I want the extension to be in the end. Now with the bolt ball (which is .7500 inches in diameter) clamped in I milled a flat spot so as to have a flat to start the drilling from. You can see the red line in this picture (note: I drew 2 lines, one the actual line, or first one drawn with the extension piece on it and then a second one parallel to the first that allowed me to see the second line as I clamped up the ball since the original line is now hidden by the tube clamp)
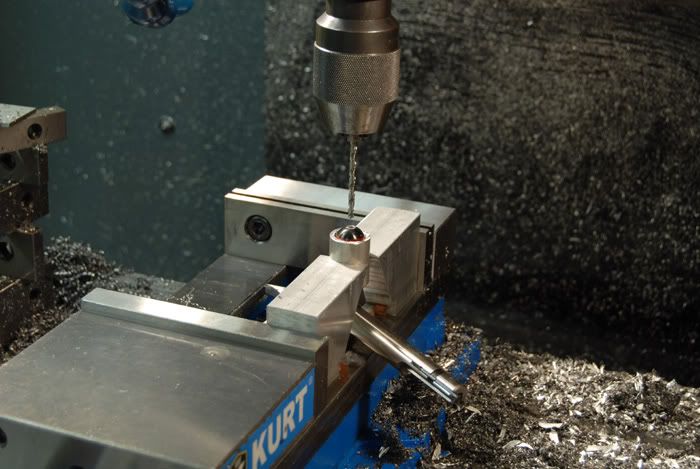
Next I drilled the hole with #25 and then tapped it 10-24.
the hole, close up
and the piece bolted on.
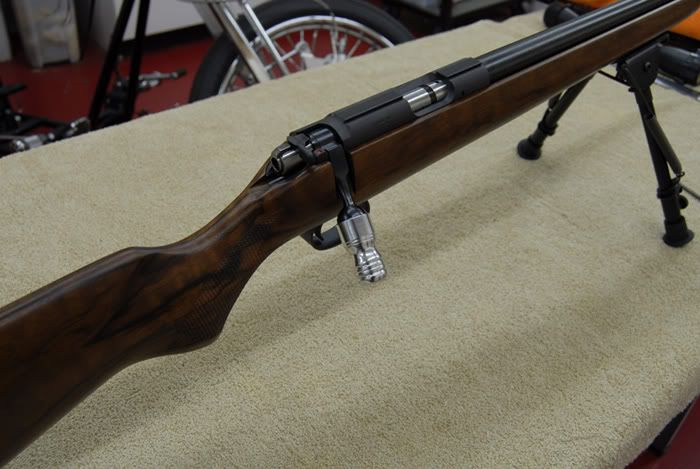

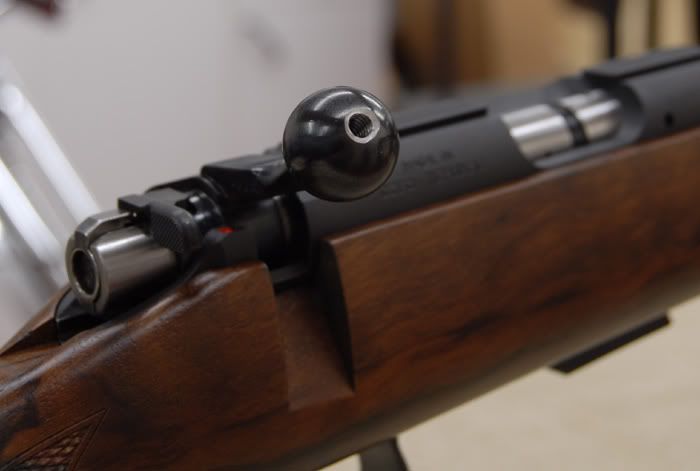
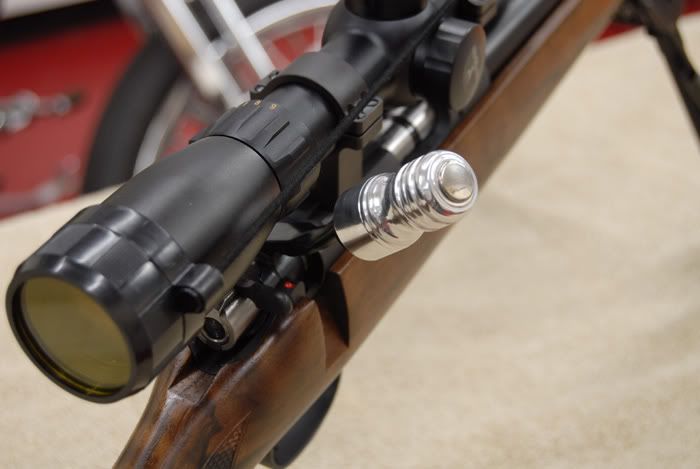
and the the finished look, with scope on, and a press fit spring dome button over the hole to clean it up.
I polished this, as I am not in need of stealth, and I only target shoot with this gun. I might one day black anodize it, but there again, I might not.
But it works great and feels great....problem solved.
So I decided I'd fix that little problem right quick like.
Anyone that wants to do the same, all you need is a mill and a lathe, or a buddy with them, and a little time to kill.
First off, I have my own private machine shop and lots of jigs and what not lying around which made this go fast, but anyone can quickly fashion some jigs to do the same. I first took a piece of 1" 6061 billet aluminum rod and turned it down to .8500 then lathed out the shape you see and drilled a hole down the center with a drill #9 for the use of a 10-24 stainless allen head bolt (you see it also). On the inside I used a .7500 ball mill to cut a perfect ball pocket on the inside, this will fit snug and like a glove over your CZ ball on the bolt as it is a .7500 ball anyway.
Next I placed the new piece on the gun over the bolt to position it where I wanted it. I chose to have it continue on the angle the small section of the bolt already was going and marked it there. I took a red paint marker, very thin edged one and drew all the way around the bolt.
Then, next I took a piece of 1" aluminum tube, with a wall thickness of .120, seamless, and cut off a piece about 1.5 inches, then cut a slot with a band saw down the lenght of it to allow it to compress. I then set up the jig you see here, and placed the bolt in this tube and clamped it in the mill. The red lines gave me the level to place the bolt so the drilled hole will be exactly centered on where I want the extension to be in the end. Now with the bolt ball (which is .7500 inches in diameter) clamped in I milled a flat spot so as to have a flat to start the drilling from. You can see the red line in this picture (note: I drew 2 lines, one the actual line, or first one drawn with the extension piece on it and then a second one parallel to the first that allowed me to see the second line as I clamped up the ball since the original line is now hidden by the tube clamp)
Next I drilled the hole with #25 and then tapped it 10-24.
the hole, close up
and the piece bolted on.
and the the finished look, with scope on, and a press fit spring dome button over the hole to clean it up.
I polished this, as I am not in need of stealth, and I only target shoot with this gun. I might one day black anodize it, but there again, I might not.
But it works great and feels great....problem solved.