• Watch Out for Scammers!

    We've now added a color code for all accounts. Orange accounts are new members, Blue are full members, and Green are Supporters. If you get a message about a sale from an orange account, make sure you pay attention before sending any money!

finished the auto annealer today

jmorris

Sergeant
Full Member
Minuteman
Dec 22, 2006
313
4
TX
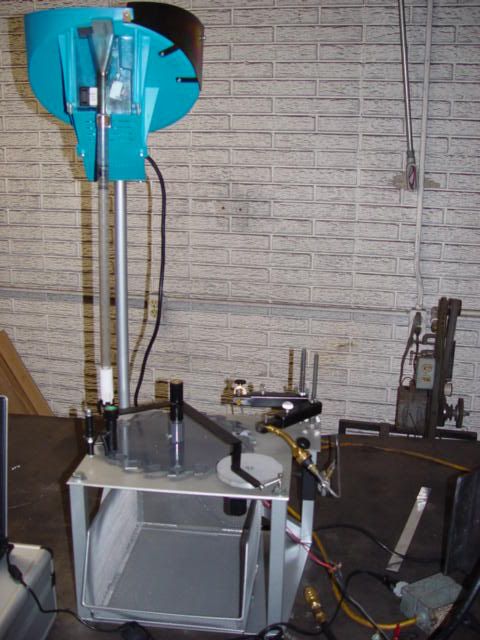
It now has a case feeder.

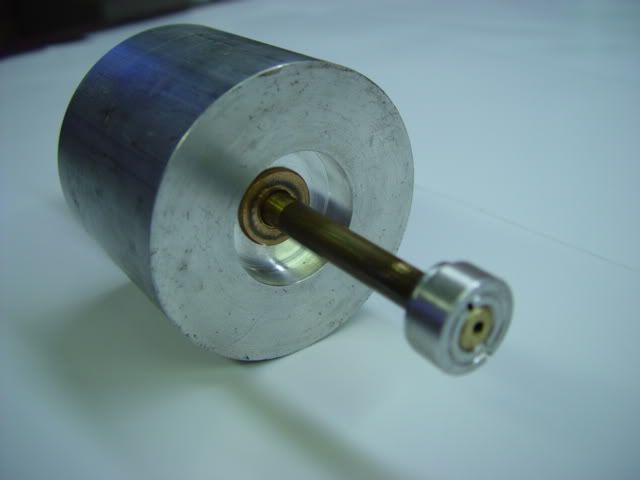
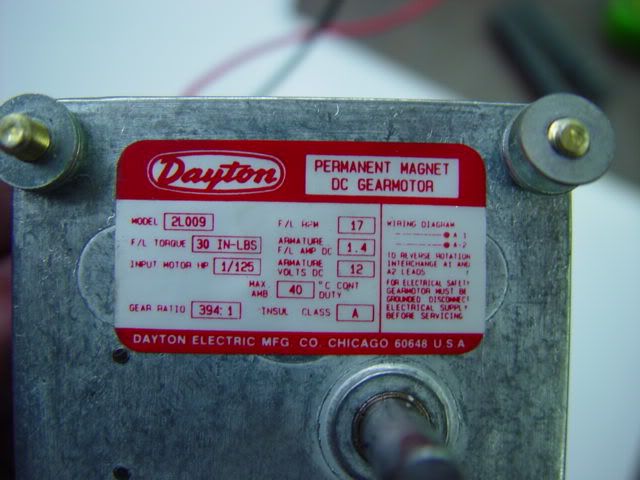
http://s121.photobucket.com/albums/o213/jmorrismetal/annealer/

Is the link to the album complete with videos and photos. The first video should answer the question, does the base of the case get too hot.


DSC01810.jpg
 
Re: finished the auto annealer today

Man I wish I had your mechanical abilities. That is just awesome! very well done.
 
Re: finished the auto annealer today

<div class="ubbcode-block"><div class="ubbcode-header">Originally Posted By: Phylodog</div><div class="ubbcode-body">I want one </div></div>

This! Screw all the others. This is the coolest one yet!
 
Re: finished the auto annealer today

good deal. Do you find any need at all, for the brass to be 'rotated' as the are in another unit?

I like the 'mechanics' of you device.
 
Re: finished the auto annealer today

<div class="ubbcode-block"><div class="ubbcode-header">Originally Posted By: Sean the Nailer</div><div class="ubbcode-body">good deal. Do you find any need at all, for the brass to be 'rotated' as the are in another unit?
</div></div>


I've never seen or used any machine until I built this one. So other than research, I'm only an week into my annealing skill set. The flames are all the way around the case though. On Ken's machine the torches are both from the same direction so I understand the need to rotate the case. FWIW the color or discolor is uniform on the cases that pass through the one I built.

Thanks for the comments and if there are any other do it yourself types out there I still have a few of the "saw blades" left over.
 
Re: finished the auto annealer today

I have been working on one myself similar. The Dillon touch is frikin' awesome that just makes the machine. Will post my pics tonight
 
Re: finished the auto annealer today

That is damn impressive work. My brain hurts just trying to think all workings of these components through. Obviously the Chinese will never employ me to violate patents!
 
Re: finished the auto annealer today

damn fine job! better make copies of your plans and mail them to yourself, LOL! figure out the materials list, draw up the plans and i'll but a set from you--cam
 
Re: finished the auto annealer today

more pics and closer looks nice
 
Re: finished the auto annealer today

There are 3 pages of photos taken step by step of assembly after paint (the link is in the first post). The only "plans" I have are scale drawings of the top plate (including hole locations), the arms and drive wheel. I include them with the "blade" when I ship it out.
 
Re: finished the auto annealer today

That is impressive. If you ever decide to produce them get in touch with me. I want one!
 
Re: finished the auto annealer today

That is impressive.....fill the case feeder and go to the store, come back to a pile of annealed brass! Cool stuff!
 
Re: finished the auto annealer today

I like to have 3 propane torches on it unless that oxy and ace your using there. Dont know if one will burn hot enough unles the table turns real slow. Then i would be worried about not getting even heat across the case. I will take pics of mine soon if i can find some time. It works fantastic and was very cheap to build.
 
Re: finished the auto annealer today

I just spent a considerable amount of time looking at this....My hats off to you, especially with the auto re-loading idea....thats what interested me the most, very cool way of doing it yet simple...although Im sure it wasnt simple getting it to work right...

So I have to ask....this entire setups timing....was that guess and adjust or did you calculate it from the very beginning?

And can you please explain what this is and the need for it...is it just a weight?
DSC01728.jpg
 
Re: finished the auto annealer today

The timing (or dwell time) is adjustable, too long and you mess up the case too short and you didn’t change anything. The quick answer is temperature sensitive paint, http://www.6mmbr.com/annealing.html has more information. If you go from say .223 to .308 to 50 bmg they all have different settings to get proper results. I did buy a 25 rpm motor but it was too fast and when I slowed it enough for the big cases it didn’t have enough torque so I swapped it for the 17 rpm one.

The photo above is the part I used to make sure the “blade” is parallel to the table top. I used flanged oil-lite bushings because they are cheap and self lubing. The brass rod was used because I didn’t have any other type of rod that was 3/8” in diameter. It’s way over kill for what it does but again I just used what I had sitting around.

I welded 1” bar stock to the “blade” and taped a ¼” hole in it so the blade claps on the brass rod. The brass rod spins in the bushings in the photo above. I used a thrust washer between the blade hub and case feeder actuator to reduce friction. This was needed as the oil-lite bushings alone provided too much drag and as the case feeder arm moved it move the “blade” as well.
 
Re: finished the auto annealer today

Okay, so when are you going to market this?
 
Re: finished the auto annealer today

You can buy one finish here (without case feed) http://www.zephyrdynamics.com/page3.html

I just thought that was too much money for something that simple. I figured he would be none too happy if I started selling his idea so I just sell "blades".

 
Re: finished the auto annealer today

Haven't finnished mine yet.

While I was collecting parts pieces & supplies, I found a good place to get the 475° Fahrenheit/246° Celsius Tempilstik° for under $10.
http://www.airgas.com/browse/product.aspx?Msg=RecID&recIds=397814
The Tempilstik is a real easy way to setup the torch heads and calibrate the dwell time.

Sorry if this is common knowledge.
Just thought I would share.
 
Re: finished the auto annealer today

475 is not enough heat, you need to one in the 650 range.
 
Re: finished the auto annealer today

As Per the "The Art and Science of Annealing" article on 6mmBR, http://www.6mmbr.com/annealing.html
<div class="ubbcode-block"><div class="ubbcode-header">Quote:</div><div class="ubbcode-body">The critical time and temperature at which the grain structure reforms into something suitable for case necks is 662 degrees (F) for some 15 minutes. <span style="color: #000099">A higher temperature, say from 750 to 800 degrees, will do the same job in a few seconds.</span> If brass is allowed to reach temperatures higher than this (regardless of the time), it will be made irretrievably and irrevocably too soft.</div></div>
Not trusting a single internet article, I copied the temperature of the one used in the Hornady Annealing Kit.
360902.jpg

Decided the stick would work better than the liquid for my purposes.

Please correct me if you know something different.
I could care less about who is right, I just want to get it right.
 
Re: finished the auto annealer today

Like the 6mmbr article said, you need to get it to 750 to anneal in 6-8 seconds. So you use the 650 degree temilaq right below the shoulder, and when it melds, that means the neck has reached the proper temp (750-800)
 
Re: finished the auto annealer today

Just wanted to add, I do not use tempilaq anymore, I can tell from the color of the case when its annealed. I run my .308 Lapua cases for 8 seconds using the Hornady kit in the pic above.
 
Re: finished the auto annealer today

I had another run of the blades made and shipped to everyone that has been waiting and still have a few left if anyone is interested in building their own.
 
Re: finished the auto annealer today

BRILLIANT IDEA!! I want one!!
 
Re: finished the auto annealer today

Jmorris well done! How much for the blade and plans?
Scot
 
Re: finished the auto annealer today

i have been working on one of these for a while now my problem is finding the right motor. ive just been using what i had lying around and i need one that has the power at a lower speed. ive been using a pulse width speed controller i made but cant locate a motor.

anychance you could help me out and let me know what your using?