

Well there you are big shooter. You have at this point handloaded ammo that is as near perfect for your rifle as possible.
But before you run'd oft to the match, let's inspect the run out of the bullet to the case. That means we want to check to make sure the bullet is inline with the case perfectly. The technical term is that the bullet is -concentric- with the case.
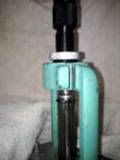
For this we will need a Concentricity Gage. Here is one I made in a machine shop:
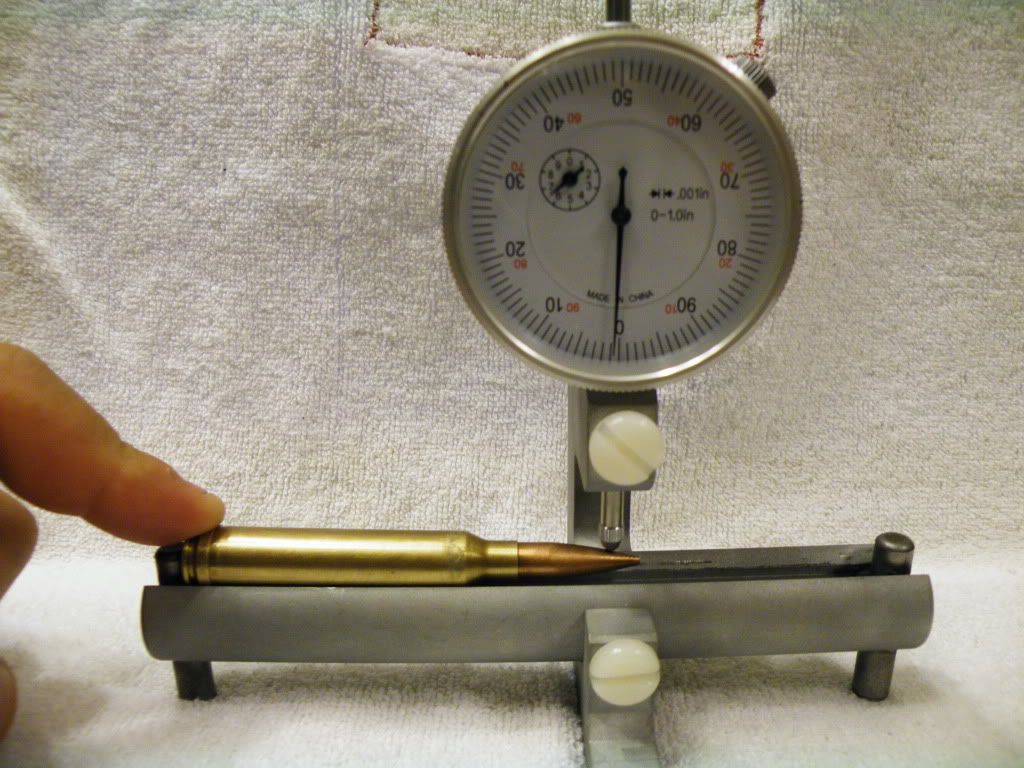
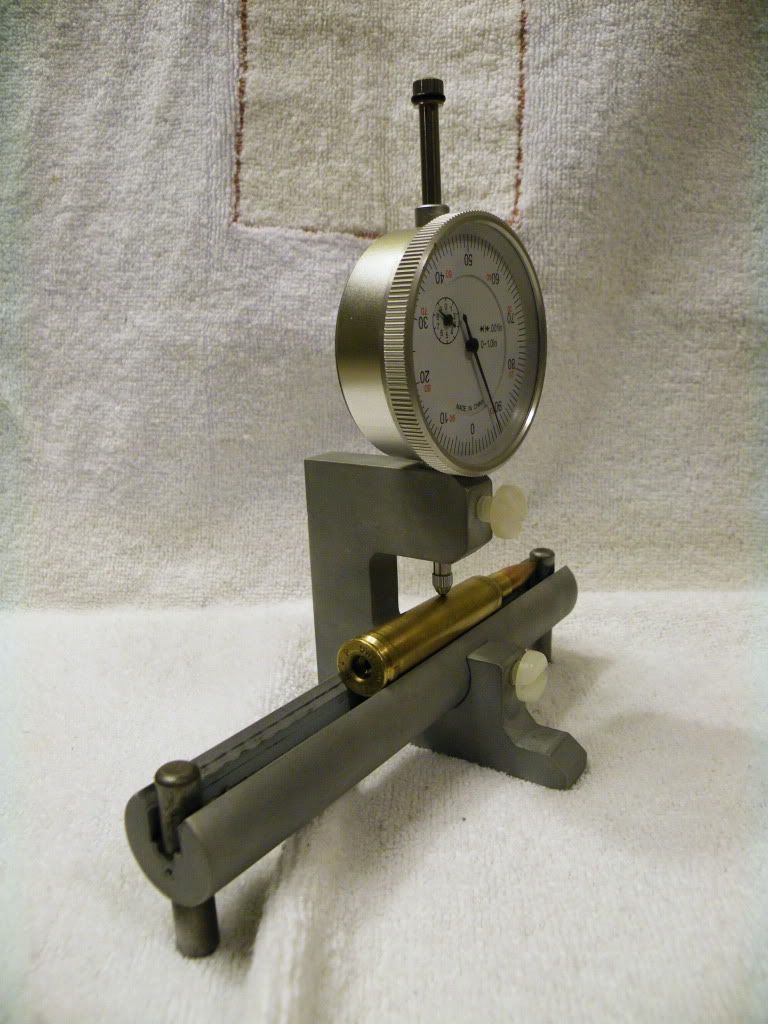
So we place our loaded round on the gage with the point of the indicator about 1/8" or so back from the meplat and zero the dial.
Now we SMOOTHLY rotate the case 360 degree's and watch for movement of the needle on the dial. If the bullet is perfectly inline with the case the needle will not move off of zero. We can allow up to .002" of run out for purposes here. But less is better.
So what happens if our bullet is not concentric to the case? It will swage, or "engrave" to the bore misaligned. In this condition as it travels down the bore the meplat will not rotate on axis, rather it will orbit. (if the tip of the bullet had a felt tip pen point- it would not make a spot on theoretical paper, rather it would draw a circle.) In this state it will take the bullet all the more down range acreage for the bullet to stop yawing, if it stop yawing at all! Not to mention the bore has now reshaped the bullet to an unbalanced profile.
I'm sorry I'm not an artist, but here is a crude illustration of a bullet misaligned in a bore (exaggerated for clarity):

A technique that can sometimes help reduce run out is while seating the bullet, seat it about half way. Then rotate the case 180 degrees in the shell holder and seat the bullet fully.
<span style="text-decoration: underline">Case Necks & Neck turning:</span>
As I mentioned in the first chapter and throughout this whole series we need everything to be perfectly consistent load to load, shot to shot.
In Chapter One of Hand Loading for Long Range we discussed weight sorting brass.
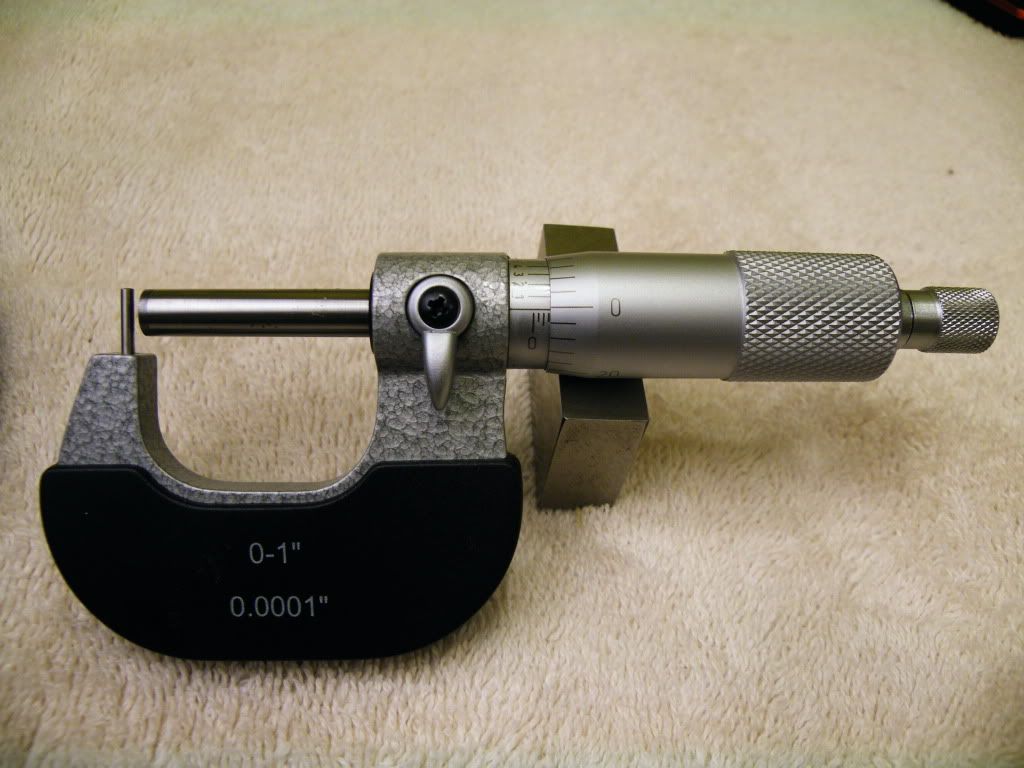
Here, if a loader wanted to move up a tier in precision they can pick up a set of neck wall micrometers, or know in the general industry as a tubing micrometer.
Here is one someone gave me. I keep meaning to grind me a "ball" to go on the pin, but they are serving fine:
Generally speaking- the thickness of the wall of case necks are not consistent around the perimeter of the neck. So with were one place is thicker and another thin, it is obvious which will stretch sooner & more upon the firing cycle. The general consensus is that in this the case will not uniformly release the bullet which can encourage the bullet to not enter the riflings perfectly aligned. At any rate with this situation in case neck wall variation we have lost <span style="text-decoration: underline">consistency!!!</span>
So with our tube mic we can measure the thickness of the wall in many places to check for run out in wall thickness.
Any cases that vary much should be culled and set aside for sighter shots or fouling shots.
Good brass should not have a lot of neck wall run out. Winchester & the premium stuff (Lapua, RWS, Norma) in my experience is generally okay for our purposes here, but do check you will find a nonconformist or two.
The ultimate treatment for neck walls it to turn them. That is to use a small affordable device to actually machine them to, or near to perfection.
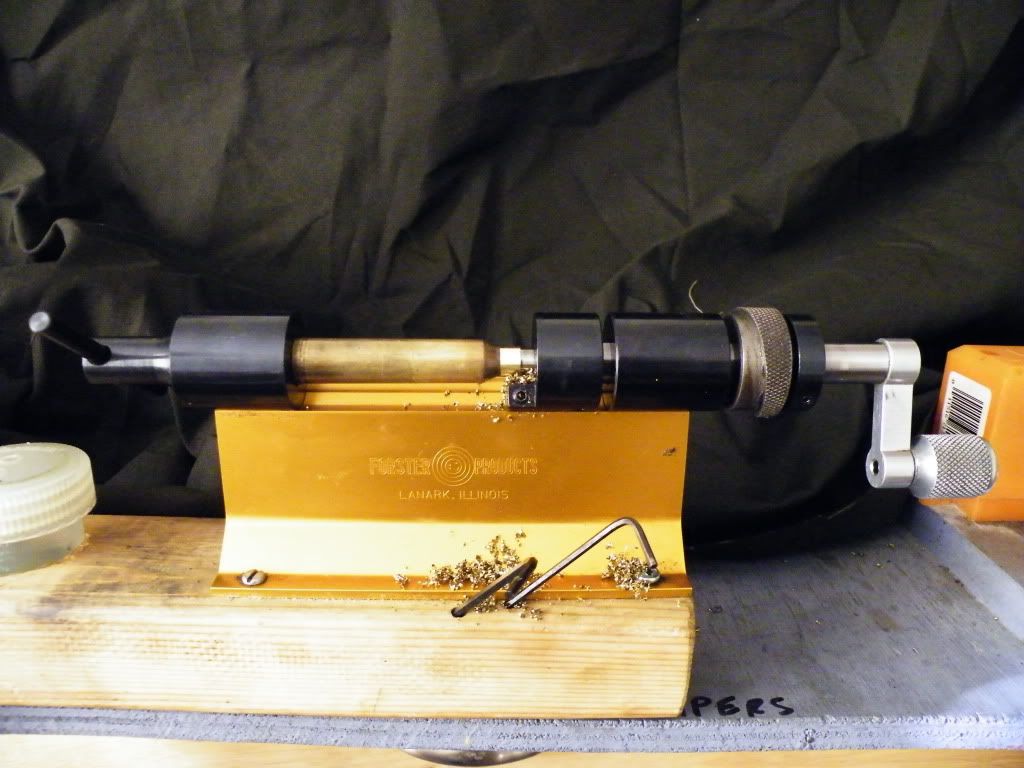
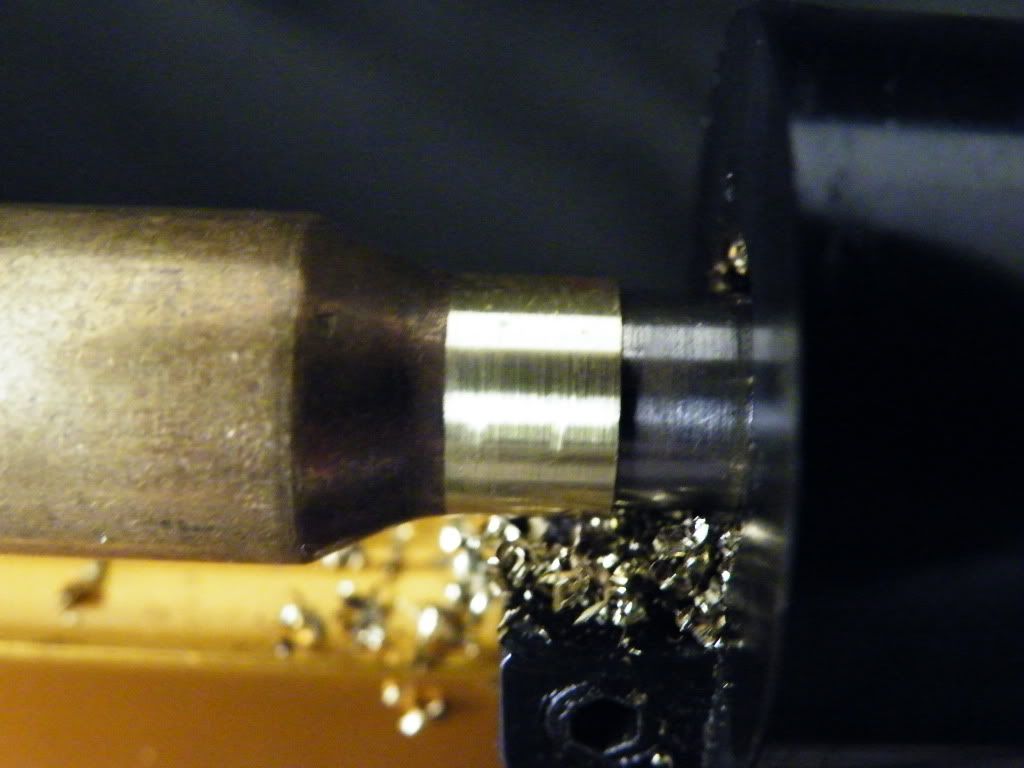
Here's a picture of my Forster case trimmer, with a neck turner installed on it ready for action.
and here's a freshly turned neck:
I personally find it easiest to just throw ALL my cases on the neck turner and turn them and visually SEE how the neck variation is after I take a "skim cut" opposed to doing a lot of careful and meticulous micrometer work. I like to keep my neck turner set to cut ALL my case necks to one specific thickness (for a particular caliber.) My turner has a carbide cutter that will practially never wear from cutting cartridge brass. I set it once and leave it alone so long as I'm working with that caliber- though I do measure the outcome of the turned necks every few cases to make sure consistency is maintained.
So what is a "skim cut?" Benchrest shooters often turn the neck to a specific and critical dimenson in relation to the neck size of their chamber and of course get 100% clean up. The two literally are and go together like a machined parts. But for our purposes here, we just need to level the surface of the neck by cutting off all the high points so we get a consistent wall thickness for consistent neck tension & consistent release of the bullet.
I adjust my neck cutter so that I get an average of 90-98% "clean up" on a dozen or so randomly picked cases. That is to say I set it to cut about 95% (average) of the surface of a given neck out of the whole lot of brass. This creates consistency without making the necks so thin that with the rough and tumble activity of being in the field that our bullet does not get knocked off centerline/ out of concentricity of the case. Sure we could cut more for 100% clean up, but at a great loss of neck strength. And we just bought a gauge to make sure they are concentric!
In the above photo you can see that the whole surface of the neck that was visible to the camera has been cut. But in this next picture you get the rest of the story- the other side of the case:
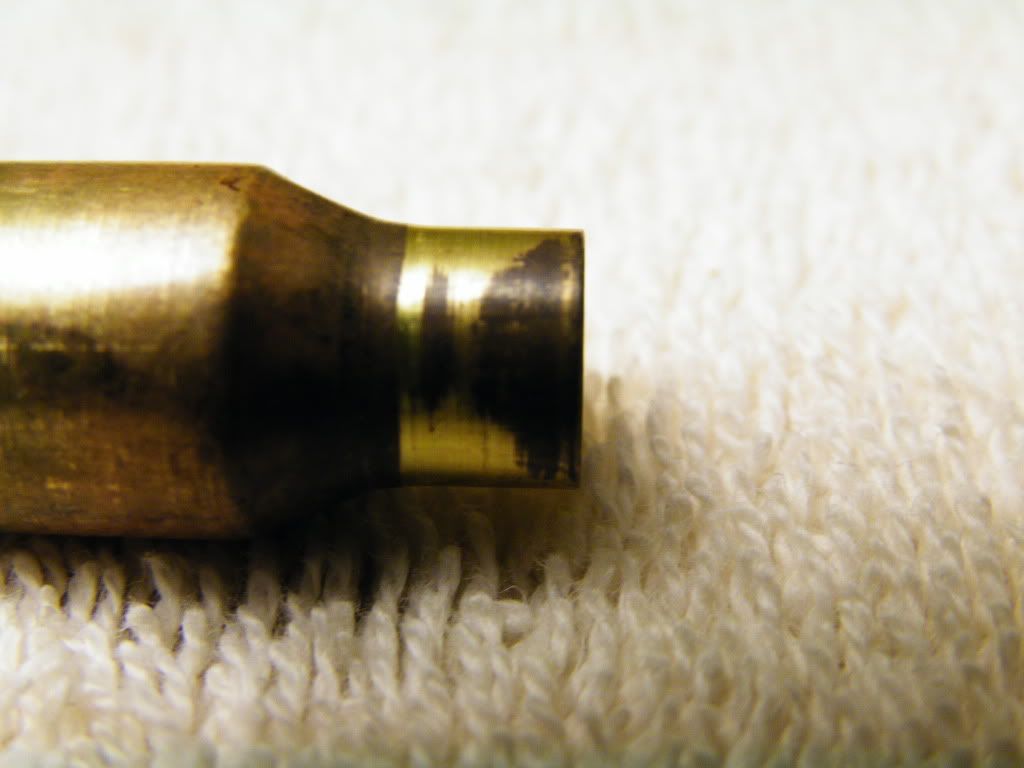
You can see the part that did not get cut. This quickly & easily identified the low spots on the surface which is where the neck wall was the thinnest. Yes, careful work with my tube mic would have shown the same, but I like the "cut & look" method as to me it is a "no brainer."
As far as this case- for how I turn & cull my necks I'm on the fence with this one. I think.. I feel... that I wish just a teeny bit more of that dark area had cleaned up. I'm gonna call this just under my 90% clean-up minimum and set this one to the side as a second string case.
My first string cases go to X-ring score type paper shoots. My second string cases (and second string components go to "hit or miss" steel type shoots. My third string stuff is to foul a clean barrel and to smile largely and say yes to the stranger that walks up and says "wow, can I shoot it?"
You need to know your brass is crawling around on you. I have read repeatedly in my search and studies about this topic that brass, especially when not annealed is looking to free it's strains. This effects us because it means brass will change dimensionally on you behind your back without permission. For instance- let's say you have half a box of fired brass, and half a box of resized and deprimed brass.
Your all fired up by this neck turning info and are about to go at it.
Well the first thing you need to do is resize your brass or at least run the mouth of it over a standard expander ball so it will fit the mandrel of the neck turner nicely & consistently . So you think "Ah-hah! I'm half done- I resized half my cases last week while I watched the A-Team on TV. " So you resize the other half of your brass and now your licking your chops at the neck turner.Stop, STOP. No so fast. Most likely the necks of those cases that watched the A-Team with you & dreamed of being fired in a mini-14 by BA have now shrunk, when thinking in (.0001") Ten-thousandth's of 1 inch.
So we want to measure and maintain our neck dimension case to case to case in the <span style="text-decoration: underline">.0002</span>- .0003" range. This is not possible if our case neck do not START OUT the same size. So resize ONE case, then immediately neck turn it. If you already have all your cases resized- no problem. Advance the expander ball of your die down as far as you can and just run the mouth over it prior to neck turning.
There are internet recipes for neck turning lubricant. I personally use and never have been dissatisfied with Imperial Sizing Die Wax lube when used on the mandrel and neck prior to turning.
Here's a device that you can use to actually check and see if your bullets are BALANCED. It's out of the scope and overboard for field shooters, but never the less neat reading & information. http://www.theaccuracyden.com/
12-20-10 NEW Tip:
Here's some Penny-tech tips that can improve your handloaded ammo.
Go to your local ACE hardware and buy a #27 rubber o-ring for each of your individual die bodies wether a sizing or seating,die. 1 per.
If you don't have an Ace, your looking for 7/8" ID rubber o-ring. I like the heavier walled ones.
Also pick up one #12 o-ring for the ram of your press. (This fits my RCBS press. Measure the ram of your press before you go to the hardware store)
Back at home put a rubber O-ring on your die so that when the die is threaded into the press the rubber ring is sandwiched between the press and the lock ring of the die. Yes, you'll have to readjust the lock-ring and the die in the press in general.
When you get the lock-ring/die set back up at the proper position in the press, you want the lock ring to be just BARELY snugged against the rubber.
What this does is allow the die to have just a tiny bit of play in the threads of the press so that any misalighment in the machining of the press, die, ram or shell holders can be compensated for by the now "floating" die set up.
Now pull that wire clip off of the ram on your press that holds the shell holder in place. Install the smaller rubber o-ring around the ram to hold the shell holder in palce. This lets the shell holder "float" to compinsate for misalighment as stated above.
Enjoy!(more concentric ammo)
Sorry for the exceedingly low picture quality. My camera perished and I only have my cell phone cam now.
-----------------------------------------------------------------------
This instructional took considerable time & effort. It is presented here for free. Enjoy! However if any one feels motivated to express appreciation a donation can be sent to the paypal account [email protected]. Thanks! TresMon
But before you run'd oft to the match, let's inspect the run out of the bullet to the case. That means we want to check to make sure the bullet is inline with the case perfectly. The technical term is that the bullet is -concentric- with the case.
For this we will need a Concentricity Gage. Here is one I made in a machine shop:
So we place our loaded round on the gage with the point of the indicator about 1/8" or so back from the meplat and zero the dial.
Now we SMOOTHLY rotate the case 360 degree's and watch for movement of the needle on the dial. If the bullet is perfectly inline with the case the needle will not move off of zero. We can allow up to .002" of run out for purposes here. But less is better.
So what happens if our bullet is not concentric to the case? It will swage, or "engrave" to the bore misaligned. In this condition as it travels down the bore the meplat will not rotate on axis, rather it will orbit. (if the tip of the bullet had a felt tip pen point- it would not make a spot on theoretical paper, rather it would draw a circle.) In this state it will take the bullet all the more down range acreage for the bullet to stop yawing, if it stop yawing at all! Not to mention the bore has now reshaped the bullet to an unbalanced profile.
I'm sorry I'm not an artist, but here is a crude illustration of a bullet misaligned in a bore (exaggerated for clarity):
A technique that can sometimes help reduce run out is while seating the bullet, seat it about half way. Then rotate the case 180 degrees in the shell holder and seat the bullet fully.
<span style="text-decoration: underline">Case Necks & Neck turning:</span>
As I mentioned in the first chapter and throughout this whole series we need everything to be perfectly consistent load to load, shot to shot.
In Chapter One of Hand Loading for Long Range we discussed weight sorting brass.
Here, if a loader wanted to move up a tier in precision they can pick up a set of neck wall micrometers, or know in the general industry as a tubing micrometer.
Here is one someone gave me. I keep meaning to grind me a "ball" to go on the pin, but they are serving fine:
Generally speaking- the thickness of the wall of case necks are not consistent around the perimeter of the neck. So with were one place is thicker and another thin, it is obvious which will stretch sooner & more upon the firing cycle. The general consensus is that in this the case will not uniformly release the bullet which can encourage the bullet to not enter the riflings perfectly aligned. At any rate with this situation in case neck wall variation we have lost <span style="text-decoration: underline">consistency!!!</span>
So with our tube mic we can measure the thickness of the wall in many places to check for run out in wall thickness.
Any cases that vary much should be culled and set aside for sighter shots or fouling shots.
Good brass should not have a lot of neck wall run out. Winchester & the premium stuff (Lapua, RWS, Norma) in my experience is generally okay for our purposes here, but do check you will find a nonconformist or two.
The ultimate treatment for neck walls it to turn them. That is to use a small affordable device to actually machine them to, or near to perfection.
Here's a picture of my Forster case trimmer, with a neck turner installed on it ready for action.
and here's a freshly turned neck:
I personally find it easiest to just throw ALL my cases on the neck turner and turn them and visually SEE how the neck variation is after I take a "skim cut" opposed to doing a lot of careful and meticulous micrometer work. I like to keep my neck turner set to cut ALL my case necks to one specific thickness (for a particular caliber.) My turner has a carbide cutter that will practially never wear from cutting cartridge brass. I set it once and leave it alone so long as I'm working with that caliber- though I do measure the outcome of the turned necks every few cases to make sure consistency is maintained.
So what is a "skim cut?" Benchrest shooters often turn the neck to a specific and critical dimenson in relation to the neck size of their chamber and of course get 100% clean up. The two literally are and go together like a machined parts. But for our purposes here, we just need to level the surface of the neck by cutting off all the high points so we get a consistent wall thickness for consistent neck tension & consistent release of the bullet.
I adjust my neck cutter so that I get an average of 90-98% "clean up" on a dozen or so randomly picked cases. That is to say I set it to cut about 95% (average) of the surface of a given neck out of the whole lot of brass. This creates consistency without making the necks so thin that with the rough and tumble activity of being in the field that our bullet does not get knocked off centerline/ out of concentricity of the case. Sure we could cut more for 100% clean up, but at a great loss of neck strength. And we just bought a gauge to make sure they are concentric!
In the above photo you can see that the whole surface of the neck that was visible to the camera has been cut. But in this next picture you get the rest of the story- the other side of the case:
You can see the part that did not get cut. This quickly & easily identified the low spots on the surface which is where the neck wall was the thinnest. Yes, careful work with my tube mic would have shown the same, but I like the "cut & look" method as to me it is a "no brainer."
As far as this case- for how I turn & cull my necks I'm on the fence with this one. I think.. I feel... that I wish just a teeny bit more of that dark area had cleaned up. I'm gonna call this just under my 90% clean-up minimum and set this one to the side as a second string case.
My first string cases go to X-ring score type paper shoots. My second string cases (and second string components go to "hit or miss" steel type shoots. My third string stuff is to foul a clean barrel and to smile largely and say yes to the stranger that walks up and says "wow, can I shoot it?"
You need to know your brass is crawling around on you. I have read repeatedly in my search and studies about this topic that brass, especially when not annealed is looking to free it's strains. This effects us because it means brass will change dimensionally on you behind your back without permission. For instance- let's say you have half a box of fired brass, and half a box of resized and deprimed brass.
Your all fired up by this neck turning info and are about to go at it.
Well the first thing you need to do is resize your brass or at least run the mouth of it over a standard expander ball so it will fit the mandrel of the neck turner nicely & consistently . So you think "Ah-hah! I'm half done- I resized half my cases last week while I watched the A-Team on TV. " So you resize the other half of your brass and now your licking your chops at the neck turner.Stop, STOP. No so fast. Most likely the necks of those cases that watched the A-Team with you & dreamed of being fired in a mini-14 by BA have now shrunk, when thinking in (.0001") Ten-thousandth's of 1 inch.
So we want to measure and maintain our neck dimension case to case to case in the <span style="text-decoration: underline">.0002</span>- .0003" range. This is not possible if our case neck do not START OUT the same size. So resize ONE case, then immediately neck turn it. If you already have all your cases resized- no problem. Advance the expander ball of your die down as far as you can and just run the mouth over it prior to neck turning.
There are internet recipes for neck turning lubricant. I personally use and never have been dissatisfied with Imperial Sizing Die Wax lube when used on the mandrel and neck prior to turning.
Here's a device that you can use to actually check and see if your bullets are BALANCED. It's out of the scope and overboard for field shooters, but never the less neat reading & information. http://www.theaccuracyden.com/
12-20-10 NEW Tip:
Here's some Penny-tech tips that can improve your handloaded ammo.
Go to your local ACE hardware and buy a #27 rubber o-ring for each of your individual die bodies wether a sizing or seating,die. 1 per.
If you don't have an Ace, your looking for 7/8" ID rubber o-ring. I like the heavier walled ones.
Also pick up one #12 o-ring for the ram of your press. (This fits my RCBS press. Measure the ram of your press before you go to the hardware store)
Back at home put a rubber O-ring on your die so that when the die is threaded into the press the rubber ring is sandwiched between the press and the lock ring of the die. Yes, you'll have to readjust the lock-ring and the die in the press in general.
When you get the lock-ring/die set back up at the proper position in the press, you want the lock ring to be just BARELY snugged against the rubber.
What this does is allow the die to have just a tiny bit of play in the threads of the press so that any misalighment in the machining of the press, die, ram or shell holders can be compensated for by the now "floating" die set up.
Now pull that wire clip off of the ram on your press that holds the shell holder in place. Install the smaller rubber o-ring around the ram to hold the shell holder in palce. This lets the shell holder "float" to compinsate for misalighment as stated above.
Enjoy!(more concentric ammo)
Sorry for the exceedingly low picture quality. My camera perished and I only have my cell phone cam now.
-----------------------------------------------------------------------
This instructional took considerable time & effort. It is presented here for free. Enjoy! However if any one feels motivated to express appreciation a donation can be sent to the paypal account [email protected]. Thanks! TresMon

