• Watch Out for Scammers!

    We've now added a color code for all accounts. Orange accounts are new members, Blue are full members, and Green are Supporters. If you get a message about a sale from an orange account, make sure you pay attention before sending any money!

Home made scope leveling jig....

hangunnr

Team Shutupnshoot
Full Member
Minuteman
May 7, 2002
455
783
Flatlandia
Was watching one of Lowlights videos and saw him use a table top jig for leveling his scope. It was made by Badger. I looked it up as I thought it was a pretty simple tool that could potentially save a little time and aggravation while setting a scope up. Found out the Badger jigs sell for upwards of $150. I couldn't believe the price...

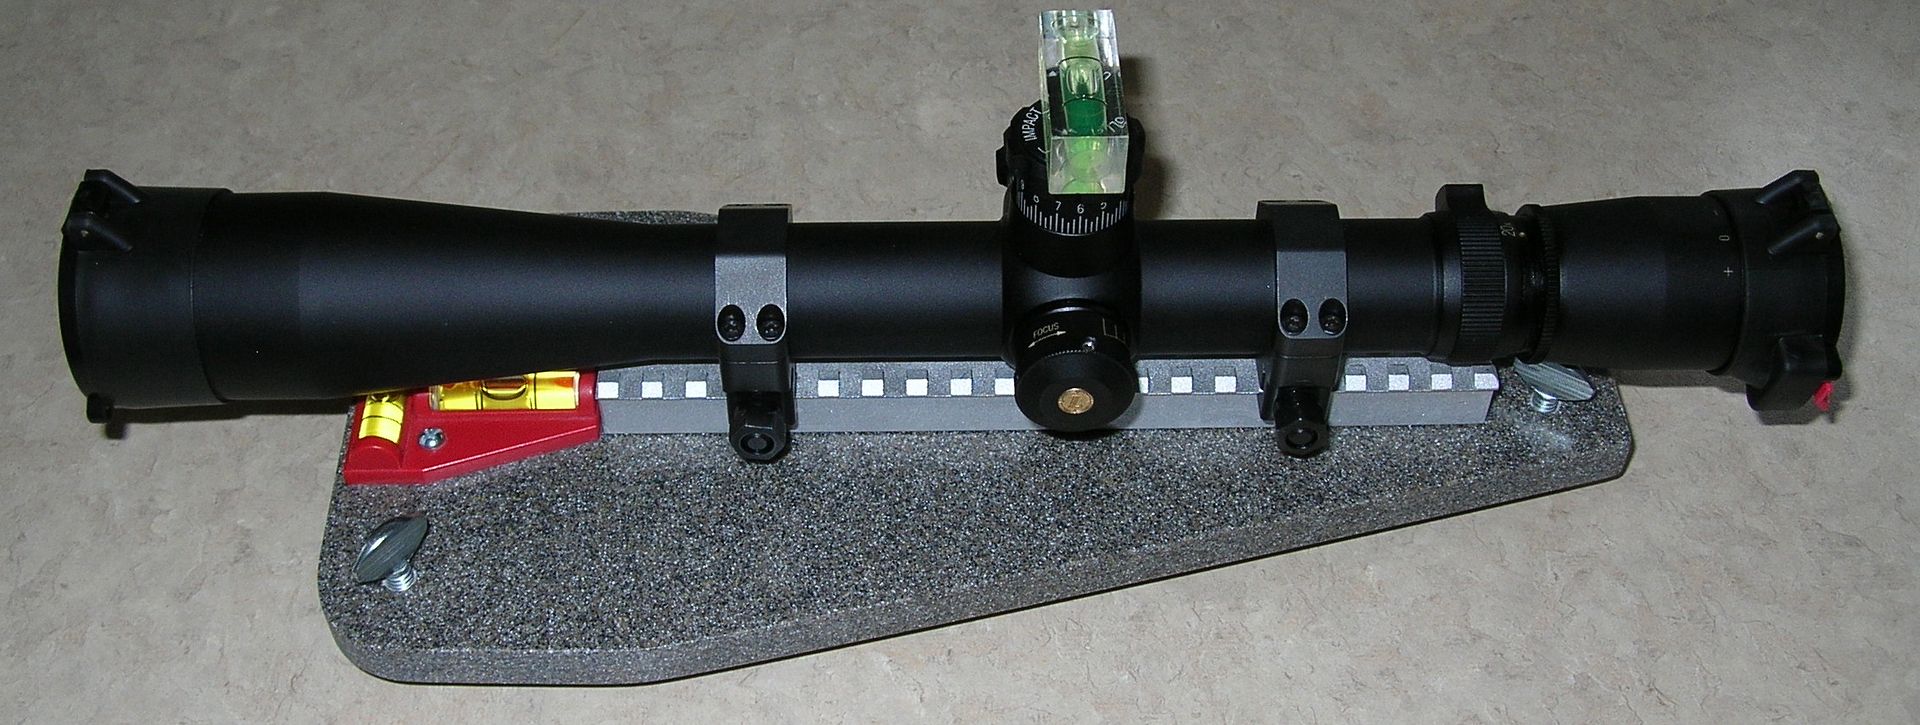
Dug through the accumulation here and had all the major components minus the fasteners. One short trip to the Ace solved that problem. After about an hour and a half in the garage I came away with this for about a $20 investment.

It would be best to verify level with a plumb line as the turrets don't always sit square to the reticle.

DSCN3804_zps773f4c91.jpg

DSCN3803_zpsb6aa2d9c.jpg

DSCN3810_zpsc2b11a6c.jpg

DSCN3805_zps26172464.jpg

DSCN3808_zpsd21764a0.jpg


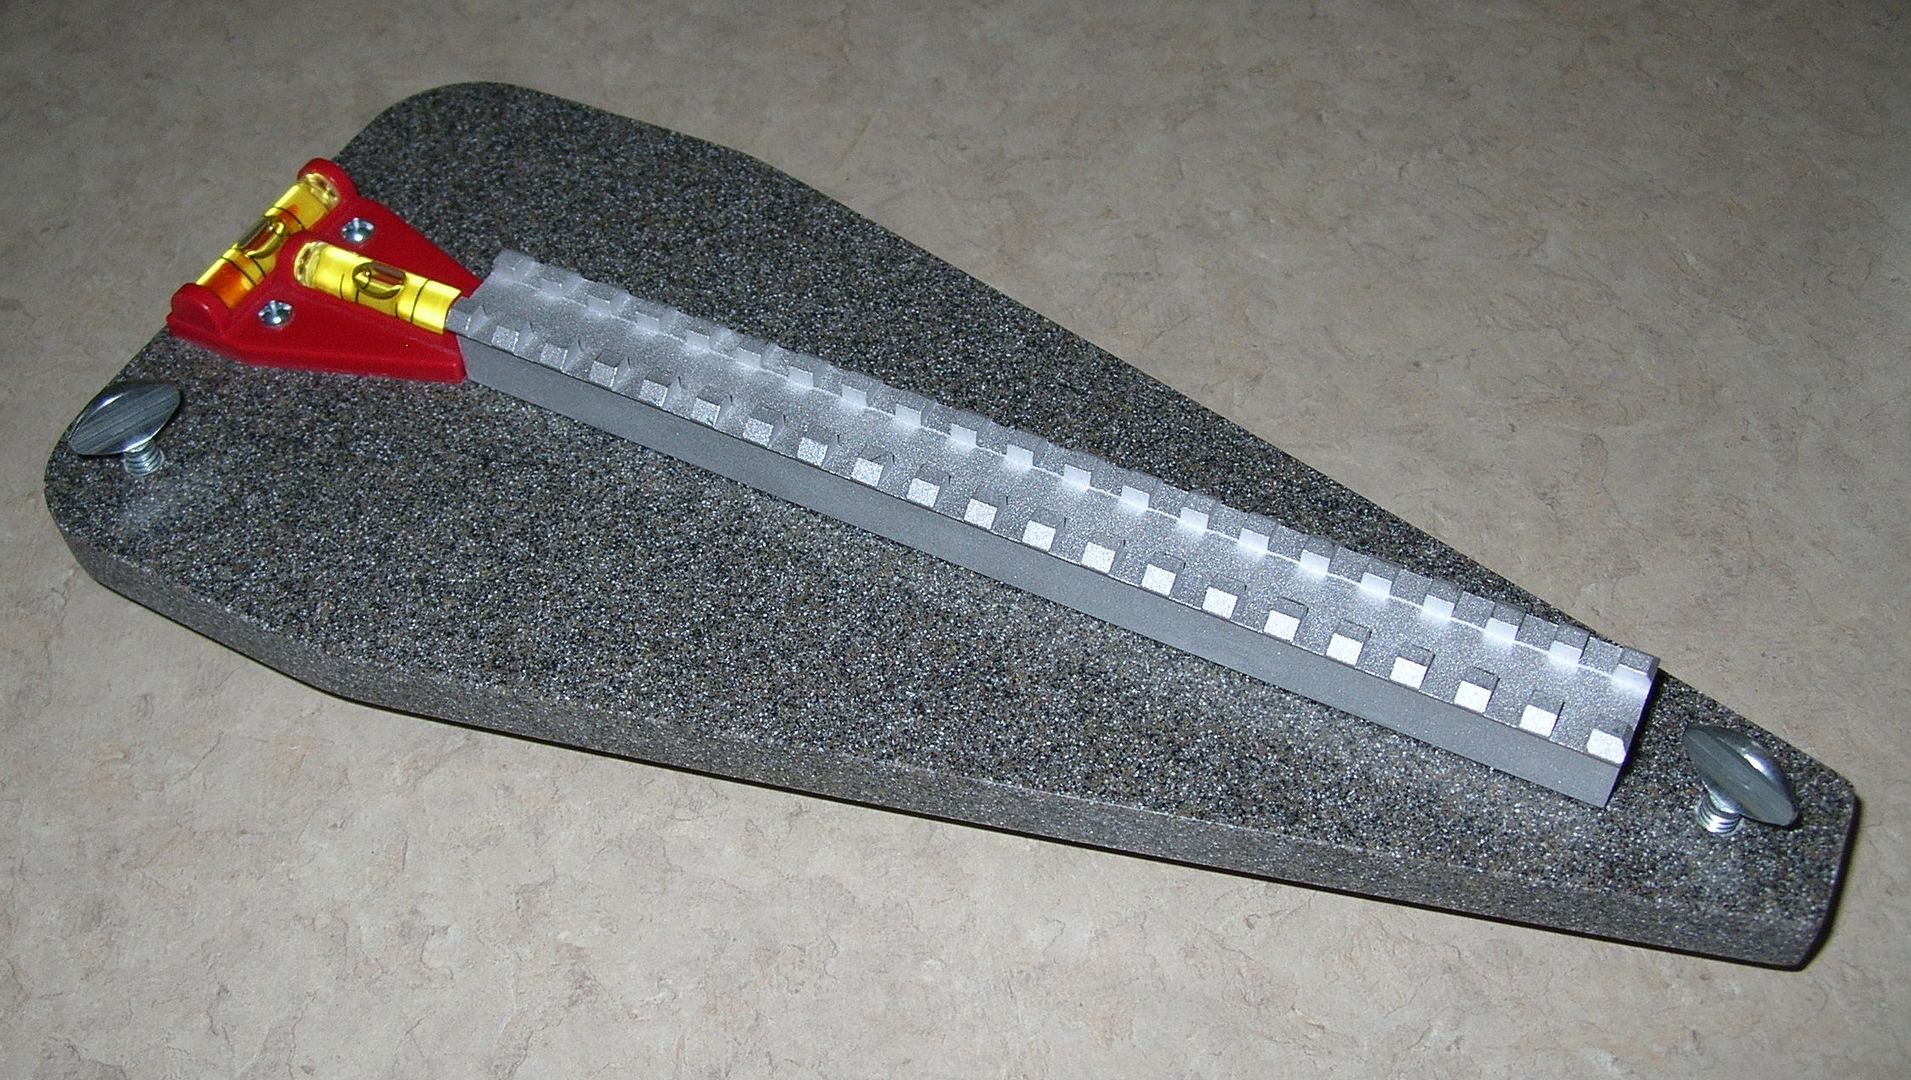
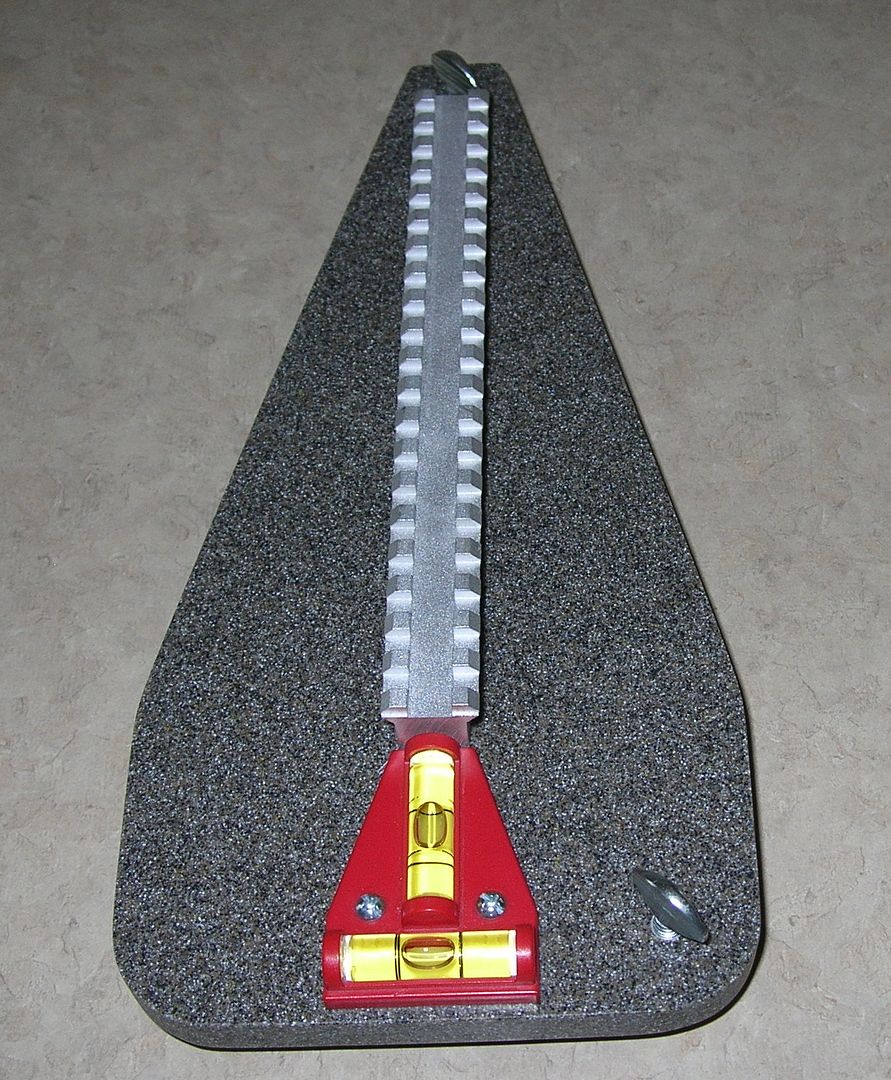
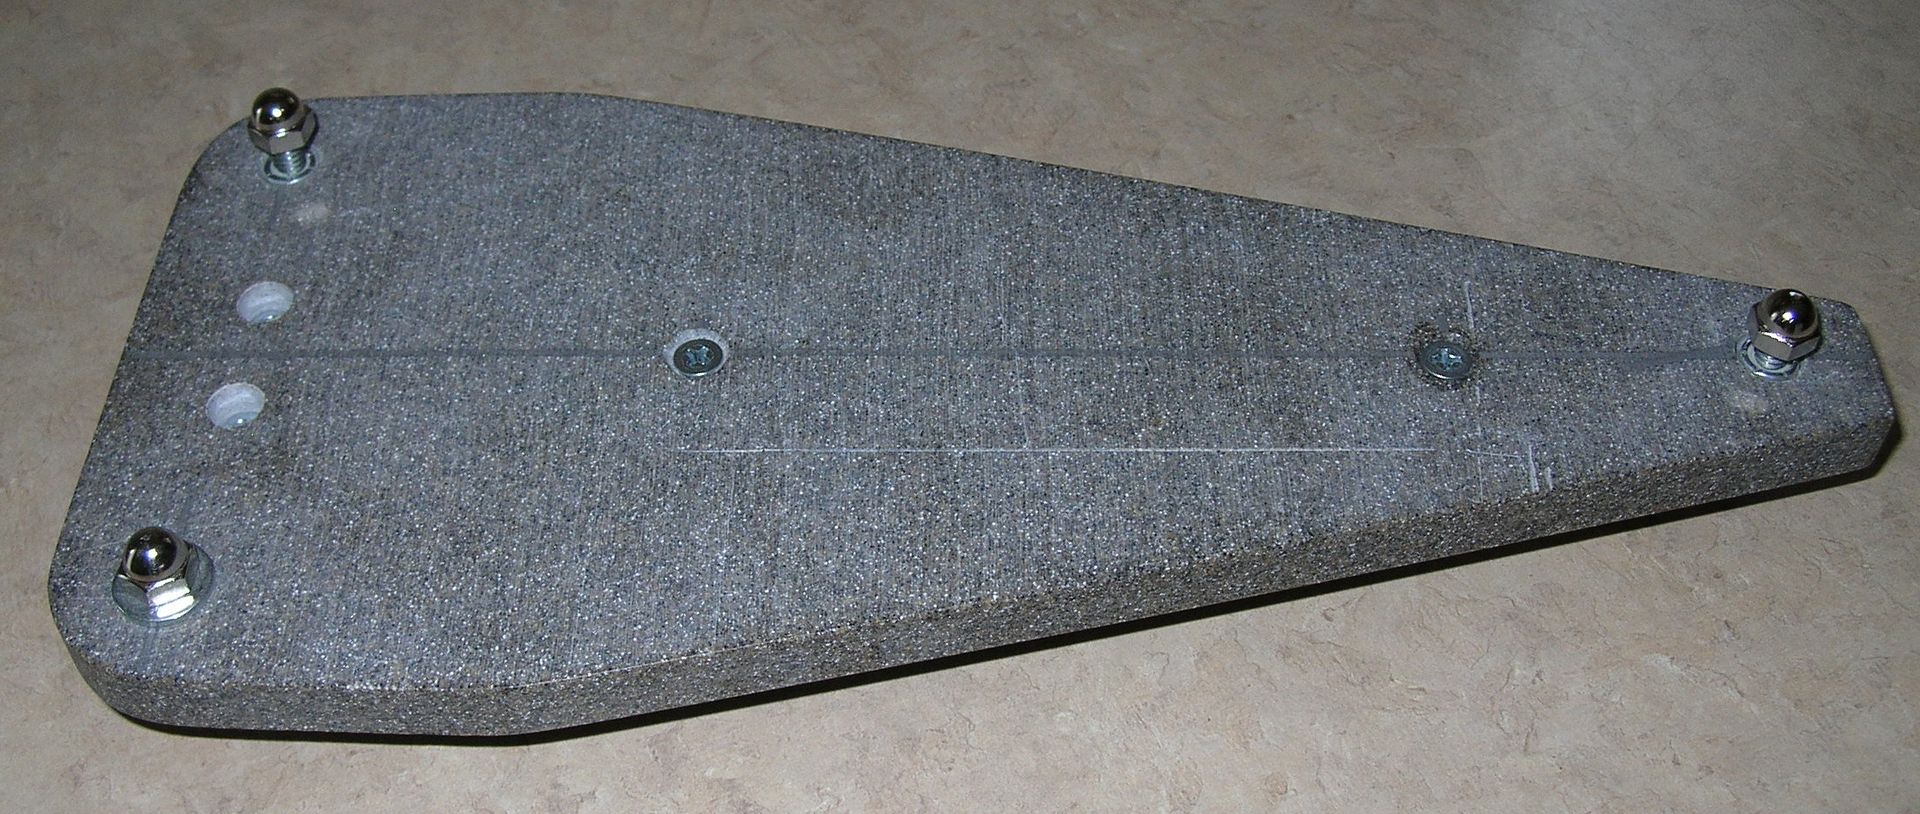
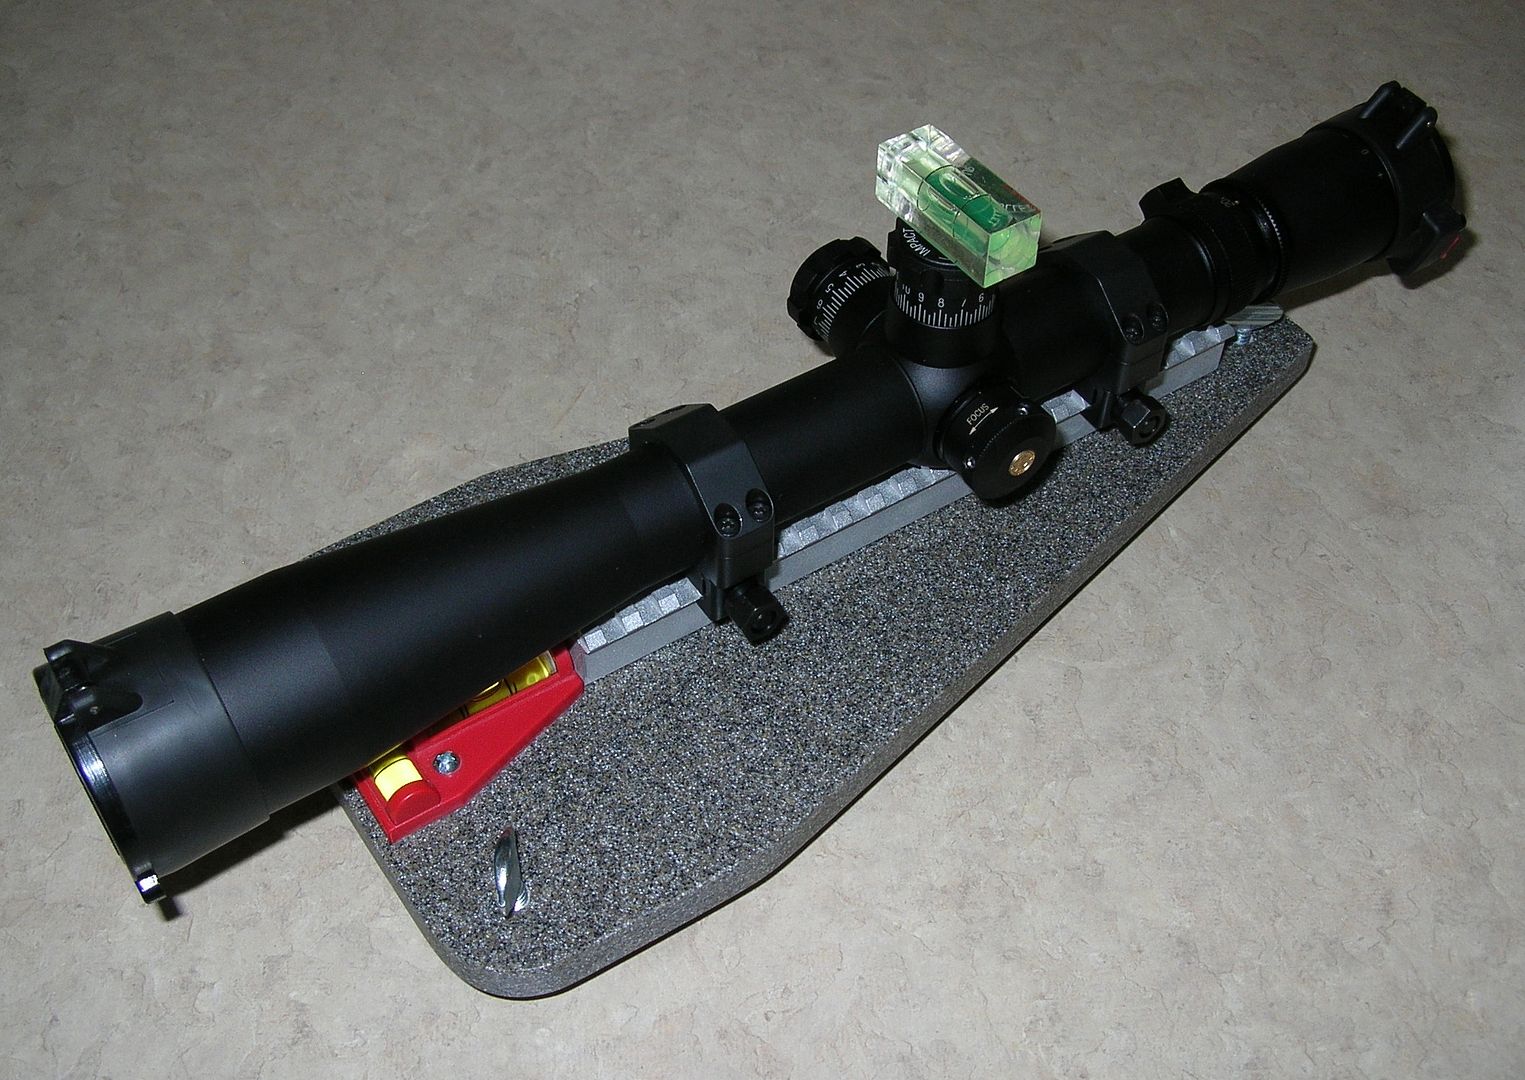
The base is made from a piece of what I believe is Corian (sp?) countertop material which had been gifted to me by my neighbor, a simple trailer leveling two way level (a bullseye level could easily be substituted) , a piece of blank stock Picatinny rail and various fasteners.

CR
 
Last edited:
well done!!! I would suppose any "base" product could work for that too. Piece of metal, plastic (thick) etc as long as its sturdy.

Great Idea!
 
Great job on this! This is perfect if you need to get the job done quickly and if your forced to do it inside. Thanks for sharing it with us.
 
I bought a set of scope leveling bubble levels and when I put them side by side they did not read the same so there was no way they could have leveled my scope. For this jig to work you would have to calibrate all 3 levels to read exactly the same before mounting them on the jig.
 
  • Like
Reactions: jr81452
This is perfect. I have an electronic level that I use to calibrate my table saw that can be zeroed on the reference surface. I can see this will be a good application.

77
 
What kind of base is that? Is it just a gunsmith base blank for making a custom base?
 
Yes, just a piece of blank 1913 rail. It can be found cheaper than Brownells on the net with a little looking around.

CR
 
If a guy really wanted to be OCD he would use a surface plate and machinist level to get the scope within .001 or so. But I doubt it would be worth the effort. I love the cheapo counter top it makes for an awesome surface for re-loading.
 
P
If a guy really wanted to be OCD he would use a surface plate and machinist level to get the scope within .001 or so. But I doubt it would be worth the effort. I love the cheapo counter top it makes for an awesome surface for re-loading.

I mounted a new scope today. I was only able to get it to .02 - .1 degree of perfectly balanced w/ my bubble level.. Is this to say I'm sloppy?
 
Serious question: how is this better than using feeler gauges under the scope as you instal them into the rings, then taking a plumb bob on your target to adjust your scope level if you desired?
 
  • Like
Reactions: hrt4me
For this jig to work you would have to calibrate all 3 levels to read exactly the same before mounting them on the jig.

Why? The "up/down" level is useless because you have no way to change it, unless you machine the rail the rings are on. All you really need is a single level. Set it on the surface the rail is sitting on, make that level, then move it to the turret, rotate scope until it is level.
 
Why? The "up/down" level is useless because you have no way to change it, unless you machine the rail the rings are on. All you really need is a single level. Set it on the surface the rail is sitting on, make that level, then move it to the turret, rotate scope until it is level.

A single level would be more consistent. All I'm saying is that these bubble levels need to be calibrated to read the same because often they do not. If you attempt to use multiple separate levels don't be surprised if your results are inconsistent.
 
Badger uses a bullseye level on their unit. I used what I had on hand.

There are any number of ways to skin this cat, by all means use what pleases you......

CR
 
A single level would be more consistent. All I'm saying is that these bubble levels need to be calibrated to read the same because often they do not. If you attempt to use multiple separate levels don't be surprised if your results are inconsistent.

I agree. Machinest levels are very precise but I have never seen people to do a final align with more than one of them.
 
Assuming your scope manufacturer certifies that the flat bottom area is parallel to the horizontal reticle line (and most do):

Just set the scope slightly loose in the rings, put a metal ruler leaned forward in a slot of the pic rail, and attempt to tilt it vertical, simultaneously contacting the flat bottom of the scope turret area with the upper surface of the ruler, and the flat surface of the pic rail with the bottom surface of the ruler. It will true the scope to the pic rail, then lock it down.

It's now mechanically squared to the pic rail.

Done. Go shoot.
 
Last edited:
Just set the scope slightly loose in the rings, put a metal ruler leaned forward in a slot of the pic rail, and attempt to tilt it vertical, simultaneously contacting the flat bottom of the scope turret area with the upper surface of the ruler, and the flat surface of the pic rail with the bottom surface of the ruler. It will true the scope to the pic rail, then lock it down.

Works very well assuming you have a full rail (one piece). As a custom rifle builder, many times a two piece base is used (customer choice) and then a fixture as shown would do the job though I have other methods that work nicely for me.

As was stated earlier - there are many ways to skin a cat.
 
  • Like
Reactions: hrt4me
Home Depot sells the round center levels for a few bucks. I use on on my turntable.

Its a neat idea but a plumb bob should work well if your reticle is etched glass.
 
Learned something new and now I feel like making one myself. Good job.
 
I like it. Simple and probably not necessary for me but I have enough crap laying around to make one, so I will. Thanks!
 
I usually plumb line my reticle but this would work excellent for tracking tests as well.
 
Hmm, I've got some granite in the basement I could sacrifice. :)
 
Excellent post. Definitely going to build one for leveling scope and hopefully it work to check the tracking of the scope.
 
I have a scope rail mounted to a heavy metal table that won't move. I don't care if the table or rail is level, what I do next is set a scope in some rings, pointed at my plumbob. I then level the scope radical to the plumb bob and tighten the Rings so it doesn't move. Then, I tighten my scope bubble level on so that it marks level.

Once I take it out of those Rings, the scope with the level on it is now good to put in any rings. I like to add just a little bit of Loctite under the scope level mount, just so it is a little extra sticky and secure.

That has work 4 several Scopes, and once I do that it is forever leveled. If I feel like checking it, I put my rifle rest on the metal table and verify the Bubble Level against the plumb bob.

Forgive spelling and whatever else, I did this by speech to text
 
I've found this jig works very well for setting scope mounted levels, and as you mentioned once the scope level is set, swapping the scope from gun to gun is a no brainer.
 
  • Like
Reactions: hrt4me
It's sometimes difficult to find a flat on the receiver to hold a level. I bypass that and level the butt plate screws parallel to a plumb line. I use a gun vise. Hidden screws usually leave tiny holes, into which a toothpick can be inserted for the alignment process. So far, it's worked fine.

Then, I level the horizontal crosshair parallel to the siding on a nearby house. I used to install siding and every piece is checked against level when it gets put on (professionally).

Only problem, houses here in my part of Arizona don't use siding, so aligning a plumb line and the vertical crosshair does the job just as well.

Gravity never lies..., except during earthquakes.

Greg
 
Last edited:
  • Like
Reactions: Drewski2324
Week done. Now I feel the need to make one.
 
Best post I’ve seen in a while. Great idea and I can’t believe I never realized how simple this would be to make before now.
 
That's pretty sick! I've been thinking about making a heavy, adjustable jig like Lowlight has in the scope tracking video, with levels and leveling feet. I want to use it for both mounting and testing.....just as soon as I finish my DIY annealer.