So, i decided id like to try an adjustable type cheek rest.
Everyone thinks they are a necessity, to the point that many non-adjustable stocks end up any number of items taped/glued to the stock to get some extra height. I decided that perhaps it was time to see for myself if its worth the effort or not.
I hate the look of the loggerhead style adjustable stocks and wanted to avoid the weight of all the associated hardware. The saddle style aren't quite as ugly (to me), but have the same drawbacks as the loggerhead style. both of the aforementioned types need to be either lowered or removed to get a cleaning rod into the bore, and then readjusted after cleaning. That likely isn't difficult using reference marks or simple measuring tools, but i wanted something that avoids this issue, and is fairly unique.
The type of cheekrests that screw onto the stock from the top, using spacers, are extremely light weight, but typically must be removed completely to get a cleaning rod into the bore. Also, the exposed screw heads are kinda ugly.
Myself and @Skookum got together and came up with some ideas to try and avoid the minor annoyances inherent to the common designs on the market. We decided we wanted a design that could be removed without tools for cleaning in the field, That repeats exactly to its adjusted height when reinstalled without needing witness marks or measuring tools, has no exposed screw heads or knobs, and weighs as little as possible.
Heres the end result:
I turned some aluminum bushings, and pressed neodymium magnets into one end:


Then Drilled into my my Manners stock and epoxied the bushings in place:

Next I solid modeled the cheek piece design we came up with, in CAD. Its intended to be cut out of a sheet of 1/8" aluminum plate using a CNC mill, then folding using a brake. The final rest:


Adjustability will be via two steel socket head screws threaded into the bottom of the pillars. The screws are dabbed with locktight, then threaded in or out to your desired height. Once set, it will retain that setting until you decide to change it. When the screws are threaded all the way into the pillars, the cheek-rest sits directly on top of the stock. There's about a 1" range of adjustment, because i used 1" long screws.
Then a flat model, so i could generate code for the actual CNC cut:

Next, we loaded the plate into the mill and made the cuts and used a press brake to create the folds. The pillars in the cheek-rest were turned on a lathe, threaded for adjustment screws, then pressed into the cheekrest, fixtured to maintain alignment and tig welded in place from the top. The welds were then machined flat.
Cerakoted in Mil Spec OD Green:


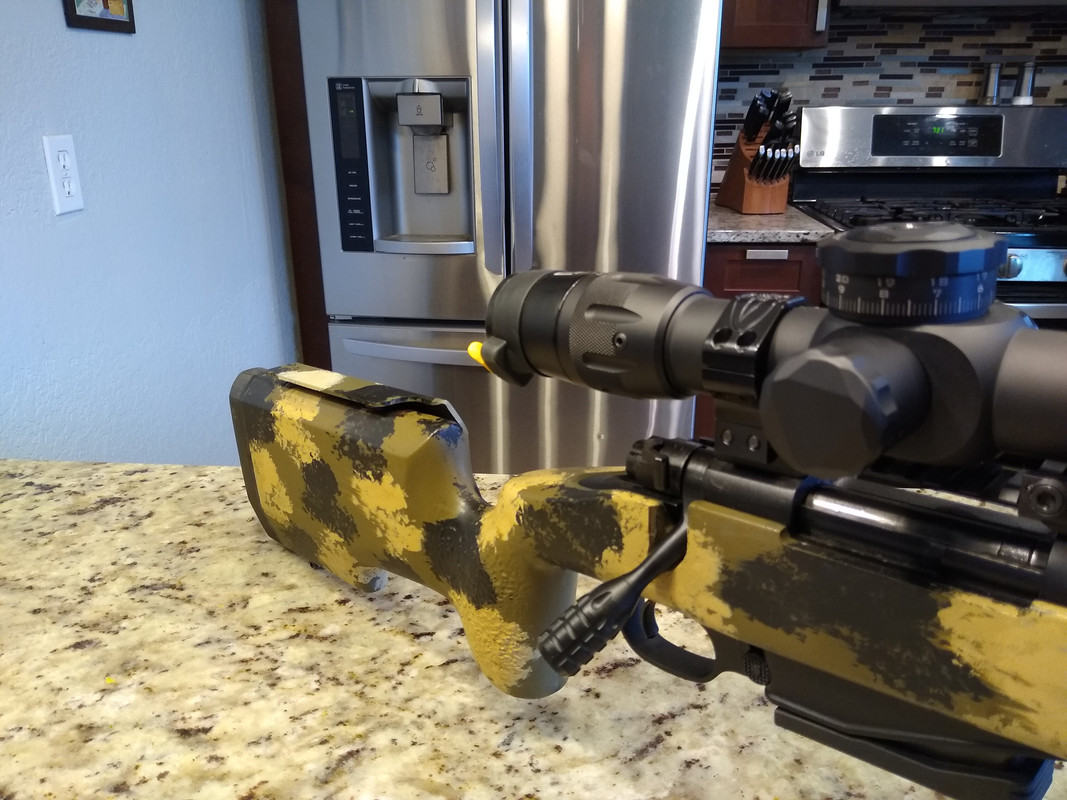
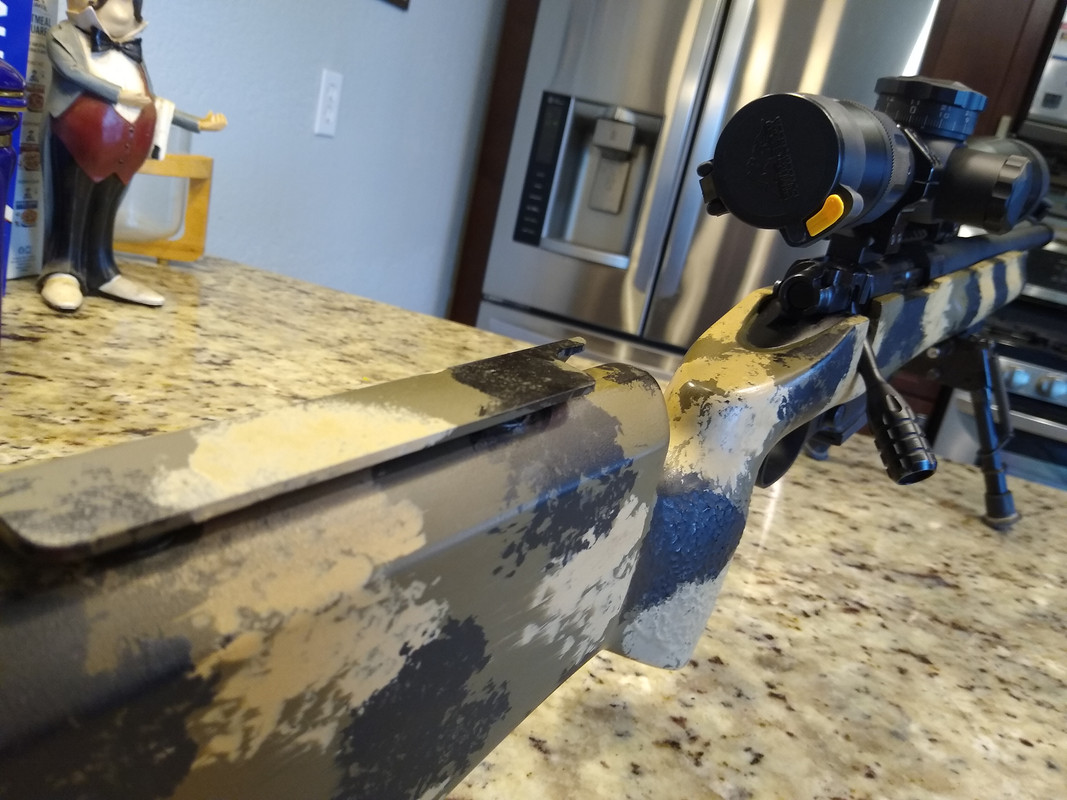
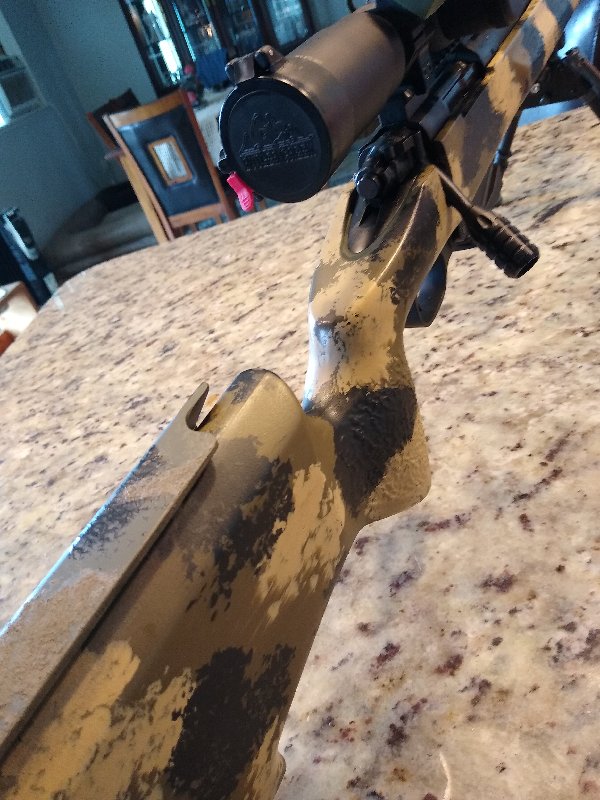
The finished product:
The cheek-rest simply slides into the stock via the 2 aluminum bushings. The neodymium magnets in the bottom of the bushings grab the screw heads and hold the cheekrest in place. Its quick to remove or install, and always goes back to the same adjusted height. The whole thing ended up weighing 4.6 oz.


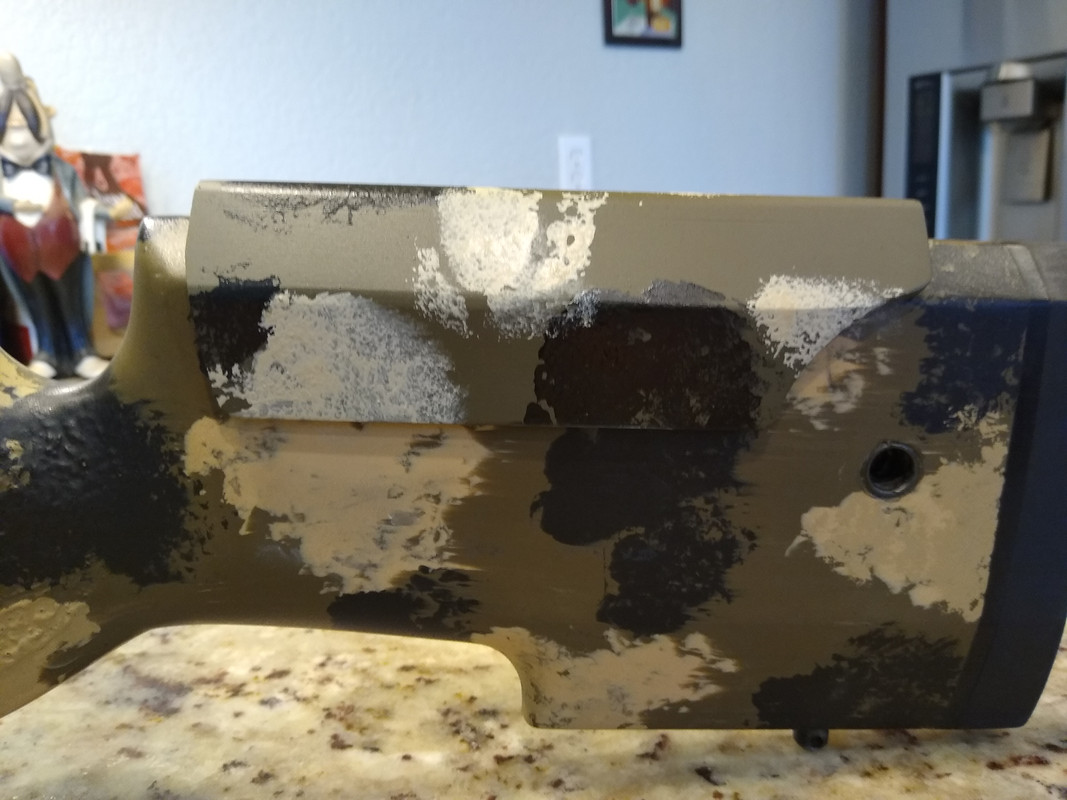
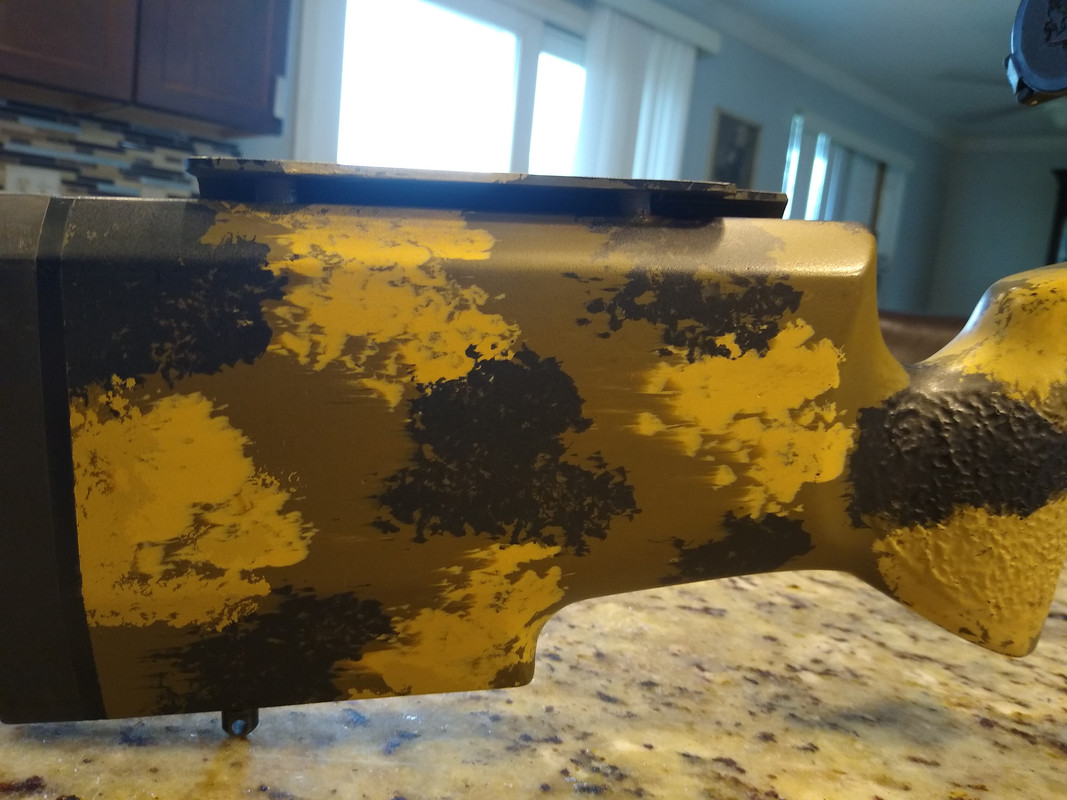
Unfortulately, im not an artist. My camo job kinda sucks. The green and black seem to match up ok, but the tan is way off.


So, my final takeway:
It feels great. A much better cheek weld, and easier, quicker re-positioning of the eye, in the scopes eyebox. I didn't know what i was missing all these years by avoiding the adjustable stocks.
Yea, theres definitely a reason to get and adjustable cheek rest.
Everyone thinks they are a necessity, to the point that many non-adjustable stocks end up any number of items taped/glued to the stock to get some extra height. I decided that perhaps it was time to see for myself if its worth the effort or not.
I hate the look of the loggerhead style adjustable stocks and wanted to avoid the weight of all the associated hardware. The saddle style aren't quite as ugly (to me), but have the same drawbacks as the loggerhead style. both of the aforementioned types need to be either lowered or removed to get a cleaning rod into the bore, and then readjusted after cleaning. That likely isn't difficult using reference marks or simple measuring tools, but i wanted something that avoids this issue, and is fairly unique.
The type of cheekrests that screw onto the stock from the top, using spacers, are extremely light weight, but typically must be removed completely to get a cleaning rod into the bore. Also, the exposed screw heads are kinda ugly.
Myself and @Skookum got together and came up with some ideas to try and avoid the minor annoyances inherent to the common designs on the market. We decided we wanted a design that could be removed without tools for cleaning in the field, That repeats exactly to its adjusted height when reinstalled without needing witness marks or measuring tools, has no exposed screw heads or knobs, and weighs as little as possible.
Heres the end result:
I turned some aluminum bushings, and pressed neodymium magnets into one end:
Then Drilled into my my Manners stock and epoxied the bushings in place:
Next I solid modeled the cheek piece design we came up with, in CAD. Its intended to be cut out of a sheet of 1/8" aluminum plate using a CNC mill, then folding using a brake. The final rest:
Adjustability will be via two steel socket head screws threaded into the bottom of the pillars. The screws are dabbed with locktight, then threaded in or out to your desired height. Once set, it will retain that setting until you decide to change it. When the screws are threaded all the way into the pillars, the cheek-rest sits directly on top of the stock. There's about a 1" range of adjustment, because i used 1" long screws.
Then a flat model, so i could generate code for the actual CNC cut:
Next, we loaded the plate into the mill and made the cuts and used a press brake to create the folds. The pillars in the cheek-rest were turned on a lathe, threaded for adjustment screws, then pressed into the cheekrest, fixtured to maintain alignment and tig welded in place from the top. The welds were then machined flat.
Cerakoted in Mil Spec OD Green:
The finished product:
The cheek-rest simply slides into the stock via the 2 aluminum bushings. The neodymium magnets in the bottom of the bushings grab the screw heads and hold the cheekrest in place. Its quick to remove or install, and always goes back to the same adjusted height. The whole thing ended up weighing 4.6 oz.
Unfortulately, im not an artist. My camo job kinda sucks. The green and black seem to match up ok, but the tan is way off.
So, my final takeway:
It feels great. A much better cheek weld, and easier, quicker re-positioning of the eye, in the scopes eyebox. I didn't know what i was missing all these years by avoiding the adjustable stocks.
Yea, theres definitely a reason to get and adjustable cheek rest.
Last edited: