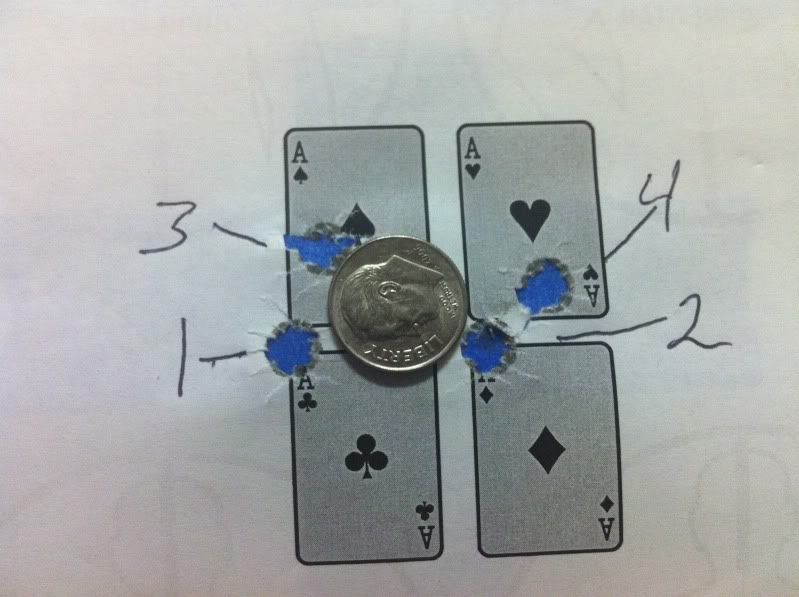
Just thought I would share my project:
Basically is was just a trip to the local Lowes/Home Depot for about $15.00 +/- worth of stuff.
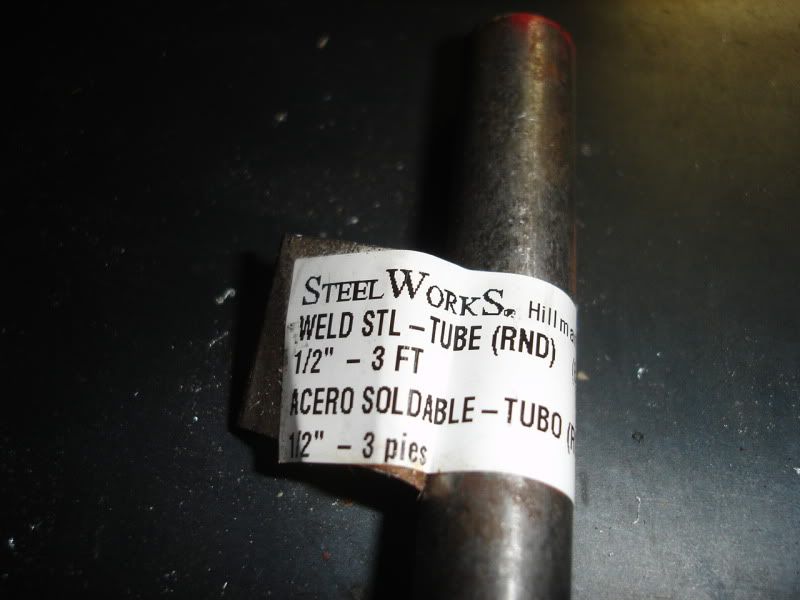
Three foot piece of 1/2" steel tubing (only need 3" +/-)
2 one inch long 1/4" spacers (found in the specialty drawers)
One 3/4 inch 1/4-20 threaded rod connector.
One 1/4-20 three inch carriage bolt (all thread)
One 1/4-20 hex nut
2 black aluminum knobs from music store
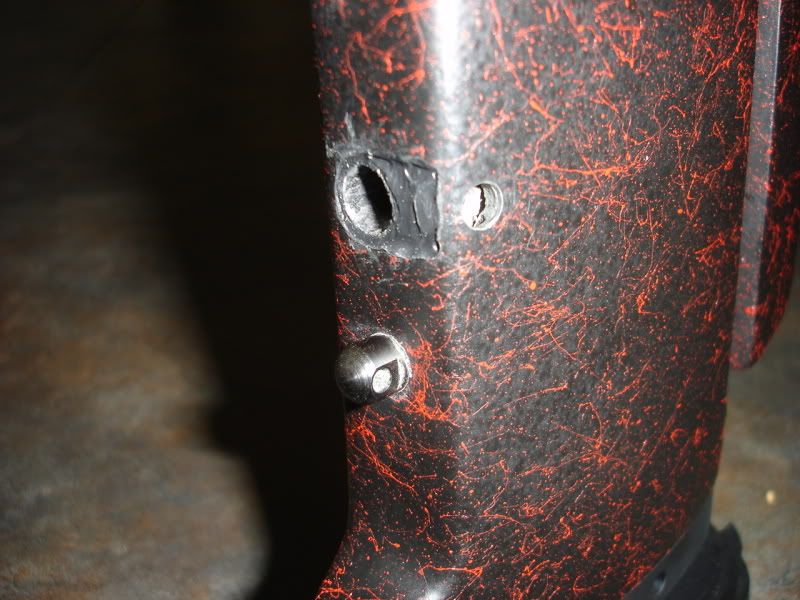
Started with my Bell & Carlson varmint/tactical stock. I drill pressed a half inch hole where I wanted the monopod to be, off center to allow for the future set-screw nut. It will depend on your stock; mine was a three inch depth. I then proceeded to notch out for the 1/4-20 nut that would be welded onto the steel tube that would go inside the hole I just drilled.
This closely shows what I'm talking about:
The 1/2" steel tube will be epoxy into this hole after you have drilled the end of the steel tube and welded on the nut for your future set-screw.
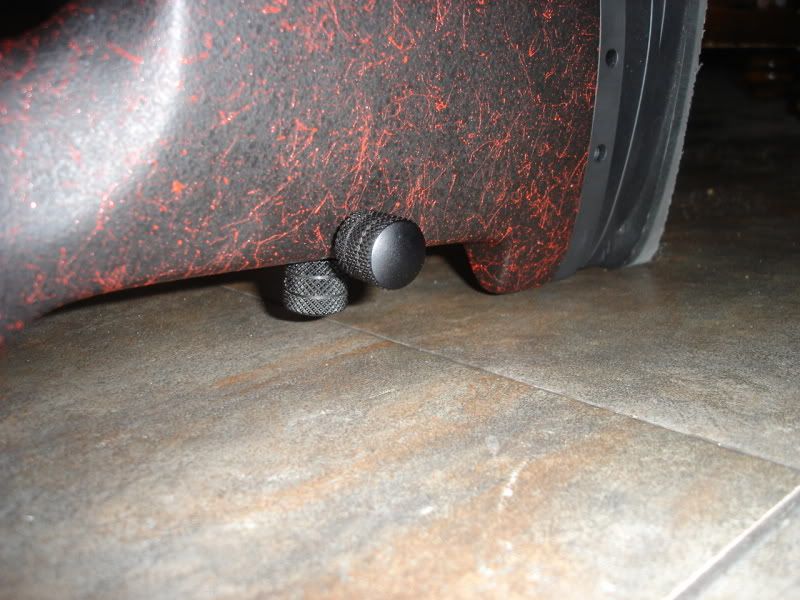
This picture also shows the side hole where the nut and set-screw will eventually go:
I wish you something easier but what I did was weld the two 1" spacers and the threaded rod coupling together in a straight line. I would suggest putting a bolt through all three parts to keep them straight while you weld them together. Of course after you weld them together you will have to grind them smooth on a grinder of your choice.
This picture shows the tube once it is completed (bottom):
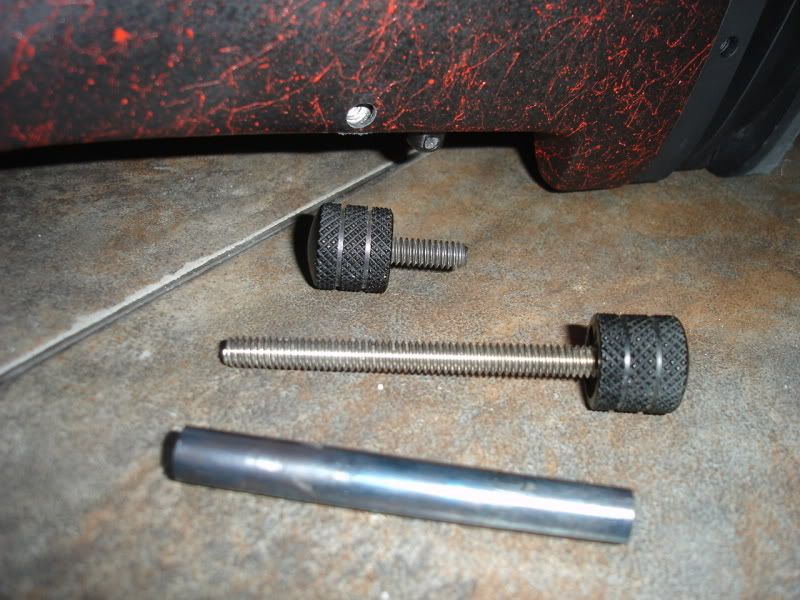
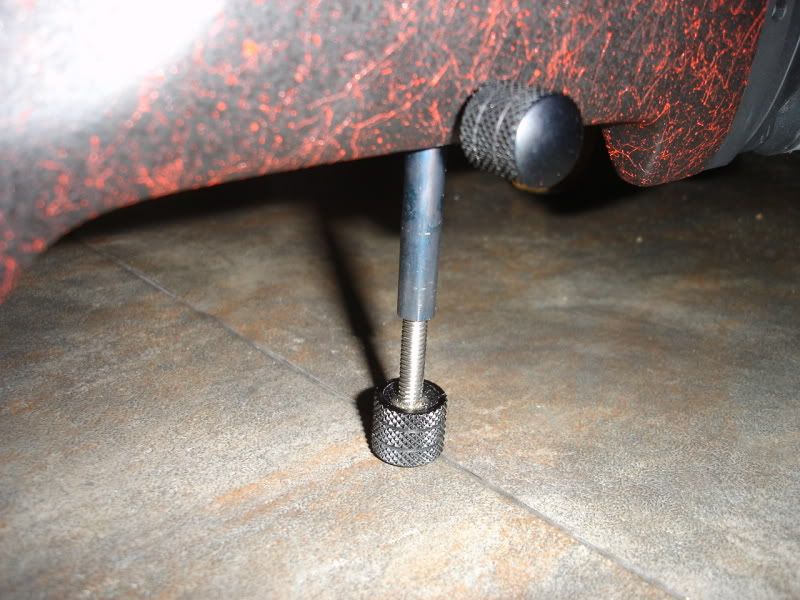
The threaded rod coupling will be at one end so that you can screw in the 3" carriage bolt; this will give you your fine height adjustments on the finished product.
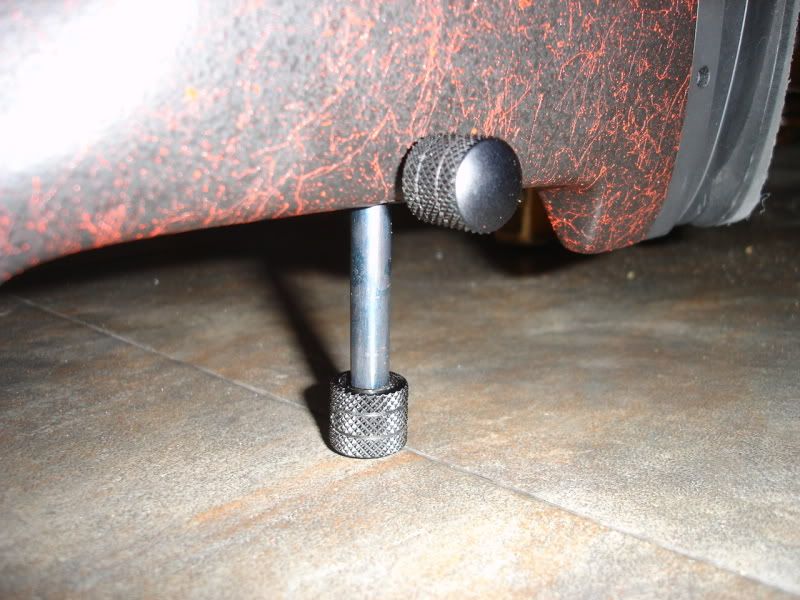
Here you can see the tube with the carriage bolt screwed into place and put inside the 1/2" steel tube. The side set-screw can also be seen holding the tube; of course it's adjustable. Loosen the set-screw and stop the tube at what ever level works for your situation:
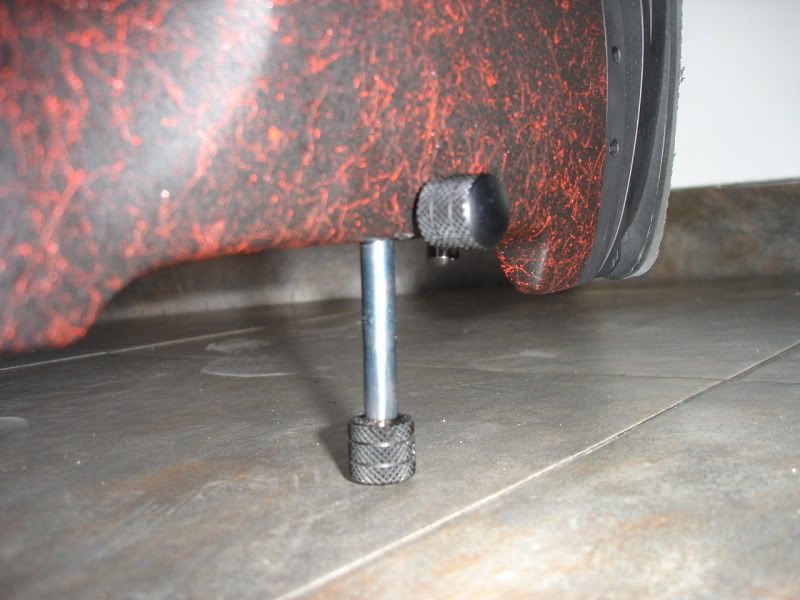
Once the tube is close to your shooting position; you can use the carriage bolt to raise or lower your but stock in conjunction with your front bipod.
The knobs seen here were picked up at a music store. They are simply volume control knobs that I epoxy onto the end of the individual bolts (after grinding the bolts down to fit). They are knurled and made of aluminum. Some are available with a allen wrench set-screw of their own but I prefer the epoxy.
Turned out ok, the knurled knobs made for a finished product that fucntions well and also gives you about 6" of adjustments:
Basically is was just a trip to the local Lowes/Home Depot for about $15.00 +/- worth of stuff.
Three foot piece of 1/2" steel tubing (only need 3" +/-)
2 one inch long 1/4" spacers (found in the specialty drawers)
One 3/4 inch 1/4-20 threaded rod connector.
One 1/4-20 three inch carriage bolt (all thread)
One 1/4-20 hex nut
2 black aluminum knobs from music store
Started with my Bell & Carlson varmint/tactical stock. I drill pressed a half inch hole where I wanted the monopod to be, off center to allow for the future set-screw nut. It will depend on your stock; mine was a three inch depth. I then proceeded to notch out for the 1/4-20 nut that would be welded onto the steel tube that would go inside the hole I just drilled.
This closely shows what I'm talking about:
The 1/2" steel tube will be epoxy into this hole after you have drilled the end of the steel tube and welded on the nut for your future set-screw.
This picture also shows the side hole where the nut and set-screw will eventually go:
I wish you something easier but what I did was weld the two 1" spacers and the threaded rod coupling together in a straight line. I would suggest putting a bolt through all three parts to keep them straight while you weld them together. Of course after you weld them together you will have to grind them smooth on a grinder of your choice.
This picture shows the tube once it is completed (bottom):
The threaded rod coupling will be at one end so that you can screw in the 3" carriage bolt; this will give you your fine height adjustments on the finished product.
Here you can see the tube with the carriage bolt screwed into place and put inside the 1/2" steel tube. The side set-screw can also be seen holding the tube; of course it's adjustable. Loosen the set-screw and stop the tube at what ever level works for your situation:
Once the tube is close to your shooting position; you can use the carriage bolt to raise or lower your but stock in conjunction with your front bipod.
The knobs seen here were picked up at a music store. They are simply volume control knobs that I epoxy onto the end of the individual bolts (after grinding the bolts down to fit). They are knurled and made of aluminum. Some are available with a allen wrench set-screw of their own but I prefer the epoxy.
Turned out ok, the knurled knobs made for a finished product that fucntions well and also gives you about 6" of adjustments: