

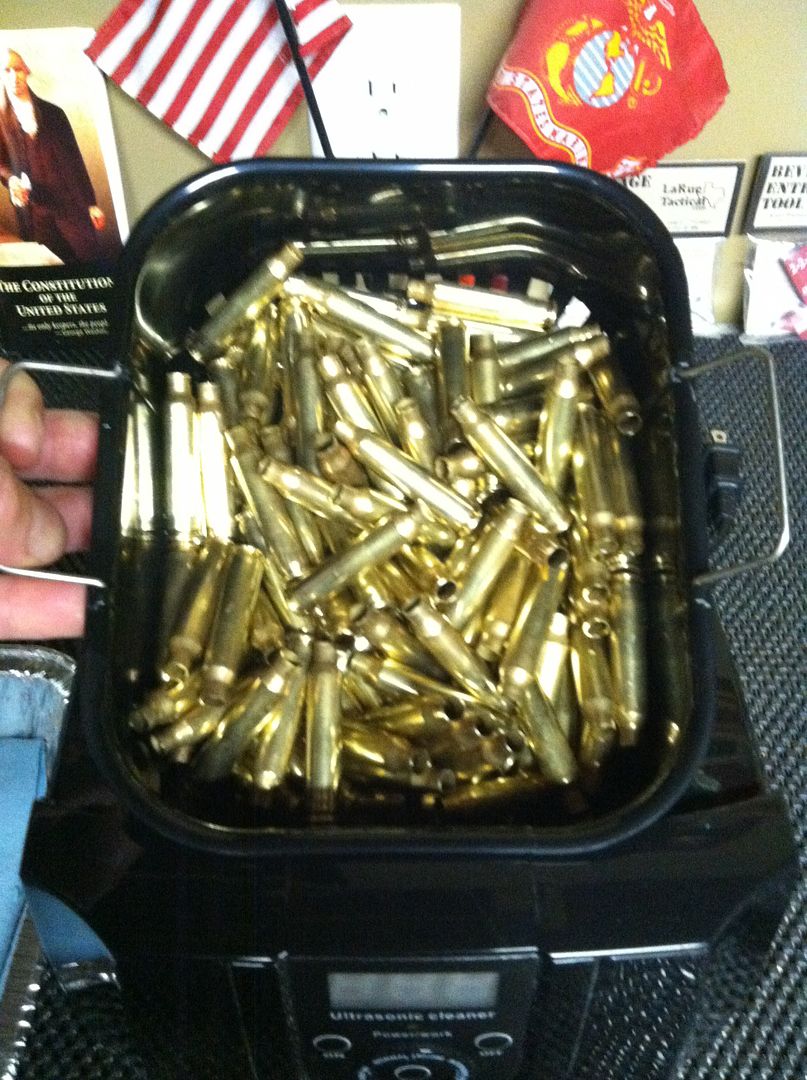
I've just bought a sonic cleaner for my brass prep , every review shows chocolate/ dirty / stained brass going in and better than NEW LOOKING Brass when done ? I'm calling bullshit on this !!!! Or what am I doing wrong ? I've got the correct amount of solution to water ratio , done everything by the book and it ain't no cleaner than when it went in except for washing off loose dirt !!! Hornady Lock and Load 2L machine and Hornady Case Cleaner are products being used .
- Thread starter Twisted .308
- Start date
You are using an out of date browser. It may not display this or other websites correctly.
You should upgrade or use an alternative browser.
You should upgrade or use an alternative browser.
T W O W O R D S : THUMLERS TUMBLER.
Okay, few more words. I had exact same product. It's gone and the Stainless Tumbler is staying.
http://www.snipershide.com/shooting...473-thumlers-tumbler-mods-post-your-pics.html
Okay, few more words. I had exact same product. It's gone and the Stainless Tumbler is staying.
http://www.snipershide.com/shooting...473-thumlers-tumbler-mods-post-your-pics.html
I've just bought a sonic cleaner for my brass prep , every review shows chocolate/ dirty / stained brass going in and better than NEW LOOKING Brass when done ? I'm calling bullshit on this !!!! Or what am I doing wrong ? I've got the correct amount of solution to water ratio , done everything by the book and it ain't no cleaner than when it went in except for washing off loose dirt !!! Hornady Lock and Load 2L machine and Hornady Case Cleaner are products being used .
I had my best luck ditching the commercially available formula and using hot, and I mean as hot as the water heater can get it, water and Lemishine in my US cleaner. A couple 8 minute cycles and a good rinse and they looked great.
Then I bought into the stainless media tumbling. That US cleaner has been collecting dust for almost a year now.
Then I bought into the stainless media tumbling. That US cleaner has been collecting dust for almost a year now.
I have a very similar US. No it does not work well.
I went with the TT and SSM way too.
I went with the TT and SSM way too.
Mine works find. I run it through a couple of cycles. I use the hornady solution.
T W O W O R D S : THUMLERS TUMBLER.
Okay, few more words. I had exact same product. It's gone and the Stainless Tumbler is staying.
http://www.snipershide.com/shooting...473-thumlers-tumbler-mods-post-your-pics.html
+1
I had the original Hornady sonic cleaner and was not impressed. Now I have the Hot Tub and it works great. I think the trick is the Hornady Hot Tub has a degas and heat feature. Downside is it Hot Tub is on the expensive side and letting cases dry is a PITA.
It's got the heat and de-gas , tried that too ...
I have the hornady magnum cleaner (2 transducers) and use the hornady cleaning solution with heat. two cycles and brass is clean. It doesn't leave a polished shine but cleans very well inside, out, and primer pocket.
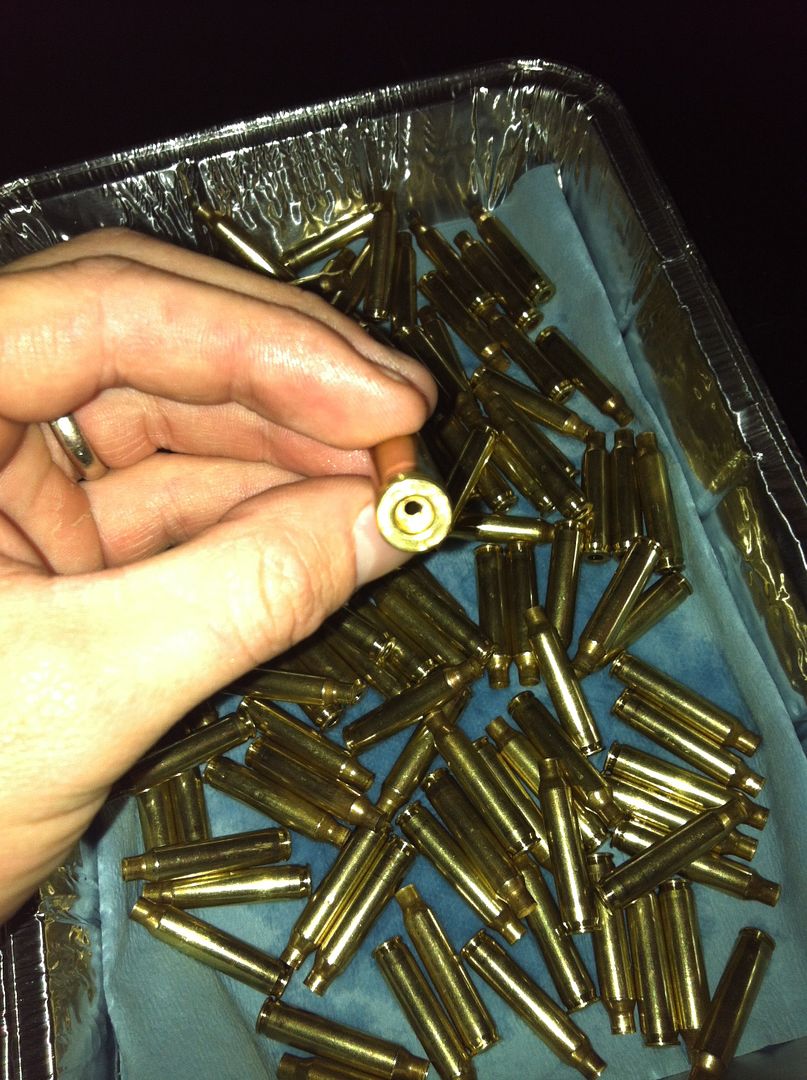
Well I tripled the solution strength and it cleaned Better , brass is
Still tarnished somewhat but it's getting a little better , test brass was pretty old ...we will see how it works on some newer brass tomorrow
Still tarnished somewhat but it's getting a little better , test brass was pretty old ...we will see how it works on some newer brass tomorrow
I have never been able to get my ultrasonic to get cases looking brand new like a stainless steel tumbling setup can. That said, the ultrasonic does a much better job at actually getting the crap out of the inside of the case and the primer pockets than a vibratory tumbler does. The cost of entry to ultrasonic is also way lower than stainless. I picked up my ultrasonic for $60 and have been mixing my own solution similar to the Hornady solution from dish soap and filter mate. After cleaning many cases here's what I've concluded:
Ultrasonic
-Cleans very well
-Pain in the ass to decap first
-Pain in the ass to dry
-Most machines do not handle large quantities of brass well
-Inexpensive to get started and run
Stainless
-Peerless cleaning inside and out
-High cost of entry, low cost over time
-Pain in the ass to decap first
-Pain the ass to dry
-Expensive
Vibratory
-Does an excellent job on the case exterior
-Minimal prep and cleanup time
-Doesn't clean primer pockets or interior well
-Low cost of entry
There are a few things you can do to make the wet cleaning methods a bit easier. I have a front load dryer with a rack insert so if I am in a hurry I will just spread the cases out on a towel on that rack and turn on the dryer for 20-30 minutes. If I had to start over I would go with a vibratory tumbler over stainless/ultrasonic for a number of reasons. You can tumble the lube off cases much easier. You can tumble loaded rounds. And there is no need to decap or dry.
For me, the bottom line is that it doesn't matter how incredible the brass looks, it won't shoot any better.
Nothing wrong with SSM. Use a Redding or Lee recapping die. Dry with a dehydrator. We use a HarvestMaid. Get 200 rounds on a tray.Dry within 30 minutes to hour max.I have never been able to get my ultrasonic to get cases looking brand new like a stainless steel tumbling setup can. That said, the ultrasonic does a much better job at actually getting the crap out of the inside of the case and the primer pockets than a vibratory tumbler does. The cost of entry to ultrasonic is also way lower than stainless. I picked up my ultrasonic for $60 and have been mixing my own solution similar to the Hornady solution from dish soap and filter mate. After cleaning many cases here's what I've concluded:
Ultrasonic
-Cleans very well
-Pain in the ass to decap first
-Pain in the ass to dry
-Most machines do not handle large quantities of brass well
-Inexpensive to get started and run
Stainless
-Peerless cleaning inside and out
-High cost of entry, low cost over time
-Pain in the ass to decap first
-Pain the ass to dry
-Expensive
Vibratory
-Does an excellent job on the case exterior
-Minimal prep and cleanup time
-Doesn't clean primer pockets or interior well
-Low cost of entry
There are a few things you can do to make the wet cleaning methods a bit easier. I have a front load dryer with a rack insert so if I am in a hurry I will just spread the cases out on a towel on that rack and turn on the dryer for 20-30 minutes. If I had to start over I would go with a vibratory tumbler over stainless/ultrasonic for a number of reasons. You can tumble the lube off cases much easier. You can tumble loaded rounds. And there is no need to decap or dry.
For me, the bottom line is that it doesn't matter how incredible the brass looks, it won't shoot any better.
U got suckered.
Get a wet tumbler.
Get a wet tumbler.
+1 Juma, spot on...I use the one WalMart sells,white round style with 4 shelves, Oster brand. Cost about
$38 to $45. Runs about 160 degrees max. Warm enough to dry, but not too hot to start annealing the body or case head. It maintains a constant warm air flow that really speeds up the drying process. My 204, 223, 6.5 and 338 cases dry within 1 hr.
$38 to $45. Runs about 160 degrees max. Warm enough to dry, but not too hot to start annealing the body or case head. It maintains a constant warm air flow that really speeds up the drying process. My 204, 223, 6.5 and 338 cases dry within 1 hr.
I microwave the solution to a boil before it goes into the unit. 2 8 minute cycles and the brass comes out very clean unless it was VERY tarnished (range pickup brass.) Trying to decide if I'm going to spend my pennies on a tumber and SS media or just buy more bullets and powder.. ") I do like the dehydrator idea for drying brass.
I do like the dehydrator idea for drying brass.
If I was going to do it again from scratch I would just skip to the SSM... but there isn't enough of an advantage right now for me to spend the extra dough.
I do like the dehydrator idea for drying brass. If I was going to do it again from scratch I would just skip to the SSM... but there isn't enough of an advantage right now for me to spend the extra dough.
It is really all about what you value in a cleaning method. If you want the cleanest, shiniest brass possible then SS is the only way to go. Let's not pretend that the time difference between wet cleaning and dry is negligible though. Even with a Lee decapping die and a food dehydrator it still takes significantly longer to wet tumble.
Vibratory: Dump cases from range bag into tumbler. Run tumbler, dump into media separator and spin. Cases ready to load.
SSM: run cases through decapping die on press. Dump into tumbler and run. Dump into media separator and spin. Put in food dehydrator to dry. Cases ready load.
SSM will absolutely 100% do a better job at cleaning. There is also much more handling of the brass and setup of various tools. Does all of this extra time translate to some tangible benefit in rifle function or accuracy?
Personally, I have had very little luck with any form of Ultrasonic Cleaning, and I am now 100% Stainless Media. I could never get the primer pockets anywhere close to clean with the ultrasonic no matter what I tried.
On the Ultrasonic, BE VERY CAREFUL about increasing the strength of the cleaning solution! The majority of that stuff is acidic / corrosive, when you increase the strength, and extend cleaning / soak times, you are "eating up" your brass. If you don't rinse / neutralize the solution in / on the cases, you can break them down pretty good over time.
In terms of performance, there have been some pretty good arguments made on using thoroughly clean cases each time:
1. Carbon that is left inside the cases, can get blasted down the barrel on subsequent firings, leading to more wear and fowling.
2. Carbon buildup in the primer pocket / flash hole can lead to inconsistent ignitions and primer seating.
Trick with the Stainless Media,
When the brass comes out of the tumbler, rinse it good with water, then dump it into a container of Isopropyl Alcohol. Then pull it out of the Alcohol, place it onto a large bath towel, and shake / roll it around. Any water left on the brass after the rinse will mix into the alcohol, and the alcohol will evaporate / dry very quickly without leaving any type of residue. Just make sure you start with the 95% or higher Isopropyl Alcohol, not the more common 50%-70% stuff. If you watch how quickly / cleanly it evaporates you can tell when it is time to pitch it, I usually go for 15-20 rinses. Since doing this, I no longer have any need to dry them with any type of heat, and the brass does not oxidize / tarnish as bad or as quickly.
Last edited:
Read this from 6mm Br .com
Ultrasonic Cartridge Case Cleaning Made Easy
by Jason Baney
Many things in my reloading routine changed after becoming involved with 1000-yard Benchrest. Before long I decided to give up tumbling with standard corn cob and walnut media due to some bad experiences with buildup in the cases. I had even tried rice as a tumbling medium, and it works great, but will also leave a nasty residue after a while. With all the media I used, I was also not happy with the dust that was left over. I didn’t particularly care to see if this dust or buildup would cause me problems, so it was just easier to stop tumbling all together. This may not have helped quantitatively, but mentally it was a step in the right direction. (Click HERE to ZOOM Photo.)
Instead, I resorted to cleaning up the outside of the necks with Krazy Kloth or some fine steel wool, or even some Kaboom liquid cleaner on a paper towel. For the inside, I would chuck a worn bronze bore brush in a cordless drill. Lastly, I scraped the primer pocket with a Lee primer pocket cleaner. All this work still left the interior of the case packed with carbon residue. This residue liked to fall out in large flakes during sizing and priming, and was a little disconcerting. Well, all that has changed, and now I save a lot of time and repetitive case handling, and end up with impressively clean cartridge cases.
Up until a few months ago, I never gave a second thought to using an ultrasonic cleaner to clean cases. But after seeing several posts on various shooting forums, I got curious and had to try one for myself. It took me a while to find the right procedure and the best “cocktail” of cleaners, but the end result was great. I’ve concluded that, if you’re fussy about your brass, ultrasonic cleaning is well worth the effort.
Support Our
SPONSORS
Getting the Machine–Ebay Comes Through
After waiting for several months with a backorder at Harbor Freight,
I decided to peruse eBay and see what was available. I’m not sure why this idea didn’t come to me earlier. To my surprise, there were many affordable, small to mid-sized units available. Since I don’t process mass quantities of brass at one time, I went for a very affordable unit. The unit had timer settings of 90/180/280/380/480 seconds, a 2.4 pint capacity, and ran at 42,000 Hz just like the unit from Harbor Freight. The “Buy it Now” cost delivered to my door was $75, but if you are patient and wait out a few auctions, you can get the same unit for much less!
Initial Testing–Simple Green Fails to Impress
The first thing I decided to clean was a 223 suppressor. I filled it with straight Simple Green, plugged the ends with disposable ear plugs, and gave it several maximum 480 second cycles. Following that I ran several distilled water only cycles until the water came out clear. It was fairly clean in the end, but I was a little disappointed at how much visible carbon was left on the suppressor. I expected Simple Green to work better…
Assembling Test Candidates
Now it was on to brass and the testing that would show me if the $75 dollar investment was worthwhile. I assembled several reasonably priced solutions that were talked about over the internet and began my plan of attack to get good information with the least time and supplies wasted. The solutions I gathered were: Simple Green, Kaboom, household White Vinegar, Carbon-Off, Birchwood Casey Brass Cartridge Case Cleaner, and GUNK Carburetor and Parts Cleaner.
Plan in Action–Beakers Speed Clean-Up
My brass test subjects were 6-times-fired .308 Lapua brass that had never been tumbled, and was on the verge of head separation. For a little variety, I also ran some dirty 17 Rem and .243 Win cases that were sent to me by a few forum members for this project. I decided to only use a couple cases in each run, as that was all that was needed to tell me if the procedure would work or not. I also segregated the different solutions in beakers within the water filled tank. This allowed me to test several solutions at once without dumping and cleaning the entire tank in between runs.
Before you ask, NO, the glass beaker doesn’t stop the ultrasonic action from penetrating to the casings inside. All cases were deprimed with a universal decapping die for optimal cleaning of all surfaces. At right are the .243 cases in the beaker waiting for solution to be added.
Testing Various Solutions–The Search for the Ideal Chemical Cocktail
First up was the Kaboom, as this was similar to CLR and has been used by several people I know (as well as myself) to clean cases manually. I did a couple runs with dilutions of Kaboom (1:8 and 1:20). After two 480-second cycles (16 minutes), the cases were very clean and shiny so I finished with a rinse cycle and dried them. The brass looked great as soon as it came out of the water. Devoid of any carbon deposits inside and out, the cases were shiny as new. Well in the morning the cases were varying shades of purple and other colors as the Kaboom had done something strange to the brass. I worried about what the chemicals might be doing to the brass, so the Kaboom was eliminated from further testing. I should have abided by the warning on the bottle to not use it on brass.
Next up was the GUNK parts cleaner. My best run with GUNK resulted in brass that was still dull, but somewhat clean. The color remained unchanged, and the inside of the case was about 70% clean, with the primer pockets being totally clean. The remaining carbon was concentrated on the inside of the case head more than the walls or neck. The harsh solvent smell and attributes made me less interested in this using this, so it too was moved to the back burner.
The most expensive cleaner, Carbon-Off, was next at bat. Carbon-off from Discovery Products costs about $22 per quart delivered, and is hard to obtain. Though this seemed like the perfect answer to my question, it was in fact the worst of the bunch! Smell was worse than the GUNK, and on top of that it was a gel and could not be diluted! Running it through the same cycle as the GUNK basically just shined up the case a bit. 95% of the carbon was still there. So Carbon-off was added to the junk pile.
Many people recommend Simple Green for carbon removal, so since I already had some, I threw it in the test as well. A 25% solution did almost nothing for the carbon, so in an effort to expedite the evaluation, I went straight to 100%. The simple green still did almost nothing to clean the inside of the cases! On top of that, in the morning, the cases looked like they had been buried underground for a few years–very dark and irregular-colored. Simple Green, by itself, was no good either.
Next I tested the only specific commercial entry, Birchwood Casey Brass Cartridge Case Cleaner (BC). This was chosen as the only commercial entry because it was the most economical. The directions recommended a three-minute soak time with agitation. If three minutes was good, eight minutes was better right? The solution was diluted as prescribed on the container and one eight-minute cycle was run followed by a hot water and distilled water rinse. Well, the cases looked beautiful on the outside (brighter than new actually), but they were still very dirty inside as well as around the neck. Since I had already exceeded the recommended soak time by almost 300%, and the cases still weren’t clean enough, the Birchwood Casey cleaner was set aside as well.
Old-Fashioned White Vinegar (with Soap) Works the Best
Now we get to the good stuff. I was desperately hoping vinegar would prove useful and justify the time and money spent on this project. It was now down to the least expensive solution I had. Dish soap had also been mentioned in the forums, so I decided to incorporate it as well. My first trial used full strength vinegar with a drop of soap, and a cycle similar to the others. This showed promise, giving a perfectly clean case, but turned the cases a dark patina once again. I also tried a 50% solution of vinegar and it gave the same results, so there was no need to use it full strength. Fifty percent white vinegar was the best solution yet, so I decided to stick with it and tweak it for the best and fastest results.
The Mad Chemist Needs A Neutralizing Agent
At this point the brass was coming out with no carbon deposits whatsoever, but I wasn’t happy with the darkening of the brass so I figured a neutralization step was needed after the vinegar to stop the acid’s reaction. A water rinse was fine with the acidic BC case cleaner, but not sufficient with vinegar. Baking soda (BS) seemed like the easiest and most readily available option to neutralize the reaction. The BS was simply dissolved in water in the proportion shown below. I went through nearly a dozen runs to come up with the best combination of vinegar, dish soap and baking soda.
ULTRASONIC CLEANING — Baney’s Best Recipes
My ultimate solution resulted in shiny brass that was 100% devoid of carbon, inside and out. Even the carbon deposits on the neck and the primer pockets were completely removed! My objective had been accomplished! Dirty old black brass came out like new inside and out…I was amazed. Not only did my protocol work well, but it was the least expensive option in the whole test! For “Cheap and Clean,” this is the procedure I settled on:
CHEAP and CLEAN
24 minutes – 50% Vinegar + 1 Drop Dish Soap per 8 ounces water
480 seconds – Baking Soda (BS) in water (1 grain BS per ounce of water)
480 seconds – Hot Water
480 seconds – Distilled Water
Total: 48 minutes
Cost: Less than $2.00 per gallon
And for a Super Shiny and FASTER End Result, Add BC Solution
Since the BC solution had worked so well to shine up the cases earlier, I attempted to work it in with the vinegar procedure to streamline it even more and give even better looking brass. So for a couple dollars more, you can have 100% clean cases, which are even shinier than the “Cheap and Clean” procedure above. So this procedure I’ll call “Clean and Shiny.”
CLEAN and SHINY
24 minutes – 50% Vinegar + 1 Drop Dish Soap per 8 ounces water
380 seconds – Birchwood Casey (BC) Case Cleaner
380 seconds – Hot Water
380 seconds – Distilled Water
Total: 43 minutes
Cost: $2.00 per gallon for the Vinegar and $4.00 per gallon for BC Cleaner.
This “Clean and Shiny” procedure gave me the best combination of carbon removal, case luster, speed, and economy. The “Clean and Shiny” regimen also eliminates the neutralization step, as the BC cleaner acts as a neutralizer. Even though it contains a few acids, they must rinse off more readily than vinegar. Regular household vinegar is 5% acetic acid (2.5% when diluted) and the BC cleaner contains 3 different acids, one of which is phosphoric (the same found in pepsi). It starts at over 50% acid as a concentrate, and a little over 3% when diluted.
Case Care Following Ultrasonic Cleaning
After removing the cases from the final distilled water rinse, I simply blow them out with compressed air and lay them on a paper towel to dry overnight. A hair dryer works well too, especially if you get the air in the case mouth. In the morning you have clean, shiny dry brass ready to size. If you have no air compressor, simply whip them around by hand a few times to force any water drops out of the case mouth. Then lay them on a paper towel to dry overnight.
--------------------------------------------------------------------------------
CONCLUSION–It Was Well Worth the Effort
Though I wasted some money on solutions that performed poorly, I am happy with the results so it was worth it. I never thought I would be able to make dirty, fired brass look like new again!
I’ve now processed many 308s and some 8X 6.5-284 cases using the “Cheap and Clean” process, and I’m very satisfied with the fact that I can almost see my reflection inside the case! Believe it or not, there was no physical work involved in cleaning the cases, just the right solutions and a bit of time in the Ultrasonic. So, quit wasting your time with vibratory tumblers or manual labor and try my protocol with an ultrasonic unit of your choice.
WARNING: The unit makes a noise that is not real friendly to your ears, so make sure to run it in a place that wont annoy the others in your household. It isn’t loud, just annoying–but no more annoying that a running tumbler!
Support Our
SPONSORS
Trick with the Stainless Media,
When the brass comes out of the tumbler, rinse it good with water, then dump it into a container of Isopropyl Alcohol. Then pull it out of the Alcohol, place it onto a large bath towel, and shake / roll it around. Any water left on the brass after the rinse will mix into the alcohol, and the alcohol will evaporate / dry very quickly without leaving any type of residue. Just make sure you start with the 95% or higher Isopropyl Alcohol, not the more common 50%-70% stuff. If you watch how quickly / cleanly it evaporates you can tell when it is time to pitch it, I usually go for 15-20 rinses. Since doing this, I no longer have any need to dry them with any type of heat, and the brass does not oxidize / tarnish as bad or as quickly.
I shake out the water by holding 2 cases at a time and shaking them enough to not feel anymore water come out against my other forearm. I then leave them on the carpet overnight. They are dry in the morning. They don't tarnish.
tag for info
I have used and continue to use my vibratory tumbler with walnut media, gets all my cases looking brand new, even the primer pockets. Call me old fashioned.........
Love my sonic cleaner. 3 rounds @ 480 seconds and brass looks great!
I tried a Harbor Freight sonic cleaner on 10 round batches of deprimed 308 using the heater function. After a couple of 5 minute sessions, the brass was clean, but . . . . After I went stainless (used tumbler gotten at a fun show for $50) I'll never go back. I can do 250 round batches of deprimed 308 using Dawn and Lemishine, let is tumble for a couple of hours, and everything comes out rosy without any further attention on my part. Anyone want a sonic cleaner, CHEAP?
I wet tumble with stainless steel media, shake them back and forth in a beach towel and dry them in less the 10 minutes in a five gallon bucket using a old hair dryer.

Many of the competitive shooters do not like the ultrasonic or stainless steel media method because it removes the carbon from inside the neck of the case. When the case is that clean they claim the bullet bonds to the case neck over time. (electro molecular bonding or Covalent bonding) I was only enlisted scum and didn't get a higher education and just blamed it on queer electrons.
Many of the competitive shooters do not like the ultrasonic or stainless steel media method because it removes the carbon from inside the neck of the case. When the case is that clean they claim the bullet bonds to the case neck over time. (electro molecular bonding or Covalent bonding) I was only enlisted scum and didn't get a higher education and just blamed it on queer electrons.
Read this from 6mm Br .com
Ultrasonic Cartridge Case Cleaning Made Easy
by Jason Baney
My ultimate solution resulted in shiny brass that was 100% devoid of carbon, inside and out. Even the carbon deposits on the neck and the primer pockets were completely removed! My objective had been accomplished! Dirty old black brass came out like new inside and out…I was amazed. Not only did my protocol work well, but it was the least expensive option in the whole test! For “Cheap and Clean,” this is the procedure I settled on:
CHEAP and CLEAN
24 minutes – 50% Vinegar + 1 Drop Dish Soap per 8 ounces water
480 seconds – Baking Soda (BS) in water (1 grain BS per ounce of water)
480 seconds – Hot Water
480 seconds – Distilled Water
Total: 48 minutes
Cost: Less than $2.00 per gallon
And for a Super Shiny and FASTER End Result, Add BC Solution
Since the BC solution had worked so well to shine up the cases earlier, I attempted to work it in with the vinegar procedure to streamline it even more and give even better looking brass. So for a couple dollars more, you can have 100% clean cases, which are even shinier than the “Cheap and Clean” procedure above. So this procedure I’ll call “Clean and Shiny.”
CLEAN and SHINY
24 minutes – 50% Vinegar + 1 Drop Dish Soap per 8 ounces water
380 seconds – Birchwood Casey (BC) Case Cleaner
380 seconds – Hot Water
380 seconds – Distilled Water
Total: 43 minutes
Cost: $2.00 per gallon for the Vinegar and $4.00 per gallon for BC Cleaner.
This “Clean and Shiny” procedure gave me the best combination of carbon removal, case luster, speed, and economy. The “Clean and Shiny” regimen also eliminates the neutralization step, as the BC cleaner acts as a neutralizer. Even though it contains a few acids, they must rinse off more readily than vinegar. Regular household vinegar is 5% acetic acid (2.5% when diluted) and the BC cleaner contains 3 different acids, one of which is phosphoric (the same found in pepsi). It starts at over 50% acid as a concentrate, and a little over 3% when diluted.
Case Care Following Ultrasonic Cleaning
After removing the cases from the final distilled water rinse, I simply blow them out with compressed air and lay them on a paper towel to dry overnight. A hair dryer works well too, especially if you get the air in the case mouth. In the morning you have clean, shiny dry brass ready to size. If you have no air compressor, simply whip them around by hand a few times to force any water drops out of the case mouth. Then lay them on a paper towel to dry overnight.
Maybe I should call my method the Clean, Shiny and Lazy"?
One thing of note that I may have missed in the article is that you will get much better results if you do smaller batches. I did two loads tonight for comparison. The first load had 60 .260 cases and took 4 cycles and came out damn well, but still had a little carbon in about 10% of primer pockets. The second load had 30 and after 2 cycles were perfect, but I did a 3rd just because.
HF Ultrasonic
Wash
50/50 Vinegar/ Distilled water volume by rough eyeball
Dash of Lemishine
Couple drops of dish soap
3-4 cycles as needed with heat
Drain (cheap colander)
Rinse
Distilled water
Dash of baking soda
1-2 cycles
Drain
Shake around in towel and drop in basket to finish drying. No comparison to traditional vibratory tumbling in speed or cleanliness in my experience.
Cheers
Vince
Last edited:
Does your brass turn green at all?Maybe I should call my method the Clean, Shiny and Lazy"?
One thing of note that I may have missed in the article is that you will get much better results if you do smaller batches. I did two loads tonight for comparison. The first load had 60 .260 cases and took 4 cycles and came out damn well, but still had a little carbon in about 10% of primer pockets. The second load had 30 and after 2 cycles were perfect, but I did a 3rd just because.
HF Ultrasonic
50/50 Vinegar/ Distilled water volume by rough eyeball
Dash of Lemishine
Couple drops of dish soap
3-4 cycles as needed with heat
Drain (cheap colander)
Distilled water
Dash of baking soda
1-2 cycles
Drain
Shake around in towel and drop in basket to finish drying. No comparison to traditional vibratory tumbling in speed or cleanliness in my experience.
Cheers
Vince
I've seen very good reports of people using home brew cleaners like this with pictures of the results. Guys try some of these and repost or find the article online about everything the guy used. His looked brand spanking new. I would like to here your results because I'm in the market for one....
Read this from 6mm Br .com
Ultrasonic Cartridge Case Cleaning Made Easy
by Jason Baney
Many things in my reloading routine changed after becoming involved with 1000-yard Benchrest. Before long I decided to give up tumbling with standard corn cob and walnut media due to some bad experiences with buildup in the cases. I had even tried rice as a tumbling medium, and it works great, but will also leave a nasty residue after a while. With all the media I used, I was also not happy with the dust that was left over. I didn’t particularly care to see if this dust or buildup would cause me problems, so it was just easier to stop tumbling all together. This may not have helped quantitatively, but mentally it was a step in the right direction. (Click HERE to ZOOM Photo.)
Instead, I resorted to cleaning up the outside of the necks with Krazy Kloth or some fine steel wool, or even some Kaboom liquid cleaner on a paper towel. For the inside, I would chuck a worn bronze bore brush in a cordless drill. Lastly, I scraped the primer pocket with a Lee primer pocket cleaner. All this work still left the interior of the case packed with carbon residue. This residue liked to fall out in large flakes during sizing and priming, and was a little disconcerting. Well, all that has changed, and now I save a lot of time and repetitive case handling, and end up with impressively clean cartridge cases.
Up until a few months ago, I never gave a second thought to using an ultrasonic cleaner to clean cases. But after seeing several posts on various shooting forums, I got curious and had to try one for myself. It took me a while to find the right procedure and the best “cocktail” of cleaners, but the end result was great. I’ve concluded that, if you’re fussy about your brass, ultrasonic cleaning is well worth the effort.
Support Our
SPONSORS
Getting the Machine–Ebay Comes Through
After waiting for several months with a backorder at Harbor Freight,
I decided to peruse eBay and see what was available. I’m not sure why this idea didn’t come to me earlier. To my surprise, there were many affordable, small to mid-sized units available. Since I don’t process mass quantities of brass at one time, I went for a very affordable unit. The unit had timer settings of 90/180/280/380/480 seconds, a 2.4 pint capacity, and ran at 42,000 Hz just like the unit from Harbor Freight. The “Buy it Now” cost delivered to my door was $75, but if you are patient and wait out a few auctions, you can get the same unit for much less!
Initial Testing–Simple Green Fails to Impress
The first thing I decided to clean was a 223 suppressor. I filled it with straight Simple Green, plugged the ends with disposable ear plugs, and gave it several maximum 480 second cycles. Following that I ran several distilled water only cycles until the water came out clear. It was fairly clean in the end, but I was a little disappointed at how much visible carbon was left on the suppressor. I expected Simple Green to work better…
Assembling Test Candidates
Now it was on to brass and the testing that would show me if the $75 dollar investment was worthwhile. I assembled several reasonably priced solutions that were talked about over the internet and began my plan of attack to get good information with the least time and supplies wasted. The solutions I gathered were: Simple Green, Kaboom, household White Vinegar, Carbon-Off, Birchwood Casey Brass Cartridge Case Cleaner, and GUNK Carburetor and Parts Cleaner.
Plan in Action–Beakers Speed Clean-Up
My brass test subjects were 6-times-fired .308 Lapua brass that had never been tumbled, and was on the verge of head separation. For a little variety, I also ran some dirty 17 Rem and .243 Win cases that were sent to me by a few forum members for this project. I decided to only use a couple cases in each run, as that was all that was needed to tell me if the procedure would work or not. I also segregated the different solutions in beakers within the water filled tank. This allowed me to test several solutions at once without dumping and cleaning the entire tank in between runs.
Before you ask, NO, the glass beaker doesn’t stop the ultrasonic action from penetrating to the casings inside. All cases were deprimed with a universal decapping die for optimal cleaning of all surfaces. At right are the .243 cases in the beaker waiting for solution to be added.
Testing Various Solutions–The Search for the Ideal Chemical Cocktail
First up was the Kaboom, as this was similar to CLR and has been used by several people I know (as well as myself) to clean cases manually. I did a couple runs with dilutions of Kaboom (1:8 and 1:20). After two 480-second cycles (16 minutes), the cases were very clean and shiny so I finished with a rinse cycle and dried them. The brass looked great as soon as it came out of the water. Devoid of any carbon deposits inside and out, the cases were shiny as new. Well in the morning the cases were varying shades of purple and other colors as the Kaboom had done something strange to the brass. I worried about what the chemicals might be doing to the brass, so the Kaboom was eliminated from further testing. I should have abided by the warning on the bottle to not use it on brass.
Next up was the GUNK parts cleaner. My best run with GUNK resulted in brass that was still dull, but somewhat clean. The color remained unchanged, and the inside of the case was about 70% clean, with the primer pockets being totally clean. The remaining carbon was concentrated on the inside of the case head more than the walls or neck. The harsh solvent smell and attributes made me less interested in this using this, so it too was moved to the back burner.
The most expensive cleaner, Carbon-Off, was next at bat. Carbon-off from Discovery Products costs about $22 per quart delivered, and is hard to obtain. Though this seemed like the perfect answer to my question, it was in fact the worst of the bunch! Smell was worse than the GUNK, and on top of that it was a gel and could not be diluted! Running it through the same cycle as the GUNK basically just shined up the case a bit. 95% of the carbon was still there. So Carbon-off was added to the junk pile.
Many people recommend Simple Green for carbon removal, so since I already had some, I threw it in the test as well. A 25% solution did almost nothing for the carbon, so in an effort to expedite the evaluation, I went straight to 100%. The simple green still did almost nothing to clean the inside of the cases! On top of that, in the morning, the cases looked like they had been buried underground for a few years–very dark and irregular-colored. Simple Green, by itself, was no good either.
Next I tested the only specific commercial entry, Birchwood Casey Brass Cartridge Case Cleaner (BC). This was chosen as the only commercial entry because it was the most economical. The directions recommended a three-minute soak time with agitation. If three minutes was good, eight minutes was better right? The solution was diluted as prescribed on the container and one eight-minute cycle was run followed by a hot water and distilled water rinse. Well, the cases looked beautiful on the outside (brighter than new actually), but they were still very dirty inside as well as around the neck. Since I had already exceeded the recommended soak time by almost 300%, and the cases still weren’t clean enough, the Birchwood Casey cleaner was set aside as well.
Old-Fashioned White Vinegar (with Soap) Works the Best
Now we get to the good stuff. I was desperately hoping vinegar would prove useful and justify the time and money spent on this project. It was now down to the least expensive solution I had. Dish soap had also been mentioned in the forums, so I decided to incorporate it as well. My first trial used full strength vinegar with a drop of soap, and a cycle similar to the others. This showed promise, giving a perfectly clean case, but turned the cases a dark patina once again. I also tried a 50% solution of vinegar and it gave the same results, so there was no need to use it full strength. Fifty percent white vinegar was the best solution yet, so I decided to stick with it and tweak it for the best and fastest results.
The Mad Chemist Needs A Neutralizing Agent
At this point the brass was coming out with no carbon deposits whatsoever, but I wasn’t happy with the darkening of the brass so I figured a neutralization step was needed after the vinegar to stop the acid’s reaction. A water rinse was fine with the acidic BC case cleaner, but not sufficient with vinegar. Baking soda (BS) seemed like the easiest and most readily available option to neutralize the reaction. The BS was simply dissolved in water in the proportion shown below. I went through nearly a dozen runs to come up with the best combination of vinegar, dish soap and baking soda.
ULTRASONIC CLEANING — Baney’s Best Recipes
My ultimate solution resulted in shiny brass that was 100% devoid of carbon, inside and out. Even the carbon deposits on the neck and the primer pockets were completely removed! My objective had been accomplished! Dirty old black brass came out like new inside and out…I was amazed. Not only did my protocol work well, but it was the least expensive option in the whole test! For “Cheap and Clean,” this is the procedure I settled on:
CHEAP and CLEAN
24 minutes – 50% Vinegar + 1 Drop Dish Soap per 8 ounces water
480 seconds – Baking Soda (BS) in water (1 grain BS per ounce of water)
480 seconds – Hot Water
480 seconds – Distilled Water
Total: 48 minutes
Cost: Less than $2.00 per gallon
And for a Super Shiny and FASTER End Result, Add BC Solution
Since the BC solution had worked so well to shine up the cases earlier, I attempted to work it in with the vinegar procedure to streamline it even more and give even better looking brass. So for a couple dollars more, you can have 100% clean cases, which are even shinier than the “Cheap and Clean” procedure above. So this procedure I’ll call “Clean and Shiny.”
CLEAN and SHINY
24 minutes – 50% Vinegar + 1 Drop Dish Soap per 8 ounces water
380 seconds – Birchwood Casey (BC) Case Cleaner
380 seconds – Hot Water
380 seconds – Distilled Water
Total: 43 minutes
Cost: $2.00 per gallon for the Vinegar and $4.00 per gallon for BC Cleaner.
This “Clean and Shiny” procedure gave me the best combination of carbon removal, case luster, speed, and economy. The “Clean and Shiny” regimen also eliminates the neutralization step, as the BC cleaner acts as a neutralizer. Even though it contains a few acids, they must rinse off more readily than vinegar. Regular household vinegar is 5% acetic acid (2.5% when diluted) and the BC cleaner contains 3 different acids, one of which is phosphoric (the same found in pepsi). It starts at over 50% acid as a concentrate, and a little over 3% when diluted.
Case Care Following Ultrasonic Cleaning
After removing the cases from the final distilled water rinse, I simply blow them out with compressed air and lay them on a paper towel to dry overnight. A hair dryer works well too, especially if you get the air in the case mouth. In the morning you have clean, shiny dry brass ready to size. If you have no air compressor, simply whip them around by hand a few times to force any water drops out of the case mouth. Then lay them on a paper towel to dry overnight.
--------------------------------------------------------------------------------
CONCLUSION–It Was Well Worth the Effort
Though I wasted some money on solutions that performed poorly, I am happy with the results so it was worth it. I never thought I would be able to make dirty, fired brass look like new again!
I’ve now processed many 308s and some 8X 6.5-284 cases using the “Cheap and Clean” process, and I’m very satisfied with the fact that I can almost see my reflection inside the case! Believe it or not, there was no physical work involved in cleaning the cases, just the right solutions and a bit of time in the Ultrasonic. So, quit wasting your time with vibratory tumblers or manual labor and try my protocol with an ultrasonic unit of your choice.
WARNING: The unit makes a noise that is not real friendly to your ears, so make sure to run it in a place that wont annoy the others in your household. It isn’t loud, just annoying–but no more annoying that a running tumbler!
Support Our
SPONSORS
Looks great. Now did u disolve the baking soda in the water before you added it? My brass came out green so I put it back in with 50/50 vinegar and water and it went back to normal. I then just rinsed in a colander. Didnt come out like yours though.Bad pics, but you get the idea. Excellent looking brass, quick and easy.
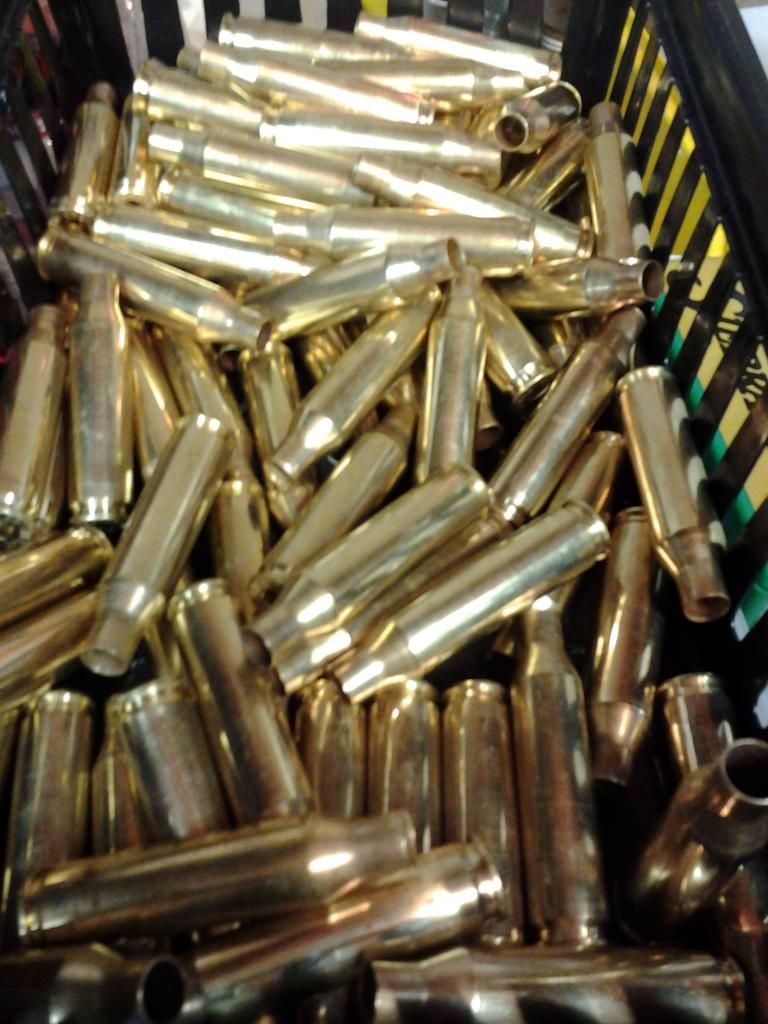
Random sampling. Can see some minor carbon in the batch that was overloaded.Still overall excellent by my standards.
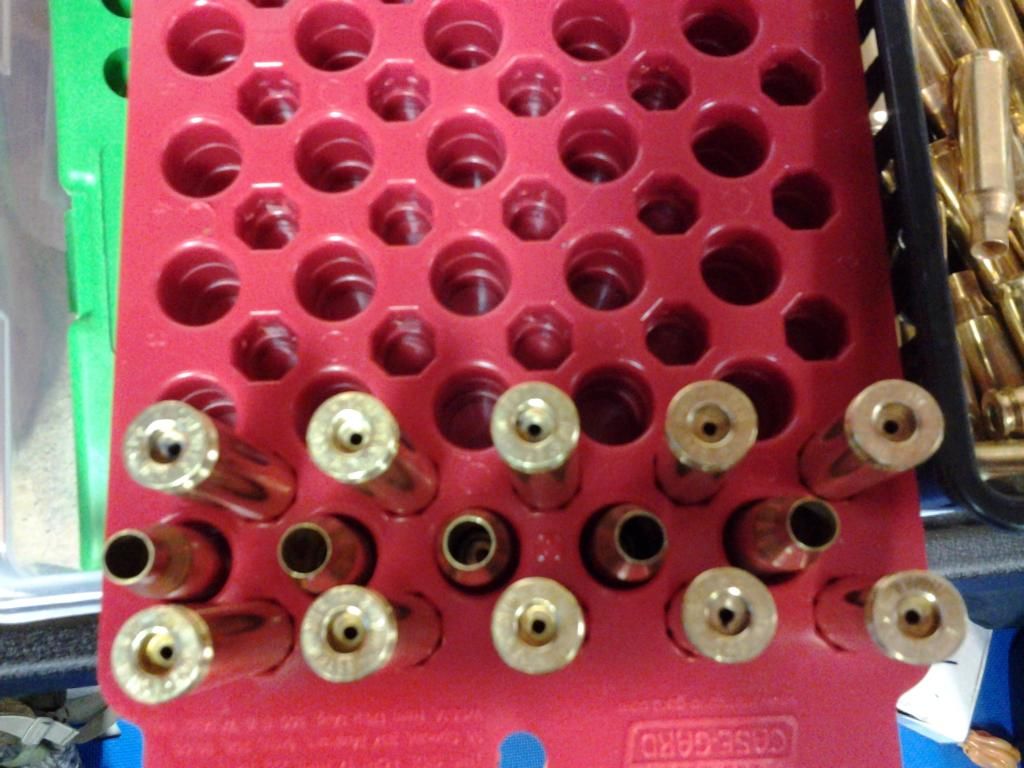
About how much bs?You have to neutralize the vinegar with the BS. Try a touch of lemishine?
Sent from my mind via apathy.
I won a hornady unit and it doesn't work at all for me.
Similar threads
- Replies
- 10
- Views
- 1K
- Replies
- 2
- Views
- 652