• Watch Out for Scammers!

    We've now added a color code for all accounts. Orange accounts are new members, Blue are full members, and Green are Supporters. If you get a message about a sale from an orange account, make sure you pay attention before sending any money!

Gunsmithing How strong should a silver-solder joint be?

Gene Poole

Sergeant
Full Member
Minuteman
Nov 24, 2011
624
40
Brighton, IL
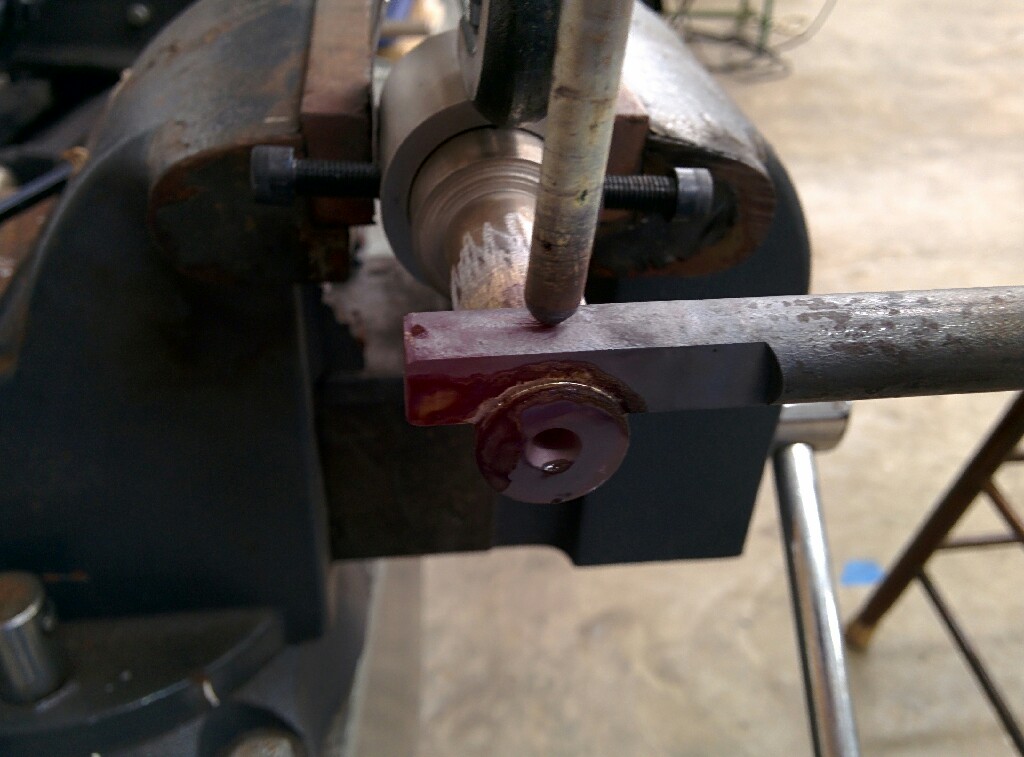
I've probably burned up $100 worth of solder practicing to do a bolt handle (Stock R700 bolt with a Kiff handle). I machined out a mock bold body and handle to practice. I've gotten to the point where I get what i think is good flow and good overall contact.

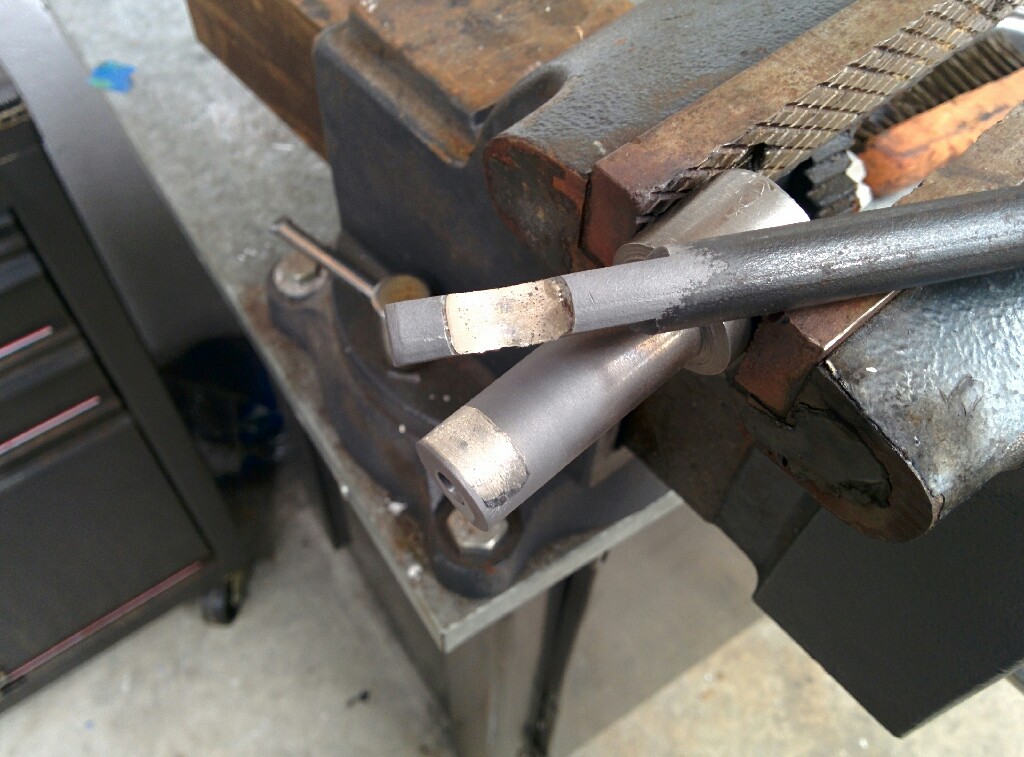
I check my work by whacking the mock handle with a 20 oz. ball peen hammer to break it off. I don't know how strong a properly soldered handle should be. With the mock bolt in a vise, I can yank on it with all my strength and it won't budge. I even whacked it lightly with a wooden mallet (I've seen people at the range clear stuck cases that way before) and it seems pretty secure. The ball peen hammer knocks it right off though and I don't know if this is normal for a solder joint or an indication of poor adhesion or what.

Any insight?

Edit: using Brownells Silvaloy 355 and Brownells flux and a lazy oxy-acetylene flame.
 
Last edited:
In school an exercise was to solder two 3/8" square x1" cold rolled bars together. To test the joint, clamp one in a vise and try to pry the exposed one off with vise grips. If it seemed impossible, take a hammer to it. Surprising how strong that stuff is when done right.

Some things to consider. A perfect mating of the two parts is a must. (the solder itself is weak in thickness) If you have daylight between them it won't be a strong joint. If at all possible, avoid applying the torch to the flux and solder. I used to put a heat sink in the bolt body because it seemed to be the right thing to do. Makes more come off than stay on. I now heat from the inside of the bolt and just heat sink the head and lugs. I don't know or care about chemistry enough to find if the gases affect the solder but I think it does.

Don't get it any hotter than you have to.

If you end up with the handle/ parts improperly located, don't try to heat and move. Just separate, clean up and start over. Hope this helps;-)

The ribbon is your friend on bolt handles
 
Last edited:
I'm a little worried about what appear to be bubbles in the solder joint after I bust it open. I think it is probably from the flux boiling so maybe I'm using too much flux. You can see where it oozed out of the joint in the first photo. The second is after cleaning and breaking it open with a sharp blow from a ball peen hammer.

IMG_20140414_192334.jpg


IMG_20140414_194541.jpg
 
My Father was very good with SS. Not me, but he told me to be carefull with the flux, can't have to much. Heat till the flux is dry then wait for it to turn clear and melt then add SS if you go past that and dry or burn the flux you start over. Don't heat more than is needed. Boil in hot water to remove flux.
 
My father was an HVAC tech and could do wonders with copper/brass/etc tubing. He always liked Sil-Fos solder that needed no flux, and used an ancient acetylene/air torch. He made it look easy. I'm sure Sil-Fos is ideal for tubing on A/C units, but I doubt it's of any use for gunsmithing.
 
I'm a little worried about what appear to be bubbles in the solder joint after I bust it open. I think it is probably from the flux boiling so maybe I'm using too much flux. You can see where it oozed out of the joint in the first photo. The second is after cleaning and breaking it open with a sharp blow from a ball peen hammer.

Nice to see you ignored my post. Don't really care but I'm just trying to help you. The radius cut in the "handle" Is too big. Note the thickness of the solder on the ends. Has to be at least .020". I can't tell you why but it makes a huge diff. Bubbles aren't good but I wouldn't worry about what you have. Try drilling a hole in the "body" and heating from the inside like I suggested.
 
Gene, Hopefully an expert will weigh in here.

We silver soldered seamless pipe into a barrel nut to make float-tubes for Highpower AR-15 builds at Lassen CC GS summer classes. The pieces need to be a really close fit. We used a couple of 1/4" square x 1mm thick pieces for the joint. It looks like you have 1-1.5mm thick silver on that piece you put together -way too much solder. And it looks like way too much heat, the steel doesn't need to be red hot. Put a small amount of solder in there so it holds the pieces apart, then heat the whole thing until the solder melts and the pieces move together. That's it. Keep trying.

Well, it is a practice piece. I cut the slot with a 3/4 mill bit and the dowel is 0.700. The actual pieces (PTG Handle and Rem bolt) fit very tight. I tried with a piece of solder foil in the joint but as the solder started to flow, it lost tension in the jig and the handle rotated a few degrees (not good if it were a real part). I may need to reconsider my setup and build a different jig with a spring loaded post to hold everything in place.

This is my first ever foray into silver soldering and I'm learning a lot. Thanks to all for the help.
 
Know what works great for fitting up a handle?

Parts!

1. Get an old shroud. Buzz the threads off it so that it just falls into the ass of the bolt.
2. Get the actual receiver your bolt belongs to.
3. Get the bolt
4. Get the handle
5. 1/4-28 screw with a T handle welded to it
6. Vice grips (I like the smaller needle nose kind)
7. Hot wrench (torch)
8. Flux
9. Silver solder foil/shim stock

Step one:

Slide the bolt into the action and rotate into "approximate" battery.

Step two:

Slide the setup shroud into the back of the bolt. Press on the shroud so that the two flats marry up flat against the raceway of the receiver.

Step three:

Now rotate the bolt till the cocking ramp indexes perfectly with the shroud. Make sure you keep finger pressure on the bolt face so that the lugs are seated against the lug abutments of the action. This is VERY IMPORTANT

Step four:

Lock the bolt into position with the 1/4-28 screw going through the front action screw hole. (take a moment and polish the head of the screw before hand so that it doesn't mark up the bolt when you lock it down)

Step five:

Lay your handle onto the bolt body. Ensure the handle is seated firmly against the action both in rotation position and against the back side of the rear bridge (more on this in a second)

Step Six:

With a pair of "scientifically modified vice grips" clamp the handle onto the bolt body across with tallest part of the handle (the lump/root of the handle) and the inside of the bolt body. -Scientifically modified means you took a brand new pair of VG's to the belt sander and polished a radius on the side that grabs the bolt body and a flat (no teeth!) on the opposing jaw. This way the thing doesn't mark stuff up and it stays put. Think about what your doing, as it's easy to screw it up. -Better buy a few pairs of VG's if your grinderfoo' needs dojo training.

Step seven:

Loosen the 1/4-28 screw and attempt to run the bolt. If your lucky/good the thing will rotate and you'll have all the p;rimary extraction the lowly M700 is capable of. If your bad it won't have hardly any. Or it'll be too tight and it won't unlock.

Step 8:

If you screwed it up (meaning you will/did) go back to step four and start over

Step 9:

Once you get it and it feels right rotate back into battery and lock the screw down again. Now cut/trim your solder shim and stick it between the handle and bolt. Clamp it up again and double check to make sure nothing moved. So long as your careful it should repeat.

Step 10:

Slather on the flux and burn them biches together. AIR COOL only. NEVER quench a soldered joint in water. It can fracture the joint.

EDIT: -Probably best to remove the bolt at this point PRIOR to soldering. :)

Step 11:

Laugh at how simple it is to do once you get a feel for it and continue giggling as you look at how overly complicated the exotic fixtures are.

I've done over a thousand bolts this very way.

Good luck and hope this helps.

C.
 
Last edited:
Thanks for posting that Chad. I read a post of yours from maybe years ago where you mentioned the vice grips thing and I searched for it but couldn't find it. Time to order some bolt shrouds.
 
Been using a method similar to what Chad mentioned for mine for several years now. I've only done a handful of them , but the small vise grip thing does work well. Guess I'm not all that original. Laffin.

Can't say I've tried to solder one, tho.
 
I made a jig similar in use to what Chad suggested, other than I have a "cantilever" with a set screw the jams the handle tight against the bolt body.
 
Gene,
I've got 2 full firing pin/shroud combos with the old J-lock you can have if you'd like, and if they'd work. Just cover the shipping.
 
Chad,

Do you de-grease or any other rituals before putting the solder in the joint?