No need to take it personal. I really don't care if everybody used ball point pen springs. I wouldn't because I know better.
Having 3K in ammo down the barrel doesn't ensure that the gun is safe. The company that I worked for, the largest automotive tool supplier in North America, designed, built and sold Ford Motor company 6 lifters to raise 8000 pound tools and they worked fine for a couple months until one of them broke and dropped one of those tools.
After doing one calculation on the idler shaft It was clear that our company blew the shaft. The allowable deflection over four feet should have been .040" It's actual deflection was .125" In the calculation I dismissed the two 3/4" keyways and the Von Mises stress concentration that would have been created by the sharp corners while machining the keyways. Meaning they blew it even worse.....
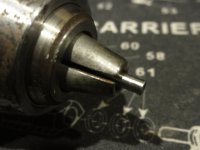
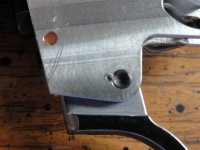
The trigger was designed and built to company standards. That meant a designer modeled it up on the computer, proto-typed it and then it was tested. After passing certain criteria it was deemed as safe enough for it's intended use by that particular company or standards that that company must adhere to by some governing board.
If I had doubts about my ability to make safe judgements about my own guns I would not alter them. My alterations are always made in such a way that I can put them back to factory specs. I also would not rock climb, scuba dive, hang-glide or have gotten my LSA rating for airplanes.
If it sound like I think my judgement is superior to most other people when it comes to mechanical crap.... I do.
My title at work was design / check the top of the food chain. I am the guy that keeps stuff from crashing down on you.
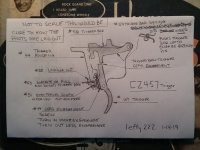
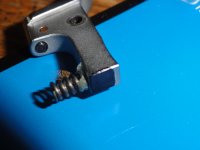
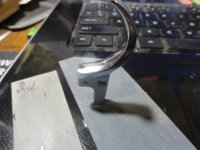
Ultimately all I really was doing was offering an alternative to the ball point pen spring. And I don't recall suggesting that mine could somehow be safer due to a different spring. That would be ridiculous. It's a spring......
On a side note... every time I see someone talk about springs and their rate I cant help but feel they are being a little pretentious but I just chuckle to myself.
Shawn
Comau LLC
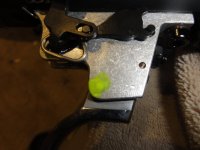
Fair enough but we are discussing making modifications to a trigger by a couple of kitchen table gunsmiths. In my case, the pen spring worked perfectly and has for a half dozen bricks of 22LR.
Is modifying any trigger outside of how it came from the factory safe?
To suggest that you are above all this is a bit pretentious considering the advice that you are offering is to the same audience.
Triggers are never to be trusted under any circumstance, and to suggest that yours are safer than another is pretty ridiculous