• Watch Out for Scammers!

    We've now added a color code for all accounts. Orange accounts are new members, Blue are full members, and Green are Supporters. If you get a message about a sale from an orange account, make sure you pay attention before sending any money!

Maggie’s Machining and woodworking for guns

scasa

Private
Full Member
Minuteman
May 27, 2010
69
182
70
Emporia Ks
I've got a lot of projects going on from refurbishing old guns, making new ones and other gun related stuff. I thought I'd put up some pics to share and maybe other people would put up some of their work also. Feel free to join in.
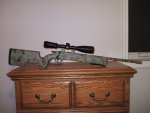
I bought an old 1022 for a project ABRA gun to see if I could make it shoot. I threaded the barrel hole and made a rear lug for the action but then it needed a new stock . I've shot it and its about 1/2 inch at 50 yds . Not really happy with that barrel so I turned and chambered a new one. I haven't shot it yet but that old barrel wouldn't shoot on my bench gun either.
I've got a couple of rimfire actions I've been working on since before I moved back to kansas so I got them out the other day and worked on them for a couple of days. There left bolt ,left port, right eject for pistols. one .22 and the other .17 hm2. I had to make the triggers for them so that's been the last 2 days.
DSCF1279.JPG
DSCF1298.JPG
DSCF1284.JPG
DSCF1290.JPG
 
Bowling lane on Shag carpet.............................................could be a thing...............gun stock i mean............................oh way too many Balfour spirits ......
 
  • Haha
Reactions: Sean the Nailer
Bowling lane ? Naw just some scraps I had, Probably left over from this one. 1022 stock is a pain to make ,this one only touches on the bedding points front and rear and no touching on the sides
 

Attachments

  • DSCF1302.JPG
    DSCF1302.JPG
    412.7 KB · Views: 334
  • Like
Reactions: Sean the Nailer
I now have two triggers almost finished still need to match to the sears after I get things a little more put together and final fitted. Once I get them in stocks I'll drill the triggers to match the bolt handles. There adjustable for sear engagement over travel and pull weight hopefully in the low ounce range.
DSCF1306.JPG
 
I haven't had to go to work in 16 days now so I've been trying to get these two pistols somewhat completed. I've also realized that the next ones I do I'll use savage extractors , cartridge guides and retainer springs. what a pain to make ,whole lot easier to machine the bolt nose like a savage and use factory parts . I've got one of the actions trigger fitted and functioning But it looks too tall for the look I'm going for. I'll see if I can shorten it about 1/4 inch or so that will help. I'm thinking aluminum stocks with AR pistol grips.
I've got another project I started a long time ago it was going to be a .17 hmr . I bought some raw forgings for AR 15's one lower and two uppers . Out of that I made a semi auto .17 hmr and a single shot bolt action in .17 hmr. I've scrapped the semi auto although it worked just fine ,most of the cases were bulged in the back and I wasn't happy with it. The bolt action has sat around for about 8 years now while I tried to figure out what kind of paint to put on it. last summer I got it out and re-chambered it in .17 WSM. Thats a pretty impressive rimfire! Still no paint though. I've finally decided I'd learn how to anodize aluminum and get some of these projects done. The guy that developed the LCD anodizing method for caswell plating was a member on another gun forum before he died and I have copies of his notes and his book outlining the prosess. He also developed what he called the sput welder for attaching aluminum wires to the part being anodized. they were being sold on the forum but I wasn't able to get one . I did however figure out how they worked and made a capacitor discharge welder that does the same thing. So I guess I'm going to learn to anodize and put some color in some projects.
Anyway here are some pics to entertain you for reading all that rambling
DSCF1319.JPG
DSCF1322.JPG
DSCF1325.JPG
DSCF1331.JPG
 
It seems like I've been working pretty hard but not a lot to show for it. I've cut a stainless barrel blank down to 16.5 inches and profiled it for the .17 cal pistol, threaded it and have it ready to chamber in the morning . That pretty much took all day. That and keeping the cat out of the chips. I've got an excell file that figures the math on threading just put in the diameter and tpi and it figures the rest including infeed at 29.5 degrees . The goo on the threads is copper anti seze .(stainless barrel and action)
If you look close in the pic with the threads you can see a tooling ball glued to the tool post in a washer, that is my center for pushing the reamer. It's centered on the barrel hole and cranked up tight till it sets. wecsog engineering at it's finest.
DSCF1334.JPG
DSCF1339.JPG
DSCF1340.JPG
 
Thanks for the complement.
sirhrmechanic
Although I don't post much I do read a lot of the forum, both those areas included. the forum has changed a lot in the 10 years I've been a member. I've learned a lot in my time here and furthered my education in long range shooting. Rimfire Benchrest is still my main interest. I don't compete as there is nothing in this part of the country but I did shoot one match when I lived in Tx with my homemade gun.

Got my barrel chambered and crowned and those pesky extractor slots cut, headspaced at 43.5 and samded out the tracks from the steady rest. I used my air powered milling head on the cross slide to cut the extractor slots ,I'll have to final them out with a jewlers file on the bench but it wont take much. Last pic is action and barrel together and a round for scale 22.5 in long . Gonna be a heck of a pistol.
DSCF1347.JPG
DSCF1346.JPG
DSCF1348.JPG
DSCF1351.JPG
 
The indexing disk is a 10 inch saw blade I cut the teeth off and made the 1 1/2 hole in it with the milling cutter. My chuck screws on and the disk is sandwiched in between the chuck and headstock spindle. I made a frame around the upper housing with angle iron for the little spring loaded plunger to mount on and also the 90 to 1 gearbox that mounts to the back of the spindle so you can rotate the spindle with some control while your milling something in the chuck. The clamp allows you to lock the disk when your milling back and forth. The milling head is an air powered die grinder with a planatary gear reduction max speed is about 2500 rpm . It's belt drive to the arbor that holds the tool bit. I have different arbors for different sized bits shanks. I bored the housing on the lathe so it's for the most part on the centerline. I can raise it up with assorted shims just cant go down. Its not perfect but it's better than nothing and has allowed me make a lot of cool stuff. I used it to cut the lug abutments from the front for my little centerfire action ( full diameter bolt so only had to cut the front) I can flute if its not too long ,bolts and such. It aint no CNC but I didn't have to learn how to write code.
DSCF1352.JPG
DSCF1354.JPG
DSCF1353.JPG
 
The last part to make to have a complete action is the loading ramp/ejector . I started with a piece of 3/4 drill rod and turned it down to the diameter of the bolt. I also had to make a jig to hold it while milling away the unwanted part That was a sleeve that the bolt would just slide into with 3 flats milled onto the sides. The loading ramp is held into the action with a small machine screw through the bottom and into the jig the same way most of the front of the jig was milled away to allow access to the part and I finally got a good part on the fourth try. the whole part is 2 inches long 9/16 wide the ejector is .055 wide and .090 tall.
DSCF1360.JPG
DSCF1363.JPG
 
IMG_9514.JPG


Made a few sets of some stabby bi-pod feet for some of my friends and my long guns. This was the first prototype. Made them all out of 416R stainless (lots of scrap pieces to use up) and heat treated them to 42R.

The remaining sets came out better since I didn't heat treat these but hey they are still going 3 years later and a bunch of abuse.
 
I was fortunate enough to get a box of barrel rejects from a well known barrel maker for the cost of shipping .I've made a lot of stuff out of them. My two rimfire actions are made from 416 stainless 50 cal. rifle barrels.
I made a jig to hold the firing pins so I could grind the tips on them. I popped a primer in the mach 2 the other night but I need more firing pin spring. I'll be making a spring guide rod today so I can cram more spring in there.
DSCF1366.JPG
 
I hate talented people!? Really impressive guys! Dam!
 
Decoy ,
thanks but I'm pretty well stocked
Seed tick ,Thanks

I've got a few more things done, the guide rod for the firing pin spring really helped and now have a good heavy pin strike.The barrel for the .22 LR action started as a green mountain gunsmith edition blank, finished on the inside just bar stock on the outside 21 in long and a tad over an inch on the outside in stainless. As usual there was some chatter and turning it down took all day to get it to a nice finish. Looks good on the outside but require lapping on the inside if its ever going to shoot well. The way I left it larger at the breech end caused it to be tight on the breech end and more loose at the muzzle. That wont work on a rimfire .22 it's got to be the other way around so it will get lapped to fix it .
the last thing done was to start getting the .22 action final finished. There is a lot of detail work to do such as lapping the cocking cams and bolt lugs, stoning out file marks and polishing . The loading port will need to be enlarged also . The right side eject works perfect on the mach2 action so that's a relief.
DSCF1371.JPG
DSCF1372.JPG
DSCF1374.JPG
 
  • Like
Reactions: camocorvette
Well I've got my barrel lapped and with the help of my new teslong borescope was actually able to view the inside of the barrel. Lapping a barrel is pretty strenuous, takes a lot of pull to pull those laps coated with abrasive through and since the tightest part was at the breech I couldn't get a run at it . Just short stroking to get it started and get the first couple inches opened up. After it was pretty uniform all the way through but still tight on the muzzle the last 30 strokes were pulled all the way through from breech to out the muzzle . Slugging it felt constitant to just tightning at about 3/4 inch from the end. I'll cut off about 1/2 inch and crown it there.
There is some distortion in the pics and it showed up with both cameras but was better with the phone. the first pic is unlapped barrel showing factory finish . The others are lapped finish. These pics were taken on a 42 inch monitor so they show everything.
Picture 004.jpg
Picture 003.jpg
Picture 001.jpg
 
Had to go back to work the last two weeks and most everything I've done has been a repeat of the .17 cal action so really not much new to show. I do now have two barreled actions to show for all my hard work. Both have been test fired and will get the final polish after the stocks are made. I wont have material till the middle of next month when I go to the Yard in Wichita. Anyway here's what they look like today.
DSCF1393.JPG
 
Started on another project yesterday, got this old shotgun when I bought all the junkers before the LGS closed down. Nothing fancy just a bolt action mossberg has the mag but no bolt ,ported barrel and adjustable choke and while digging in the junk box found a reciever and bolt for the same gun. The bolt didn't have the guts in it but at least it was a start. I have my grandfathers old bolt action mossberg so I pulled the bolt apart and made a copy of the missing parts. There were a lot of variations on these old guns . My bolt has the ball detent in it and the gun I bought has the hole for it . On my grandpas gun the bolt shroud is held in with a small screw .I have no idea how this one was held in place but it now has a screw. The original had a two piece firing pin/striker assembly that was loose to allow it to swivel , mine is two piece with the pin loctited in the striker. My firing pin is made from a piece of stainless car antenna, the solid kind. Everything else is made from drill rod.
DSCF1397.JPG
DSCF1395.JPG
DSCF1398.JPG
 
Well I'm still off work so it's time for more gun projects. I got out my space gun and started refining all the parts on it. It started out as 0% forgings and I've just machined away as I needed as I went along . There was no plans ,it's design on the fly. Although it sorta worked It still needed some refining to smooth things out and a trigger guard and takedown pins. there was a lot of filing and sanding to get rid of tool marks where I cut the extra parts off the forgings that I didn't need. I also bead blasted them to see how they looked.
The action fits inside the upper forging and the float tube nut holds it in place there is also an alignment pin to make sure it's in straight. The bolt handle threads into the bolt body and you have to remove the handle to get the bolt out. This a front locking 3 lug action ,once I figured how to make a two lug I just had to make a 3. The firing pin has a return spring and also serves as the ejector. The plug in the back with the screw in it is the plunger that pushes the firing pin in to eject the empty. The action is a simple push feed but needed a little ramp in the bottom lug to keep the round centered and it's angled down at the back. It took some fiddling with it to get it to feed right but after a little radius on the back of the chamber ,a chamber polish and a bolt nose polish it feeds ok.. The rotation of the bolt cocks the hammer and also keeps it from firing unless the bolt is closed all the way. I've trimmed the hammer quite a bit because it rides on the bottom of the bolt. still have some more to do but its pretty close. Between that and tweeking the hammer spring to get just enough firing pin hit for good ignition I think it will be ok. No need for a disconector so I left that out and I threaded the hole for the grip screw all the way through so I can use a set screw to adjust the sear engagement.
I test fired it yesterday and noticed the case heads were slightly bulged which looked like too much headspace but it was exactally on spec .066. The firing pin indention was also pushed out making it look like a very shallow strike. I decided to reset the headspace to .002 crush fit and try that. That worked a lot better. Firm bolt handle on close and good igniting.
Picture 017.jpg
Picture 016.jpg
Picture 014.jpg
Picture 013.jpg
Picture 011.jpg
Picture 010.jpg
Picture 008.jpg
Picture 005.jpg
Picture 005.jpg
Picture 003.jpg
Picture 003.jpg
Picture 002.jpg
 
Time to switch projects for a while while waiting for parts and supplies.
I've got a firearms development corp action in ppc that I put a bushing in the bolt for .223 . Three years ago for christmas I got a barrel and a trigger so that's the current project. This action is 1.450 in dia. and my barrel is 1.2 . It's the same size as the thread relief in the front of the action . It wont work for a shouldered barrel so it will be a barrel nut system. I turned the barrel down to 1.00 and threaded 16 tpi then I made a long barrel nut so it didn't look so skinny. I thought I might play around with a barrel tuner so I threaded the front .880x32 for one. For a stock I've had this walnut laminated blank for probably 30 years time to use it. It was in a leaky trailer in a bucket full of water for several months , I'll see if I can make something out of it. Made some cutters to do the inletting with out of paddle bits. They work pretty good but the junction between action and barrel I had to do by hand. Drilled holes for action screws while in the mill they fit perfect . Thats not how it usually works. With the action in the stock and partially bedded I started with a rough drawing that sort of resembled a stock, cut it out on the bandsaw and started in on it with body shop tools and drum sanders. two days later this is what it looks like
Picture 010.jpg
Picture 008.jpg
Picture 005.jpg
Picture 006.jpg
Picture 007.jpg
Picture 002.jpg
Picture 012.jpg
 
Well the bedding is finally done. The first time it had some bubbles in it so I redid it . Much better this time.
Picture 015.jpg
Picture 015.jpg


Now I need a trigger guard to finish out the bottom of the stock. I kinda took the long way around. Milled a piece of 3/4 stock down to 5/8 then cut the hole out of the middle
Picture 019.jpg


With the hole the right size I stood it upright and narrowed the loop to .400 with a ball mill stopping just short of the part that is inletted into the stock. Just enough to final finish when it's installed.
Picture 018.jpg


There is no back part on the trigger guard because of the rear action screw access. There is two screws in the front and the rest just hangs there.
Picture 014.jpg


It still needs some more trimmed off the back, contoured to the stock and kinda round everything off a little but it's almost done.
Picture 017.jpg
 
False alarm not going back to work yet. Oh well I've got plenty to do here and since it's muddy it's back to the shop for more gun projects.
I made a barrel nut wrench for my oddball barrel nut and gave the nut a final trim and polish,
Picture 023.jpg
trimmed a little off the front of the tuner ,recut the angle and put the index marks on it. Their both ready to blue now. The last tool I need is an action wrench not really a wrench as much as a way to hold for tightning the barrel nut
Picture 024.jpg

yes that's an end mill I'm using for a boring bar.
Final sanded the stock and stained it this morning .First coat of poly on it now.
Picture 022.jpg
 
False alarm not going back to work yet. Oh well I've got plenty to do here and since it's muddy it's back to the shop for more gun projects.
I made a barrel nut wrench for my oddball barrel nut and gave the nut a final trim and polish, View attachment 7280585trimmed a little off the front of the tuner ,recut the angle and put the index marks on it. Their both ready to blue now. The last tool I need is an action wrench not really a wrench as much as a way to hold for tightning the barrel nutView attachment 7280587
yes that's an end mill I'm using for a boring bar.
Final sanded the stock and stained it this morning .First coat of poly on it now.View attachment 7280590
Using an end mill for a boring bar is an old machinists trick and it works slicker than goose doo doo on linoleum!

Nice to see some of the old machinists hacks here!!

Sirhr
 
  • Like
Reactions: Barneybdb
Sure jump right in .I've made a couple of powder horns a long time ago. take lots of pics and details on the scrimshaw
 
Been working on pistol stocks for the bolt action pistols These started as a 3 3/4 x 1 1/4 block of aluminum 7 pounds 4 ounces there now under 3 pounds. I did the inletting for the actions with a paddle bit ground to the proper radius and for the barrels the same way. Took a long time as I had to keep the cuts pretty light. They came out ok though. They got narrowed up today and the area for the AR-15 grip started. Still have a lot of material to remove But were getting there.
Picture 025.jpg
IMG_0130.jpg
Picture 033.jpg
Picture 030.jpg
Picture 031.jpg

The cycle time for narrowing the sides was 5.5 hours per stock . I've lost track of how long it took to inlet for the actions but it was a long time.
 
Kind of a 'big' gun... but the pivot pin for the breech on this wall-cannon was definitely loose.

So turning a new pin out of stainless bar.

Three steps in the pin to take the upper and lower hinge (which is fixed with a pin) and the breech which pivots. I'll ream the bottom hole (it's a bit undersized) and pin hone the breech pivot to bet everything moving just right tomorrow. But the pin is done, basically.


pin1.jpg


This is the pivoting part of the breech. It's been 'hogged out' in to a taper which is 1.012" at the top and 1.005" at the bottom. A few minutes on the in hone and I should be able to open up to 1.016" which will give a thou clearance on the pin. The groove at the bottom is where I will slice the pin off the bar.
pin2.jpg


Here is the pin fitted into the two trunnions. It slides into the top fine. But the bottom is a hair oversized. Tomorrow it will go in a collet and the bottom will be made to fit with minimal clearance. The bottom has a bolt on it (i'll weld that in) and locks the pin into the trunnions.

pin3.jpg


This is a very fun restoration. Hoping that it will take off the shelf US 75MM shells. It's close. Very close!

Seems strange to be going to .001" on things that weight half a ton. But, it's the English Way!

Cheers,

SIrhr
 
Cool project. How the heck do you work with something that heavy? How much of a restoration are you going to do as far as clean up repair the edges and corners and polish?
 
Cool project. How the heck do you work with something that heavy? How much of a restoration are you going to do as far as clean up repair the edges and corners and polish?
Overhead chain falls... tractor forks... 500lb winch that mounts on lathe and mill. V-blocks with oiled steel bars on them to allow rotation on cart/bench. Lots of ways. Just don’t drop on foot!

3E8981F5-1D73-4812-A759-21D8ABEA7BE0.jpeg
E7BA1ED6-9DE1-454E-9FA1-49FCA5526A53.jpeg

This tube will have its trunnions smoothed, complete polish on barrel. Breech completely dismantled and rebuilt.

Simple mechanisms, but tolerance is everything!

sirhr
 
View attachment 7288799

Not sure if this counts... but any of you guys Horners?

One of three horns I made today. Tomorrow I'll polish and scrimshaw.

Cheers,

Sirhr
I have built several, my own and for my hunting buddies. I have to see if I can find the photos
I found these, my main horn. Copied from a horn I saw in the Fort Ticonderoga Museum.
DSC_0145 (2).JPG
DSC_0147.JPG
 
Last edited:
Sirhr Is there a liner in that bore? Are you going to shoot that thing? Dang I need a cannon.
 
Well the weather has been pretty nice lately so I've had farm chores to do, spraying pasture for weeds, trimming trees and cutting the tornado damaged trees out of the creek. I've had a little time in the mornings to get a few things done.
I scored a reamer on accurate shooter and got the barrel chambered for the .223 project. I'm always concerned with a fixed pilot reamer about the pilot to barrel fit, this was perfect so I set up my redneck chambering rig and went for it.
Picture 040.jpg

I'm really happy with the way it came out. Haven't got the borescope in it yet but the base area looks really good
Picture 039.jpg

The stencils came in for marking the barrel so after figuring out the position stuck the stencil on and bead blasted the caliber on the barrel. I blued over it when I blued the barrel but it still shows up pretty good
Picture 038.jpg

Made some progress on the pistols too ,getting the stocks cut for these grips and the rear contured to blend it all together took a lot of figuring but finally got something that looks pretty decent.
Picture 034.jpg

I'll anodize the stocks red and blue but that will probably be fall before I have time to do that
Picture 036.jpg

hopefully I can get a couple more scopes by then
Picture 035.jpg
 
Very nice, I wish that I had the skills to do things like that.


Finished the breech today and fitted. Ended up being about four hours with Swiss files, stones, shims (to center the breech block) and, finally lapping compound. Now 45 pounds of interrupted screw breech closes with a nice snick... and locks like a vault door with simple finger pressure.

Victorian quality deserves to be made perfect again!

B73F0FAF-1C1E-4B4F-B98F-5581E3AC1ADB.jpeg

Also Deserves a nice period-correct rampart which will have a full recoil system... thank god for plasma cutter on this one!

cheers, Sirhr
 
Last edited:


Finished the breech today and fitted. Ended up being about four hours with Swiss files, stones, shims (to center the breech block) and, finally lapping compound. Now 45 pounds of interrupted screw breech closes with a nice snick... and locks like a vault door with simple finger pressure.

Victorian quality deserves to be made perfect again!

View attachment 7298043
Also Deserves a nice period-correct rampart which will have a full recoil system... thank god for plasma cutter on this one!

cheers, Sirhr


Sweet........well done......