

This post is way long in coming (as in nearly 2 years) and hopefully someone else besides me can use it – whether for sale or personal use - as I’m NOT looking for any remuneration for my effort. Thus, I’m making this “open source” and any reader of this post is free to use this design as they see fit and may directly contact me for the .stl CAD file and have it modified/3D printed accordingly. I’m not a machinist,professional designer or entrepreneur. Just like you, looking for an improved way….
I stand 6’4” with a giraffe long neck, sleeve length of 37” and have a length of pull at the far end of the spectrum – nearly every long gun I’ve ever owned has required buttstock spacers beyond the norm (you name it: Clays/Skeet, AR, precision rifles, etc). Both my Sako TRG 22 and 42 used the awesome custom buttstock and cheek riser spacers designed and produced by Hide shooter Terje Andre Fjørtoft. When I recently had my GA precision Templar II action re-barreled by TS Customs and fitted to an MPA stock, the first thing I noted was that the MPA OEM aluminum cheek piece could barely be dialed up high enough for an acceptable scope sight picture. Please note it’s not the gear, it’s my anatomy.
I initially contacted MPA about my need to raise the cheek piece at the upper limit of/even more than the OEM assembly. They were VERY helpful and sent me a solution (sort of) that uses a longer threaded screw and longer riser pins. The problem was that the cheek piece had to be completely removed for cleaning the gun only after turning the horizontal thumbscrew multiple, multiple turns. I abandoned this design solution and later, opted for their well-designed quick release cheek pad, and with my design below, was the solution I needed.
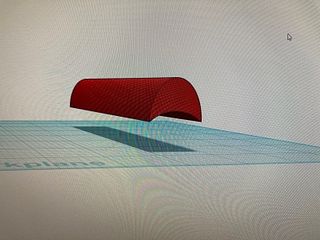
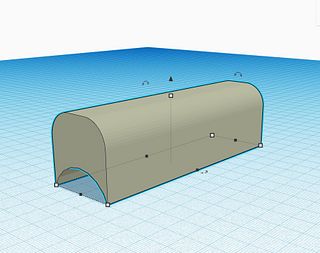
I then designed my own elevated cheek piece using a free online CAD design program – TinkerCad. From that I made two separate prototype designs (Design #1 and #2) and then had these 3D printed. I could have had them made with screw mounting holes “predrilled”, but opted instead to do this myself with a hand drill and device I had that's used to center drill rifle barrels for Picatinny rail attachment.
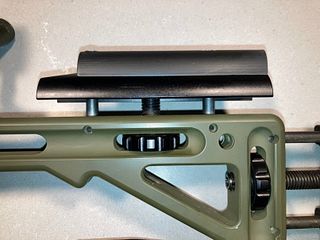
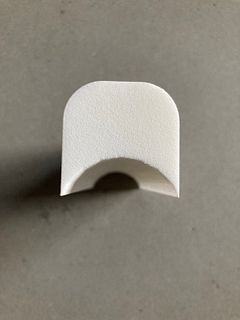
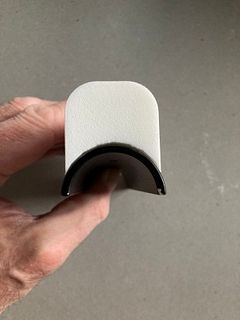
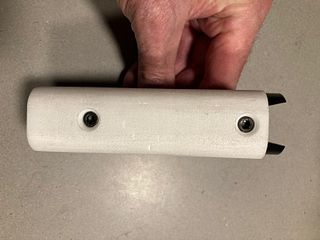
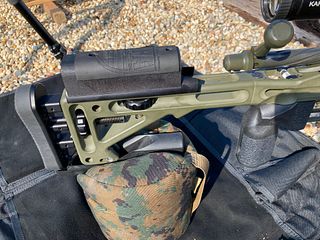
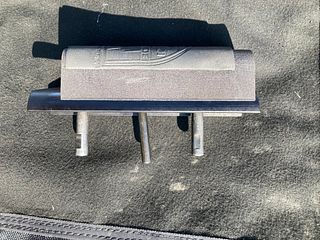
The problem with the first design (Design #1) was that it was too "peaked" and although looked great, was painful (!) to rest/weld a cheek on for any length of time. I then used the radius of curvature of an Accuracy International cheek piece as a model (there's gotta be a reason AI uses this geometry in their cheek piece!). From this came the second design (Design#2) which I had 3D printed in white plastic (mistake!), but later learned that *synthetic* RIT dye when properly applied (details available on request) is color stable over time. I finished this with an OEM MPA rubber pad. Works perfect when shooting, and is easily removed for barrel cleaning, etc.
Machinists/designers on this site may be rolling eyes, laughing their asses off with this post and the elementary approach/product of my solution described above. Either way, I hope anyone reading this will find it useful!
DESIGN #1
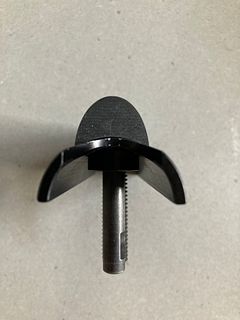
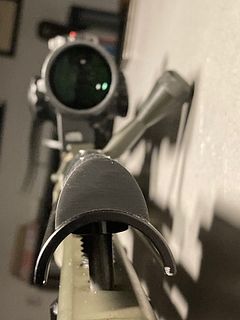
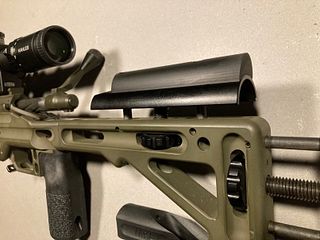
DESIGN #2
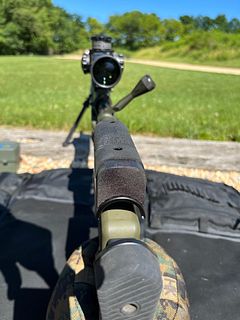
I stand 6’4” with a giraffe long neck, sleeve length of 37” and have a length of pull at the far end of the spectrum – nearly every long gun I’ve ever owned has required buttstock spacers beyond the norm (you name it: Clays/Skeet, AR, precision rifles, etc). Both my Sako TRG 22 and 42 used the awesome custom buttstock and cheek riser spacers designed and produced by Hide shooter Terje Andre Fjørtoft. When I recently had my GA precision Templar II action re-barreled by TS Customs and fitted to an MPA stock, the first thing I noted was that the MPA OEM aluminum cheek piece could barely be dialed up high enough for an acceptable scope sight picture. Please note it’s not the gear, it’s my anatomy.
I initially contacted MPA about my need to raise the cheek piece at the upper limit of/even more than the OEM assembly. They were VERY helpful and sent me a solution (sort of) that uses a longer threaded screw and longer riser pins. The problem was that the cheek piece had to be completely removed for cleaning the gun only after turning the horizontal thumbscrew multiple, multiple turns. I abandoned this design solution and later, opted for their well-designed quick release cheek pad, and with my design below, was the solution I needed.
I then designed my own elevated cheek piece using a free online CAD design program – TinkerCad. From that I made two separate prototype designs (Design #1 and #2) and then had these 3D printed. I could have had them made with screw mounting holes “predrilled”, but opted instead to do this myself with a hand drill and device I had that's used to center drill rifle barrels for Picatinny rail attachment.
The problem with the first design (Design #1) was that it was too "peaked" and although looked great, was painful (!) to rest/weld a cheek on for any length of time. I then used the radius of curvature of an Accuracy International cheek piece as a model (there's gotta be a reason AI uses this geometry in their cheek piece!). From this came the second design (Design#2) which I had 3D printed in white plastic (mistake!), but later learned that *synthetic* RIT dye when properly applied (details available on request) is color stable over time. I finished this with an OEM MPA rubber pad. Works perfect when shooting, and is easily removed for barrel cleaning, etc.
Machinists/designers on this site may be rolling eyes, laughing their asses off with this post and the elementary approach/product of my solution described above. Either way, I hope anyone reading this will find it useful!
DESIGN #1
DESIGN #2
