• Watch Out for Scammers!

    We've now added a color code for all accounts. Orange accounts are new members, Blue are full members, and Green are Supporters. If you get a message about a sale from an orange account, make sure you pay attention before sending any money!

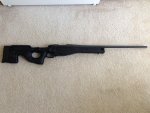
Remington 700 x AICS Build

busycloud

Private
Full Member
Minuteman
Nov 17, 2013
24
0
This thread documents my recent decision to build a rifle in order to take up the hobby of long range target shooting. Once I knew that I wanted to own a long range rifle I started doing research. I wanted to own a good reliable rifle that I could learn to shoot with.

After doing months of research I narrowed down 2 choices of rifles. The original choice was the Savage Arms 10/110 FCP HS (338 Lapua Mag) and the second choice was the Remington 700 SPS AAC-SD.
Considering that I had only shot handguns and a Bulgarian SLR 95, the Savage in 338 would probably been too much for a beginner long range shooter. Not to mention the ammo costs of the 338, so I decided to go down the road of the Remington 700.
Learning that there were many upgrade options available for the Rem700 I felt that I made a solid choice. I decided to make some modifications immediately right out of the box and quickly learned that there was still yet quite a bit to research and learn.
Here is the entire build process and issues that I experienced.

Rifle specs
Remington Model 700 SPS 24” barrel (1:10 barrel twist)

Scope
Vortex Viper 6.5-20x44

Accessories
Pelican 1750 Case
Timney Trigger
TPS 30mm rings
TPS XPS Rail
Atlas bipod
 
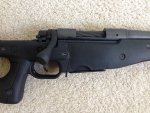
Once I knew that I wanted to use a Remington 700 I needed to figure out which type to start with. Initially I was targeting the 20” sps aac-sd version but then decided on the 24” sps instead. I bought one for fairly cheap from Budsgunshop. Only after completing the build did I realize I could have skipped buying a pre-assembled rifle and just ordered a custom barreled action! Since I planned on removing the stock and using a Accuracy International 2.0 chassis... the Hogue overmold stock is going bye-bye!

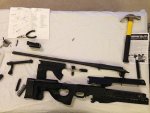
After purchasing the rifle and completing the transfer with my local FFL dealer (Digital Instincts) I immediately started dismantling it.

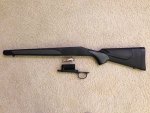
Stock-Hogue-OverMold1.jpg

Stock-Hogue-OverMold2.jpg
 
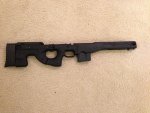
Knowing that I wanted to purchase a new stock for my build I spent a few months researching which stock to get. I was going to go with a MDT TAC-21 chassis but then learned about Accuracy International’s 2.0 chassis and was sold. Made the purchase and could not have been happier to receive it. The quality is rock solid and it comes with a 5 round clip.

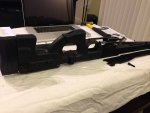
AICS 2.0 Unboxed
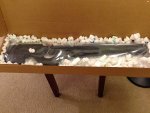
Boxed-AICS.jpg
AICS-Unboxed.jpg
(The clip is not fully inserted in this pic. This is a 5 round clip and those are flush to the base of the chassis when inserted all the way.)
10 round clips extend out like the picture.
 
Last edited:
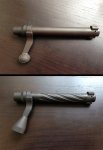
During the build I stumbled onto a thread here on the hide from LongRifles, Inc about their bolt fluting special buy option. Such a great deal and service I decided to send my bolt to them. Perfect timing since I had my Rem disassembled. I had them flute the bolt, mount a knob and cerakote it in black.

They did an amazing job and it took a week to complete.
Bolt-before-and-after.jpg

Before and After
 
I spent about 3 months prior to purchasing the rifle doing research on the Remington 700. For some reason I never learned about the infamous trigger issue with the X-Mark Pro that ships with some models. Not long after getting my rifle my buddy bursted my bubble by sending me the MSNBC special on the misfire issue the X-Mark Pro triggers were experiencing. (The issue was that some Rems were firing while on safety.... $%CK!!) So this lead me to do some intensive research on the issue and how to solve it.

Simple solution was to purchase an aftermarket trigger and be done. Pissed that I had to spend money to buy a new trigger. I did not want to mess around with sending my trigger back to Remington just to wait forever to get it back so I dropped the cash on a Timney. Glad I did!

The installation of the new trigger was fairly easy with the help of youtube.
View attachment 42596
View attachment 42597
View attachment 42598
 
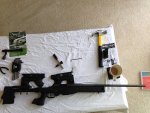
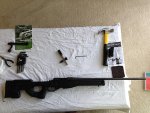
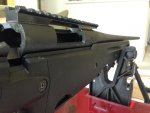
Once I had all the parts and tools I needed I started the install of the barrel and trigger into the AICS. I quickly learned that I needed quite a few micro hex keys and micro screwdrivers to complete the install. Not to mention I needed a torque tool that worked in ‘inch’ pounds NOT ‘foot’ pounds. Thankfully I found the Borka Torque wrench which works perfectly with the AICS!!

Borka-Tools-MG15.jpg

Rem-AICS-triggerspringresearch.jpg
 
This is the story about the disease that is precision rifle customization...

Symptom #1
Empty wallet

Symptom #2
Smile on your face when shooting
 
It took a while to narrow down a good scope for a beginner. I decided on the Vortex Viper 6.5-20X44 PA riflescope. A mistake was made on my part in terms of the correct ring sizes to get in order to mount the scope. I bought the TPS 1" Low rings when instead I needed the 30" sizes. So I had to wait 2 weeks to complete the return/exhange with MidwayUSA. Once the replacement rings arrived I started the installation of the TPS rail and rings.

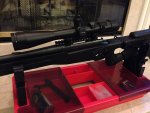
rail.jpg

Once the rail was mounted and torqued down I started the rings and scope installation. (I bedded my rail before torquing it down to the barrel to ensure a nice flush mount.)

Ring-Install.jpg

Scope-Install-1.jpg

Scope-Install-2.jpg
 
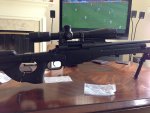
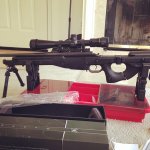
Got the scope mounted and just need to get to the range and bore sight/zero the scope in.

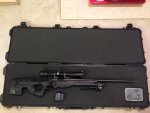
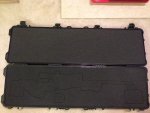
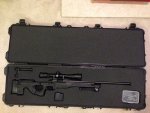
For my birthday my girlfriend bought me a sweet Pelican case. Placed the rifle on the foam of the case, traced the outline of the rifle onto the foam with a Sharpie marker and cut the foam with a $10 Black & Decker electric turkey carver... worked Perfectly!

case-1.jpg

case-2.jpg

case-3.jpg
 
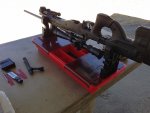
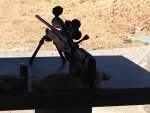
Took the new baby to the Los Altos Rod and Gun Club in Los Gatos, Ca. Awesome range and it is close to home! I brought the rifle here to sight it in and try and find the scope's zero. Prior to getting to the range I made a stop by Kerley's Hunting & Outfitting to grab a bench rest bag. One of the guys that worked there helped me out and was cool enough to bore sight my rifle for me. He did it in minutes! He even double checked my scoped rings and checked if they were torqued properly.

Got to the range, gave the action screws a once over to make sure they were torqued and go time! It felt ridiculously good to make that first shot.

2.jpg

3.jpg

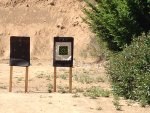
When I got to the 25yrd part of the range to see if I could get on paper.... I pretty much hit the target dead center!

Target.jpg


Now that I know the thing fires I have a long road ahead in terms of learning how to zero the scope and shoot properly.

There are some good courses offered in my area that I will be taking but most of the learning will continue via trial and error.
 
Poor guy you have no idea what you've gotten yourself into. lol This is a lifelong obsession and you should have ran away as fast as you could. I feel sorry for your wallet and your state of mind. You are now hooked and it only gets worse from here on out. Just kidding welcome aboard. You started out right by getting as much info as you could. Looks like a good set up that you can build on(same rifle I started with). Get out and shoot and have fun.
 
Poor guy you have no idea what you've gotten yourself into. lol This is a lifelong obsession and you should have ran away as fast as you could. I feel sorry for your wallet and your state of mind. You are now hooked and it only gets worse from here on out. Just kidding welcome aboard. You started out right by getting as much info as you could. Looks like a good set up that you can build on(same rifle I started with). Get out and shoot and have fun.

That pretty much summed it up!!! Looks like I may have to cut back severely on other hobbies!
 
Yes. But why would you select that? That's the question. Obviously I can see that it is a light barrel model.


Sent from my iPhone using Tapatalk