
I probably should have called this "A Blind Squirrel Finds a Nut". Snuck out a 2nd place at Riverbend this time around so here is my blog on the event:
Disclaimer: All photos are by Jimmy Nutt or Lisa Stennett. Thank you both for always providing excellent imagery. Additionally, thank you Bruce Perry for always putting on a great event. Finally, if you are featured in these images and would like to be removed, please contact me and I will remove your images immediately.
I had no intentions of writing another blog on this year’s Riverbend Run and Gun since I did one in 2019, but a couple things occurred that made me feel like a short write-up was necessary.
The beauty of this event is that it is close to home for me. Being less than 1.5 hours away made things nice, much less packing and preparation. I left the morning of the event with plans to arrive 2.5 hours prior to my launch time and meet up with my buddy Travis who runs these events as well.
Nothing changed from my usual run and gun rifle/pistol/belt set-up so nothing new to sort there. I did a 1 mile “shake-out” run about 1 hour before my launch time. I chose to do the 5k version of this event, whereas last time I did the 10k version. I had several reasons for this:
1.) The 10k version is simply two loops of the 5k course. I really just wanted to see the stages/challenges once
2.) I was OK with only getting 5k worth of my money since it was a short drive and no overnight stay to the event
3.) After signing up for the 10k, I realized the field was much larger in the 5K and I wanted to participate in the larger field
4.) The last couple weeks training runs for me were less than stellar
At launch time I headed out toward Stage 1, where there was already runners stacked up waiting to shoot. Typically at these events, I have an early launch time due to my running speed, so I rarely ever encounter wait times, however I would end up with extended wait times at 5 of the 6 stages in this event.
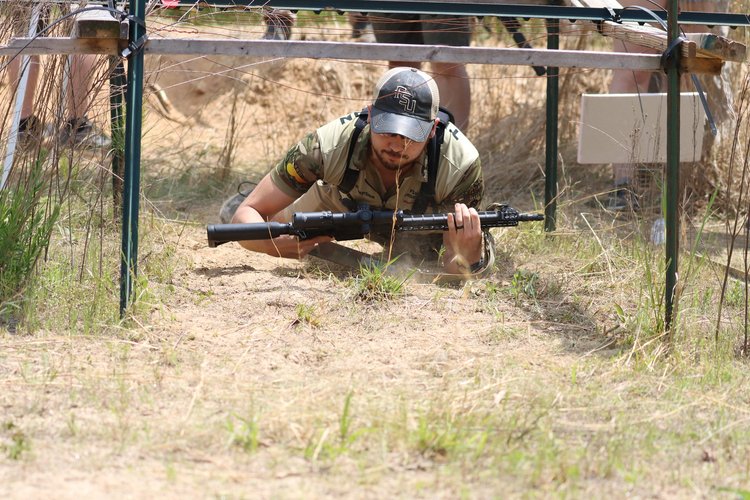
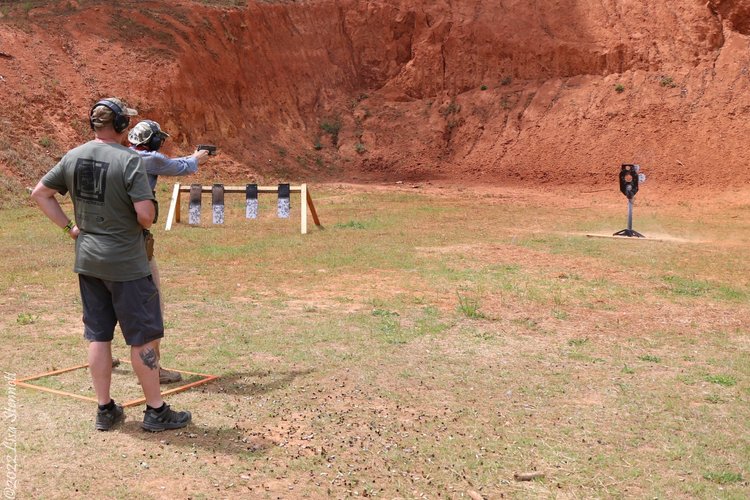
Stage 1 - VTAC CQB:
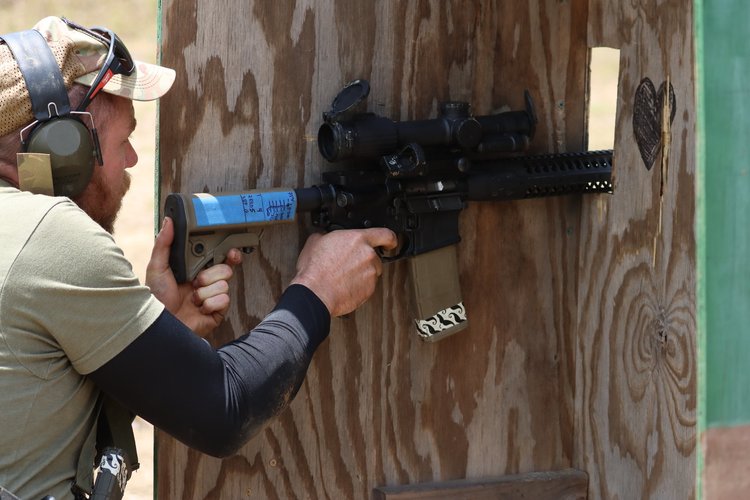
Stage one consisted of working a VTAC barricade with your rifle on some very close, but very small rubber flipper targets. You were to draw a card to get a corresponding sequence of numbers. I believe my card 4-3-1-2 but its certainly a bit foggy writing this a week later. The holes in the VTAC board was marked with those same numbers and you were to engage each target through each hole, following the sequence of the card you pulled.
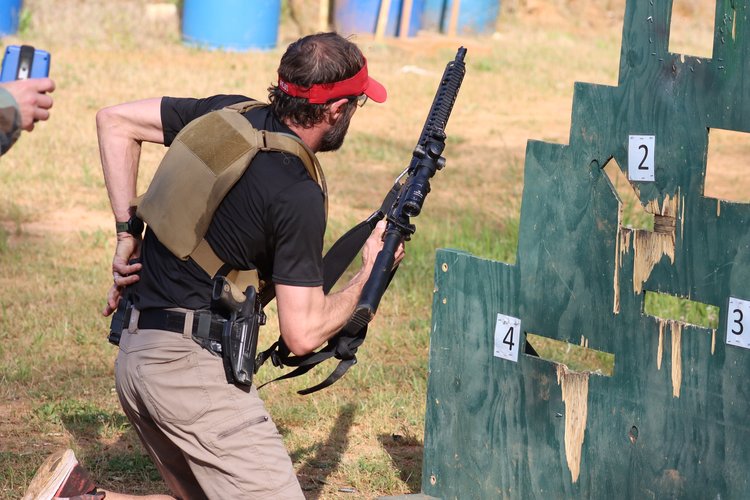
Dan beginning work on the VTAC.
My first shooting position was from the completely horizontal hole on the VTAC. In this position I lay the gun flat, over my shoulder and I always try to shoot “port-up” as I don’t like to extract toward the ground where debris can get scattered. As I began shooting the first target I wasn’t making any hits. I used quite a bit of my first magazine trying to make hits on the very first target by holding to the right hand side. I eventually moved to holding to the left side of the target and started making hits. Once I made my first hit, I moved through the board fairly quickly, but given I had used so much ammo on the first target, I actually had to perform a reload on this stage to finish it. A lot of time and ammo was eaten up on that first target and that is nobody’s fault but mine.
Drew Running the VTAC. Photo by Lisa Stennett.
THE FIX:
I have had two VTAC boards at my house for about 2 years now, one set up at about 15 yards for pistol and the other at 100 yards for rifle. I never work my rifle at the pistol distances. This is now a painfully obvious mistake. When engaging my VTAC at home at 100 yards my horizontally held targets are right side holds because between the ranges of 75-150 yards with my optic setup my POI is high. At the distances we engaged on Stage 1, I would be low, basically only the difference of sight height over bore. If I am not shooting from a horizontal position, it is natural for me to compensate for this offset and hold high at close ranges. It is also natural for me to compensate from my home VTAC and hold right out at 100 yards. Lack of practice at a short distance with my rifle from the VTAC lead to spending a lot more time and ammo than I should have on this stage.
As usual, when something during an event gives me fits, I buy it and add it to my home range. I immediately came home and ordered those little green flipper targets to set up at close range with my rifle. This mistake shouldn’t happen twice. I will be running my rifle at pistol distances from the VTAC now that I have some targets I can shoot at close range with rifle calibers.
I also had some small issues with my handguard wrap hanging up going in and out of the narrow slots in the VTAC. I removed the wrap completely and will be running with a bare rail from now on.
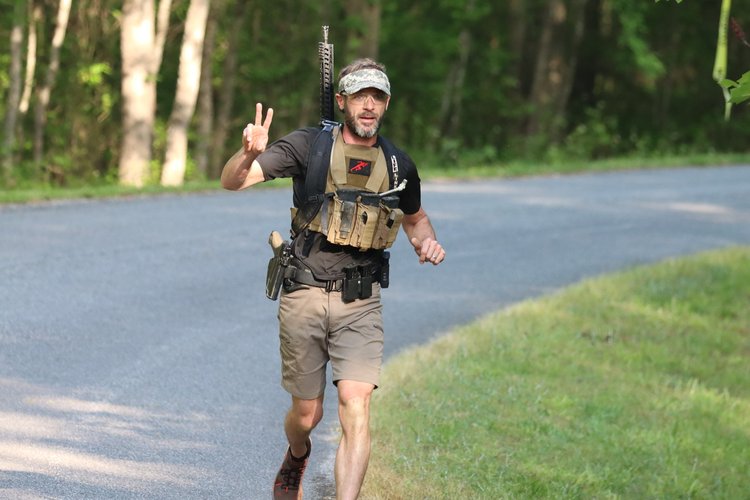
The author…running…sort of.

Entanglement Bridge
Stage 2 - Long Range:
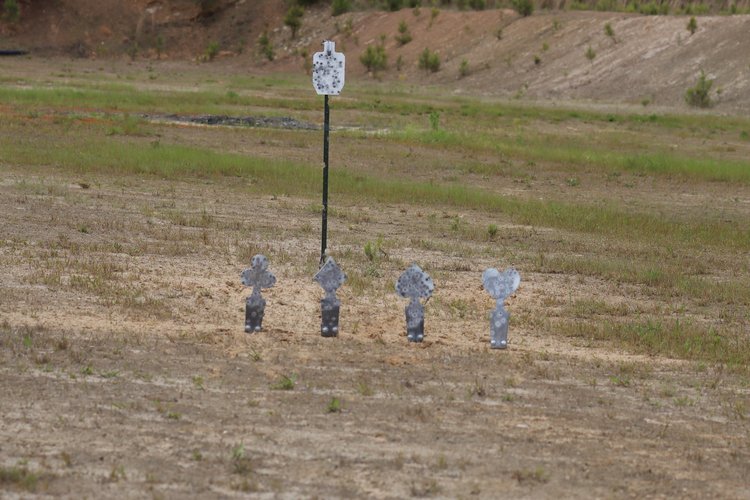
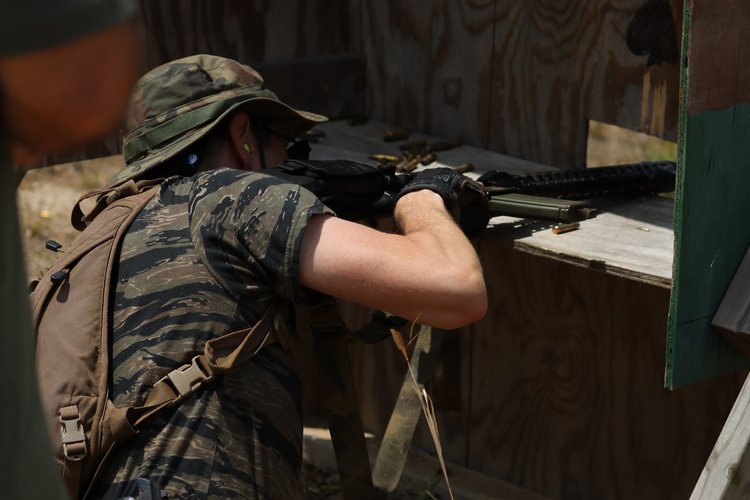
It was a long run (probably over a mile?) to Stage 2 which was the long-range stage. The stage was simple. Two smaller torso targets were set up at roughly 200 yards, one on your far right and one on the far left, and a full-size torso set up at 550 yards. You were to engage both 200 yard targets once and then the 550 yard targets once. You were to repeat this process 5 times. This was to be shot prone from a slightly raised platform that was provided.
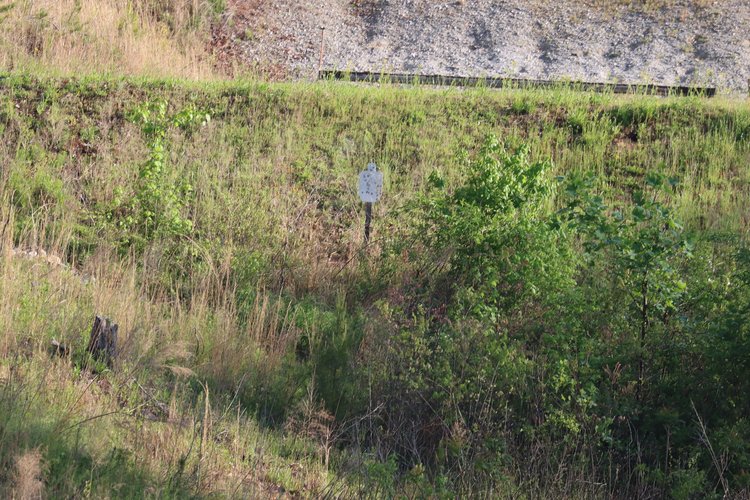
200 yard reduced torso

550 yard full size torso
On the buzzer while sprinting to the platform I loaded my rifle and attempted to put in the legs to my Heathen Systems bipod. When I went to lie down, one of the legs fell out and I had to scramble to find and re-engage the leg on my left hand side. I was a bit fumbly on the clock here. Once I got the leg in I settled on the first 200 yard target and squeezed. Nothing. It appears on my way to the platform, while loading on the run, I did not fully seat my magazine. I had to clear the malfuction and get back on target. Because of all of this my first shot did not go off on Stage 2 until 30 seconds into the timer.
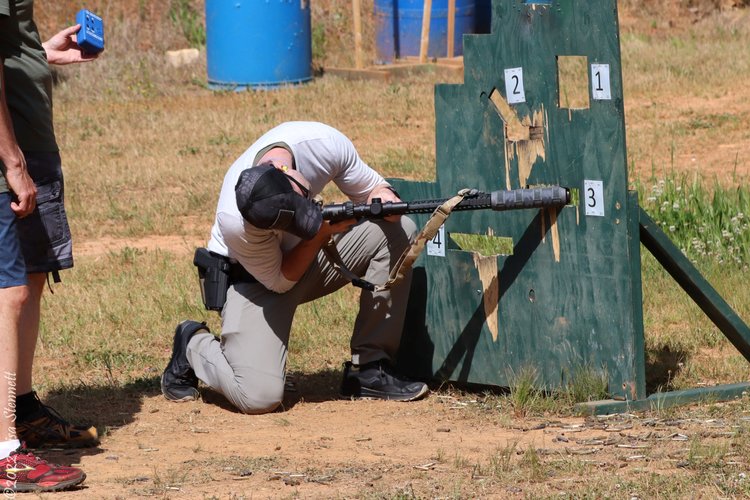
Once I started shooting, I was a bit slower than I would have like to have been trying to re-locate the two targets at 200 yards each time. They were hard to see since they were unpainted, smaller and set against a wooded background. Swinging left to right to engage these targets should have been much faster, but because I was running my Kahles K18i which is a second focal plane scope, I really needed to leave the optic at its max magnification (8x), so that my holds at 550 would remain correct. I had no issue making my hits at 550 yards and my time on Stage 2 would have been one of the fastest on the day if I had not spent so much time getting that first shot off.

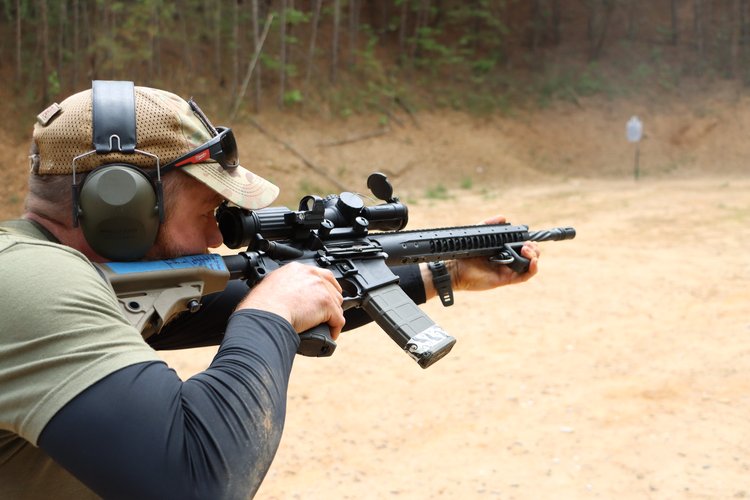
The Author on the Long-Range Stage. Notice three things at work: First, the super short length of pull and resulting stability, second, low/forward scope mount and solid cheek weld and the Heathen Bipod at work. Photo by Lisa Stennett.
THE FIX:
Shame on me for having a problem with my bipod leg. Last December when shooting some long range with a buddy out in some cutover at our hunting area, I had that same leg fall out on me and I lost it for a while. It happened a couple times that day, and I never fixed the issue. That’s just lazy. After the event, when I got back home, I replaced the barricade stop that holds the legs with a new one and the problem is fixed.
As for having to engage the stage at 8x with my optic, well, I fixed that too. I came home and immediately removed my Kahles K18i optic and replaced it with an EOTECH Vudu 1-10 in First Focal Plane. I have been thinking about this change for quite some time, as I have made 2 errors in Run and Guns previously by using my holdovers outside of max magnification. The problem is, this time I remembered to be at max magnification, but I really didn’t need/want to be. Stage 2 would have best been shot on about 5-6x, which means I could move there for the 200 yarders, but then I’d have to go back to 8x for the 550 yarder. I would have to make 10 magnification changes for one stage. With a first focal plane scope, this problem goes away. My holds are correct at any magnification so I can back out to the zoom range that is comfortable for the entire target array. Secondly, the mils inside the Vudu 1-10 are numbered, which makes it far easier to reference under stress. I always had to count subtensions inside the Kahles and that is no fun when on a timer.
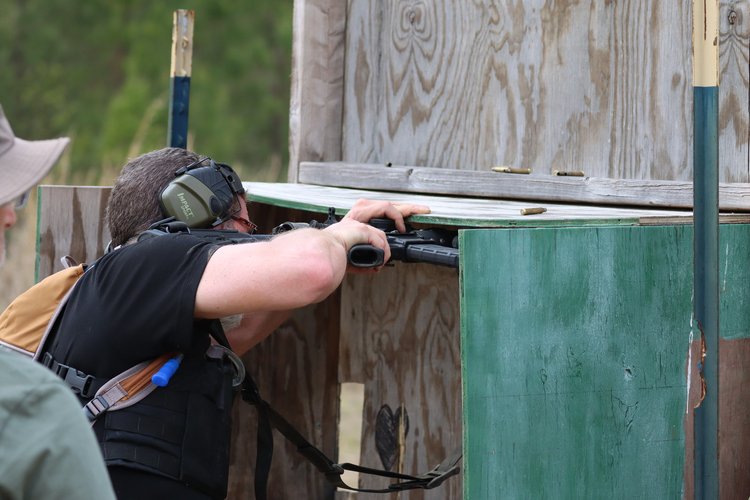
Stage 3 - The Box:
A short run to stage 3 and you arrive at the infamous “Box”. The Box we have seen before at this event. It is designed to induce malfunctions by locating your ejection port against the sides of its walls. The first time I shot this event back in 2019, which was actually my first Run and Gun ever, I was so “green” I did not really even understand it’s intent. Remarkably, I made it through that stage in 2019 without a single hiccup. That would not be the case this time.
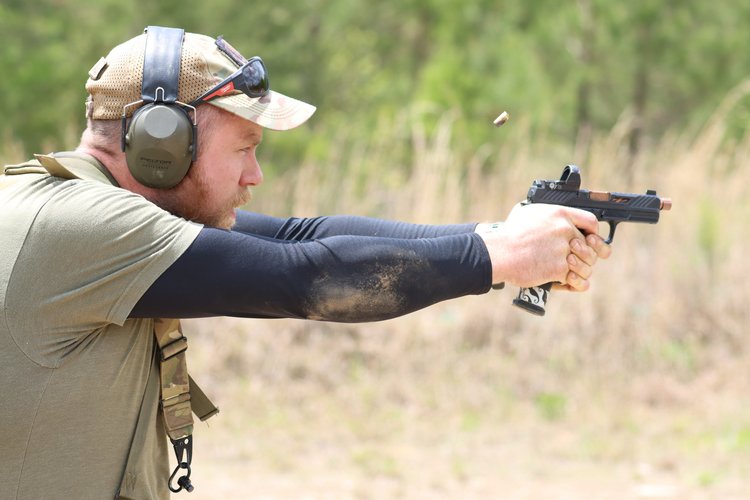
The start of the stage had a low crawl leading up to a bench where you would stage your rifle for later use. There were 4 small flipper targets that you were to engage with your pistol, making 3 ATTEMPTS each and one single High Value Target to be engaged after you dropped your mag with one final round left in the chamber. No excuses, I shot pistol on this stage extremely poorly and I really have no idea why. Depending upon how many hits you made on each target (or in my case, didn’t make) determined how many times you had to engage from each port inside the box with your rifle. Once I got done engaging the pistol targets, I holstered and grabbed my rifle.
Competitor on low-crawl stage 3
Stage 3 pistol arrary
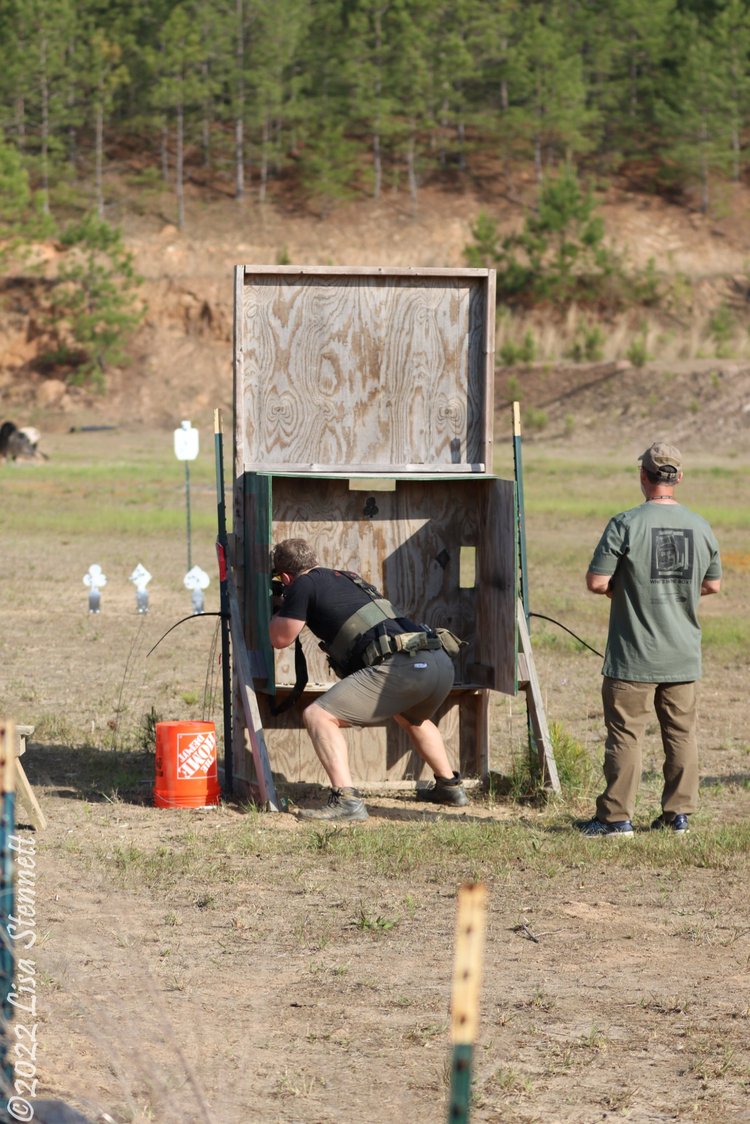
The infamous “Box”. Photo by Lisa Stennett
The first port I shot through was on my right hand side, a vertical port against the edge of the box where my ejection port was against the wood. I made 4 hits through this port and it still bothers me that in my head on that 4th hit, something felt off and I did nothing to address it. I moved to the left side port, switched to shooting left handed, engaged the target and pulled the trigger…nothing. I look down and sure enough, my final round from the right side had induced a malfunction. Had I listened to my instinct, I could have cleared that before moving to left handed but because I barreled on pig-headed now I have to clear this thing on my opposite side. I worked through the malfunction and made my hits from the left hand side.
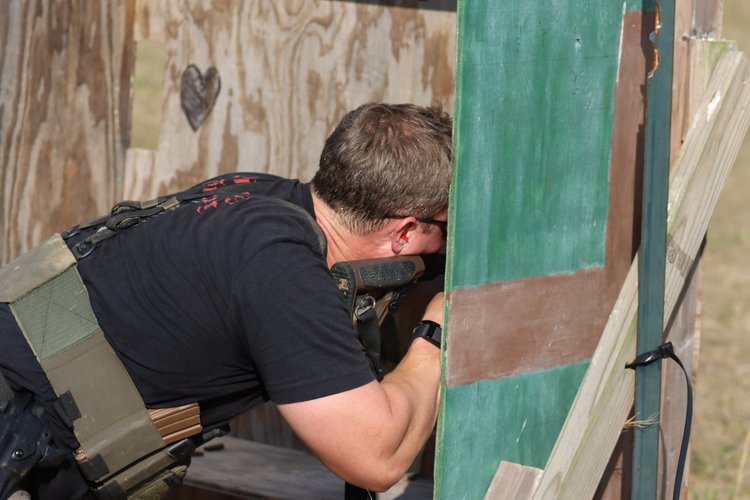
Michael running the right side port on the box. This one will get you.
Travis showing us how to avoid going left handed on the left side box port
The 3rd port was a horizontal port on the bottom. This should be like shooting a horizontal port on a VTAC but I made it more difficult by inducing my own malfunction. Since we had to stage the rifle during the pistol part of this stage, when I picked up my rifle to run the box, I never re-slung my rifle. The loose sling ended up lying directly on top of my ejection port for my first shot on the bottom port and caused a malfunction. I had to stop and clear that before continuing. My next shots from the bottom port and shots from the top port found their way to the target and finally that nightmare stage for me was over.
Competitor running the low horizontal box port.
Competitor running the upper horizontal box port.
THE FIX:
Well, for starters, get better at pistol shooting, ha! I really can’t explain why I shot that portion so poorly. It happens. Secondly, if you feel something “off” in your action and the recoil and return of your bolt carrier group, you are probably right. Trust your instincts. Finally, ALWAYS sling your rifle.
Stage 4 - Strong and Weak:
A short run to stage 4 and it was here I got to redeem my pistol shooting a little bit. You were to start inside Travis’ “Deuce and a Half” truck (Thanks for providing that Travis!) and engage a hostage style target with 3 center flippers both out and back with your pistol and then move to engage right side targets with right hand only and left side targets with left hand only. Strong hand/Weak hand stages are usually my kryptonite, but not this time. I moved through the stage with fairly clean, fairly quick shooting and headed on out to the last two stages.
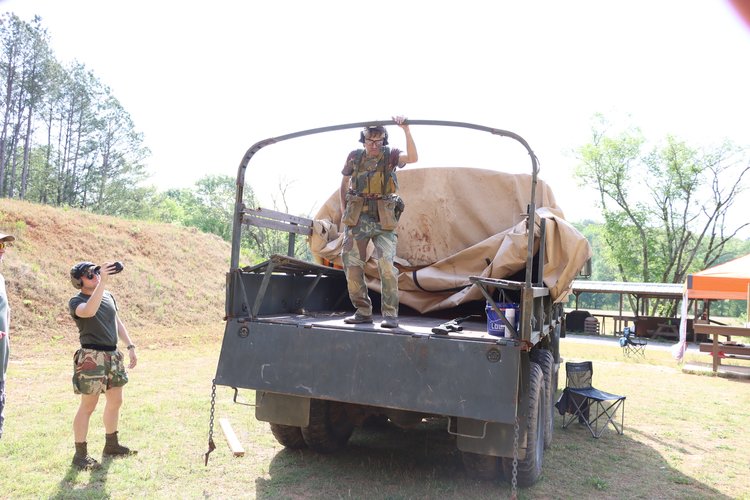
Travis’ Deuce and a Half on Stage 4 (Starting position)
Strong/Weak side Stage 4 targets and Hostage flipper. Photo by Lisa Stennett.
Stage 5 - Wind Sprints
We have seen this one before, but this time slightly modified. On this stage you were to load and make ready your pistol and rifle and they were to be staged roughly 15 yards apart. There was a target setup in front of each staging area and a kettlebell on the ground. You were to make one hit on the steel target with your pistol, pickup the kettlebell, run to your rifle and make one hit with your rifle on the small green flipper target. You were then to pickup the kettlebell and run back to your pistol. Rinse, repeat, as fast as possible, 8 times.
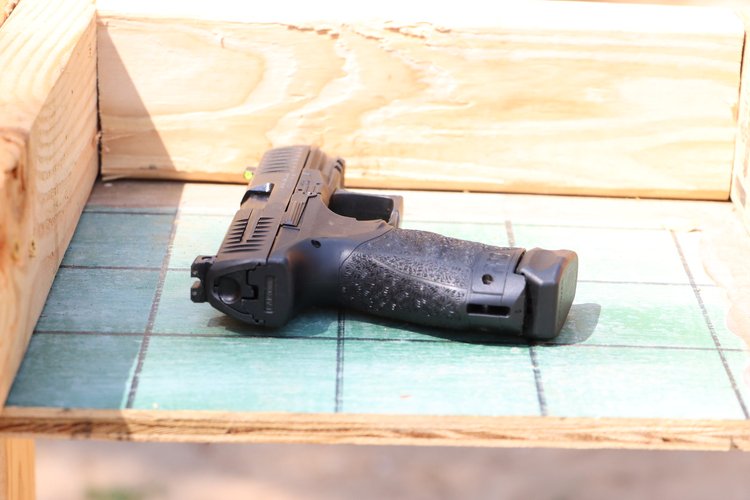
Pistol in staging location for Stage 5
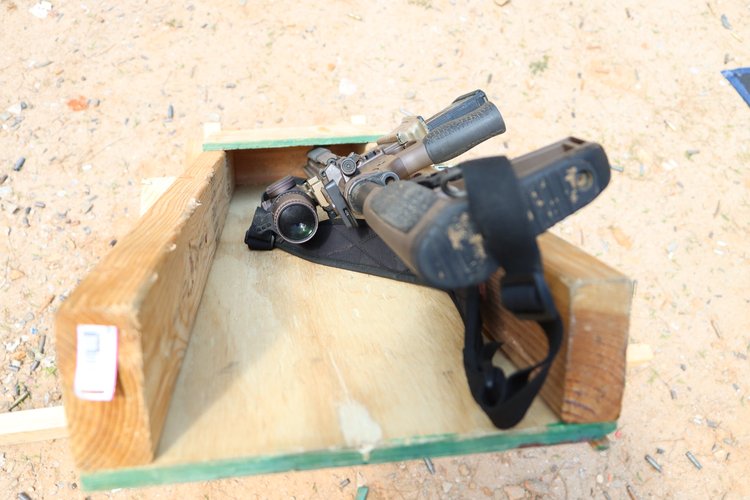
Rifle in staging location for Stage 5
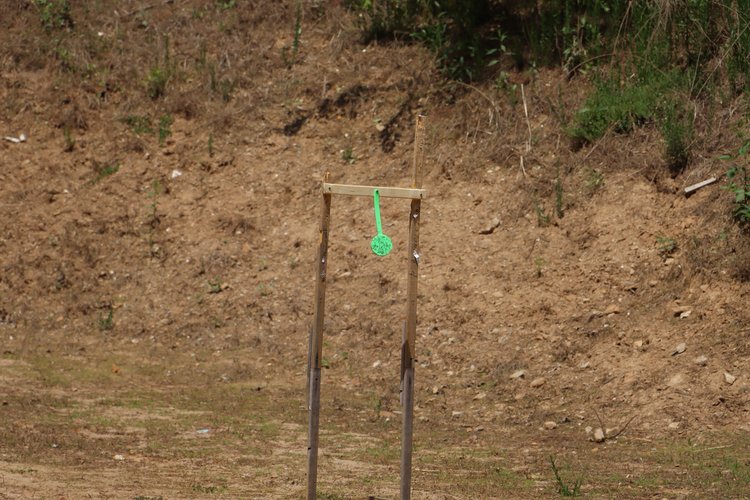
Stage 5 small rifle flipper
Stage 5 pistol steel
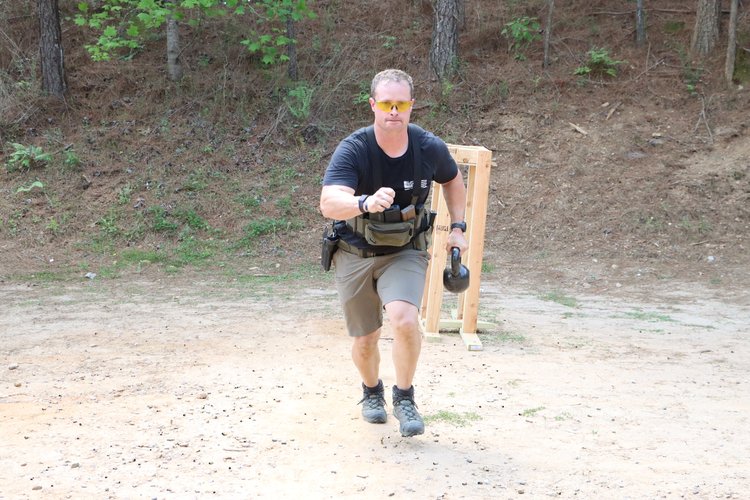
Michael running the wind sprints on Stage 5 with the kettlebell
Travis using his 45 degree red dot on the flipper target
I moved through this stage fairly quickly. If there was any hiccup, because of the small size of the rifle target, I was engaging with my scope on about 2.5x instead of using my piggybacked red-dot up top. This might have been a mistake. I think using my red-dot here would have proved to be more efficient, even if I had to make an extra shot or two. This stage was designed to wear you out, and it certainly works. Its basically like doing “suicides” at basketball practice but with a kettlebell and targets. I shot this stage pretty well and I was ready to move on the final stage.
THE FIX:
Now that I have those little green flipper targets, I will work on making hits with both red dot and scope to see which one is more efficient at different distances.
Stage 6 - The Door:
The final stage was straightforward: Kick down a door and engage all the paper targets in the A-zone, but not the hostages, as fast as possible with 2 hits each with any weapon system you choose.
I am 100% positive this is not the first door Michael has kicked in.
This is one I really want back. No malfunctions, just stupid decisions. I decided to engage this with my rifle, thinking I was going to have to make the hits from a bit further away and I wanted to be able to confirm A-zone hits with my scope. When I kicked the door down, the shooting area was large and close to the targets. I could have just hosed this stage with my pistol or even the red-dot on my rifle but for some reason, slowly and methodically I engaged all targets with two hits each. To make matters worse, the two AR mags I had left were nearly empty, so I ended up running through 2 (!) partial rifle mags before finally pulling out my pistol to finish the job.
THE FIX:
I think subconsciously I knew I had at least passed all prior stages and did not want a failure on the final stage by hitting a hostage, so I shot with an extreme amount of caution that was not necessary at all. This is not the first time I have done that and it is a mentally block that I must get over. I know it originates from lack of confidence, but at those distances and those targets, it shouldn’t have. That was an easy-day-hose-it-down-go-out-in-a-blaze-of-glory stage and I treated it like a fragile piece of porcelain.
After finishing up on Stage 6, I sprinted, literally, to the finish line. From a shooting standpoint, I had only shot poorly on one stage, Stage 3 - The Box, but I was pretty deflated about all of the issues I had that killed so much time on the clock. All of those issues were easily preventable. A conservative estimate is that I left at least 1 full minute of shooting time on the table and I was not happy about that at all.
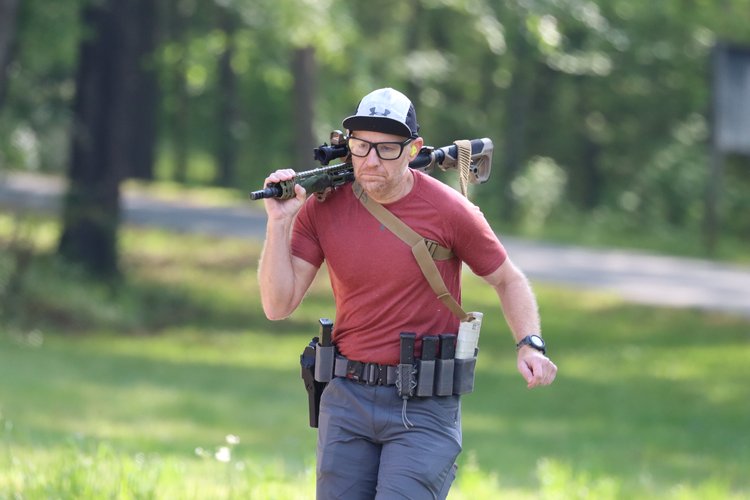
Dan, running. I really need to check out how he is carrying his rifle.
My buddy Travis was running the 10k version of the event and we had a chance during wait time together on stage 5 to compare score cards up until that point. It was clear, he was on an absolute heater. When I finished up running, I waited for him to come through his first 5k leg and I told him, “All you have to do is match those scores one more time, and you will win the whole thing.” I don’t think he really believed me, but he did go back out and beat his scores on nearly all stages and it resulted in him getting 1st place for the 10k event. As I said already, well done buddy, you deserve it because you have put in the work and it shows.
Travis, the 10k winner.
As for me, I left before the final scores were announced as I was still close enough to home to make the rest of my day productive. Travis called me that night and told me I placed 2nd place out of 77 entrants in the 5k. I honestly couldn’t believe it. Despite my issues, my shooting time overall still ended up 7th and my running score 2nd. It was just enough combined to push me a few points ahead of 3rd place. If there is one thing I have been able to do in these events, it has been to avoid stage failure and to run consistently near the top. With a 5th, 3rd and now 2nd place finish, that recipe is getting me close. I think if I can clean up a few of things, and confidently engage some stages more quickly, maybe, one day I can bring home first place as well.
There is always next year…..
Disclaimer: All photos are by Jimmy Nutt or Lisa Stennett. Thank you both for always providing excellent imagery. Additionally, thank you Bruce Perry for always putting on a great event. Finally, if you are featured in these images and would like to be removed, please contact me and I will remove your images immediately.
I had no intentions of writing another blog on this year’s Riverbend Run and Gun since I did one in 2019, but a couple things occurred that made me feel like a short write-up was necessary.
- I had an abnormal amount of equipment/operator/brain-fart errors that don’t normally occur that I needed to address in some way
- I remarkably ended up with my best finish of 2nd place
The beauty of this event is that it is close to home for me. Being less than 1.5 hours away made things nice, much less packing and preparation. I left the morning of the event with plans to arrive 2.5 hours prior to my launch time and meet up with my buddy Travis who runs these events as well.
Nothing changed from my usual run and gun rifle/pistol/belt set-up so nothing new to sort there. I did a 1 mile “shake-out” run about 1 hour before my launch time. I chose to do the 5k version of this event, whereas last time I did the 10k version. I had several reasons for this:
1.) The 10k version is simply two loops of the 5k course. I really just wanted to see the stages/challenges once
2.) I was OK with only getting 5k worth of my money since it was a short drive and no overnight stay to the event
3.) After signing up for the 10k, I realized the field was much larger in the 5K and I wanted to participate in the larger field
4.) The last couple weeks training runs for me were less than stellar
At launch time I headed out toward Stage 1, where there was already runners stacked up waiting to shoot. Typically at these events, I have an early launch time due to my running speed, so I rarely ever encounter wait times, however I would end up with extended wait times at 5 of the 6 stages in this event.
Stage 1 - VTAC CQB:
Stage one consisted of working a VTAC barricade with your rifle on some very close, but very small rubber flipper targets. You were to draw a card to get a corresponding sequence of numbers. I believe my card 4-3-1-2 but its certainly a bit foggy writing this a week later. The holes in the VTAC board was marked with those same numbers and you were to engage each target through each hole, following the sequence of the card you pulled.
Dan beginning work on the VTAC.
My first shooting position was from the completely horizontal hole on the VTAC. In this position I lay the gun flat, over my shoulder and I always try to shoot “port-up” as I don’t like to extract toward the ground where debris can get scattered. As I began shooting the first target I wasn’t making any hits. I used quite a bit of my first magazine trying to make hits on the very first target by holding to the right hand side. I eventually moved to holding to the left side of the target and started making hits. Once I made my first hit, I moved through the board fairly quickly, but given I had used so much ammo on the first target, I actually had to perform a reload on this stage to finish it. A lot of time and ammo was eaten up on that first target and that is nobody’s fault but mine.
Drew Running the VTAC. Photo by Lisa Stennett.
THE FIX:
I have had two VTAC boards at my house for about 2 years now, one set up at about 15 yards for pistol and the other at 100 yards for rifle. I never work my rifle at the pistol distances. This is now a painfully obvious mistake. When engaging my VTAC at home at 100 yards my horizontally held targets are right side holds because between the ranges of 75-150 yards with my optic setup my POI is high. At the distances we engaged on Stage 1, I would be low, basically only the difference of sight height over bore. If I am not shooting from a horizontal position, it is natural for me to compensate for this offset and hold high at close ranges. It is also natural for me to compensate from my home VTAC and hold right out at 100 yards. Lack of practice at a short distance with my rifle from the VTAC lead to spending a lot more time and ammo than I should have on this stage.
As usual, when something during an event gives me fits, I buy it and add it to my home range. I immediately came home and ordered those little green flipper targets to set up at close range with my rifle. This mistake shouldn’t happen twice. I will be running my rifle at pistol distances from the VTAC now that I have some targets I can shoot at close range with rifle calibers.
I also had some small issues with my handguard wrap hanging up going in and out of the narrow slots in the VTAC. I removed the wrap completely and will be running with a bare rail from now on.
The author…running…sort of.
Entanglement Bridge
Stage 2 - Long Range:
It was a long run (probably over a mile?) to Stage 2 which was the long-range stage. The stage was simple. Two smaller torso targets were set up at roughly 200 yards, one on your far right and one on the far left, and a full-size torso set up at 550 yards. You were to engage both 200 yard targets once and then the 550 yard targets once. You were to repeat this process 5 times. This was to be shot prone from a slightly raised platform that was provided.
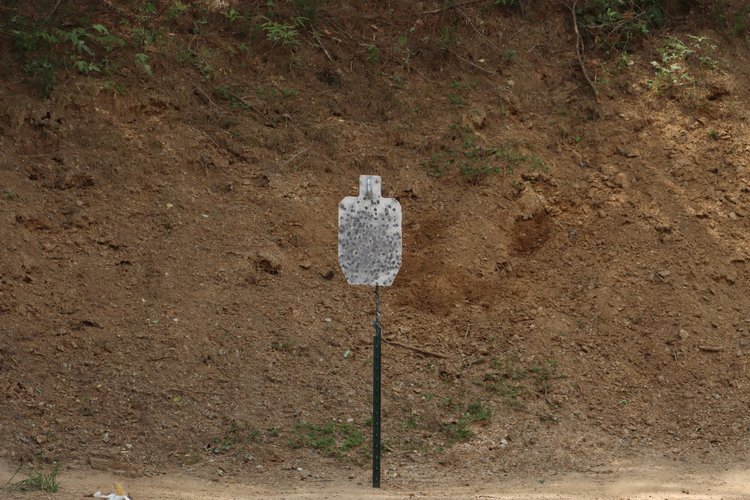
200 yard reduced torso
550 yard full size torso
On the buzzer while sprinting to the platform I loaded my rifle and attempted to put in the legs to my Heathen Systems bipod. When I went to lie down, one of the legs fell out and I had to scramble to find and re-engage the leg on my left hand side. I was a bit fumbly on the clock here. Once I got the leg in I settled on the first 200 yard target and squeezed. Nothing. It appears on my way to the platform, while loading on the run, I did not fully seat my magazine. I had to clear the malfuction and get back on target. Because of all of this my first shot did not go off on Stage 2 until 30 seconds into the timer.
Once I started shooting, I was a bit slower than I would have like to have been trying to re-locate the two targets at 200 yards each time. They were hard to see since they were unpainted, smaller and set against a wooded background. Swinging left to right to engage these targets should have been much faster, but because I was running my Kahles K18i which is a second focal plane scope, I really needed to leave the optic at its max magnification (8x), so that my holds at 550 would remain correct. I had no issue making my hits at 550 yards and my time on Stage 2 would have been one of the fastest on the day if I had not spent so much time getting that first shot off.
The Author on the Long-Range Stage. Notice three things at work: First, the super short length of pull and resulting stability, second, low/forward scope mount and solid cheek weld and the Heathen Bipod at work. Photo by Lisa Stennett.
THE FIX:
Shame on me for having a problem with my bipod leg. Last December when shooting some long range with a buddy out in some cutover at our hunting area, I had that same leg fall out on me and I lost it for a while. It happened a couple times that day, and I never fixed the issue. That’s just lazy. After the event, when I got back home, I replaced the barricade stop that holds the legs with a new one and the problem is fixed.
As for having to engage the stage at 8x with my optic, well, I fixed that too. I came home and immediately removed my Kahles K18i optic and replaced it with an EOTECH Vudu 1-10 in First Focal Plane. I have been thinking about this change for quite some time, as I have made 2 errors in Run and Guns previously by using my holdovers outside of max magnification. The problem is, this time I remembered to be at max magnification, but I really didn’t need/want to be. Stage 2 would have best been shot on about 5-6x, which means I could move there for the 200 yarders, but then I’d have to go back to 8x for the 550 yarder. I would have to make 10 magnification changes for one stage. With a first focal plane scope, this problem goes away. My holds are correct at any magnification so I can back out to the zoom range that is comfortable for the entire target array. Secondly, the mils inside the Vudu 1-10 are numbered, which makes it far easier to reference under stress. I always had to count subtensions inside the Kahles and that is no fun when on a timer.
Stage 3 - The Box:
A short run to stage 3 and you arrive at the infamous “Box”. The Box we have seen before at this event. It is designed to induce malfunctions by locating your ejection port against the sides of its walls. The first time I shot this event back in 2019, which was actually my first Run and Gun ever, I was so “green” I did not really even understand it’s intent. Remarkably, I made it through that stage in 2019 without a single hiccup. That would not be the case this time.
The start of the stage had a low crawl leading up to a bench where you would stage your rifle for later use. There were 4 small flipper targets that you were to engage with your pistol, making 3 ATTEMPTS each and one single High Value Target to be engaged after you dropped your mag with one final round left in the chamber. No excuses, I shot pistol on this stage extremely poorly and I really have no idea why. Depending upon how many hits you made on each target (or in my case, didn’t make) determined how many times you had to engage from each port inside the box with your rifle. Once I got done engaging the pistol targets, I holstered and grabbed my rifle.
Competitor on low-crawl stage 3
Stage 3 pistol arrary
The infamous “Box”. Photo by Lisa Stennett
The first port I shot through was on my right hand side, a vertical port against the edge of the box where my ejection port was against the wood. I made 4 hits through this port and it still bothers me that in my head on that 4th hit, something felt off and I did nothing to address it. I moved to the left side port, switched to shooting left handed, engaged the target and pulled the trigger…nothing. I look down and sure enough, my final round from the right side had induced a malfunction. Had I listened to my instinct, I could have cleared that before moving to left handed but because I barreled on pig-headed now I have to clear this thing on my opposite side. I worked through the malfunction and made my hits from the left hand side.
Michael running the right side port on the box. This one will get you.
Travis showing us how to avoid going left handed on the left side box port
The 3rd port was a horizontal port on the bottom. This should be like shooting a horizontal port on a VTAC but I made it more difficult by inducing my own malfunction. Since we had to stage the rifle during the pistol part of this stage, when I picked up my rifle to run the box, I never re-slung my rifle. The loose sling ended up lying directly on top of my ejection port for my first shot on the bottom port and caused a malfunction. I had to stop and clear that before continuing. My next shots from the bottom port and shots from the top port found their way to the target and finally that nightmare stage for me was over.
Competitor running the low horizontal box port.
Competitor running the upper horizontal box port.
THE FIX:
Well, for starters, get better at pistol shooting, ha! I really can’t explain why I shot that portion so poorly. It happens. Secondly, if you feel something “off” in your action and the recoil and return of your bolt carrier group, you are probably right. Trust your instincts. Finally, ALWAYS sling your rifle.
Stage 4 - Strong and Weak:
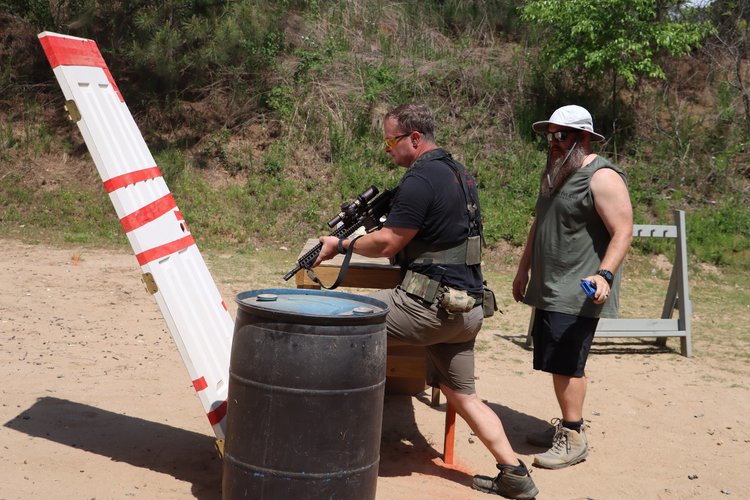
A short run to stage 4 and it was here I got to redeem my pistol shooting a little bit. You were to start inside Travis’ “Deuce and a Half” truck (Thanks for providing that Travis!) and engage a hostage style target with 3 center flippers both out and back with your pistol and then move to engage right side targets with right hand only and left side targets with left hand only. Strong hand/Weak hand stages are usually my kryptonite, but not this time. I moved through the stage with fairly clean, fairly quick shooting and headed on out to the last two stages.
Travis’ Deuce and a Half on Stage 4 (Starting position)
Strong/Weak side Stage 4 targets and Hostage flipper. Photo by Lisa Stennett.
Stage 5 - Wind Sprints
We have seen this one before, but this time slightly modified. On this stage you were to load and make ready your pistol and rifle and they were to be staged roughly 15 yards apart. There was a target setup in front of each staging area and a kettlebell on the ground. You were to make one hit on the steel target with your pistol, pickup the kettlebell, run to your rifle and make one hit with your rifle on the small green flipper target. You were then to pickup the kettlebell and run back to your pistol. Rinse, repeat, as fast as possible, 8 times.
Pistol in staging location for Stage 5
Rifle in staging location for Stage 5
Stage 5 small rifle flipper
Stage 5 pistol steel
Michael running the wind sprints on Stage 5 with the kettlebell
Travis using his 45 degree red dot on the flipper target
I moved through this stage fairly quickly. If there was any hiccup, because of the small size of the rifle target, I was engaging with my scope on about 2.5x instead of using my piggybacked red-dot up top. This might have been a mistake. I think using my red-dot here would have proved to be more efficient, even if I had to make an extra shot or two. This stage was designed to wear you out, and it certainly works. Its basically like doing “suicides” at basketball practice but with a kettlebell and targets. I shot this stage pretty well and I was ready to move on the final stage.
THE FIX:
Now that I have those little green flipper targets, I will work on making hits with both red dot and scope to see which one is more efficient at different distances.
Stage 6 - The Door:
The final stage was straightforward: Kick down a door and engage all the paper targets in the A-zone, but not the hostages, as fast as possible with 2 hits each with any weapon system you choose.
I am 100% positive this is not the first door Michael has kicked in.
This is one I really want back. No malfunctions, just stupid decisions. I decided to engage this with my rifle, thinking I was going to have to make the hits from a bit further away and I wanted to be able to confirm A-zone hits with my scope. When I kicked the door down, the shooting area was large and close to the targets. I could have just hosed this stage with my pistol or even the red-dot on my rifle but for some reason, slowly and methodically I engaged all targets with two hits each. To make matters worse, the two AR mags I had left were nearly empty, so I ended up running through 2 (!) partial rifle mags before finally pulling out my pistol to finish the job.
THE FIX:
I think subconsciously I knew I had at least passed all prior stages and did not want a failure on the final stage by hitting a hostage, so I shot with an extreme amount of caution that was not necessary at all. This is not the first time I have done that and it is a mentally block that I must get over. I know it originates from lack of confidence, but at those distances and those targets, it shouldn’t have. That was an easy-day-hose-it-down-go-out-in-a-blaze-of-glory stage and I treated it like a fragile piece of porcelain.
After finishing up on Stage 6, I sprinted, literally, to the finish line. From a shooting standpoint, I had only shot poorly on one stage, Stage 3 - The Box, but I was pretty deflated about all of the issues I had that killed so much time on the clock. All of those issues were easily preventable. A conservative estimate is that I left at least 1 full minute of shooting time on the table and I was not happy about that at all.
Dan, running. I really need to check out how he is carrying his rifle.
My buddy Travis was running the 10k version of the event and we had a chance during wait time together on stage 5 to compare score cards up until that point. It was clear, he was on an absolute heater. When I finished up running, I waited for him to come through his first 5k leg and I told him, “All you have to do is match those scores one more time, and you will win the whole thing.” I don’t think he really believed me, but he did go back out and beat his scores on nearly all stages and it resulted in him getting 1st place for the 10k event. As I said already, well done buddy, you deserve it because you have put in the work and it shows.
Travis, the 10k winner.
As for me, I left before the final scores were announced as I was still close enough to home to make the rest of my day productive. Travis called me that night and told me I placed 2nd place out of 77 entrants in the 5k. I honestly couldn’t believe it. Despite my issues, my shooting time overall still ended up 7th and my running score 2nd. It was just enough combined to push me a few points ahead of 3rd place. If there is one thing I have been able to do in these events, it has been to avoid stage failure and to run consistently near the top. With a 5th, 3rd and now 2nd place finish, that recipe is getting me close. I think if I can clean up a few of things, and confidently engage some stages more quickly, maybe, one day I can bring home first place as well.
There is always next year…..

