• Watch Out for Scammers!

    We've now added a color code for all accounts. Orange accounts are new members, Blue are full members, and Green are Supporters. If you get a message about a sale from an orange account, make sure you pay attention before sending any money!

Snipery Australian Owen semi-auto SMG build FINISHED W/VIDEO

buffalowinter

Freer of the Oppressed
Supporter
Full Member
Minuteman
  • Mar 17, 2014
    3,306
    12,327
    106
    Llano, TX
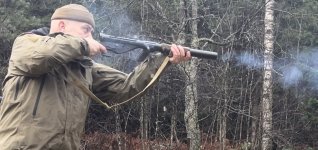
    Started building an Australian Owen SMG in semi-auto...who doesn't want a vertical feed, bottom ejecting tinker-toy.
    alex-stuart-owen-8.jpg
    owen-submachine-gun-australia.jpg

    Biggest challenges were the bullpup design trigger linkage and the vertical feed. To get the vertical feed to work I cut a sten bolt in half and re-welded it to vertical feed.

    before and after

    DSCN4936.JPG DSCN4944.JPG

    Next I had to get the trigger to work in the bullpup configuration. Basically, this is the normal Sten trigger with the trigger lever cut-off and a linkage to a forward placed trigger. Actually works really well, but took a lot of fabrication.

    before: note two triggers and after

    DSCN4933.JPG
    DSCN4935.JPG


    Well, the hard part is done, and initial testing looks like it feeds well and everything works.. Welded the barrel in, added the barrel extension and fitted the forward grip. Submitted paperwork for an SBR and the barrel will be cut to 10" and the unique muzzle brake attached when the form 1 is approved.

    DSCN4946.JPG DSCN4939.JPG

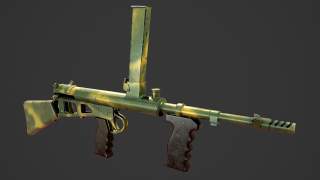
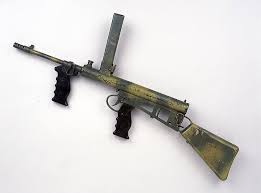
    Now to work on the dust cover and attaching the skeleton buttstock. Also need to attach the mag well.
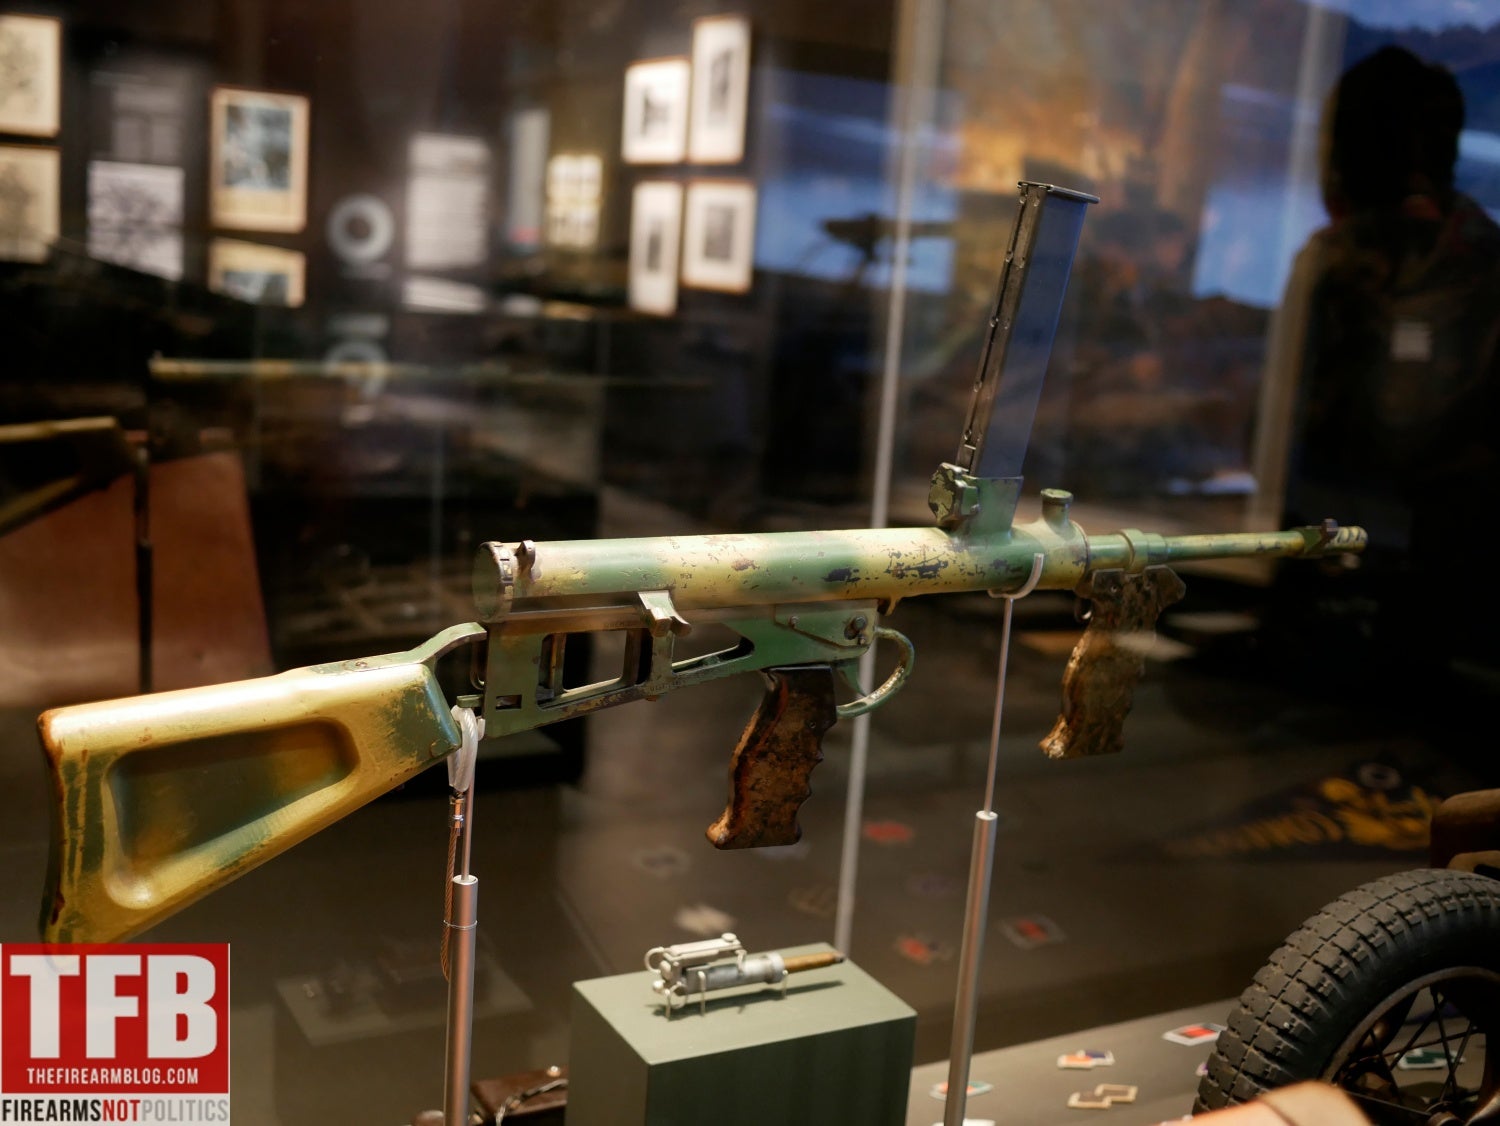
    DSCN4948.JPG DSCN4942.JPG

    An early mock-up.

    DSCN4937.JPG


    Add some finishing details such as the correct cocking knob, the off-set sights, the barrel screw, sling swivels, and finally the correct paint.

    owen-austen-006-1024x815.jpg
    images
    TFBMiles1-1.jpg
     
    Magazine well done. Gun has been test fired, and cycles and shoots fine.
    DSCN4949.JPG


    Now to figure out how to mount the detachable skeleton stock.
    DSCN4950.JPG


    Still need to do:
    Make sideplates/dust cover
    weld rear sight
    install extractor (waiting on part)
    final assembly of fire control group using proper pins. For test firing I was using cotter pins and thru bolts to facilitate correcting problems. The side plates will probably screw on and hold all the pins in place. I'm looking at some type of rear sleeve extension to facilitate mounting the stock and for aesthetic appearance.
    Paint
    Upon receipt of form 1, cut barrel to 10", crown, thread, and mount muzzle brake
     
    Very cool. The right coloured paints to finish it are surprisingly bright colours when you see them for real.

    A friend on mine got hit in the foot with one of these in Viet Nam. He was at his artillery firebase (161 Bty RNZA) when an Australian patrol was contacted only a couple of kilometres away.

    The gunners were all standing up trying to see what was happening when zzzzzzzzzzzzzzzzzzzzzzzzzztttttttttttt! Whack! Pete was hit in the foot by an almost spent bullet. It caused a painful bruise but no other injury.

    The 9mm bullet was picked up off the ground next to him.
     
    Last edited:
    • Wow
    • Like
    Reactions: sinister and ZG47A
    I am going to take up a collection to buy you a TiG welder... ;-)

    Seriously, cool job on that Owen! Can't wait to hear the testing results and see the finished gun!

    Cheers,

    Sirhr
    But then it wouldn't look like the originals. No TIG welding in WWII. Although perfected in 1941 by Russell Meredith of Northrop Aircraft, it didn't gain in popularity until the '50's. I am basically the "Woodwright's Shop" version of Gunsmithing. No milling machine for me, give me a set of Horseshoer's files. PS, pretty much finished up today. Ready for sand blasting, priming and paint. I have to electro-chemical etch the serial number. Pics to follow.
    im-a-grumpy-old-man-grumpy.gif
    When I was a kid, I loved Roy Underhill on PBS on The Woodwright's Shop. I learned sooooo much from watching that show and it definitely contributed to my "hands-on" delinquency! And obsession with projects. And antiques.

    Circa 1980, I actually wrote Roy Underhill a letter asking him to show how a Pennsylvania Rifle stock was made. And not only did he write back, but he went to Colonial Williamsburg and did a whole show on how their gunsmiths made their muskets. I forgot how I found the address. No Internet then. Must have been shown at the end of the show or something.

    And, true about Oz welding... We have a saying in the shop about Australian... repairs. "The right way. The Wrong Way. And the Australian Way."

    Sorry Barney!

    Cheers,

    Sirhr
    I went to Undergraduate school at the College of William and Mary in Virginia (Official title in the King's charter, suck it Harvard!) and spent some time at the Gunsmith's.
     
    Pretty much finished. Test fire complete. Cycle test complete. Waiting for an ejector but that is an external bolt on piece (ejector from MK 1 Sten). Going to experiment with an original charging handle but have completed testing with a Sten charging handle and it worked fine, Sand blast, prime, and paint tomorrow. Who knows how long it will take to get the form 1 back, I've got three submitted right now.
    DSCN4954.JPG
    DSCN4955.JPG
    DSCN4956.JPG
    DSCN4957.JPG
    DSCN4958.JPG
    DSCN4959.JPG
     
    I have a 1945 No1 MkIII that still has the original, unfaded poop green jungle paint on it under the stock. If you want a paint match I can get it for you.
     
    • Like
    Reactions: BScore
    I have a 1945 No1 MkIII that still has the original, unfaded poop green jungle paint on it under the stock. If you want a paint match I can get it for you.
    Thanks, I have some correct yellow poop paint that I got from Arizona Supply that they had color matched. used it on my South African (out of Rhodeia) FAL. I'm just going to try to get close with the green as this isn't an exact clone. I've done a pretty intense google search looking for color pic's and it appears that there are a couple of different paint scheme's. I'm going to try to match the bottom pic of an Owen in the National Museum of American History collection.
    DSCN4929.JPG
    1090692-768x577.jpg


    Owen SMG National Museum of American History collection
    deliveryService
     
    SN and NFA info electro-chemically etched. NFA stuff won't be visible, it is under the dustcover. Now, on to sand blasting. Chemical etching is incredibly easy...12 volt battery and salt water over vinyl stencils.
    slide-19.jpg

    Electrolysis will result in disolution of the anode (steel) with reduction in gaseous chlorine.

    DSCN4960.JPG
    DSCN4961.JPG
     
    Last edited:
    Made the charging knob. This is the only original Owen part in the gun. Made a base to fit into the bolt, drilled and tapped a 10-32 hole in the knob and base, put them together with a 10-32 screw then pinned both the base and knob through the screw.
    DSCN4965.JPG
    DSCN4964.JPG


    Also finished up my frolding WWII British Paratrooper bike.
    DSCN4966.JPG


    Made by BSA. Note the hinge and clamp.
    DSCN4967.JPG


    Original WWII British Torch. The most bizarre design taking a square battery. Took me all morning to figure it out and make an AA adapter.
    DSCN4968.JPG


    Top tube clamp
    DSCN4969.JPG


    Complicated center pull brakes.
    DSCN4970.JPG


    I had to fabricate these pedals. They slide to the inside to keep them out of the way when jumping.
    DSCN4971.JPG
    DSCN4972.JPG


    Imagine jumping this into Holland during Operation Market Garden.
    ecbc35d27151859f1baa55f17a610c56.jpg
     
    SN and NFA info electro-chemically etched. NFA stuff won't be visible, it is under the dustcover. Now, on to sand blasting. Chemical etching is incredibly easy...12 volt battery and salt water over vinyl stencils.
    slide-19.jpg

    Electrolysis will result in disolution of the anode (steel) with reduction in gaseous chlorine.

    View attachment 7780114View attachment 7780116

    Llano?

    That’s got me thinking about some brisket and baked potato at coopers!
     
    I have a pile of stuff from the 82nd.. grandfather went from 0-1 to O-6 in three years


    View attachment 7781031
    Was a hell of a way to get promoted, though!

    Old British Barracks toast: “To Long Wars and Sickly Seasons.”

    The only two ways you got promoted in the Victorian army…

    Cool stuff, thanks for posting!

    Sirhr
     
    • Like
    Reactions: sinister and ZG47A
    Completely finished and test-fired. As usual, upon final assembly, I had to work out some kinks and do some re-design. Despite being sleeved, the end cap kept failing and shooting the end cap, guide rods, and springs out the back after a dozen rounds. Three 10-32 screws through another sleeve and into the end-cap solved that problem. Ready for paint and a final video once the weather gets nicer.
    DSCN4976.JPG
    DSCN4977.JPG


    Now to finish up my VG-1 in 7.92x33. It sat at a well know gunsmith's for over a year waiting for the barrel to be pinned and a firing pin made. They finally admitted they were too busy to get to it. I Pinned the barrel the day it came back and made a firing pin the next day. Making a new firing pin. The first one I made consistently popped primers but only fired intermittently with live ammo. Damnedest thing I ever saw and still not sure why...non-concentric chamber and /or, non-concentric pin with some tolerance stacking thrown in is my best guess.

    DSCN4978.JPG
     
    It makes me skieerd.

    6jsqbd.jpg


    When there are geriatric Australian street gangs running wild, it'll be your fault!