

I figured it was about time to make a simple guide for problem areas to check with these two common triggers. If you just got a stock/chassis or just installed one of these triggers and your barreled action and or bottom metal will not drop in, your safety will not function correctly, your trigger will not fire. Then its probably one or more of these areas that needs attention. Most of the newer, common chassis (AI, McRee, RockSolid, Manners Mini Chassis, XLR, KMW IMB) are already inlet in these spots. The same areas can give problems in traditions stocks (Manners, McMillan, H&S, B&C, KMW Sentinel) as well. Manners and McMillan will inlet the stock for your specific trigger when ordering a stock from them. The bottom metal or trigger guard can be affected by these triggers as well (Badger, APA, Pacific, Surgeon, BDL & ADL factory style)
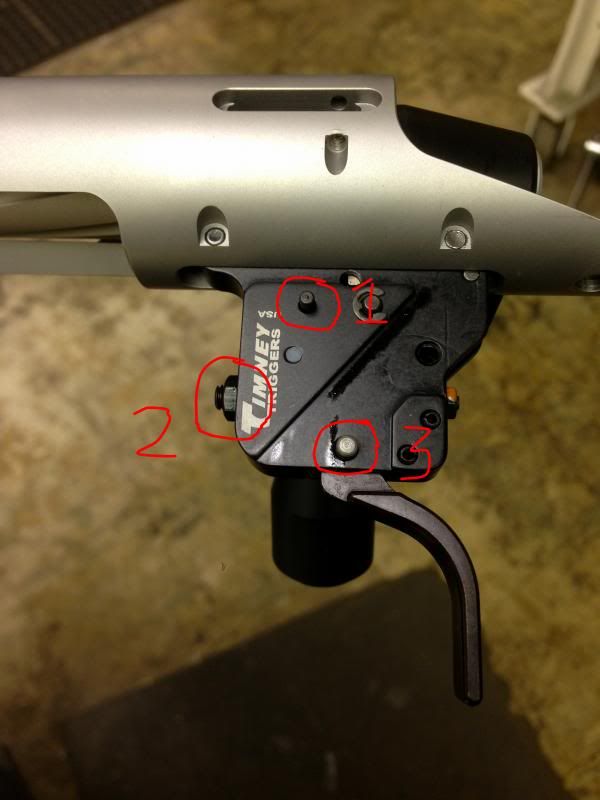
Timney 510/510U has three common areas that need to be checked. Timney is marked in RED
1: Safety detent pin. This pin on the left side of the trigger body. It moves in and out as the trigger is moved from safe to fire and fire to safe positions. If you can not move the safety to one position or the other, check this area.
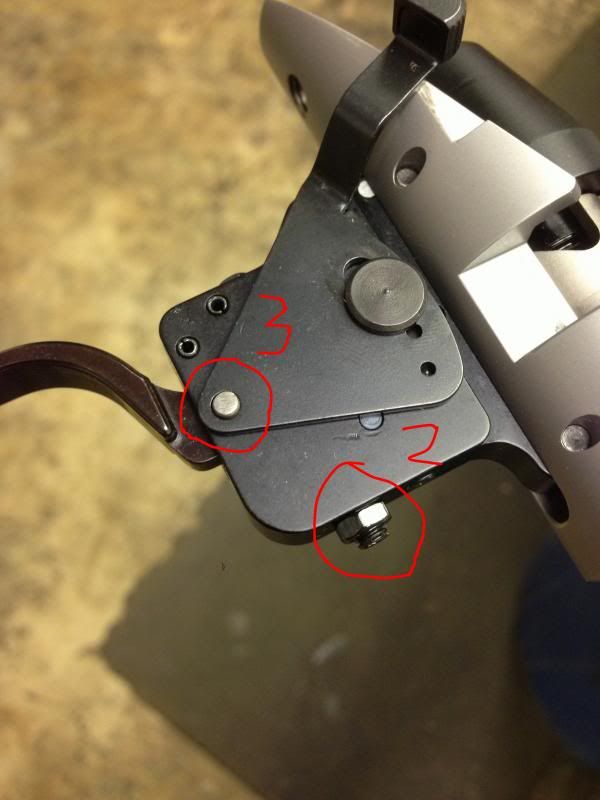
2: Trigger poundage adjustment screw and nut. This part of the trigger often rubs on the bridge area of a stock or chassis. May prevent the barreled action from dropping in.
3: Pivot pin and safety lever. The pin is a little long and can stick out further to one side and catch the stock or bottom metal. The bottom round portion of the safety lever can catch on the bottom metal as well. If your barreled action will not fully drop in, is cocked to one side or the bottom metal will not drop in check this area. If your safety binds or will not work, check this area.
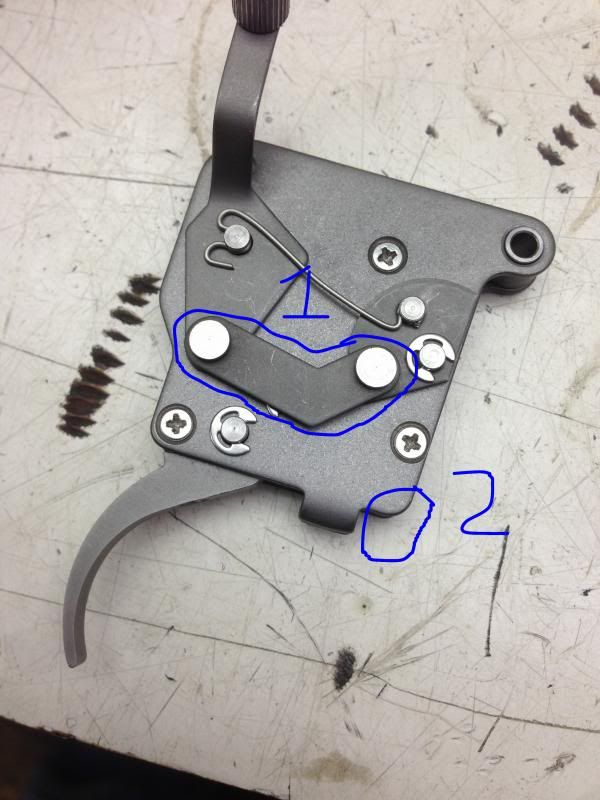
Jewell triggers are easy. The common spots to check, marked in BLUE
1: Safety linkage, The safety linkage moves forward and down slightly when going from safe to fire. The linkage moves back and down slightly when going from fire to safe. If your barreled action will not drop, is cocked to one side, check this area. If you can not put your rifle on fire, or back on safe from fire, check this area. On bottom saftey models, Check for rubbing on the bottom metal and lower chassis cut out. Remington X Mark Pro safety linkage can hit in this same spot.
2: Front edge of trigger body, This area can make contact in the bottom of the trigger cut out of a chassis or front part of trigger cut out on bottom metal. If your barreled action will not fully drop in, bottom metal will not drop in, check this area. This is not as common but still needs checked. It will not take much pressure on this area to lock the trigger up. CG-22 triggers also need checked in this area.
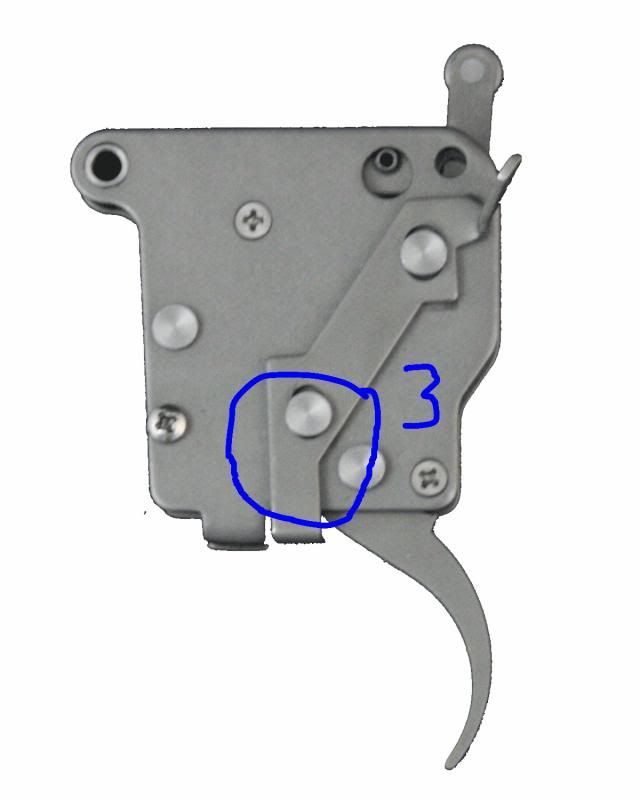
3: Bolt release linkage, This can often rub on the bottom of the chassis cut out or bottom metal. If your barreled action is cocked to the side or your bolt release sticks or is sticky, check this area
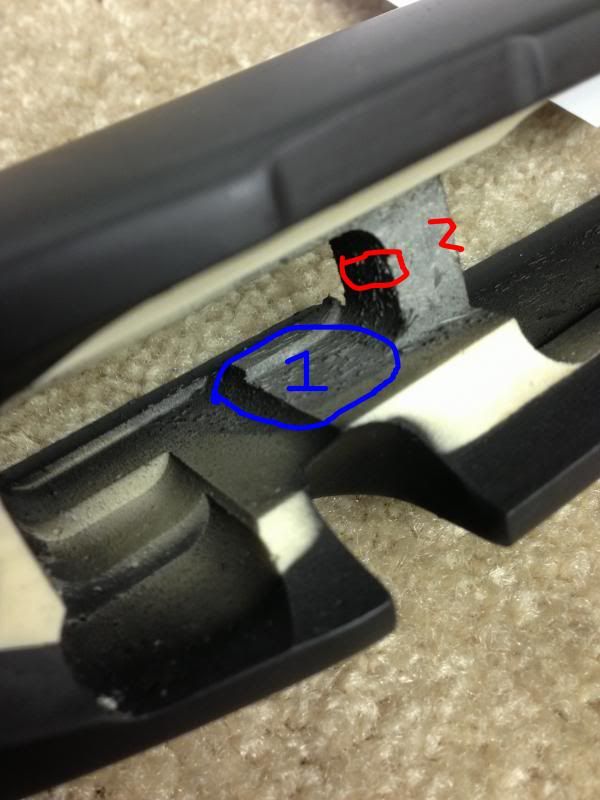
Here are the corresponding areas on a traditional stock. Timney = RED, Jewell = BLUE
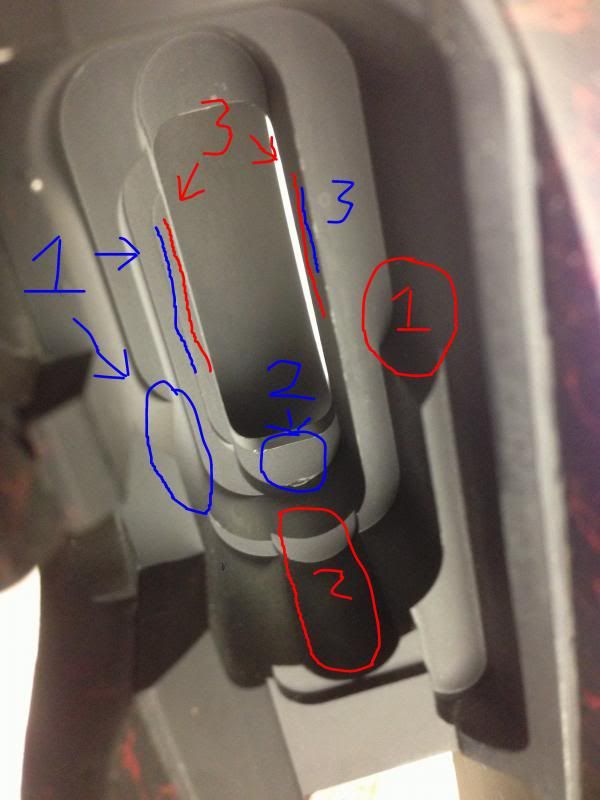
Corresponding areas for a Chassis. These can also be applied to the traditional stock. Timney = RED, Jewell = BLUE (Manners Mini Chassis pictured. Note how this was inlet from Manners)
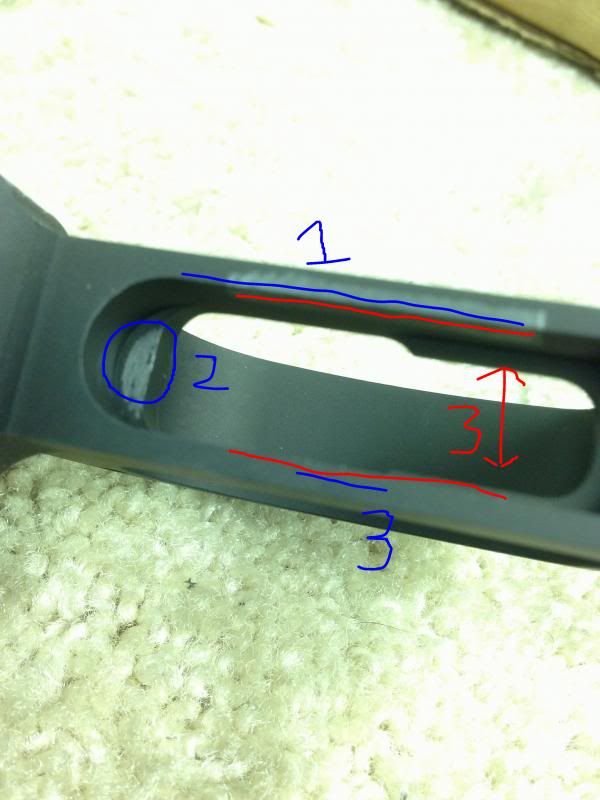
Corresponding areas for bottom metal. Timney = RED, Jewell = BLUE
Im not going to go into how to inlet other than saying, the mill and a sharp end mill are your friends. They will give you the best overall results IMO.
Timney 510/510U has three common areas that need to be checked. Timney is marked in RED
1: Safety detent pin. This pin on the left side of the trigger body. It moves in and out as the trigger is moved from safe to fire and fire to safe positions. If you can not move the safety to one position or the other, check this area.
2: Trigger poundage adjustment screw and nut. This part of the trigger often rubs on the bridge area of a stock or chassis. May prevent the barreled action from dropping in.
3: Pivot pin and safety lever. The pin is a little long and can stick out further to one side and catch the stock or bottom metal. The bottom round portion of the safety lever can catch on the bottom metal as well. If your barreled action will not fully drop in, is cocked to one side or the bottom metal will not drop in check this area. If your safety binds or will not work, check this area.


Jewell triggers are easy. The common spots to check, marked in BLUE
1: Safety linkage, The safety linkage moves forward and down slightly when going from safe to fire. The linkage moves back and down slightly when going from fire to safe. If your barreled action will not drop, is cocked to one side, check this area. If you can not put your rifle on fire, or back on safe from fire, check this area. On bottom saftey models, Check for rubbing on the bottom metal and lower chassis cut out. Remington X Mark Pro safety linkage can hit in this same spot.
2: Front edge of trigger body, This area can make contact in the bottom of the trigger cut out of a chassis or front part of trigger cut out on bottom metal. If your barreled action will not fully drop in, bottom metal will not drop in, check this area. This is not as common but still needs checked. It will not take much pressure on this area to lock the trigger up. CG-22 triggers also need checked in this area.
3: Bolt release linkage, This can often rub on the bottom of the chassis cut out or bottom metal. If your barreled action is cocked to the side or your bolt release sticks or is sticky, check this area


Here are the corresponding areas on a traditional stock. Timney = RED, Jewell = BLUE

Corresponding areas for a Chassis. These can also be applied to the traditional stock. Timney = RED, Jewell = BLUE (Manners Mini Chassis pictured. Note how this was inlet from Manners)

Corresponding areas for bottom metal. Timney = RED, Jewell = BLUE

Im not going to go into how to inlet other than saying, the mill and a sharp end mill are your friends. They will give you the best overall results IMO.
Last edited:
