I came up with this idea after months of boredum that had previously consumed all of my good ideas on a west-pac MEU.
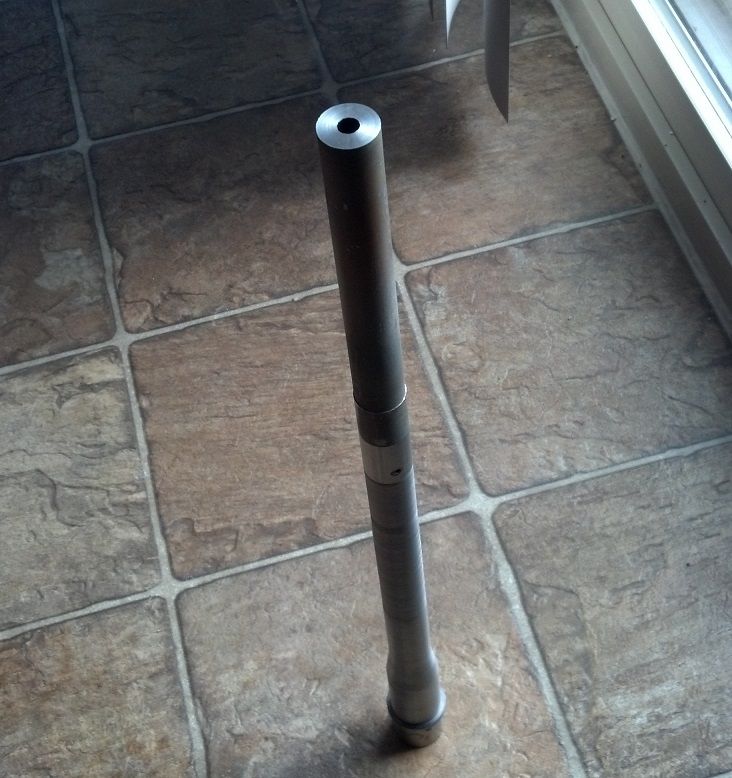
I had been wanting to shave some material off of my "SPR" profile 18" AR15 barrel, as well as have it cut down to 16". I checked a few places for pricing and couldn't bring myself to spend over $100 on a pretty heavily used barrel. I had decided that I'd just wait it out until I burned the barrel up and would get a shorter lighter replacement later. Then I began to wonder if I could so it myself on my 7x12" Grizzly mini-lathe.
Looking over the specs of the spindle and chuck bores, I found that it might fit with a bit of work. I'd have to shave everything behind the gas bock to < 20mm so that it would fit through the headstock and feed correctly (I don't need that shoulder behind the FSB because my YHM FSB clamps on and I use a FF tube, no retaining cap), and I would have to make a spider for the rear of the spindle. Also, I'd have to come up with a way to indicate off of the bore. After mulling it over a while I figured what the hell, live and learn. Worst case scenario, I buy a new barrel and learn something. Best case I get what I want almost for free.
First step, I slid the muzzle as far into the 4-jaw/spindle as possible, then pulled up the tail stock with a live center into the barrel extension (loosely). I indicated the barrel OD right up next to the 4-jaw until it was running within .0005", then tightened up the tailstock/live center. I made several passes, removing the bulk of the material necessary, then put a very slight taper from ~4" behind the gas port until it met the steeper taper just forward of the chamber area.
After that was finished, I pulled the barrel out, slid it through the head stock, and cut it to 16.5" with a rough OD indication.
Now on to indicating the bore. What a headache... Here's the clearance I had to play with in the rear of the spindle.
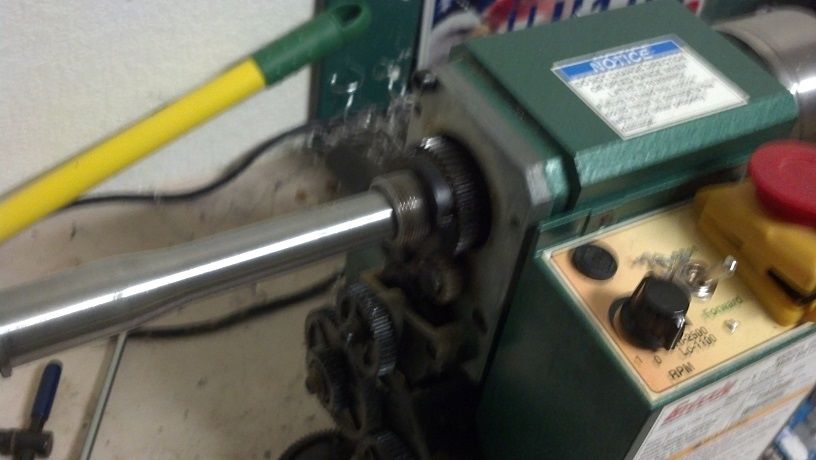
I made a spider out of some 2.125" solid 6061 bar. Drilled, bored, then threaded to fit the rear of my spindle, then drilled and tapped 4, 1/4x20 holes and used some 1" screws as "teeth". Sorry, I don't have any pictures of it, but it looks just like any other...
Next was a 5" long aluminum bar, 7/8" diameter. I fit it between centers and turned down 3" of it's length to .255", with a very shallow taper leading up to .257" (this is a 6.5 Grendel barrel, .264 groove, .256 land). The extra 2" I turned to about 3/4" just to get it concentric with the rest of it.
Spider on the spindle, barrel in the spindle, and an open 3/4" 316 stainless ring between the barrel and the 4-jaw chuck (pivot point). Inserted the indicating rod into the bore, and played the adjusting game for probably an hour before it was running within .001" runout across the length of the rod that I could measure. Whew...
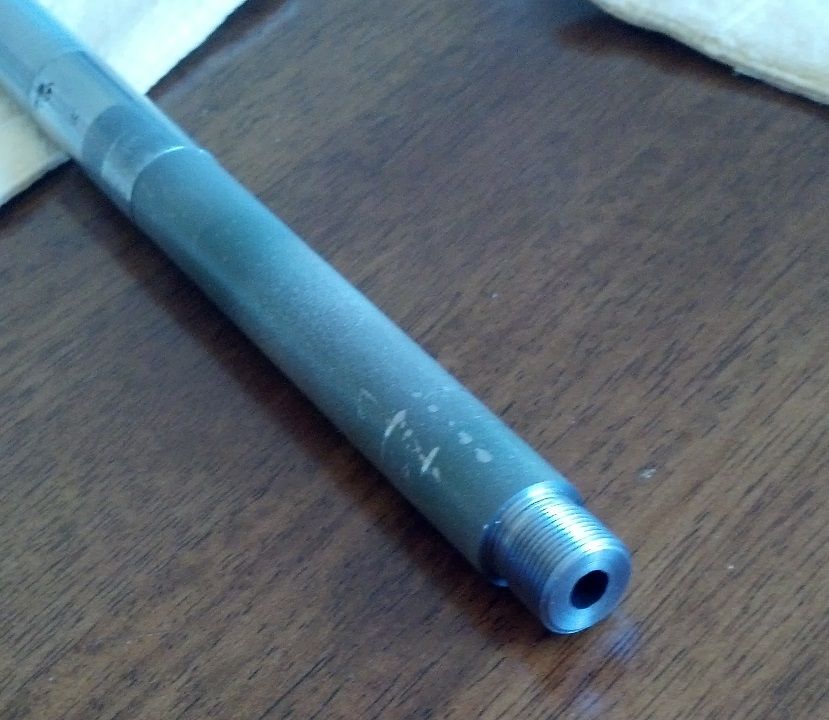
Turned down to .6245", cleaned up the face (crown), cut a relief for tool clearance, and geared up the lathe for 24 TPI. I was extra cautious, cutting only .001" per pass with lots of oil. Ended up with this;
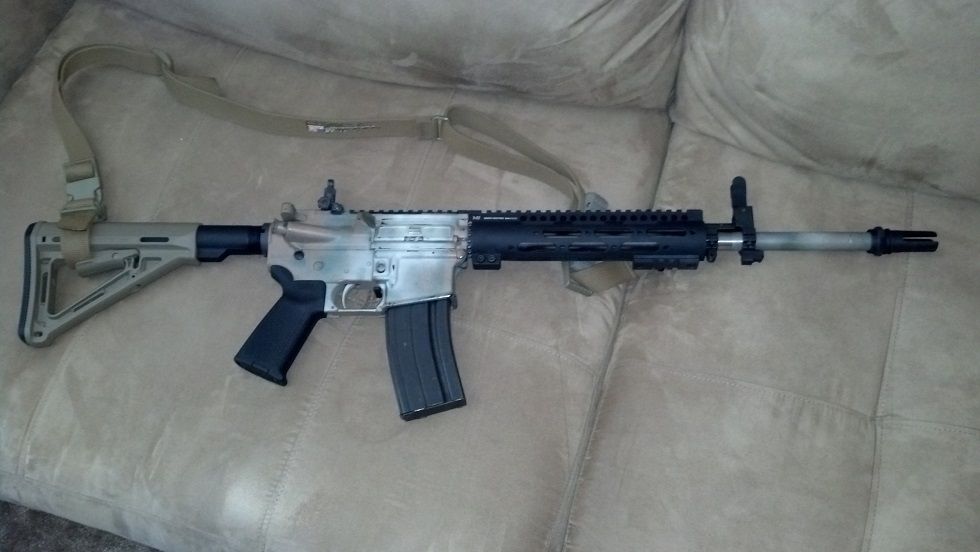
And here she all is put together. I need to bust out the spray paint again. Damn lego guns are so easy to replace stuff.
All in all I'm calling it a success. Not the most professional thing ever, but I doubt anyone is going to question it. This barrel is not leaving my possession, regardless. I saved myself $100-150 or so for a couple hours of my time, and got quite a bit of insight and a plethora of notes on how to do things better in the future. The AAC flash hider/suppressor mount is there for looks at this point. I may eventually get a suppressor, but I believe I'll have shot this barrel out first. Either way, I'm going to triple check clearance if I ever mount one up on those threads. Everything checked out before and after cutting, and I've got ~.02"+ clearance anyways using a 7.62 can, but safety rules out.
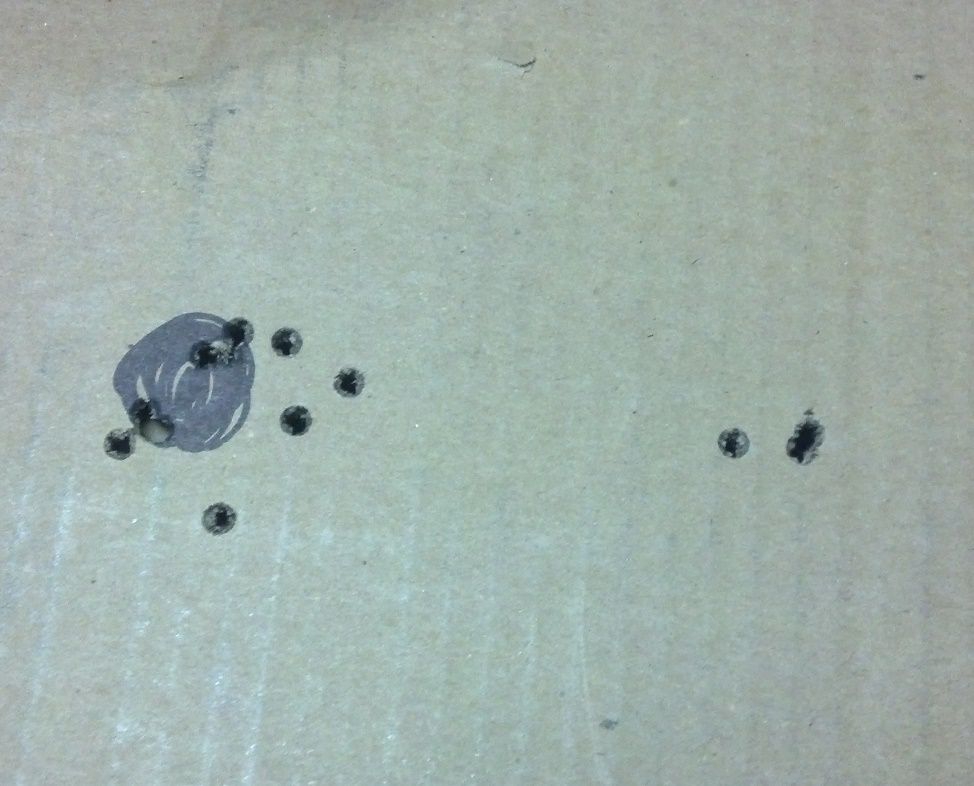
Will I ever try this again? No. Not on that lathe. Even with a complete tune-up, tightening gibs and taking out backlash, I don't think it was rigid enough. I've made a point to make my next big purchase a 36" or 40" grizzly lathe and $1000-2000 of tooling. I just wanted to see if it was possible and felt I didn't have much to lose, considering how many rounds are already through this tube. I haven't been able to shoot it, yet, so we'll see if I've wrecked it next weekend probably... I'll throw a range report onto this thread when it happens.
Alright, do your worst!")
I had been wanting to shave some material off of my "SPR" profile 18" AR15 barrel, as well as have it cut down to 16". I checked a few places for pricing and couldn't bring myself to spend over $100 on a pretty heavily used barrel. I had decided that I'd just wait it out until I burned the barrel up and would get a shorter lighter replacement later. Then I began to wonder if I could so it myself on my 7x12" Grizzly mini-lathe.
Looking over the specs of the spindle and chuck bores, I found that it might fit with a bit of work. I'd have to shave everything behind the gas bock to < 20mm so that it would fit through the headstock and feed correctly (I don't need that shoulder behind the FSB because my YHM FSB clamps on and I use a FF tube, no retaining cap), and I would have to make a spider for the rear of the spindle. Also, I'd have to come up with a way to indicate off of the bore. After mulling it over a while I figured what the hell, live and learn. Worst case scenario, I buy a new barrel and learn something. Best case I get what I want almost for free.
First step, I slid the muzzle as far into the 4-jaw/spindle as possible, then pulled up the tail stock with a live center into the barrel extension (loosely). I indicated the barrel OD right up next to the 4-jaw until it was running within .0005", then tightened up the tailstock/live center. I made several passes, removing the bulk of the material necessary, then put a very slight taper from ~4" behind the gas port until it met the steeper taper just forward of the chamber area.
After that was finished, I pulled the barrel out, slid it through the head stock, and cut it to 16.5" with a rough OD indication.
Now on to indicating the bore. What a headache... Here's the clearance I had to play with in the rear of the spindle.
I made a spider out of some 2.125" solid 6061 bar. Drilled, bored, then threaded to fit the rear of my spindle, then drilled and tapped 4, 1/4x20 holes and used some 1" screws as "teeth". Sorry, I don't have any pictures of it, but it looks just like any other...
Next was a 5" long aluminum bar, 7/8" diameter. I fit it between centers and turned down 3" of it's length to .255", with a very shallow taper leading up to .257" (this is a 6.5 Grendel barrel, .264 groove, .256 land). The extra 2" I turned to about 3/4" just to get it concentric with the rest of it.
Spider on the spindle, barrel in the spindle, and an open 3/4" 316 stainless ring between the barrel and the 4-jaw chuck (pivot point). Inserted the indicating rod into the bore, and played the adjusting game for probably an hour before it was running within .001" runout across the length of the rod that I could measure. Whew...
Turned down to .6245", cleaned up the face (crown), cut a relief for tool clearance, and geared up the lathe for 24 TPI. I was extra cautious, cutting only .001" per pass with lots of oil. Ended up with this;
And here she all is put together. I need to bust out the spray paint again. Damn lego guns are so easy to replace stuff.
All in all I'm calling it a success. Not the most professional thing ever, but I doubt anyone is going to question it. This barrel is not leaving my possession, regardless. I saved myself $100-150 or so for a couple hours of my time, and got quite a bit of insight and a plethora of notes on how to do things better in the future. The AAC flash hider/suppressor mount is there for looks at this point. I may eventually get a suppressor, but I believe I'll have shot this barrel out first. Either way, I'm going to triple check clearance if I ever mount one up on those threads. Everything checked out before and after cutting, and I've got ~.02"+ clearance anyways using a 7.62 can, but safety rules out.
Will I ever try this again? No. Not on that lathe. Even with a complete tune-up, tightening gibs and taking out backlash, I don't think it was rigid enough. I've made a point to make my next big purchase a 36" or 40" grizzly lathe and $1000-2000 of tooling. I just wanted to see if it was possible and felt I didn't have much to lose, considering how many rounds are already through this tube. I haven't been able to shoot it, yet, so we'll see if I've wrecked it next weekend probably... I'll throw a range report onto this thread when it happens.
Alright, do your worst!