Not sure where I went wrong, I watched so many videos, got advice on here, took every precaution I could, and now the barreled action is stuck in the stock.
Here’s the setup zermatt origin, manners TA elitetac, Hawkins Hunter dbm
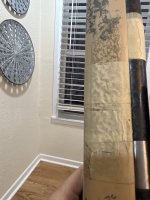
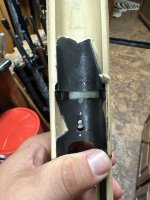
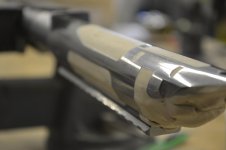
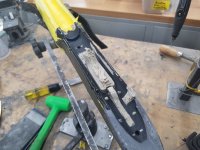
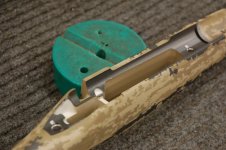
Here’s what I did: taped a few inches forward of the action to center the barrel. Taped the stock from front of recoil lug hole and about 4” forward, (regular tan masking tape if that matters). I’ll attach a photo of where it’s all taped so it makes sense. Taped front and sides of recoil lug. Clay in the trigger hole, clay in the trigger pin slots, clay in the little hole where the lug is pinned. Waxed areas in the mag well and trigger well and everywhere else on the stock I didn’t want bedding. One shot on the action and barrel up to the taped part beyond the tape on the stock (2 coats with time between them). Bedded with probed for action, pillars and bottom metal.
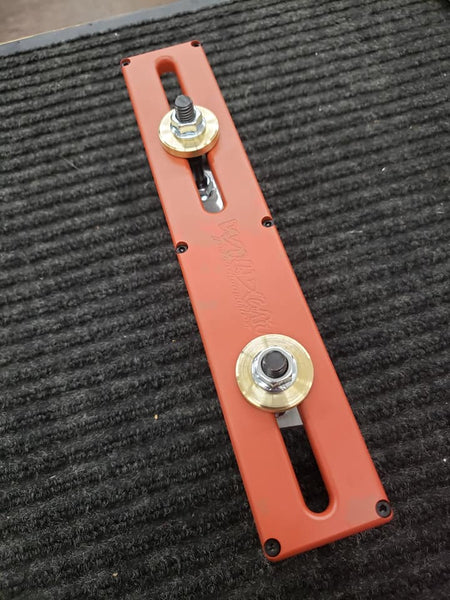
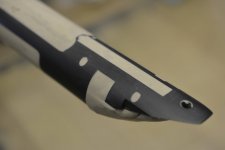
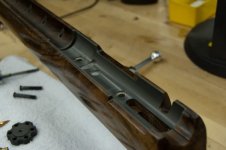
Here’s where I’m at: Action is stuck in stock. Now the bottom metal came free (although it was tight) so I’m fairly confident the release agent worked just fine. But the action absolutely will not budge. I’ve cleaned up the excess that was in the mag well hole and it has come off the action quite easily, and not quite as easily in the stock parts that were waxed but rough, couple hits with the chisel fixed that real quick though. I’m assuming the issue is just a very tight bed because everything is coming off the areas I can access that had release agent on them, but I could be wrong of course. I just feel like if i pull any harder I’m risking breaking the stock, it’s getting some flex in the forarm with the ammount of pressure I’m trying already. I suppose the bedding could have run up the barrel channel past the tape but that seems unlikely given that it only gooped out the first inch or so infront of the lug. I can’t image where there could be a mechanical lock given the careful clay application and visually unobstructed feed lips. I’ve been bouncing the rifle on it’s butt pad on the ground with little to no progress made. I’ve been tapping at the accessible parts of the bottom of the action with a punch but I don’t think I can hit it any harder without tearing up the metal. So I’m at a loss at this point. Everything I’ve read on here says put it in the freezer, but mine isn’t big enough for a rifle so I’d have to find a friend with room to spare that wouldn’t mind me using theirs, and my deadblow hammer is inside a pickup that’s at the ford house for repairs.
So my question is if anyone has any suggestions to try before I go asking around to use some freezer space or is that absolutely the best way to go about this?
Here’s the setup zermatt origin, manners TA elitetac, Hawkins Hunter dbm
Here’s what I did: taped a few inches forward of the action to center the barrel. Taped the stock from front of recoil lug hole and about 4” forward, (regular tan masking tape if that matters). I’ll attach a photo of where it’s all taped so it makes sense. Taped front and sides of recoil lug. Clay in the trigger hole, clay in the trigger pin slots, clay in the little hole where the lug is pinned. Waxed areas in the mag well and trigger well and everywhere else on the stock I didn’t want bedding. One shot on the action and barrel up to the taped part beyond the tape on the stock (2 coats with time between them). Bedded with probed for action, pillars and bottom metal.
Here’s where I’m at: Action is stuck in stock. Now the bottom metal came free (although it was tight) so I’m fairly confident the release agent worked just fine. But the action absolutely will not budge. I’ve cleaned up the excess that was in the mag well hole and it has come off the action quite easily, and not quite as easily in the stock parts that were waxed but rough, couple hits with the chisel fixed that real quick though. I’m assuming the issue is just a very tight bed because everything is coming off the areas I can access that had release agent on them, but I could be wrong of course. I just feel like if i pull any harder I’m risking breaking the stock, it’s getting some flex in the forarm with the ammount of pressure I’m trying already. I suppose the bedding could have run up the barrel channel past the tape but that seems unlikely given that it only gooped out the first inch or so infront of the lug. I can’t image where there could be a mechanical lock given the careful clay application and visually unobstructed feed lips. I’ve been bouncing the rifle on it’s butt pad on the ground with little to no progress made. I’ve been tapping at the accessible parts of the bottom of the action with a punch but I don’t think I can hit it any harder without tearing up the metal. So I’m at a loss at this point. Everything I’ve read on here says put it in the freezer, but mine isn’t big enough for a rifle so I’d have to find a friend with room to spare that wouldn’t mind me using theirs, and my deadblow hammer is inside a pickup that’s at the ford house for repairs.
So my question is if anyone has any suggestions to try before I go asking around to use some freezer space or is that absolutely the best way to go about this?