• Frank's Lesson's Contest

    We want to see your skills! Post a video between now and November 1st showing what you've learned from Frank's lessons and 3 people will be selected to win a free shirt. Good luck everyone!

    Create a channel Learn more
  • Having trouble using the site?

    Contact support

Maggie’s The Welding and Metalworking Thread

How are the 255's working out for you in the school? Have one in my home shop and been a very good welder so far and really like the pulse function. The XR Aluma Pro gun does a nice job on aluminum.
They are awesome. We got them when they forst came out and they had some parts issued but miller resolved them very quickly. I tried to blow one up and it didn't get it done. High school kids are experts in breaking stuff and so far they have held up pretty good. They pulse gmaw like a champ. Stick is a bit tricky at times. I like to hold a long arc length when I light uo to let everything warm up. The machine does not want to maintain a very long ark before either cuts out for saftey.

I'd love one at home for the versatility.
 
1000007964.jpg

1000007967.jpg


1000007966.jpg


This gate is about as big of a project as we can get done in our little shop. Turned out pretty good. Impressed this kid has over 30 hours in to it. Almost all of them are after school hours.not all of the younger generation is lazy.
 
Little help, please.
So, the aluminum grate project has gone sideways. After welding, they twisted up like a potato chip. We attempted to heat straighten, but that didn't phase it in the least,
Anybody got any ideas how to straighten 3/8" 6061 flat bar after welding?
 
Little help, please.
So, the aluminum grate project has gone sideways. After welding, they twisted up like a potato chip. We attempted to heat straighten, but that didn't phase it in the least,
Anybody got any ideas how to straighten 3/8" 6061 flat bar after welding?
Earlier you said they got welded on one side then sent to finish.
Equal heat on both sides eliminates the stress while it cools off.
Spacers tacked in should hold things fairly straight. May just need spacers welded in.
Photos ?
 
Clamp it all down with c clamps to a solid steel table, heat the whole thing up and let it cool down with the clamps in place. Might have to do it a couple times. But really it comes down to the method of welding and equal heat placement when initially building it like hobo mentioned.
 
Little help, please.
So, the aluminum grate project has gone sideways. After welding, they twisted up like a potato chip. We attempted to heat straighten, but that didn't phase it in the least,
Anybody got any ideas how to straighten 3/8" 6061 flat bar after welding?
Look around for a heat treating shop near you.
They shouldn't have any trouble doing a thermo cycle run on it and it should stress relieve the thing.
Doesn't cost anything to make a call.....well, it's part of your phone plan anyway.

OBTW, you have to heat the whole thing at once, not sections at a time because that's how you got in this mess in the first place.
It has to cool equally as well, last I heard they were still burying it in some special sand....but what the fuck do I know anyway ?

Big oven, big cooling area.
 
Could also check with engine shops that have the proper way of welding cast iron blocks. They'll have a big oven that they put the blocks into and it heats up and then cools down gradually over 24hrs. Could be a good option as well.
 
Earlier you said they got welded on one side then sent to finish.
Equal heat on both sides eliminates the stress while it cools off.
Spacers tacked in should hold things fairly straight. May just need spacers welded in.
Photos ?
send pictures
It’s sitting on some channel to provide a flat surface. Welded on one side then flipped to weld opposite side. After the first one, I did clamp the one corner to put a counter bend to try that, but it came out the same. Pretty much looks like a potato chip 🤣
IMG_0926.jpeg
IMG_0927.jpeg
 
It’s sitting on some channel to provide a flat surface. Welded on one side then flipped to weld opposite side. After the first one, I did clamp the one corner to put a counter bend to try that, but it came out the same. Pretty much looks like a potato chip 🤣View attachment 8384790View attachment 8384791
I'm not a welder but I've done some here and there. I worked with a welder offshore who told me how he used to get those ALUMINUM flatbed 18 wheeler trailers to curve upward in the middle so that when you load them they will flatten out. Weld a single bead starting in the middle and working out to both ends--with the trailer flipped upside down-IIRC. I may not be telling this correctly at all...

Later in life, I built a large playground type swingset out of pipe in my shop on jackstands. Of course all the welding of legs, gussets and swing hangers was on just one side of the main crossmember. It looked like a longbow when I got through and nothing I tried along the way would stop the pull. Then I remembered what that welder had told me. I started in the middle of the pipe on the side opposite of all the other welding (the top) and welded a rod-length (stick welding) in one direction, then a rod length in the other direction towards the outer ends. It started to straighten a bit, enough that I had to move the jackstands holding the legs a little bit at a time. I welded until the pipe was back straight as an arrow and it has remained so to this day.

All this to say, if you weld a stringer bead along the high side of the bend starting in the middle, it may pull back straight. Then grind the stringer bead down smooth if you want. Again, I'm not a welder but it worked for me.
 
Last edited:
  • Like
Reactions: RPN and Hobo Hilton
It’s sitting on some channel to provide a flat surface. Welded on one side then flipped to weld opposite side. After the first one, I did clamp the one corner to put a counter bend to try that, but it came out the same. Pretty much looks like a potato chip 🤣View attachment 8384790View attachment 8384791
If you redo it, note how much bow you got while welding the first piece. Then, use shims and clamps to induce that much opposing bow in the unwelded pieces. Once welded, they should be flat.

Start at 5.34 in the video below for a better description than I can give…

 
My suggestion is not cost effective.

Block up the frame on level support blocks. Hook up a stress relief machine and heat it to the point of having the stress relieved. Once level, cover it with blankets and allow it to cool slowly. This is just a brief on what is "standard for the industry".

 
All of those suggestions will work, with steel. If it were built out of steel, it would be easy as pie to heat straighten it. That was something I got pretty good at at some previous jobs where heat distortion was a problem with thinner materials (under 1/2").
The main issue is the rules for steel fab don't apply to 6xxx alloy aluminum.
So what I'll try next is shorter sections, somewhere around 24" to see how that works. I built a test piece that was 22" to ship to the boss's house
for a test fit, and it was flat as a pancake.
The bad thing is, the house is on Sint Maarten and I can't just "run down there and test a full size piece.

ETA: I've gotten to the point where I'm not a fan of welding Aluminum, but that's all we use here :rolleyes:
 
Last edited:
  • Like
Reactions: Hobo Hilton
All of those suggestions will work, with steel. If it were built out of steel, it would be easy as pie to heat straighten it. That was something I got pretty good at at some previous jobs where heat distortion was a problem with thinner materials (under 1/2").
The main issue is the rules for steel fab don't apply to 6xxx alloy aluminum.
So what I'll try next is shorter sections, somewhere around 24" to see how that works. I built a test piece that was 22" to ship to the boss's house
for a test fit, and it was flat as a pancake.
The bad thing is, the house is on Sint Maarten and I can't just "run down there and test a full size piece.

ETA: I've gotten to the point where I'm not a fan of welding Aluminum, but that's all we use here :rolleyes:
I edited my tale above to include the fact that the trailers are aluminum
 
  • Like
Reactions: kindabitey
Can you get it all clamped flat and add use an angle or another channel to hold it flat? I'm guessing there is enough stress built up it will still bow. Saw it apart and weld it back together flat ish? Aluminum can be a bitch some times. Specialy long sections.
 
I edited my tale above to include the fact that the trailers are aluminum
How you described the process is pretty close. I talked to my Lincoln Electric rep. about this. One of his accts. is a trailer manufacturer in SW Virginia that does aluminum flat trailers. Apparently there's a lot of pre-planning/ engineering that goes into those that's beyond my capabilities. And just for the record the Lincoln rep. majored in Mech. engineering and minored in Metallurgy, and grew up in the welding consultation business.
I did try to run a weld on the opposite side of the curve, but it's 3/8" wide, so it was pretty tricky to keep it from rolling off. Even then, it didn't have much effect.
I guess the next step is to get a 2" sheet 48x96 and cut it out on the waterjet.
 
  • Like
Reactions: Hobo Hilton
Can you get it all clamped flat and add use an angle or another channel to hold it flat? I'm guessing there is enough stress built up it will still bow. Saw it apart and weld it back together flat ish? Aluminum can be a bitch some times. Specialy long sections.
I tried three different methods, and they all came out the same.
 
It's *springy* so you can't simply clamp it flat and hope for whatever magic to occur.
You have to remove the *springy* from it (stress relief).

If you're going to try something that has little chance of working you have to overcompensate (like with your penis) by bowing it in the opposite direction so when you release it it should spring back to some happy medium ground.
That's why nothing except a full heat cycling will work.....because the method you're using requires guessing at where the happy medium falls and it never falls right.
 
Just now saw this thread!
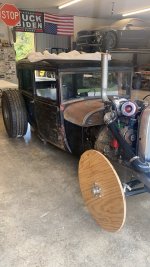
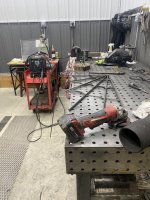
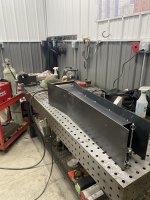
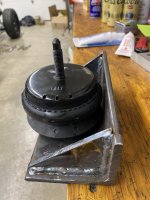
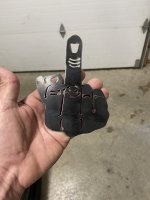
Here is some of the fun I’ve had in the last few years. Had a plasma table for a while and made some cool things.
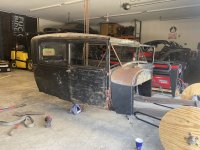
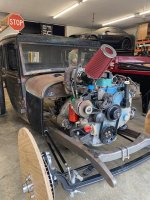
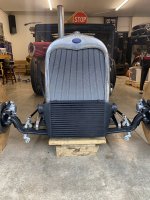
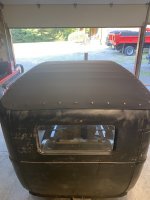
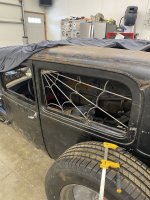
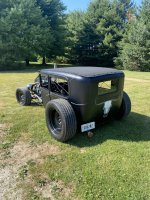
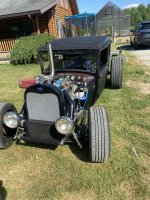
Kid talked me into building a Rat rod.
I think it turned out ok for never leaving my garage for the build.
 

Attachments

  • IMG_0325.jpeg
    IMG_0325.jpeg
    652.4 KB · Views: 71
  • IMG_0386.jpeg
    IMG_0386.jpeg
    567.8 KB · Views: 64
  • IMG_0406.jpeg
    IMG_0406.jpeg
    703.7 KB · Views: 70
  • IMG_0689.jpeg
    IMG_0689.jpeg
    629.7 KB · Views: 74
  • IMG_0760.jpeg
    IMG_0760.jpeg
    543 KB · Views: 71
  • IMG_0772.jpeg
    IMG_0772.jpeg
    681 KB · Views: 67
  • IMG_0814.jpeg
    IMG_0814.jpeg
    836.5 KB · Views: 67
  • IMG_0822.jpeg
    IMG_0822.jpeg
    454.2 KB · Views: 67
  • 4652B6CF-F2C3-4561-9E18-D8080F28EA70.jpeg
    4652B6CF-F2C3-4561-9E18-D8080F28EA70.jpeg
    435.1 KB · Views: 74
  • 66888095912__E12EA580-95D3-4BC0-9AC8-851C46A5C81E.jpeg
    66888095912__E12EA580-95D3-4BC0-9AC8-851C46A5C81E.jpeg
    631.9 KB · Views: 76
  • IMG_1264.jpeg
    IMG_1264.jpeg
    622.3 KB · Views: 71
  • IMG_1296.jpeg
    IMG_1296.jpeg
    547.1 KB · Views: 72
  • 67002617778__B9A9D465-3A83-4AA0-B39E-AF3E642369E7.jpeg
    67002617778__B9A9D465-3A83-4AA0-B39E-AF3E642369E7.jpeg
    431.1 KB · Views: 72
  • IMG_1329.jpeg
    IMG_1329.jpeg
    376.6 KB · Views: 79
  • IMG_1594.jpeg
    IMG_1594.jpeg
    1.1 MB · Views: 72
  • IMG_1593.jpeg
    IMG_1593.jpeg
    934.6 KB · Views: 76
  • IMG_1595.jpeg
    IMG_1595.jpeg
    1.2 MB · Views: 80
"I guess the next step is to get a 2" sheet 48x96 and cut it out on the waterjet"

That sounds very expensive. If all else fails, how about a hydraulic press?
We don’t have a press that could do that. Today we tried blocking it up and ran a forklift over one corner, and it popped back to the same spot 🙄
We have a waterjet capable of cutting up to 6”. The plate will be the spendy part.
 
  • Like
Reactions: Hobo Hilton
Try making a press out of a 3' length of heavy I beam, a bottle jack and a couple of strongbacks. Shouldn't cost much, and cheaper than cutting from plate, that's for sure.
We spend money like drunken sailors here, so cost isn't the issue. The main reason I don't want to cut them is the 13 hours of cut time.
 
No intercooler ?
Blow through carb, so you can get away with a lot more than fuel injection. The atomization of the air/fuel through the venturis actually reduces temperatures naturally so for my power goals I can get by without an intercooler, and if I want more then race gas is an option for those moments.
 
  • Like
Reactions: iceng
If you redo it, note how much bow you got while welding the first piece. Then, use shims and clamps to induce that much opposing bow in the unwelded pieces. Once welded, they should be flat.

Start at 5.34 in the video below for a better description than I can give…


That guy is the Norm Abram of metal. I have bought a couple of his tools, and to tell the truth they are wasted on a guy like me.

When we built our house some friend of ours said don't expect Norm Abram and Bob Villa to build your house. It will define half assed. Anyone that has lived in a house knows that is true. It is done fast, but not the way it really should be done....oh it will pass, but it is not 10/10.

I think welders are the same thing. Close enough. If you want that level of perfection you need to learn how to do it yourself, if you need to rely on someone else it will not be done "right".
 
  • Like
Reactions: Sean the Nailer
That guy is the Norm Abram of metal. I have bought a couple of his tools, and to tell the truth they are wasted on a guy like me.

When we built our house some friend of ours said don't expect Norm Abram and Bob Villa to build your house. It will define half assed. Anyone that has lived in a house knows that is true. It is done fast, but not the way it really should be done....oh it will pass, but it is not 10/10.

I think welders are the same thing. Close enough. If you want that level of perfection you need to learn how to do it yourself, if you need to rely on someone else it will not be done "right".
Fireball cast iron squares are the absolute tits for fit up.
 
  • Like
Reactions: Bradu and missed
That guy is the Norm Abram of metal. I have bought a couple of his tools, and to tell the truth they are wasted on a guy like me.

When we built our house some friend of ours said don't expect Norm Abram and Bob Villa to build your house. It will define half assed. Anyone that has lived in a house knows that is true. It is done fast, but not the way it really should be done....oh it will pass, but it is not 10/10.

I think welders are the same thing. Close enough. If you want that level of perfection you need to learn how to do it yourself, if you need to rely on someone else it will not be done "right".
If he is the Norm Abram of metal then who is Ron Covell?
 
Hey, did you guys know that while heating 6061 aluminum, it will go from a solid bar on the work table to a liquid on the floor in about .2 seconds without warning :rolleyes:
Well, know you do
If you soot aluminum up with candle soot, then heat it with your torch, as soon as the soot disappears you are like just short of melting.
It’s red neck but it works.

At that point it can be bent real easy.

Maybe an experts can chime in on improvements to this method?
 
If you soot aluminum up with candle soot, then heat it with your torch, as soon as the soot disappears you are like just short of melting.
It’s red neck but it works.

At that point it can be bent real easy.

Maybe an experts can chime in on improvements to this method?

Rub a bar of soap on it. When soap turns black, the aluminum is annealed.

Works like a charm. Any bar soap seems to work. I keep chunks of hotel soap around for annealing and because you can scrape wood screws across it and it makes them go in slick as snot!

Sirhr
 
This should be printable….

You’re welcome!!

View attachment 8387841

Sirhr
What ?

Whitworth and British pipe but no Acme thread ?
Useless I tell ya.

It's like owning a 15/64 wrench, a drag link socket, and a cotter pin extractor all in one !

BTW, the metric sizes say "size inch" it should say "size mm".
Ya feel me?
 
  • Like
Reactions: iceng