• Watch Out for Scammers!

    We've now added a color code for all accounts. Orange accounts are new members, Blue are full members, and Green are Supporters. If you get a message about a sale from an orange account, make sure you pay attention before sending any money!

Maggie’s Motivational Pic Thread v2.0 - - New Rules - See Post #1

913E298D-6150-4361-9692-FB1449C58257.jpeg
 
Shouldn’t it say “triple trouble” instead?

Pic thread rules:

View attachment 8237094

Motivational to me: They fixed the framing under the stairs in our new detached garage build… was gonna be kind of tough to get to the utility sink otherwise! LoL
I'd be finding a different framer. Those stairs are going to squeak like a nest of rats. PLUS:
Fucked up stairs and framing.jpeg
 
I'd be finding a different framer. Those stairs are going to squeak like a nest of rats. PLUS:View attachment 8237377

yup.. why we called the builder out. Was wondering how long it would take someone to point out some obvious ”issues” with the job so far. All this will be covered up with drywall at some point, so not too concerned about some deviations as long as it doesn’t present a structural issue, but tells me a lot about the build quality in general.

Kind of like the crazy amount of nails used. I have neither the time nor energy to do it myself, and am constantly shocked at how low standards for stick-frame construction have continued to drop over the years.

There are at least two other flaws that have me more concerned just in this picture…. Let’s see who can find them!

Also, I think those are normal ‘cripple’ studs; just there to add thickness for the windows above. Maybe someone on here can enlighten me?
 
  • Like
Reactions: gigamortis
That strap looking thing on the right reminded me of being up on a roof nailing sheathing down, watching them hook a tow strap to the corner of the house, then hook it to a pickup truck to pull the house into square.
Letting me get down off the roof first would have been nice.
 
The typos are better than the real thing.
Just changed them.

Time to clear out the memory in my phone.

So many bad spellings in texts that you don’t fix and auto correct is auto change to something totally different

I aim to please lol
 
  • Like
Reactions: 37L1
I’m don’t do framing but I’ll play. Are the stringers (?) for the stairs just toe-nailed? Shouldn’t they be supported from below?

View attachment 8237422
No Bueno.

We like to head those off, so we can hang them properly. Toe nails here are not your friend.

That top plate isn't doing its job, if it's not connected 🤷‍♂️. Maybe he thought that was there for blocking 🤦‍♂️

Lots of overhang on the treads too. Seems this may have been someone very "green" to stair framing.
 
I’m don’t do framing but I’ll play. Are the stringers (?) for the stairs just toe-nailed? Shouldn’t they be supported from below?

View attachment 8237422

Oh yeah, I forgot about that gap in the boards on top of the top plate there!

But yes, that gap at the top of the stairs is my #1 concern. I’m not even sure that’s how stairs are supposed to attach at the top. What’s supporting the weight on that end, other than a few nails?

The other is how almost none of the supports between the studs are cut to the correct length; especially on the stairs:

IMG_5404.jpeg


Edit: The good news is, with the insane number of nails this framing crew went through, I think I can try to pass this off as a steel structure for insurance purposes! 🤪
 
Last edited:
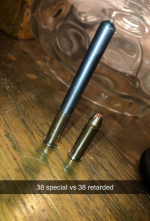
We all mock keltec.
But my brother bought one as a goof at the range one day

I don’t know how many rounds have been shot and it’s never been cleaned or oiled.

Better than a AK lol
I have absolutely no room to talk. I just picked up a KS7 from my FFL this week for well under $400 shipped/transferred. It’ll have more money in accessories than the gun alone is worth after adding a light/sling/and spare shell storage. 😂

I tore it down and cleaned all the packing grease/oil off it, and was impressed by the design. We all know they’re cheaply made weapons, but their designs seem to be functional (in theory, barring QC issues). Can be fun purchases if you can get past how ugly they are by noticing what you paid for them.
 
Oh yeah, I forgot about that gap in the boards on top of the top plate there!

But yes, that gap at the top of the stairs is my #1 concern. I’m not even sure that’s how stairs are supposed to attach at the top. What’s supporting the weight on that end, other than a few nails?

The other is how almost none of the supports between the studs are cut to the correct length; especially on the stairs:

View attachment 8237435

Edit: The good news is, with the insane number of nails this framing crew went through, I think I can try to pass this off as a steel structure for insurance purposes! 🤪

Holy shit. It's like one of those "the longer you look the worse it gets" pictures. Top tread nails missed. gaps all over the place. Nothing flush. Uses nails like he's my kid playing with my nail gun.
 
yup.. why we called the builder out. Was wondering how long it would take someone to point out some obvious ”issues” with the job so far. All this will be covered up with drywall at some point, so not too concerned about some deviations as long as it doesn’t present a structural issue, but tells me a lot about the build quality in general.

Kind of like the crazy amount of nails used. I have neither the time nor energy to do it myself, and am constantly shocked at how low standards for stick-frame construction have continued to drop over the years.

There are at least two other flaws that have me more concerned just in this picture…. Let’s see who can find them!

Also, I think those are normal ‘cripple’ studs; just there to add thickness for the windows above. Maybe someone on here can enlighten me?
The cripple on the end, supporting the rough sill, should be one piece to the bottom plate. A stud reaching from plate to plate is called a king stud. That one on the left side would not pass a framing inspection where I am even there were shitty carpenters that would do that.

I attach the stringers using hangers and what we call "power blocking"...usually a 2x6 glued and nailed into the face of the stringers. This gets glued/nailed into the framing on the upper floor level. Similar at the bottom of the stairs, using a foam sill gasket and TapCon screws into the concrete or glue/screws into the wood floor framing that has been headered out to support those stairs.

Also, notice how each of your rough treads has already warped (they are not done) and there are MULTIPLE shiners. I use 2 layers of 3/4 glued and SCREWED for rough treads. I do also prefer to use LVL for the stringers.

On the far left of the pic I sent earlier is some weird off layout studs. In the middle of the window, the cripples are not the same layout. They should be on the same layout as the rest of the wall, add in for king studs. Sure, drywall....but what about when you want to attach something?

I bet I could find more than a weeks worth of repairs you need in just a few minutes of walking.
Ah it’s fine. Caulk and paint make you the carpenter you ain’t.
 
The cripple on the end, supporting the rough sill, should be one piece to the bottom plate. A stud reaching from plate to plate is called a king stud. That one on the left side would not pass a framing inspection where I am even there were shitty carpenters that would do that.

I attach the stringers using hangers and what we call "power blocking"...usually a 2x6 glued and nailed into the face of the stringers. This gets glued/nailed into the framing on the upper floor level. Similar at the bottom of the stairs, using a foam sill gasket and TapCon screws into the concrete or glue/screws into the wood floor framing that has been headered out to support those stairs.

Also, notice how each of your rough treads has already warped (they are not done) and there are MULTIPLE shiners. I use 2 layers of 3/4 glued and SCREWED for rough treads. I do also prefer to use LVL for the stringers.

On the far left of the pic I sent earlier is some weird off layout studs. In the middle of the window, the cripples are not the same layout. They should be on the same layout as the rest of the wall, add in for king studs. Sure, drywall....but what about when you want to attach something?

I bet I could find more than a weeks worth of repairs you need in just a few minutes of walking.
I just want to know why the bridging is at 6'-8" AFF? Going to be an interesting drywall job.
 
  • Like
Reactions: 91Eunozs
Is this a pro porn in school libraries cartoon? If so, what do you have to say for yourself?
This might be the most narcissistic, primary character syndrome having post I've ever read. Who the fuck owes you an explanation for their post? Go back to the BST forums pearl clutcher.

(Unless I missed the sarcasm in your post, but I doubt it.)
 
  • Like
Reactions: lash and doubloon
Bridging is required for sheer on the joints of the sheeting, if it's 8 foot they ran it vertically, which is against the strength axis of the sheets. O.S.B. does have a strength axis and should be run horizontal.
No shit. :rolleyes::ROFLMAO:
The question is why is it 6'-8", and not 4' and 8'. Never seen a 6'-8" wide sheet of osb (or any other sheet material)
 
  • Like
Reactions: Aftermath