• Watch Out for Scammers!

    We've now added a color code for all accounts. Orange accounts are new members, Blue are full members, and Green are Supporters. If you get a message about a sale from an orange account, make sure you pay attention before sending any money!

Accuracy International AT-X

Update on my broken bolt handle. Got my brand new replacement bolt form AI today. They took care of it without any issues.

Now I can sell this damn thing. 🤦‍♂️😂

1652456003971.jpeg
 
Hahah. Im not kidding though. She’s going up for sale.
Is that because of the break in the bolt handle? Or something else you dont like about the gun?

I just got mine yesterday, I can see how it'd break off (not that I think it should, just saying its a tad rougher than I expected), manipulation is a bit stiff - hoping use will help fix it a bit.

Magazine feed is not awesome either do a lot of people file off the lip on front of mag - or will that mess up more than it helps?
The gun is awesome. Just going a different route.
 
  • Like
Reactions: TheOtherAndrew
Is that because of the break in the bolt handle? Or something else you dont like about the gun?

I just got mine yesterday, I can see how it'd break off (not that I think it should, just saying its a tad rougher than I expected), manipulation is a bit stiff - hoping use will help fix it a bit.

Magazine feed is not awesome either do a lot of people file off the lip on front of mag - or will that mess up more than it helps?

The front lip should assist in feeding. If you’re running into issues it’s likely an out of spec mag.

AI will fix or replace mags that don’t work properly.

I personally bought 6 mags (3 ax and 3 aw) to get 3 (2ax and 1aw) that feed properly with 6gt and 6cm. I haven’t sent the 3 non working back, but will be soon.
 
  • Like
Reactions: Darkside-Six
20220513_153627.jpg

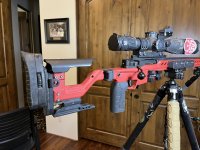
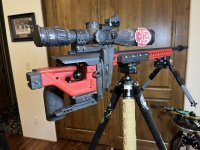
Well here she is. Everything looks like it should. Ran some snapcaps through and it fed fine. I can pull the bolt out without removing the cheekrest which is a plus even though I ordered a hinge. Going to shoot it in a few. Overall I'm pleased. Will update if any "issues" arise.
 
Well here she is. Everything looks like it should. Ran some snapcaps through and it fed fine. I can pull the bolt out without removing the cheekrest which is a plus even though I ordered a hinge. Going to shoot it in a few. Overall I'm pleased. Will update if any "issues" arise.

Wow, love it, looks sick! Enjoy!
 
Anyone run an ATX in PRS comps without a bag rider? Seems like the one could get by without a bag rider
 
Anyone run an ATX in PRS comps without a bag rider? Seems like the one could get by without a bag rider
I’ve been running mine without a bagrider since I got it. Waiting for the sawtooth bag rider.

Your rear bag needs to be a bit bigger without the bag rider but it hasn’t been the end of the world
 
  • Like
Reactions: JB.IC
Is that because of the break in the bolt handle? Or something else you dont like about the gun?

I just got mine yesterday, I can see how it'd break off (not that I think it should, just saying its a tad rougher than I expected), manipulation is a bit stiff - hoping use will help fix it a bit.

Magazine feed is not awesome either do a lot of people file off the lip on front of mag - or will that mess up more than it helps?
Do some dry fire and lube it up, it will feel a lot better.
 
Do some dry fire and lube it up, it will feel a lot better.

Also, if not already doing it, when opening the bolt, place your thumb directly behind the firing pin. Thumb print down.

Use that for leverage to open the bolt with a “knife” hand.

Doing this, the rifle pretty much doesn’t move and the bolt pops up and open easily.

Most of the time when I see someone having issues with rifle or sight picture moving, they are not using their thumb. This usually smooths everything out.

As you can’t just touch the bolt open like most of the popular two lug actions.
 
  • Like
Reactions: TheOtherAndrew
View attachment 7868964
Well here she is. Everything looks like it should. Ran some snapcaps through and it fed fine. I can pull the bolt out without removing the cheekrest which is a plus even though I ordered a hinge. Going to shoot it in a few. Overall I'm pleased. Will update if any "issues" arise.
My brother in Christ, that gun has approximately one mile of ARCA dovetail on it for bipods, tripods, and probably some kind of -pods I don’t even know about yet. Are those adapters next on the shopping list?

Looks excellent, by the way. Glad you enjoy it.
 
  • Like
Reactions: M8541Reaper
FYI - I just posted in the PX we have :
(1) Black AT-X ready to ship
(1) Elite Sand AT-X inbound (we are taking orders, will have it in 2-3 days)
(1) Red AT-X inbound (sold)
You #@$%! Bout 5 days ago woulda been nice to know you had my precious in black...

Oh well - red is starting to grow on me with that carbon fiber barrel/flake offset
 
Hey while its not overly difficult, its also not really obvious how to replace your fixed stock with the Hinge Assembly. I included some quick short instructions on my website where I list the AT-X Hinge Assembly for sale:


Here they are as well (since I just replaced mine):

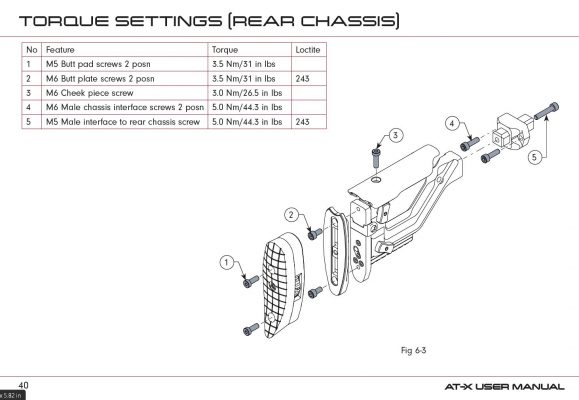
Below the manual calls for 44.3 inch pound torque settings for #4 (bolts to main chassis), and #5 which is the bolt to the rear chassis. These are basically the same bolt sets you will use for replacing the fixed chassis with the hinge assembly. The AT-X Hinge Assembly comes with (4) M6 hex screws and (1) M5 hex screw. You will need to remove the part below that is between the screws #4 and #5.


AT-X Hinge Assembly Torque Settings


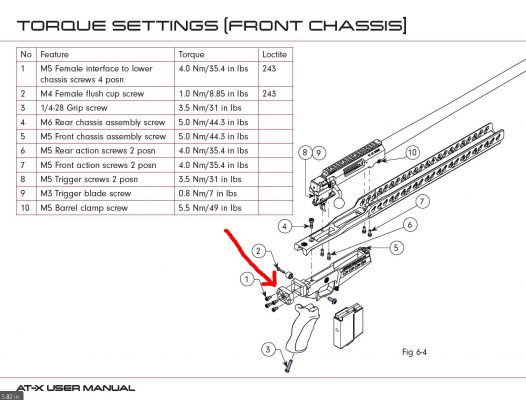
Additionally, you will need to remove the below part as well (between #1 and #2). You will then replace these with the Hinge Assembly.


AT-X Hinge Assembly Torque_Settings_Rear_Chassis-2

edit - of course there are the other parts like the part that keeps the stock in the folded position - those are pretty obvious so I didn't include them...
opening the hinge was the toughest part for me. The hinge is extremely tight and without the stock attached to get more leverage opening the thing took some prying which I don't recommend, maybe someone has better tips. If I was doing it again I'd probably try clamping the end in a vise with soft jaws and slowly tapping open the hinge with a mallet.
 
  • Like
Reactions: Timo Turl
opening the hinge was the toughest part for me. The hinge is extremely tight and without the stock attached to get more leverage opening the thing took some prying which I don't recommend, maybe someone has better tips. If I was doing it again I'd probably try clamping the end in a vise with soft jaws and slowly tapping open the hinge with a mallet.
Ha, I did the same thing, but I think if I put the stock on to get it open, and just inserted both ends loosely into the slots, I could have done it without prying with a flat head screwdriver and marring the nice anodizing job....

Kind of difficult to describe I guess...
 
  • Like
Reactions: TylerN
I just plugged it in to the unbolted stock parts. That worked perfectly.

opening the hinge was the toughest part for me. The hinge is extremely tight and without the stock attached to get more leverage opening the thing took some prying which I don't recommend, maybe someone has better tips. If I was doing it again I'd probably try clamping the end in a vise with soft jaws and slowly tapping open the hinge with a mallet.
 
This is what I was trying to say I should have done :) @BuLLet just said it so much more eloquent
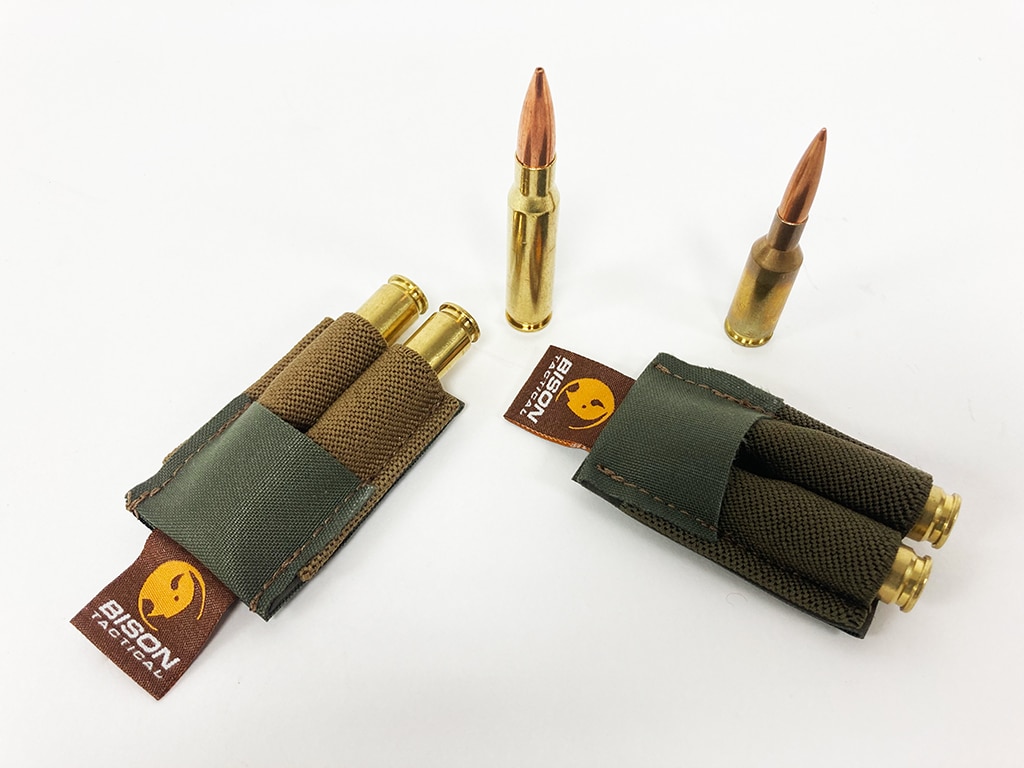
Another annoyance, but pretty trivial annoyance is now the stock closes right where I had my spare 2 round carrier... Gotta find another location for that now and there is not a lot of available space on the chassis :)
Same, thinking I'll try the elastic 2 round carrier instead of the Hoptic quiver to solve that one. I believe SAP makes an elastic carrier.
 
What minimum height rings does a guy need to clear a Leupold Mark 5 5-25x56mm with the full length bridge?
 
This is what I was trying to say I should have done :) @BuLLet just said it so much more eloquently.
Great feedback and instructions especially on opening the hing!

What is the flushcup assembly for if I already have one on mine?
 

Attachments

  • 33EF97B9-29A1-4184-B8AC-D9DDFEA174A6.jpeg
    33EF97B9-29A1-4184-B8AC-D9DDFEA174A6.jpeg
    488.4 KB · Views: 225
  • 7CAF5FA4-DC69-4022-B039-751BE2AAF229.jpeg
    7CAF5FA4-DC69-4022-B039-751BE2AAF229.jpeg
    475.6 KB · Views: 230
  • Like
Reactions: blbennett1288
I know you’re not asking me but it’s the bag rider from BugHoles


It's exactly that one; bugholes.com AI bag rider. (this time I'm typing up that URL from my computer so my phone auto-correct doesn't have it's way with their name :cool:.)
 
  • Like
Reactions: Fruehling
Great feedback and instructions especially on opening the hing!

What is the flushcup assembly for if I already have one on mine?

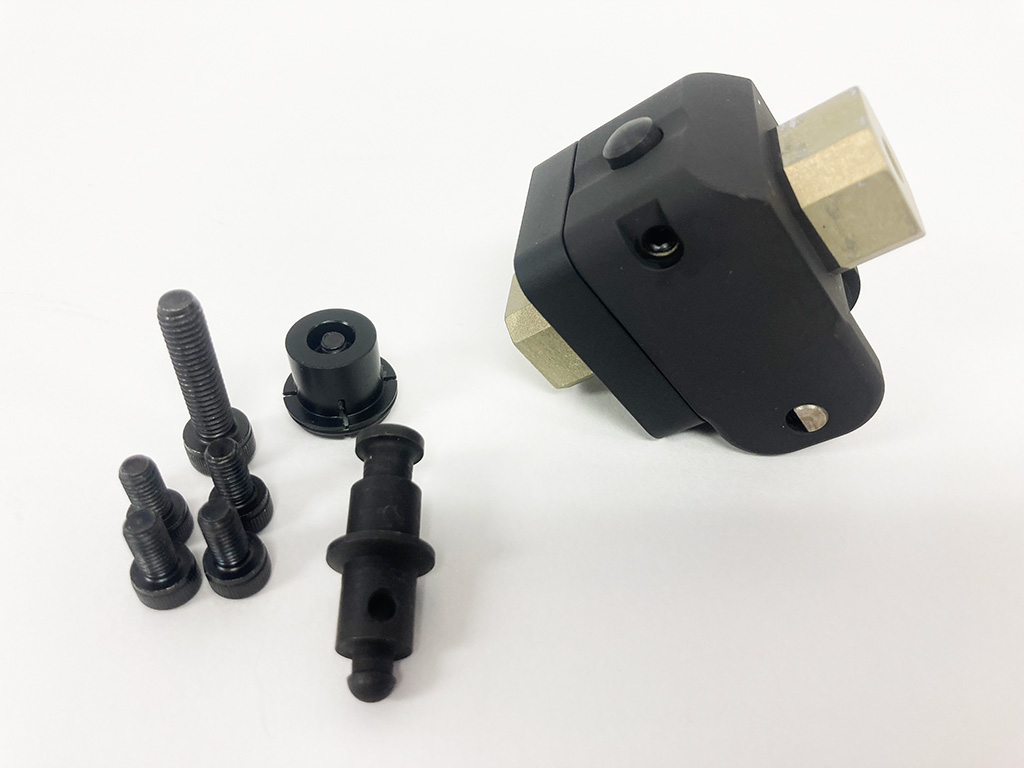
You're missing the lock that secures the stock open. Remove the flush cup from the stock (above the grip) and re-use the flush cup and small screw to screw in the post with the nipple on it. Then screw in the cup that clamps over the nipple on the stock like this. Then when the stock is opened all the way this catches and holds the stock in position.

PXL_20220516_185552778.jpg

PXL_20220516_185619296.jpg

PXL_20220516_185543332.jpg
 
You're missing the lock that secures the stock open. Remove the flush cup from the stock (above the grip) and re-use the flush cup and small screw to screw in the post with the nipple on it. Then screw in the cup that clamps over the nipple on the stock like this. Then when the stock is opened all the way this catches and holds the stock in position.

View attachment 7870951
View attachment 7870952
View attachment 7870950
Since I haven't decided if I'm gonna remove the quiver might leave as is.