
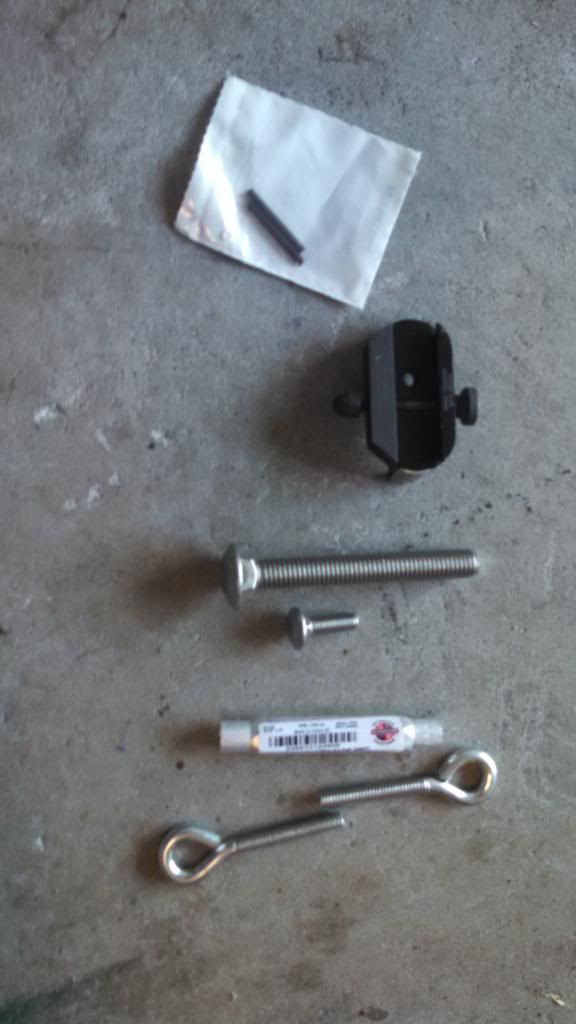
I got bored today and started looking at rear monopods for my rifle and decided I'd just make my own. It's by no means professional but it cost me a total of $16. It also functions as a hand stop for my left hand. I started with this pile of parts, which includes a turn buckle, a 1/2x13x3" stainless carriage bolt (cut off for the stud on the adapter), an adapter for a SAW forward grip, a 5/16x1 carriage bolt for the bottom of the monopod, and a 1/8" roll pin.
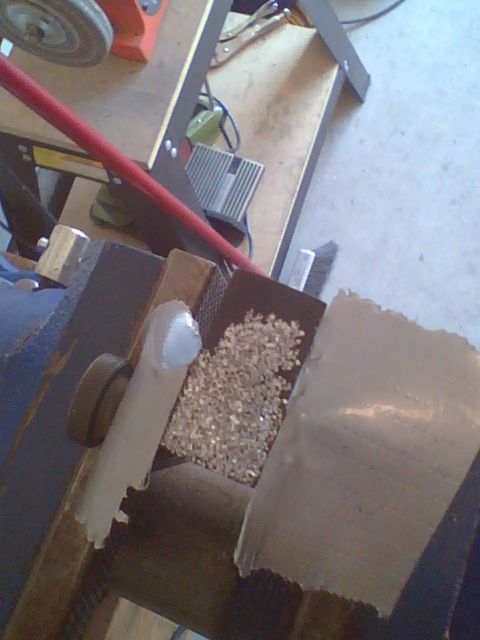
Then I decided to stipple the "front" of the adapter where my hand would contact it for some extra grip (more boredom than function).
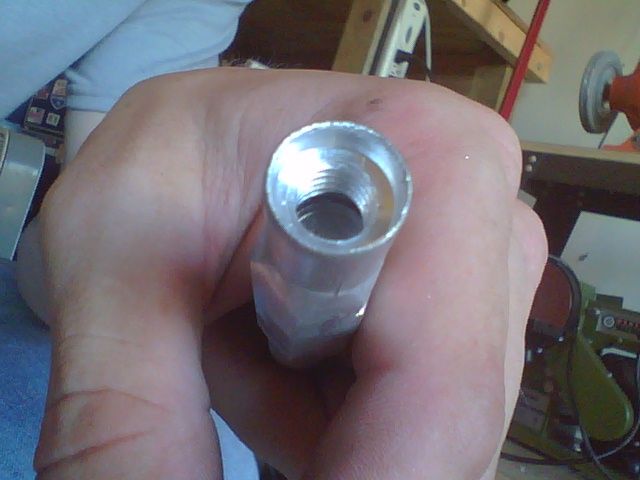
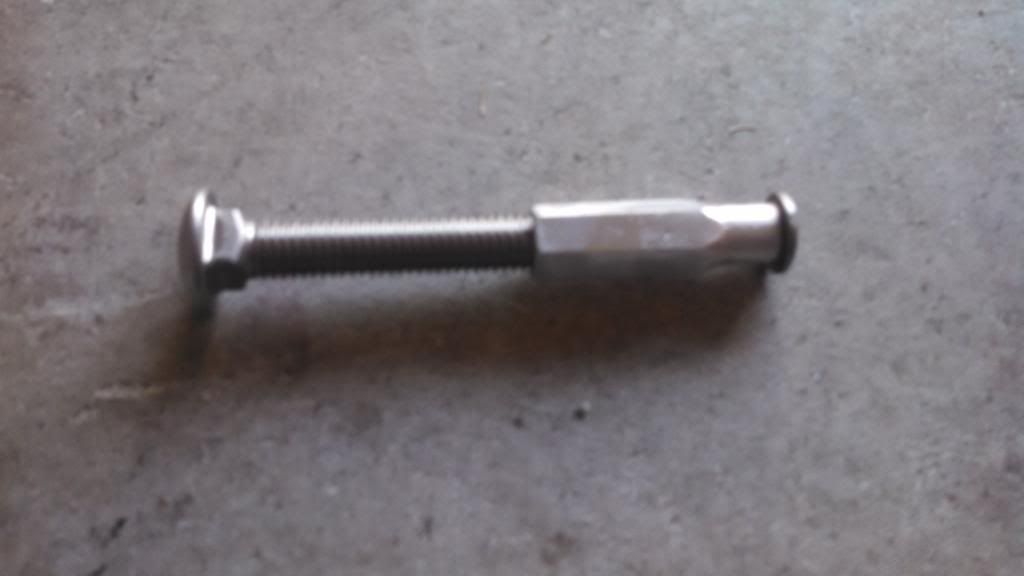
Next I cut off the turn buckle to 2" and drilled out the front of the threaded portion so the carriage bolt wouldn't stick out where the square bit is at the base. I then threaded the larger portion of the turn buckle with a 1/2x13 tap, cut off the smaller carriage bolt to leave 1/4" of threads.
And wound up with this:
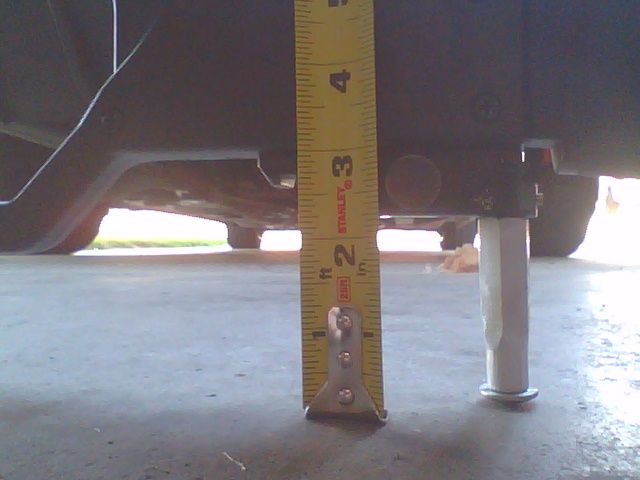
Then I drilled and tapped the "rear" of the adapter to accept the 1/2" stud cut from the large carriage bolt and pinned it to the adapter. It's removeable with a thumb screw so I'm not planning to leave it there like an Accushot or something that can fold up. That left me with this with the monopod completely depressed:
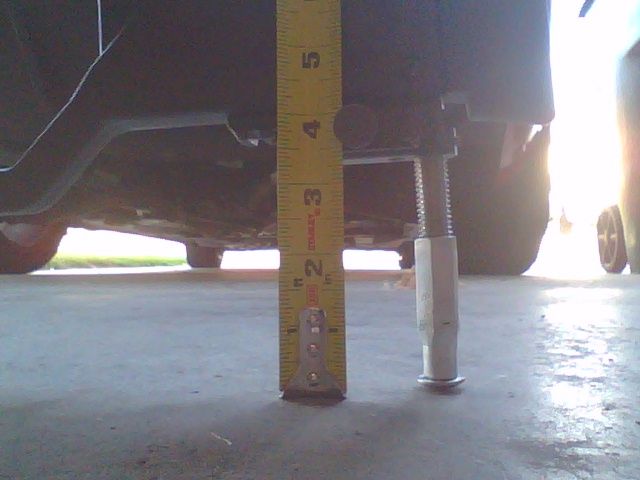
And fully extended:
So far the rifle looks like this with the monopod on. It's since gotten a black coat of paint which is drying right now.
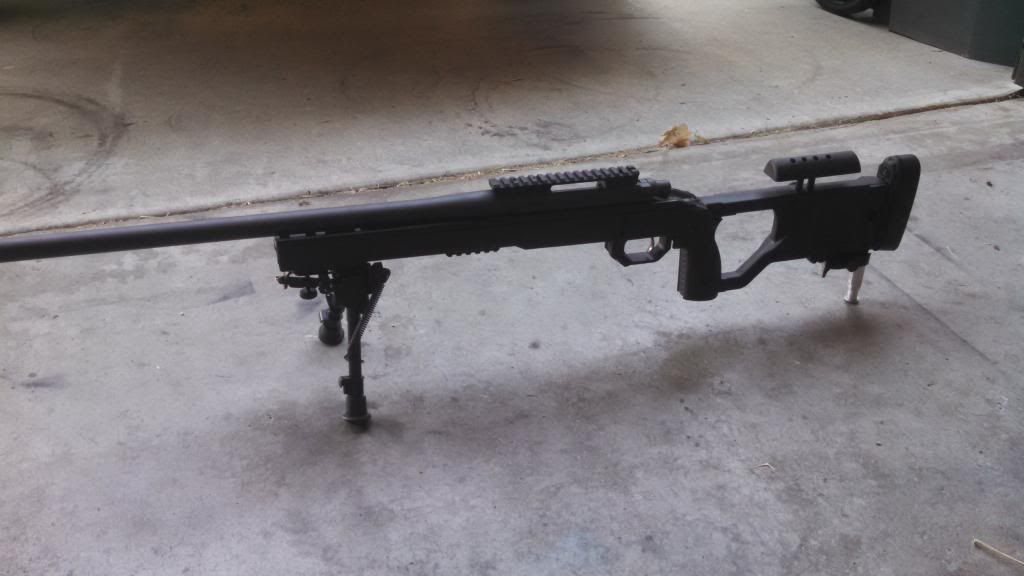
It may not be the prettiest thing in existence but it has as much adjustment as the ones I looked at online, and it seems to work fine. Once I get back from leave I'll take it out to the range and see how she handles. Not bad for $16 I'd say. Hope this helps someone.
Then I decided to stipple the "front" of the adapter where my hand would contact it for some extra grip (more boredom than function).
Next I cut off the turn buckle to 2" and drilled out the front of the threaded portion so the carriage bolt wouldn't stick out where the square bit is at the base. I then threaded the larger portion of the turn buckle with a 1/2x13 tap, cut off the smaller carriage bolt to leave 1/4" of threads.
And wound up with this:
Then I drilled and tapped the "rear" of the adapter to accept the 1/2" stud cut from the large carriage bolt and pinned it to the adapter. It's removeable with a thumb screw so I'm not planning to leave it there like an Accushot or something that can fold up. That left me with this with the monopod completely depressed:
And fully extended:
So far the rifle looks like this with the monopod on. It's since gotten a black coat of paint which is drying right now.
It may not be the prettiest thing in existence but it has as much adjustment as the ones I looked at online, and it seems to work fine. Once I get back from leave I'll take it out to the range and see how she handles. Not bad for $16 I'd say. Hope this helps someone.
