Join the Hide community
Get access to live stream, lessons, the post exchange, and chat with other snipers.
Register
Download Gravity Ballistics
Get help to accurately calculate and scope your sniper rifle using real shooting data.

Install the app
How to install the app on iOS
Follow along with the video below to see how to install our site as a web app on your home screen.
Note: This feature may not be available in some browsers.
You are using an out of date browser. It may not display this or other websites correctly.
You should upgrade or use an alternative browser.
You should upgrade or use an alternative browser.
Gunsmithing just some pictures from this weekend's shop time.
- Thread starter 300sniper
- Start date
Re: just some pictures from this weekend's shop time.
<div class="ubbcode-block"><div class="ubbcode-header">Originally Posted By: ackleyfan</div><div class="ubbcode-body">Very nice, How much were the threads out? </div></div>
i didn't measure. i go straight to 1.082"-16 on the threads now. i made a gauge that i use so all my barrels should be the same.
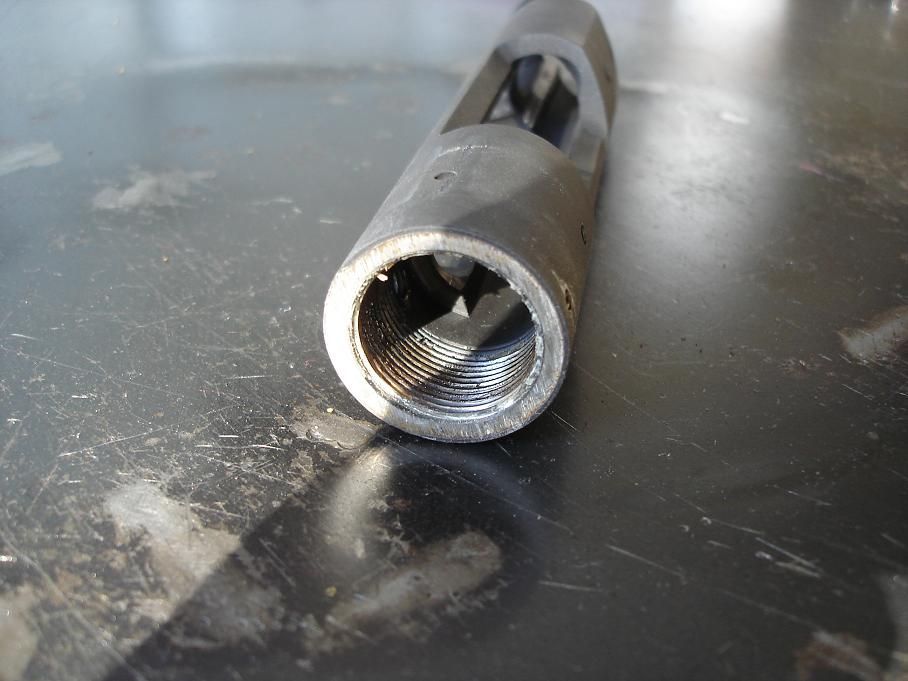
while cutting the threads, they didn't seem too bad on this one. i didn't hear an interrupted cut at least. the internal lugs were pretty bad and the finish on the face of the receiver was terrible.
<div class="ubbcode-block"><div class="ubbcode-header">Originally Posted By: ackleyfan</div><div class="ubbcode-body">Very nice, How much were the threads out? </div></div>
i didn't measure. i go straight to 1.082"-16 on the threads now. i made a gauge that i use so all my barrels should be the same.
while cutting the threads, they didn't seem too bad on this one. i didn't hear an interrupted cut at least. the internal lugs were pretty bad and the finish on the face of the receiver was terrible.
Re: just some pictures from this weekend's shop time.
just wondering what kind of spindle speed and feed rates you use for such an oustanding finish. are you using carbide or HSS tooling? inserts or one piece? thanks.
chuck
just wondering what kind of spindle speed and feed rates you use for such an oustanding finish. are you using carbide or HSS tooling? inserts or one piece? thanks.
chuck
Re: just some pictures from this weekend's shop time.
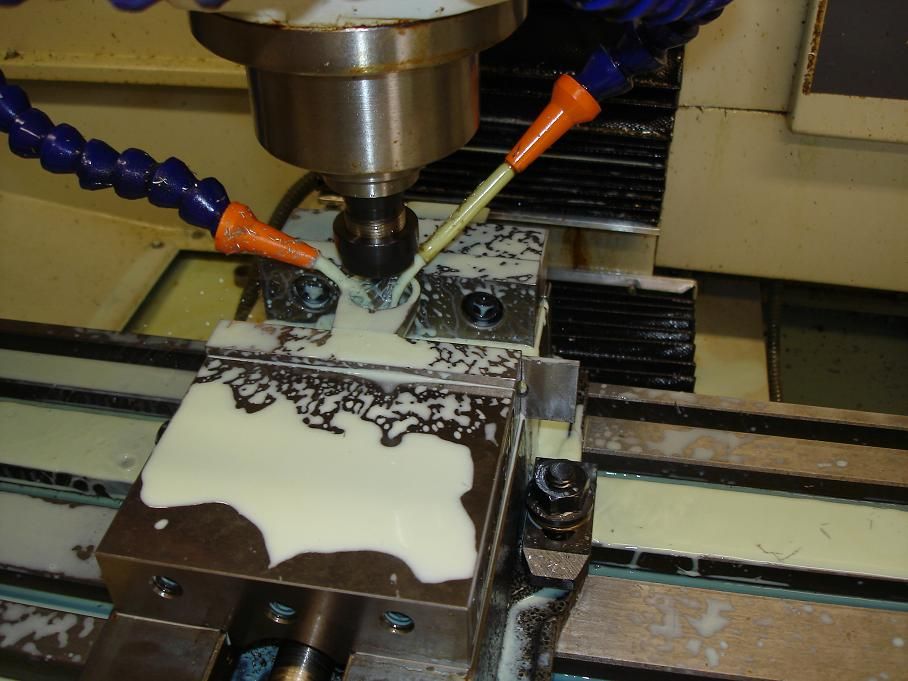
70 rpm, .0625 ipr, .002" doc when truing the internal threads of the receiver. this is way too slow for the coated carbide laydown threading inserts i am using but it seems to work. for all the other cuts i have been using a solid carbide boring bar at about 450 rpm. i think that solid carbide boring bar is my favorite lathe tool. i use it a lot.
i really want to start (or at least try) truing receivers vertically in the cnc mill using a thread mill so i can optimize feeds and speeds to achieve a superior finish.
Re: just some pictures from this weekend's shop time.
<div class="ubbcode-block"><div class="ubbcode-header">Originally Posted By: 300sniper</div><div class="ubbcode-body">remington's finish machine work:
 </div></div>
I love how everyone always posts the nastiest dirtiest pictures of stripped down 700 recievers before they post the perfectly clean "after" pictures.
<div class="ubbcode-block"><div class="ubbcode-header">Originally Posted By: 300sniper</div><div class="ubbcode-body">remington's finish machine work:
I love how everyone always posts the nastiest dirtiest pictures of stripped down 700 recievers before they post the perfectly clean "after" pictures.
Re: just some pictures from this weekend's shop time.
Robert,
Nice job. Finally SOMEONE else who understands what a counterbore and chamfered corners are all about.
Hats off. . .
Get that fixture made and throw that chit in the mill! I promise once you do you'll fall in love all over again!
later,
C.
PS: PM sent. Merry Xmas!
Robert,
Nice job. Finally SOMEONE else who understands what a counterbore and chamfered corners are all about.
Hats off. . .
Get that fixture made and throw that chit in the mill! I promise once you do you'll fall in love all over again!
later,
C.
PS: PM sent. Merry Xmas!
Re: just some pictures from this weekend's shop time.
<div class="ubbcode-block"><div class="ubbcode-header">Originally Posted By: 2156SMK</div><div class="ubbcode-body">I love how everyone always posts the nastiest dirtiest pictures of stripped down 700 recievers before they post the perfectly clean "after" pictures. </div></div>
yeah, remington's finish <span style="font-style: italic">machining</span> on the face of the receiver was really exaggerated because it was dirty
 .
.
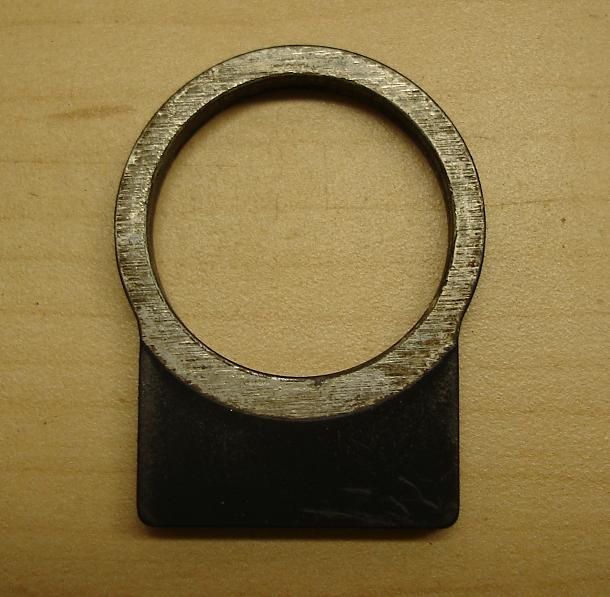
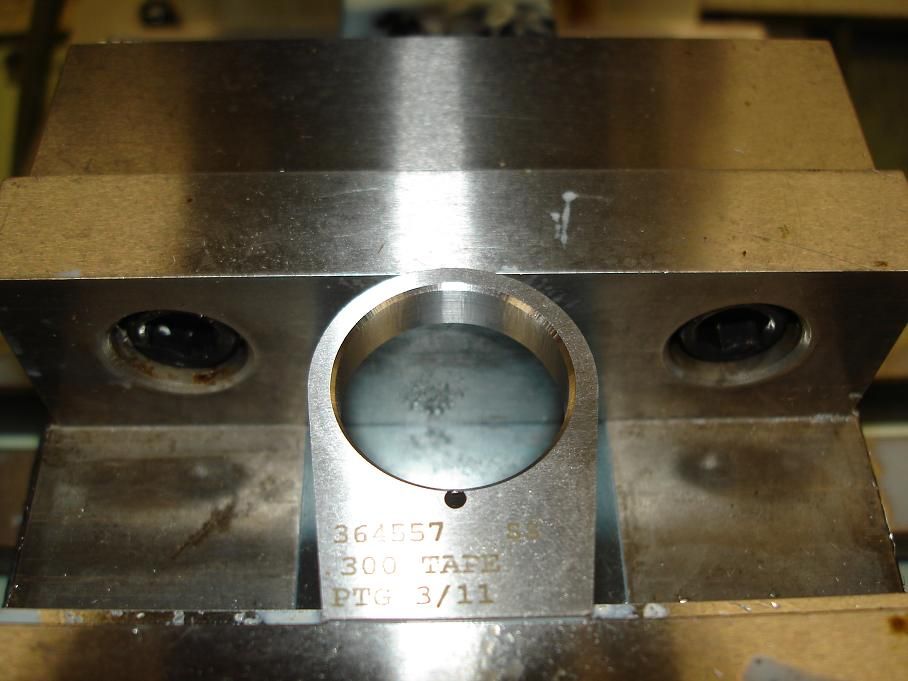
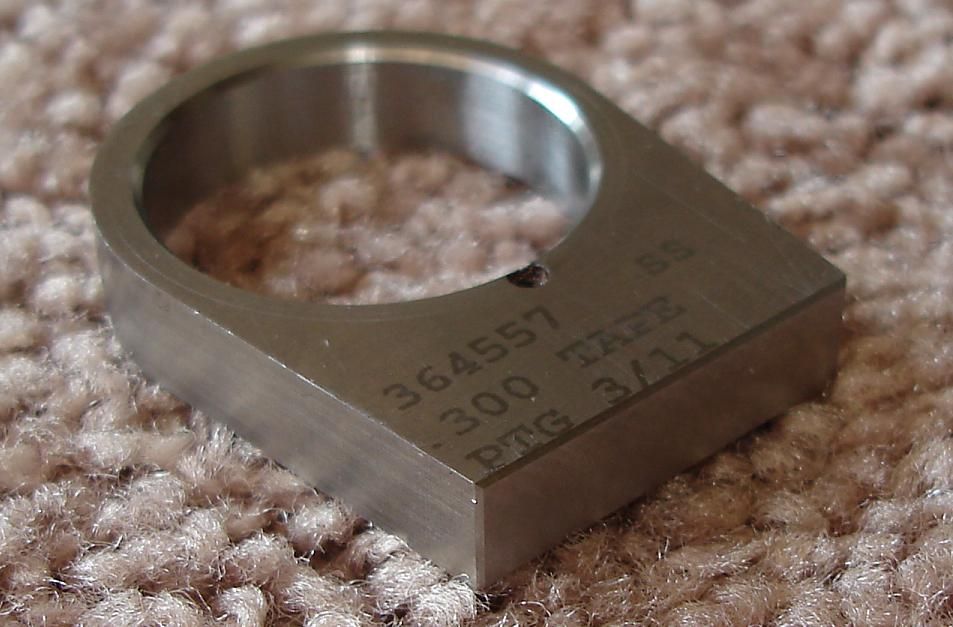
edit: here's the recoil lug that was against that receiver face. i don't think those horizontal lines are nasty dirt. i'm thinking they are from corrosion where the receiver face had such a rough finish it allowed moisture between it and the lug.
next time i pull a barrel off that i fit i'll post some pictures. i don't think it will be anywhere near as nasty looking as this unfired remington.
<div class="ubbcode-block"><div class="ubbcode-header">Originally Posted By: 2156SMK</div><div class="ubbcode-body">I love how everyone always posts the nastiest dirtiest pictures of stripped down 700 recievers before they post the perfectly clean "after" pictures. </div></div>
yeah, remington's finish <span style="font-style: italic">machining</span> on the face of the receiver was really exaggerated because it was dirty
edit: here's the recoil lug that was against that receiver face. i don't think those horizontal lines are nasty dirt. i'm thinking they are from corrosion where the receiver face had such a rough finish it allowed moisture between it and the lug.
next time i pull a barrel off that i fit i'll post some pictures. i don't think it will be anywhere near as nasty looking as this unfired remington.
Re: just some pictures from this weekend's shop time.
<div class="ubbcode-block"><div class="ubbcode-header">Originally Posted By: C. Dixon</div><div class="ubbcode-body">Robert,
Nice job. Finally SOMEONE else who understands what a counterbore and chamfered corners are all about.
Hats off. . .
Get that fixture made and throw that chit in the mill! I promise once you do you'll fall in love all over again!
later,
C.
PS: PM sent. Merry Xmas! </div></div>
thanks chad.
and major thanks for the pm. i'll see what that program looks like with my control.
Re: just some pictures from this weekend's shop time.
Great pictures and damn good work sir. I enjoy seeing other people's methods and outcomes. Keep it up!
Great pictures and damn good work sir. I enjoy seeing other people's methods and outcomes. Keep it up!
Re: just some pictures from this weekend's shop time.
Very nice work Robert! I agree with you and Chad about truing in the mill, I opened up and chamfered a bolt face in mine on the weekend and the results were fantastic. It's got me thinking of a jig now to set an action up properly to do the same.
Cutting the bolt face as a spiral pocket with a really small stepover then a .002" finish cut around the outside left it looking like chrome.
Chad, do you just touch off the thread mill on the top of the thread and set a g43 offset for it or is there something trickier? I've haven't tried to chase a thread in the mill as yet.
Re: just some pictures from this weekend's shop time.
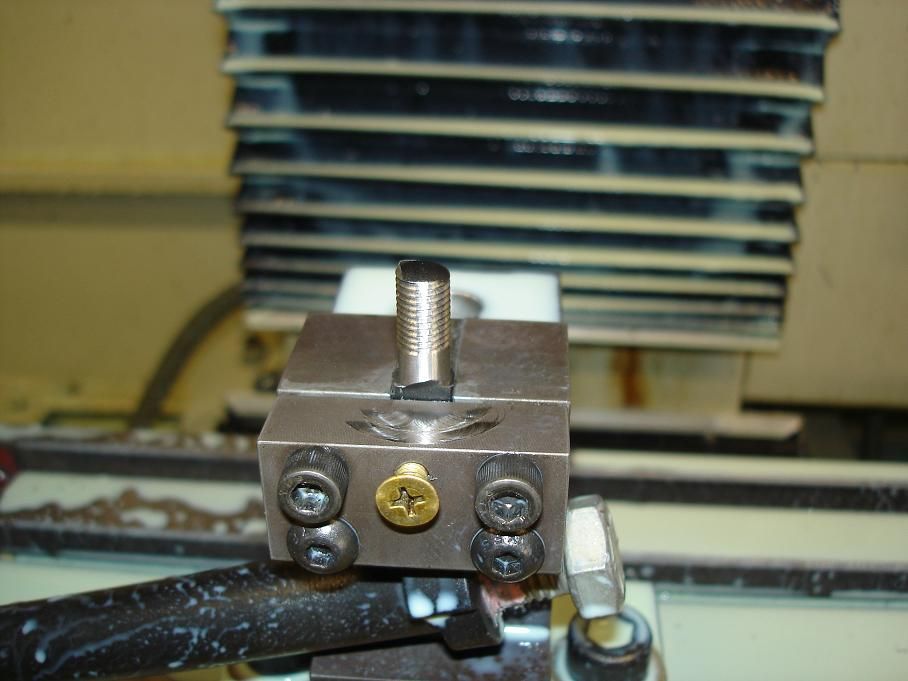
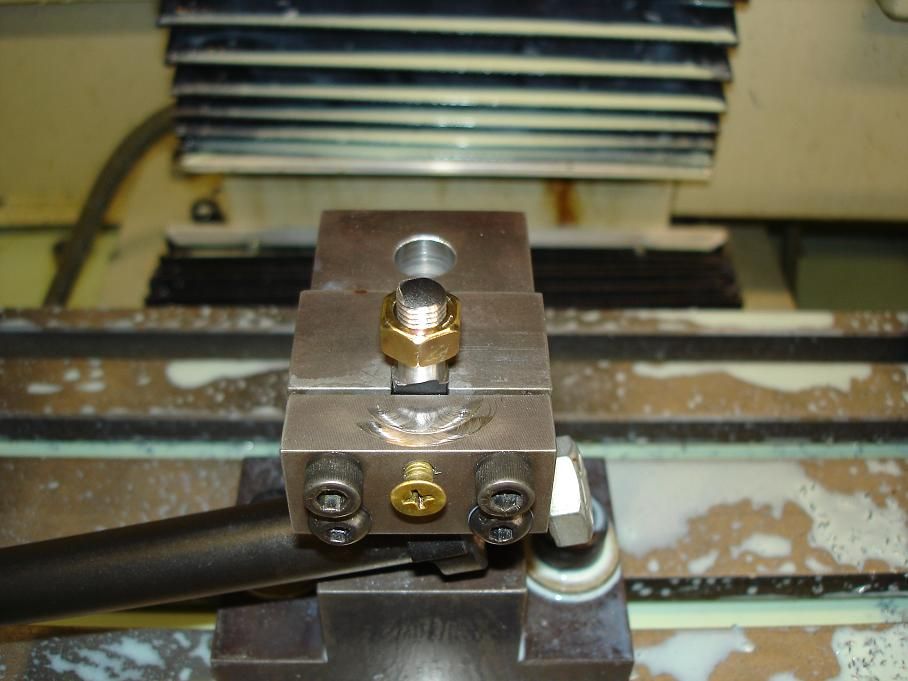
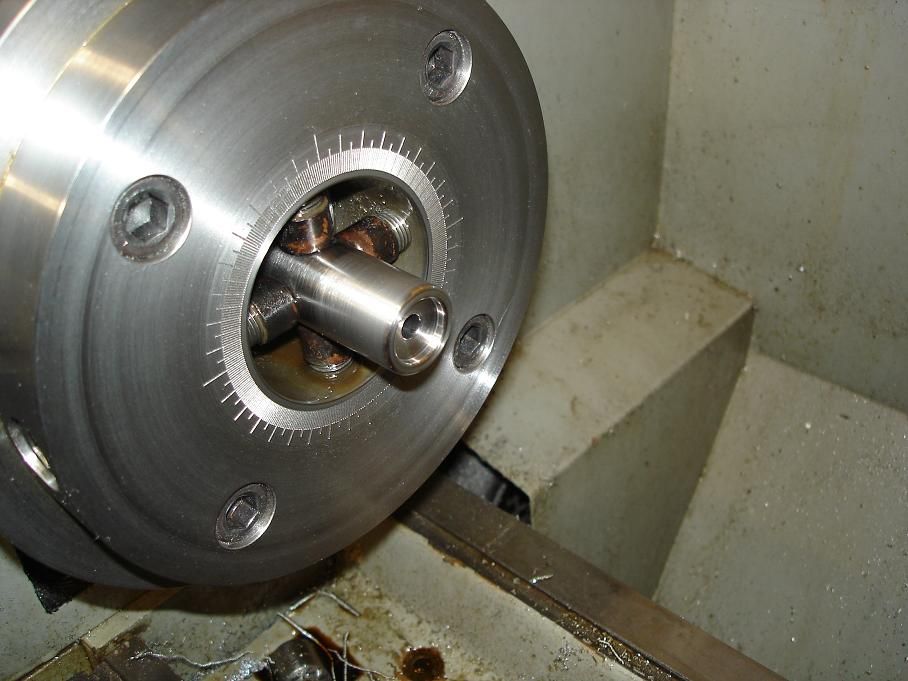
i got the bolt done this morning.
i set it up in my receiver/bolt truing jig i made. i gimble it between a spud threaded into the rear of the bolt and the middle of the bolt body until the stickout tir reads less than .0002" near the bolt head and near the adjustment screws. certainly this is more stickout than you would want for real machining but for taking a skim pass of .001" or less at a time, it seems to work just fine. it is also the best method i can think of at this time, without knocking off the bolt handle.
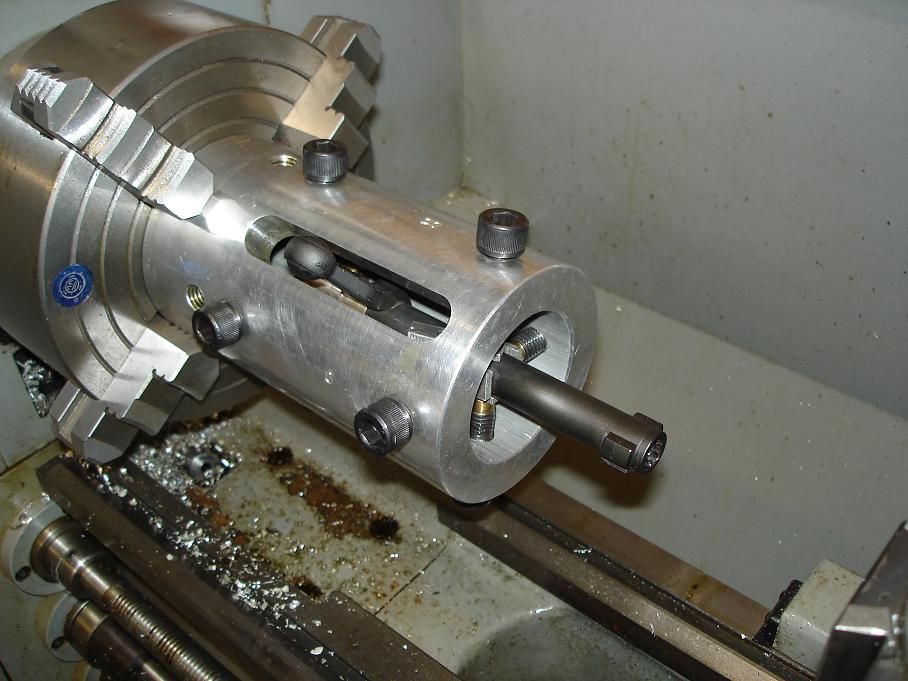
when truing the rear of the lugs with this setup i had trouble getting my left hand cutting tool and holder into position. i improvised with what i had and used a large boring bar turned upside down and the spindle in reverse. i use my solid carbide boring bar for the rest of the cuts. i use it to face the bolt face normally and run the spindle in reverse with the boring bar on the rear of the bolt to face the front of the lugs and true od of the bolt nose.
i got the bolt done this morning.
i set it up in my receiver/bolt truing jig i made. i gimble it between a spud threaded into the rear of the bolt and the middle of the bolt body until the stickout tir reads less than .0002" near the bolt head and near the adjustment screws. certainly this is more stickout than you would want for real machining but for taking a skim pass of .001" or less at a time, it seems to work just fine. it is also the best method i can think of at this time, without knocking off the bolt handle.
when truing the rear of the lugs with this setup i had trouble getting my left hand cutting tool and holder into position. i improvised with what i had and used a large boring bar turned upside down and the spindle in reverse. i use my solid carbide boring bar for the rest of the cuts. i use it to face the bolt face normally and run the spindle in reverse with the boring bar on the rear of the bolt to face the front of the lugs and true od of the bolt nose.
Re: just some pictures from this weekend's shop time.
Dirty or not, that factory finish looks like it is the saw cut finish of the stock and never got touched during machining.
Dirty or not, that factory finish looks like it is the saw cut finish of the stock and never got touched during machining.
Re: just some pictures from this weekend's shop time.
<div class="ubbcode-block"><div class="ubbcode-header">Originally Posted By: mbrittan308</div><div class="ubbcode-body">Dirty or not, that factory finish looks like it is the saw cut finish of the stock and never got touched during machining.
</div></div>
i'm wondering if they face the receivers on a belt sander. they're pretty crude these days.
Re: just some pictures from this weekend's shop time.
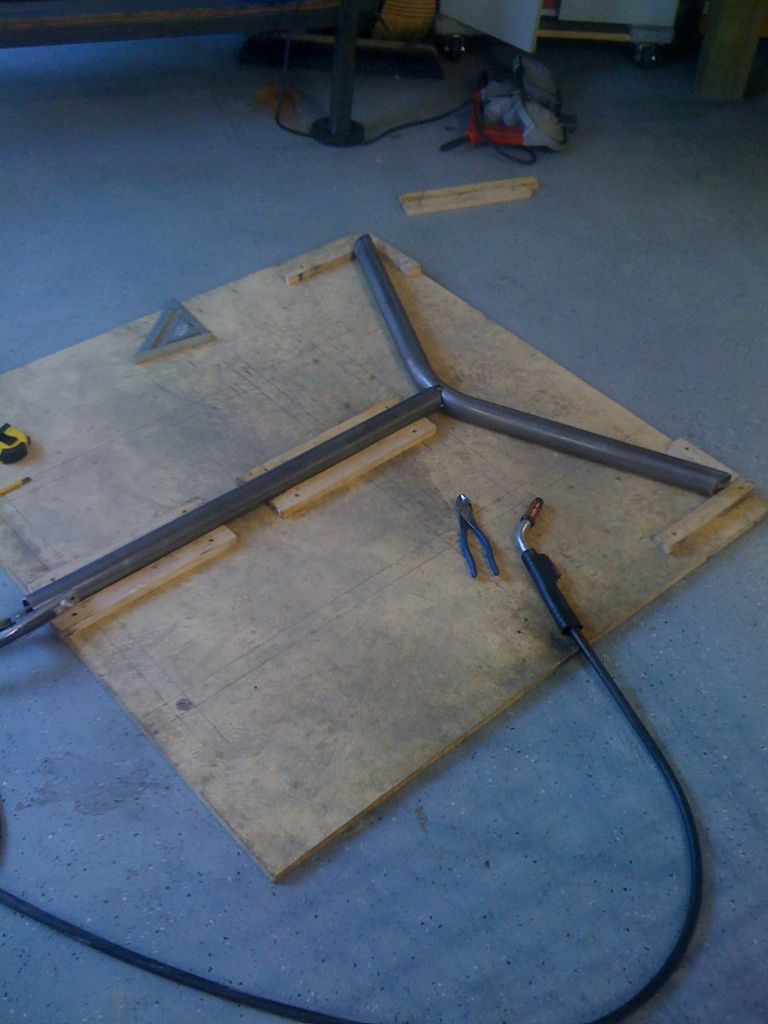
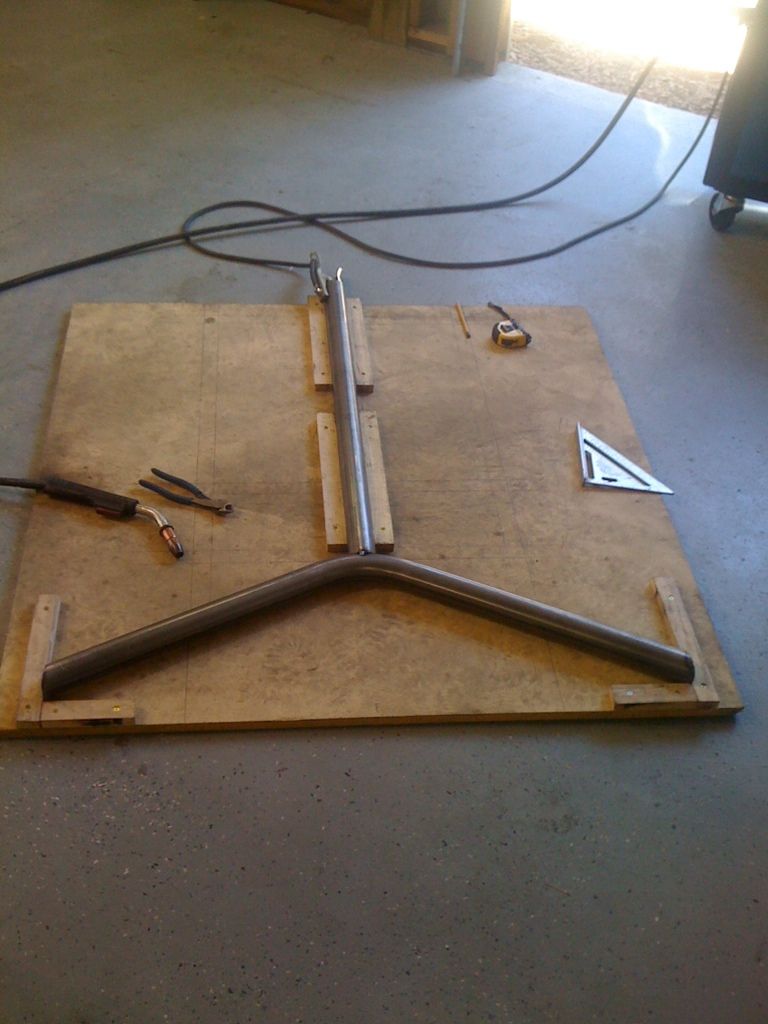
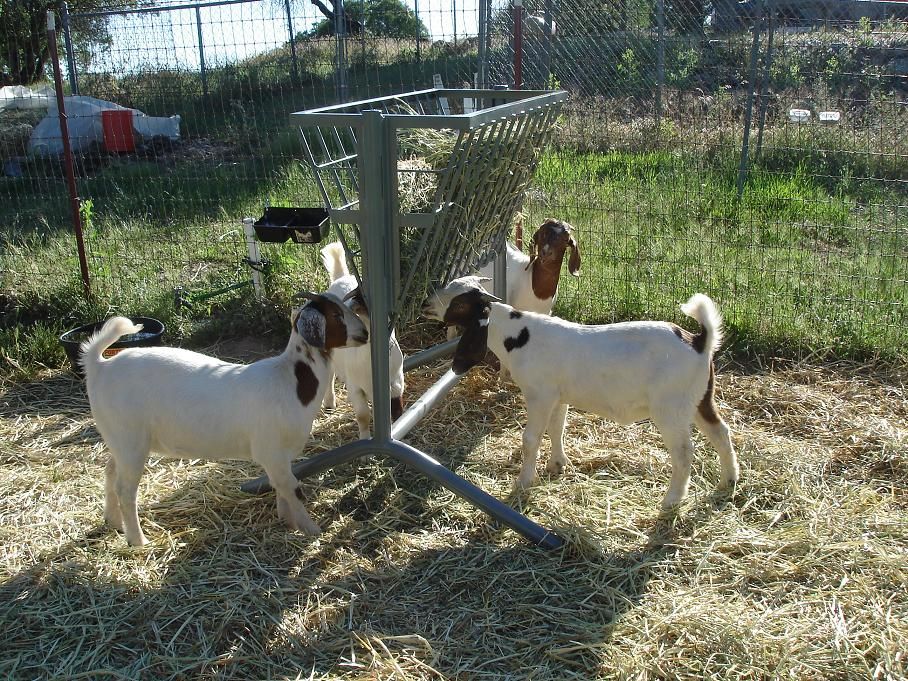
here's something else that came out of the garage shop (non gun-smithing related). since i couldn't find a quality american made hay feeder, i decided to make my own.
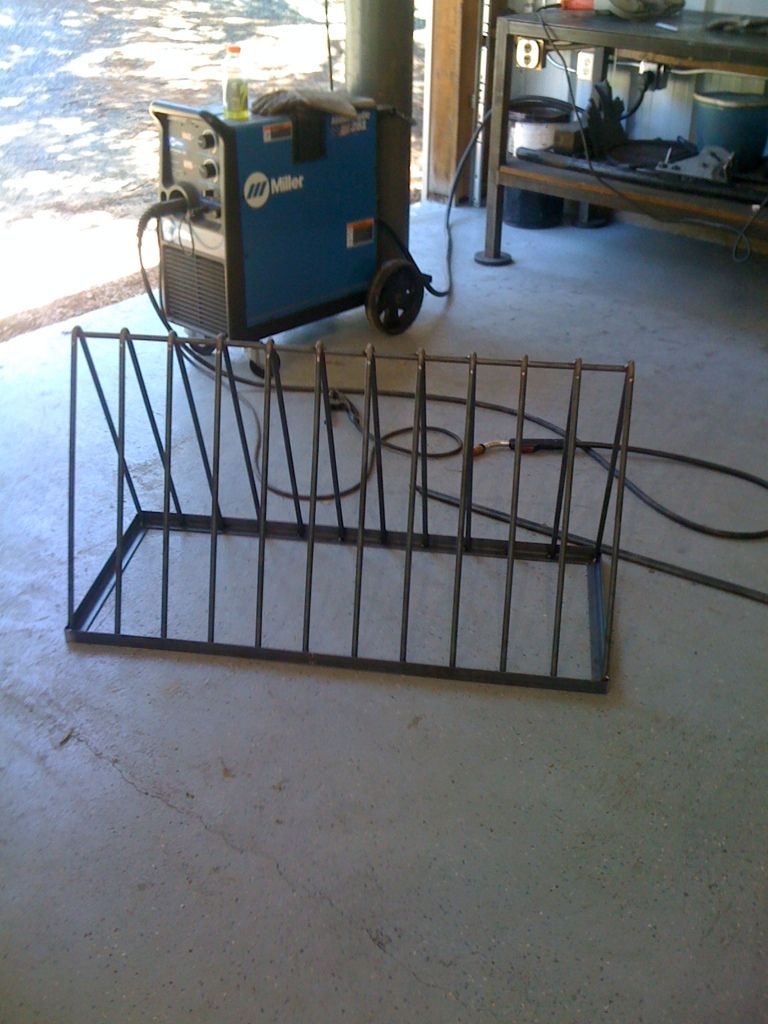
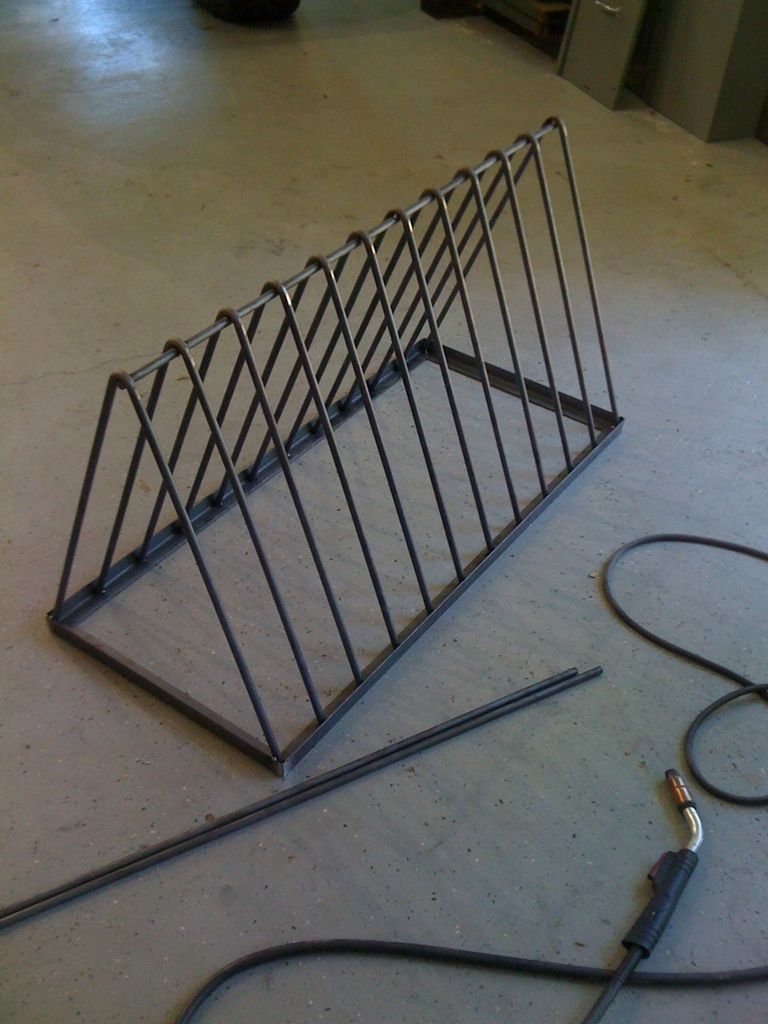
a quick improvised fixture for welding the legs.
getting close.
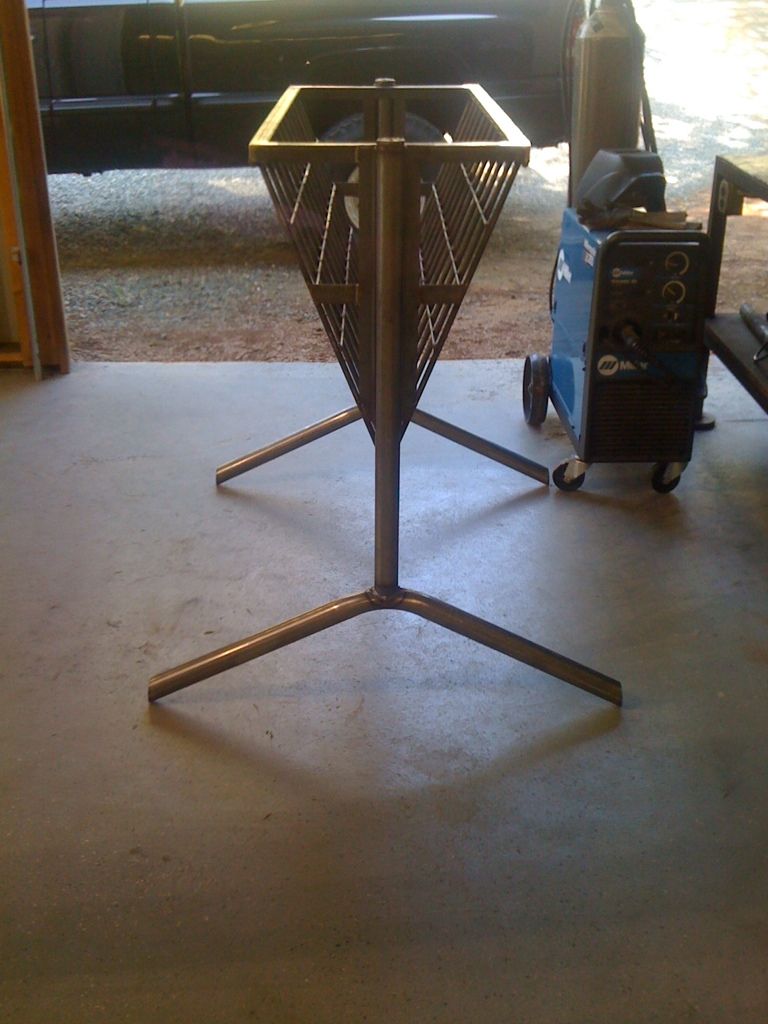
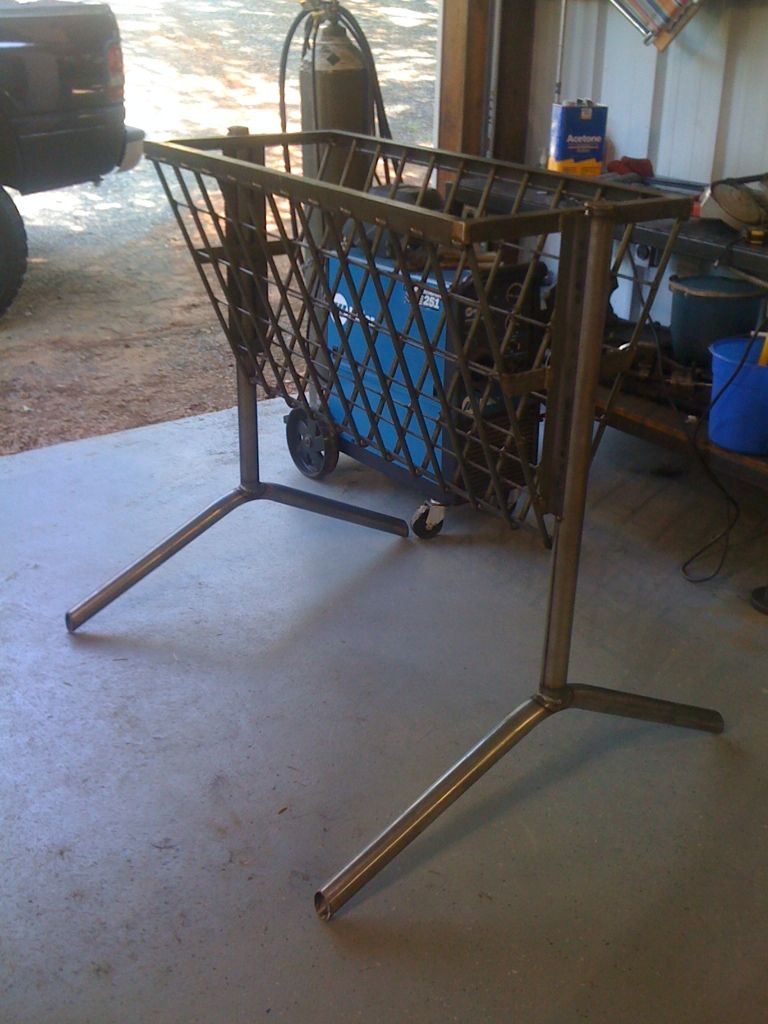
sprayed with sherwin williams alkyd paint.
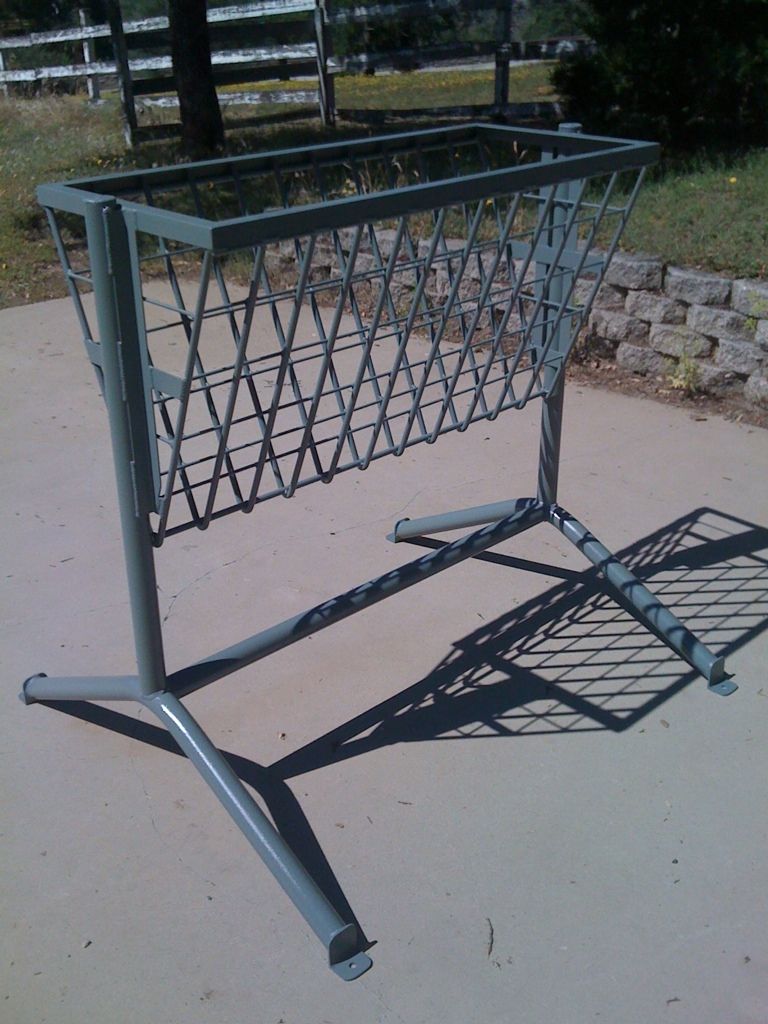
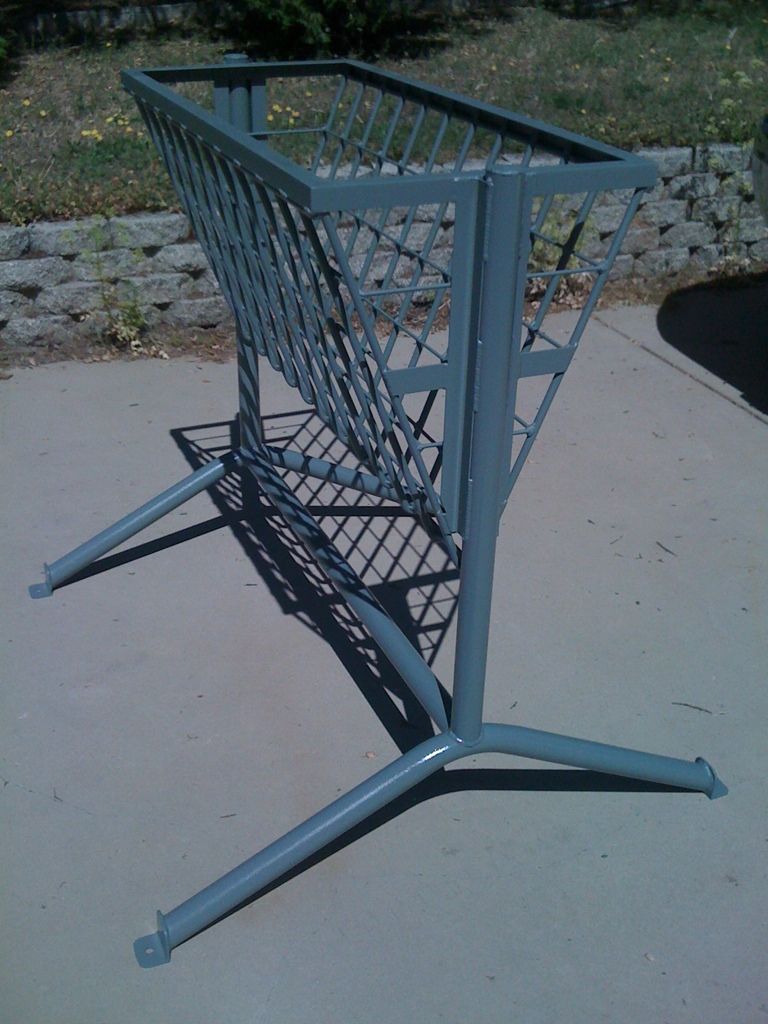
and the coco-puff machines approve.
here's something else that came out of the garage shop (non gun-smithing related). since i couldn't find a quality american made hay feeder, i decided to make my own.
a quick improvised fixture for welding the legs.
getting close.
sprayed with sherwin williams alkyd paint.
and the coco-puff machines approve.
Re: just some pictures from this weekend's shop time.
<div class="ubbcode-block"><div class="ubbcode-header">Originally Posted By: gregt</div><div class="ubbcode-body">
Chad, do you just touch off the thread mill on the top of the thread and set a g43 offset for it or is there something trickier? I've haven't tried to chase a thread in the mill as yet. </div></div>
Watch the vid clip.
Don't have to mess with a G43.
Here's what I did. Cutter comp the snot out of the thread mill so that it doesn't touch the part. When the insert gets to a comfortable height in the hole so that you can see what's going on (say two revs down from the top) you slow the feed way, way down (10% of programmed rate) till the tool is on the "Y" zero position. At that point (or as close to it as you can get, if your +/- .005 from "Y" zero your still plenty close enough) you note the <span style="font-weight: bold">z position </span>of the tool (with the G43 active mind you) and stop the program.
Now jog the tool over to the thread and use the Z to move up/down until the tool's profile fits into the thread feature on the receiver. Use a flashlight and back light it so you see what's going on.
Tips: TRUST YOUR EYES. Human eye has a resolution of about .002" That's PLENTY close for this kind of work. Your pushing the thread bigger so .002" doesn't mean a thing anyway. It's no less accurate than jamming an ID threading tool into a hole when setup on the lathe so have no fear.
Now that the tool is in the part note the shift in the Z on the "distance to go" callout on the position display.
Lets say during your thread milling operation you stopped the machine at a Z height of .800" above the lug abutments. You paused the machine on it's Y zero and jog over to the existing thread and jockey the thread mill into the thread. Now your DRO reads Z .0174". What does this mean? It means your are now actually at .8174" (.8 + .0174) above the lug.
Now go into your program and just add a couple lines of code to make it easy the next time you run the program on later actions. There's probably a more elegant way to do this with a G10 or something but I'm too lazy to dig the book out and sort through it. This works, I understand it, and it's pretty simple. If I were doing a hundred actions a day or something I'd be more inclined to invest more time into streamlining it a bit more.
(Safety line);
T2M6;
G54G0G90X0.Y0.;
G43H2Z2.0;
Z.800;
M00;
G0Z2.0
Normal thread milling program starts here. . .
You can get the thread timed two ways from this point.
1. Just bump your work shift in the Z axis by .0174
2. Bump the tool length offset by .0174
Personally I opt for the tool length offset because screwing with the work shift means ALL my tools used later are also going to be affected positively by .0174. Isolating the edit to the tool length page only affects the thread mill which is all I'm after.
Easy stuff! Seriously!
In my case however TWO tools are edited because I use an endmill also written to a thread milling cycle to counterbore and truncate the thread lead. If you don't edit this as well it with either leave some of the thread or eat partially into the one you want to preserve. Gotta do BOTH if your going to add this feature.
Re: just some pictures from this weekend's shop time.
with a bare action stripped down, i'd guess i stand in front of the lathe for an hour and a half to two hours truing the bolt and receiver.
with a bare action stripped down, i'd guess i stand in front of the lathe for an hour and a half to two hours truing the bolt and receiver.
Re: just some pictures from this weekend's shop time.
Once the machine is setup it's less than half an hour per receiver.
That includes tearing it down and the lapping.
Gotta love automation!
Once the machine is setup it's less than half an hour per receiver.
That includes tearing it down and the lapping.
Gotta love automation!
Re: just some pictures from this weekend's shop time.
i spent a little more time in the shop this morning.
i opened up the recoil lug to 1.083"+
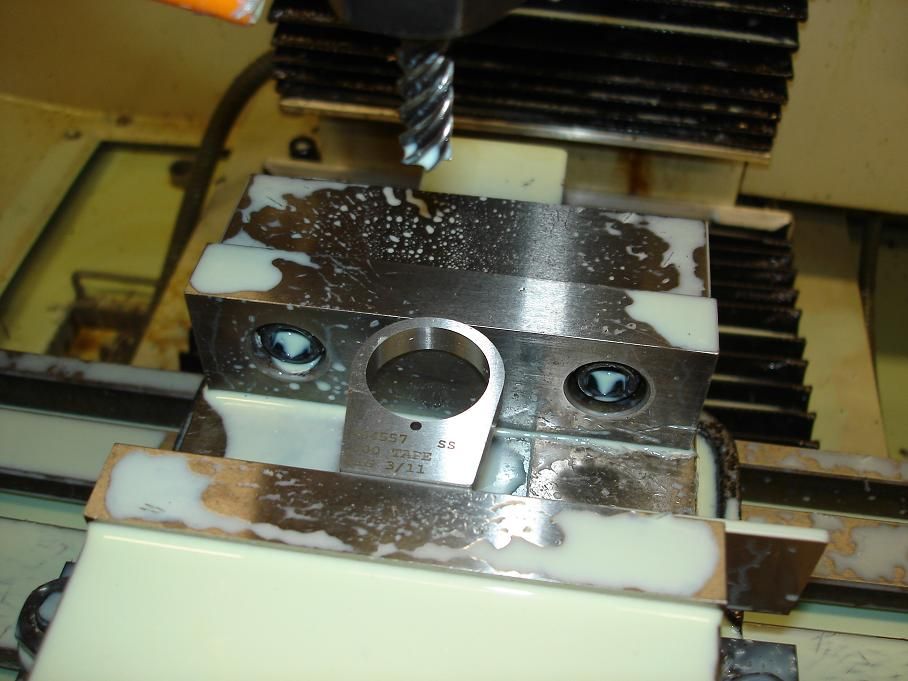
chamfering the side that faces the barrel shoulder. i prefer this and leaving the radius from the tool at the tenon to shoulder junction instead of plunging a turning tool into the tenon to remove the radius. it's not like the joint is ever going to fail but i don't like intentionally creating stress risers.
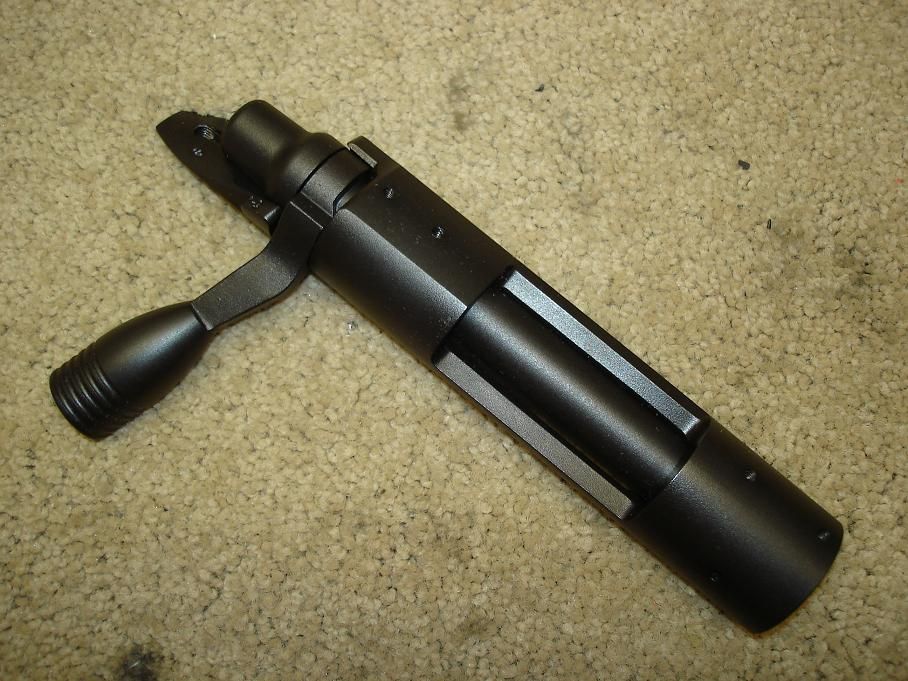
getting my knob-job on.
i spent a little more time in the shop this morning.
i opened up the recoil lug to 1.083"+
chamfering the side that faces the barrel shoulder. i prefer this and leaving the radius from the tool at the tenon to shoulder junction instead of plunging a turning tool into the tenon to remove the radius. it's not like the joint is ever going to fail but i don't like intentionally creating stress risers.
getting my knob-job on.
Re: just some pictures from this weekend's shop time.
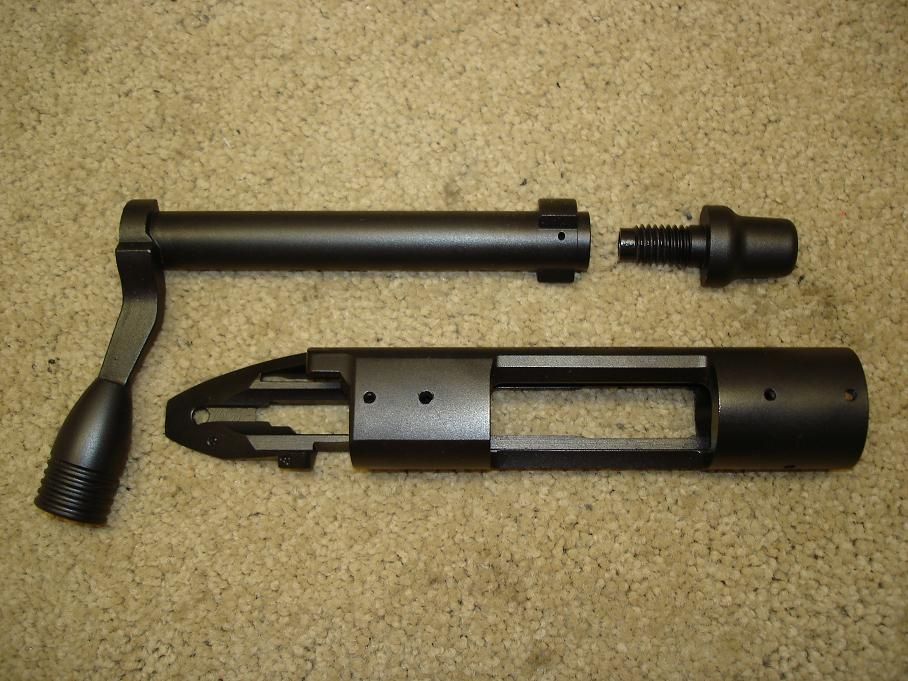
complete knob-job.
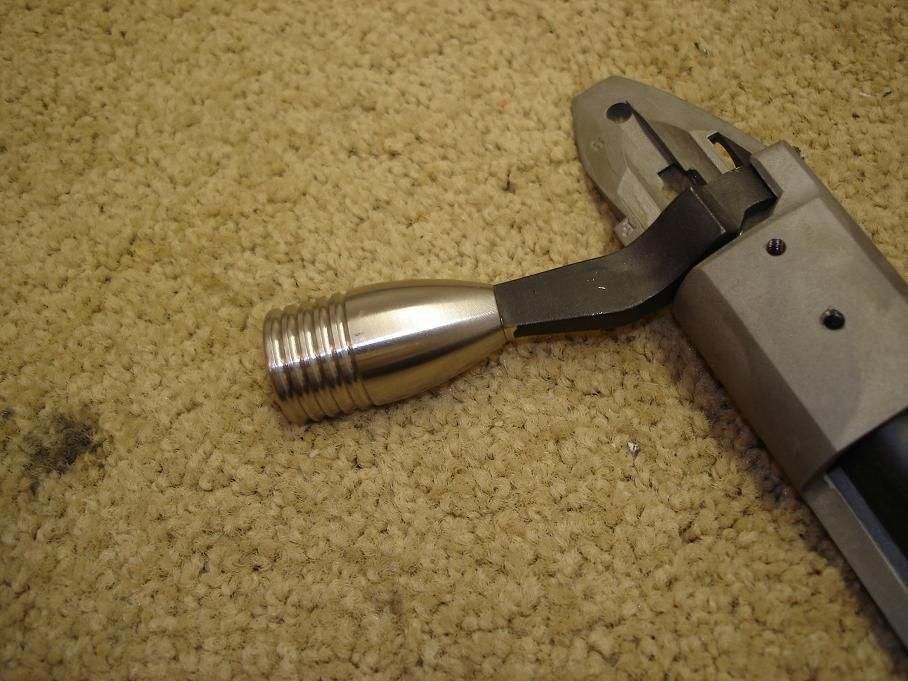
not being a fan of spiders, i get a bit uneasy when these big ass wolf spiders run around the shop. this one was pretty big but at least it didn't have eleventy-billion babies on it's back like some of them to. it was damn aggressive though. i tried poking it with a welding rod and it attacked it. it got the carb cleaner treatment after that.

complete knob-job.
not being a fan of spiders, i get a bit uneasy when these big ass wolf spiders run around the shop. this one was pretty big but at least it didn't have eleventy-billion babies on it's back like some of them to. it was damn aggressive though. i tried poking it with a welding rod and it attacked it. it got the carb cleaner treatment after that.
Re: just some pictures from this weekend's shop time.
Bert,
You prolly know this already buuuuuhhhhhtttttt.
Much better to make a soft jaw in AL that has a radius to captivate the arc at the top of the lug. I'm sure you've seen them "pinch" a bit while snuggin up the vise.
I did it that way a long time too till it finally bugged me enough.
BTW.
If you get to a point where your ready to switch coolants give this a try: CIMCO 320. If you ask they'll send you a 5 gallon pail and the santizer too free of charge;
Mix to 7% indicated and let it rip!
No more "milk farm" slime or smell! Bad ass stuff.
Nice work!
C.
Re: just some pictures from this weekend's shop time.
i have been thinking about a better way to hold the lugs without squishing them. the more i think about how much time i put into modifying existing lugs, the more i think about just making my own or having some made to my specs. formed soft jaws would probably be the best way for what i'm doing.
i've been using hangstefer's s-500 coolant. i have been happy with it and not had any of the issues i hear people having with other coolants. it has never had a smell. it doesn't stain. it doesn't peel the paint off my machine. even in the uninsulated/non-climate controlled metal building it's in, i've never had any rust. it doesn't bother my skin or sinuses. i figure i have another year or two before i use up the rest of my 5 gallon bucket.
that said, would i see benefits by changing to the cimco 320?
Re: just some pictures from this weekend's shop time.
300, you and C. Dixon do some KICK ASS work. I just wish I had the tools to get into this type of work. I had always wanted to get familiar around a lathe and mill.
300, you and C. Dixon do some KICK ASS work. I just wish I had the tools to get into this type of work. I had always wanted to get familiar around a lathe and mill.
Re: just some pictures from this weekend's shop time.
<div class="ubbcode-block"><div class="ubbcode-header">Originally Posted By: C. Dixon</div><div class="ubbcode-body">Once the machine is setup it's less than half an hour per receiver.
That includes tearing it down and the lapping.
Gotta love automation!</div></div>
<div class="ubbcode-block"><div class="ubbcode-header">Originally Posted By: 300sniper</div><div class="ubbcode-body">with a bare action stripped down, i'd guess i stand in front of the lathe for an hour and a half to two hours truing the bolt and receiver.</div></div>
I've only used the PTG tooling and I would say it's about a 15-20 minute job. Pinning the recoil lug and the time savings over the lathe makes the mill worth it.
Re: just some pictures from this weekend's shop time.
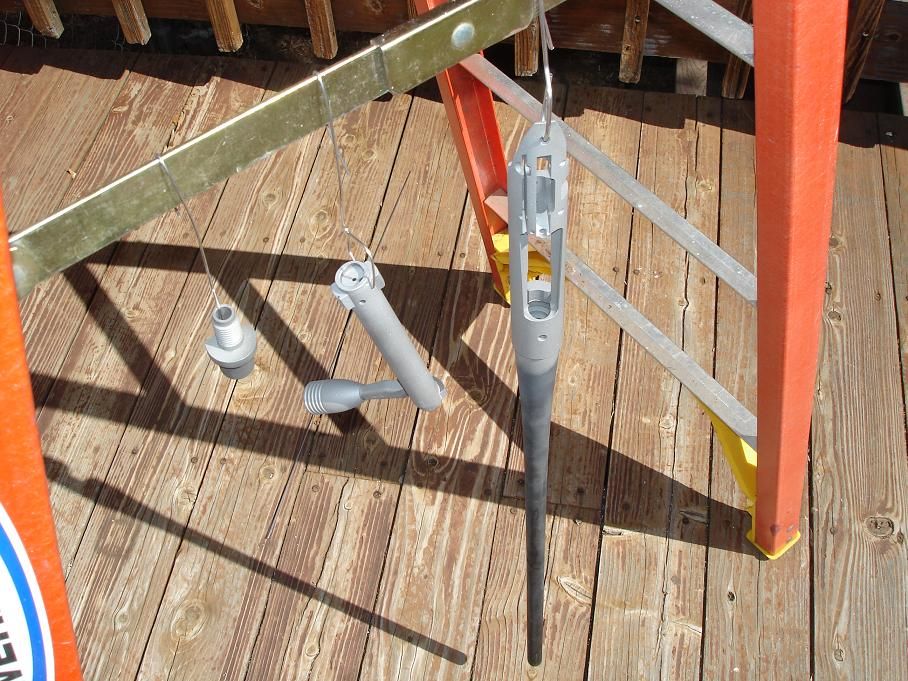
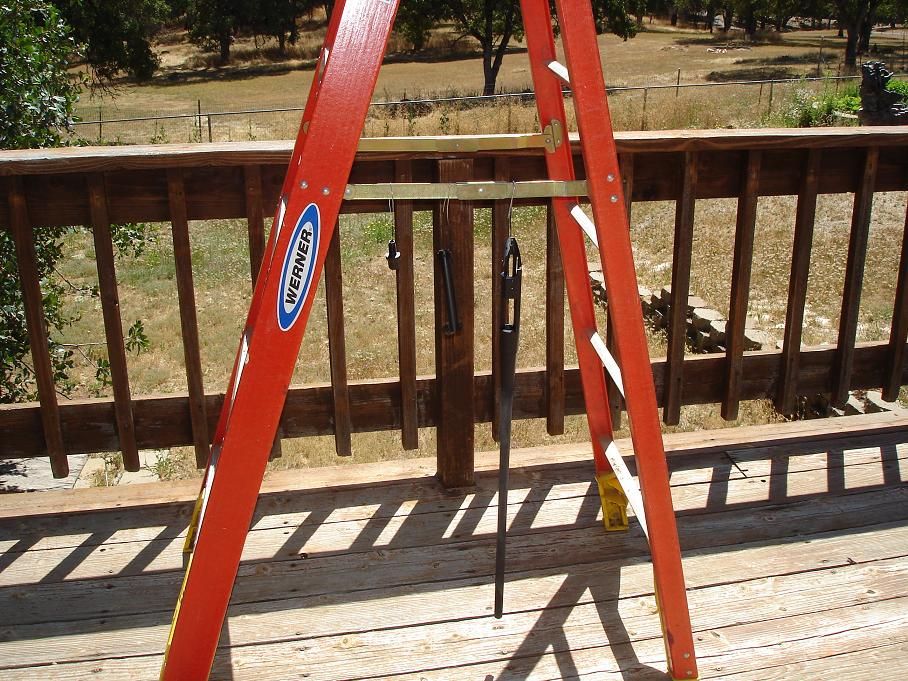
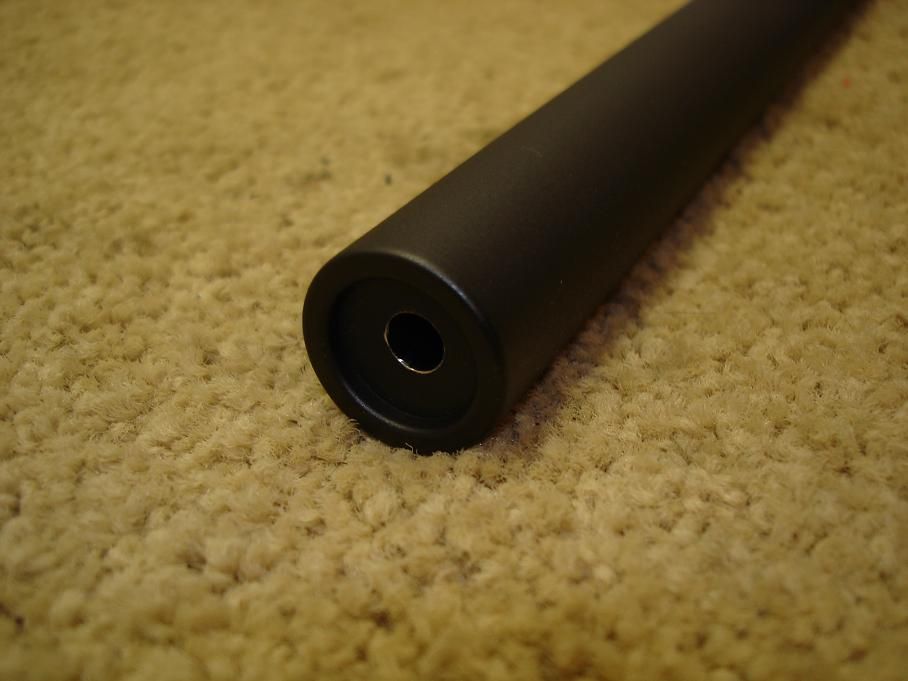
hillbilly paint booth.
i maaaay have to take the girlfriend out for dinner when she gets home tonight


cured flat black moly-resin. once the penetrating oil soaks in the shine will go away and leave a very nice mat finish. i love moly-resin.
hillbilly paint booth.
i maaaay have to take the girlfriend out for dinner when she gets home tonight
cured flat black moly-resin. once the penetrating oil soaks in the shine will go away and leave a very nice mat finish. i love moly-resin.
Re: just some pictures from this weekend's shop time.
Awesome stuff! Really enjoy seeing this WIP threads!
Awesome stuff! Really enjoy seeing this WIP threads!
Re: just some pictures from this weekend's shop time.
<div class="ubbcode-block"><div class="ubbcode-header">Originally Posted By: 300sniper</div><div class="ubbcode-body">hillbilly paint booth.
i maaaay have to take the girlfriend out for dinner when she gets home tonight
cured flat black moly-resin. once the penetrating oil soaks in the shine will go away and leave a very nice mat finish. i love moly-resin.
</div></div>
Very Nice!!
<div class="ubbcode-block"><div class="ubbcode-header">Originally Posted By: 300sniper</div><div class="ubbcode-body">hillbilly paint booth.
i maaaay have to take the girlfriend out for dinner when she gets home tonight
cured flat black moly-resin. once the penetrating oil soaks in the shine will go away and leave a very nice mat finish. i love moly-resin.
Very Nice!!
Re: just some pictures from this weekend's shop time.
Hey 300, Are you taking the receiver threads out to 1.082 all the way down to the lug surface or just a little passed where the threads stop.
Nice work on the action! looks like your getting your machining and gunsmithing down. How is that 284 shooting?
Hey 300, Are you taking the receiver threads out to 1.082 all the way down to the lug surface or just a little passed where the threads stop.
Nice work on the action! looks like your getting your machining and gunsmithing down. How is that 284 shooting?
Re: just some pictures from this weekend's shop time.
<div class="ubbcode-block"><div class="ubbcode-header">Originally Posted By: Tac284</div><div class="ubbcode-body">Hey 300, Are you taking the receiver threads out to 1.082 all the way down to the lug surface or just a little passed where the threads stop.
Nice work on the action! looks like your getting your machining and gunsmithing down. How is that 284 shooting? </div></div>
i only chase as far as the existing threads go.
the 284 was still shooting great the last time i shot it. i have another barrel i'm about to put on it. it's sitting at 2800 rounds right now. it's been a few months since i've even pulled a trigger though. work's been slow so eating is taking priority over shooting.
Re: just some pictures from this weekend's shop time.
Nice job on the hay feeder. I need to build something similar for my sheep except it needs to be big enough to hold a round bale.

Nice job on the hay feeder. I need to build something similar for my sheep except it needs to be big enough to hold a round bale.
Re: just some pictures from this weekend's shop time.
Nice work.
Can't wait to see the finished product!!
Nice work.
Can't wait to see the finished product!!
Re: just some pictures from this weekend's shop time.
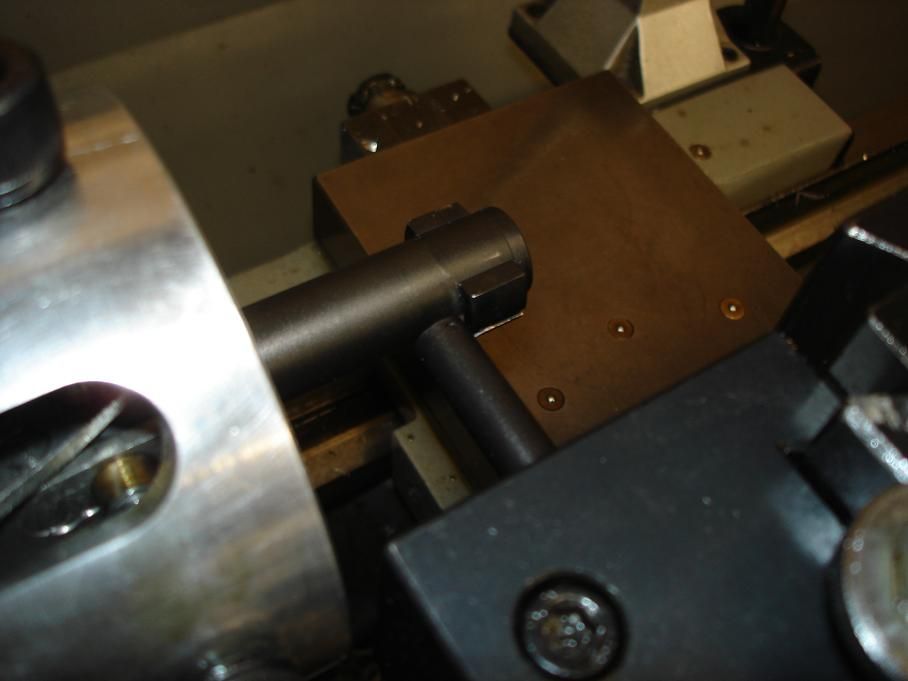
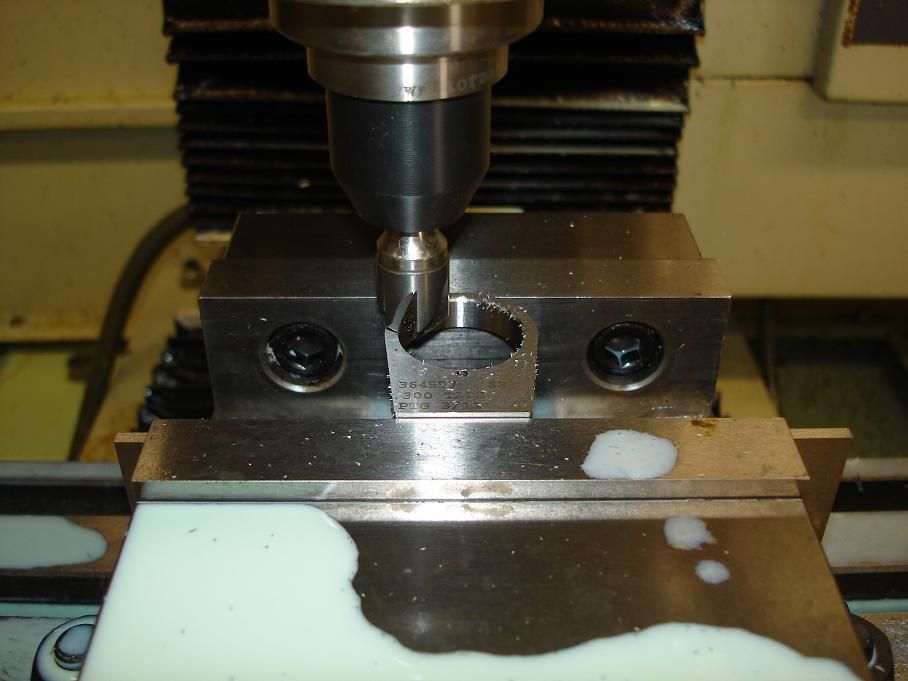
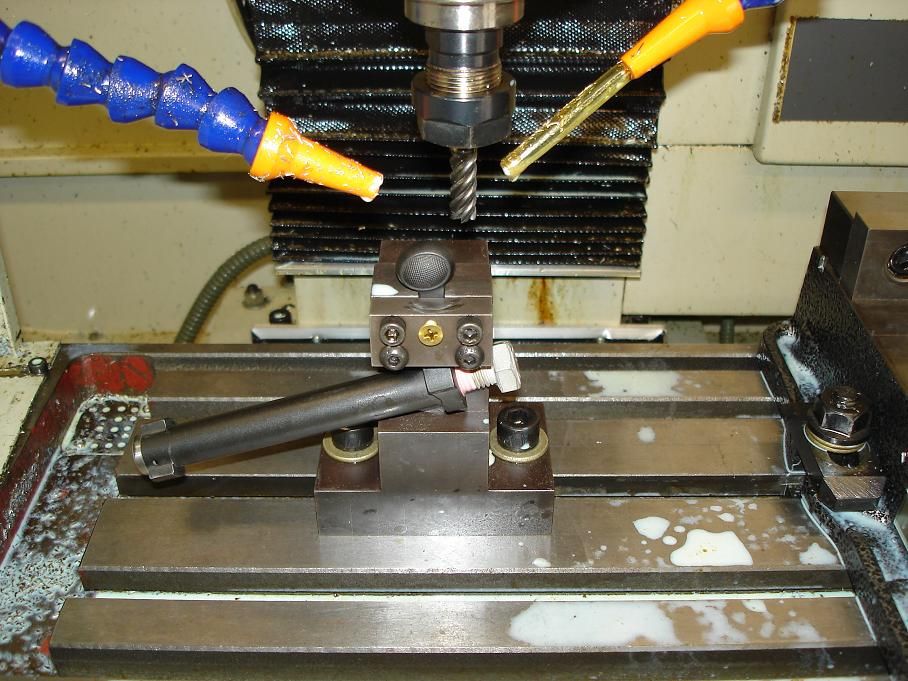
i machined the bottom of the lug so it would fit in an aics without having to deepen the lug recess potentially weakening the chassis. while i had it in the mill, i gave the edges a .010" chamfer.
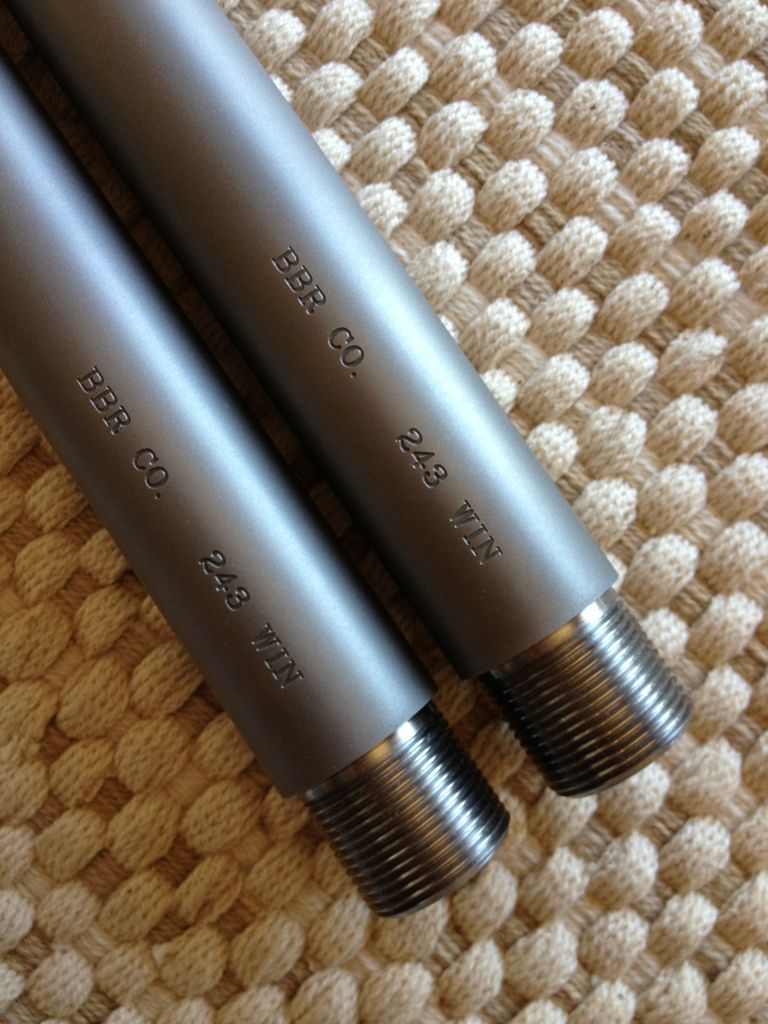
the flash makes the engraving look pretty bad. it looks good in person.
i machined the bottom of the lug so it would fit in an aics without having to deepen the lug recess potentially weakening the chassis. while i had it in the mill, i gave the edges a .010" chamfer.
the flash makes the engraving look pretty bad. it looks good in person.

Re: just some pictures from this weekend's shop time.
I was curious what you used to do the engraving on the barrel and action???
I need to get an engraving system for my shop since the guy I was using moved I have to bite the bullet and get one…
Thanks
I was curious what you used to do the engraving on the barrel and action???
I need to get an engraving system for my shop since the guy I was using moved I have to bite the bullet and get one…
Thanks
Re: just some pictures from this weekend's shop time.
i'm engraving on the cnc mill because that's what i have available. if i were going to be doing this for money, not just a hobby, i'd probably get an electro-chemical etching setup.
i'm engraving on the cnc mill because that's what i have available. if i were going to be doing this for money, not just a hobby, i'd probably get an electro-chemical etching setup.
Re: just some pictures from this weekend's shop time.
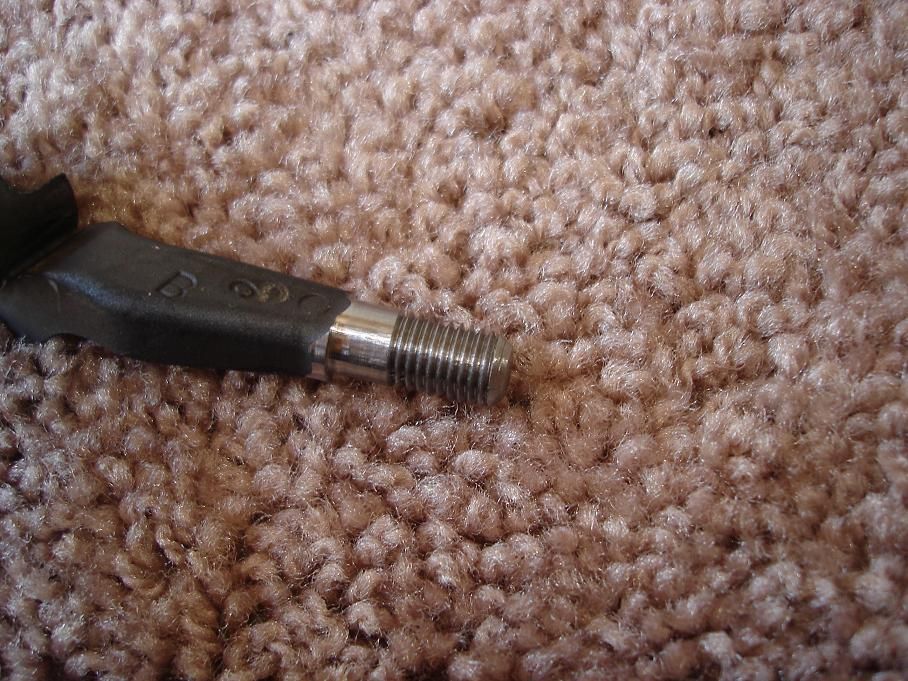
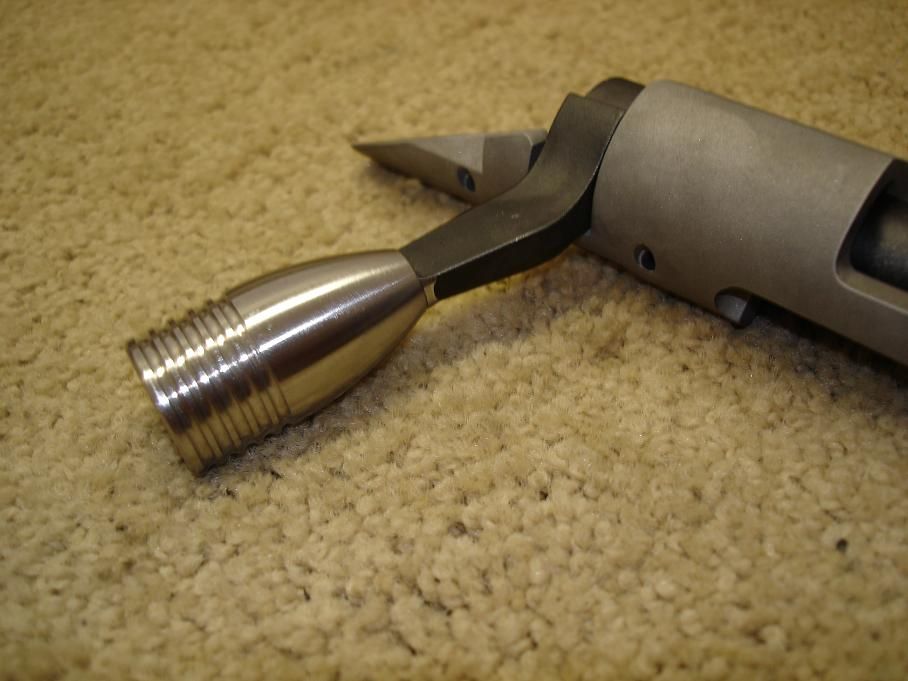
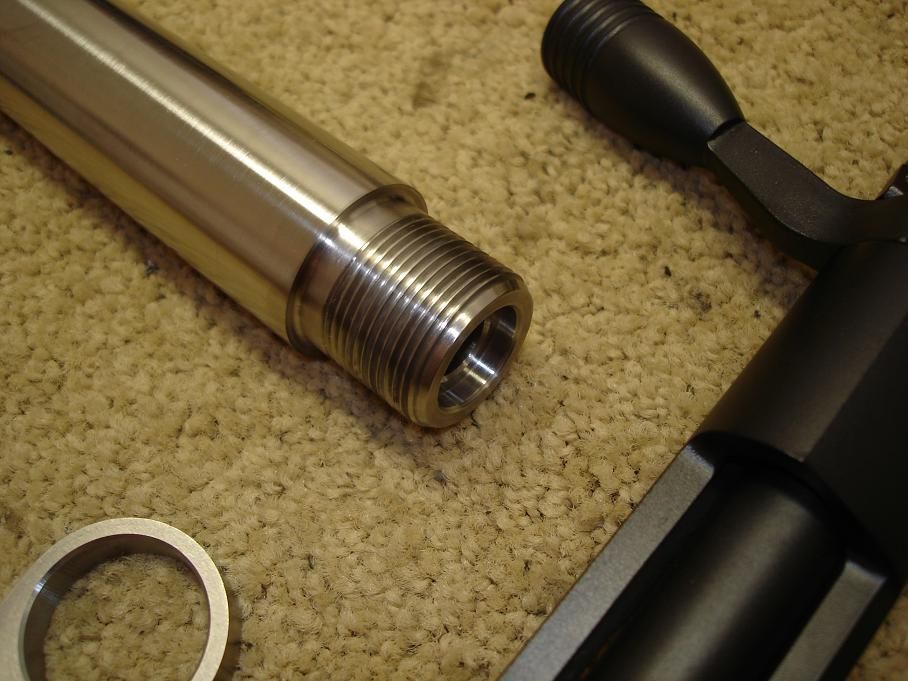
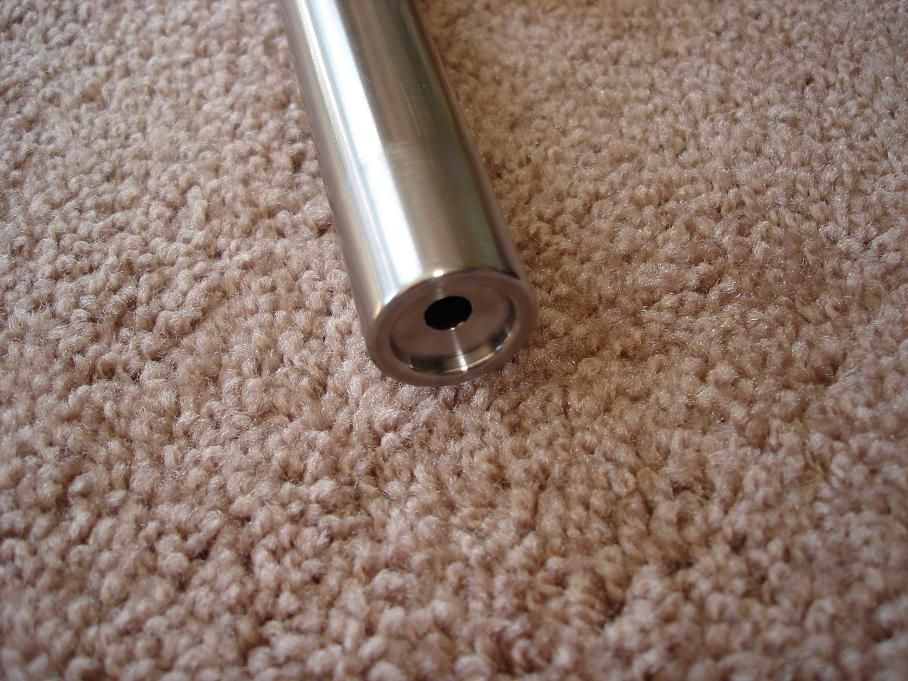
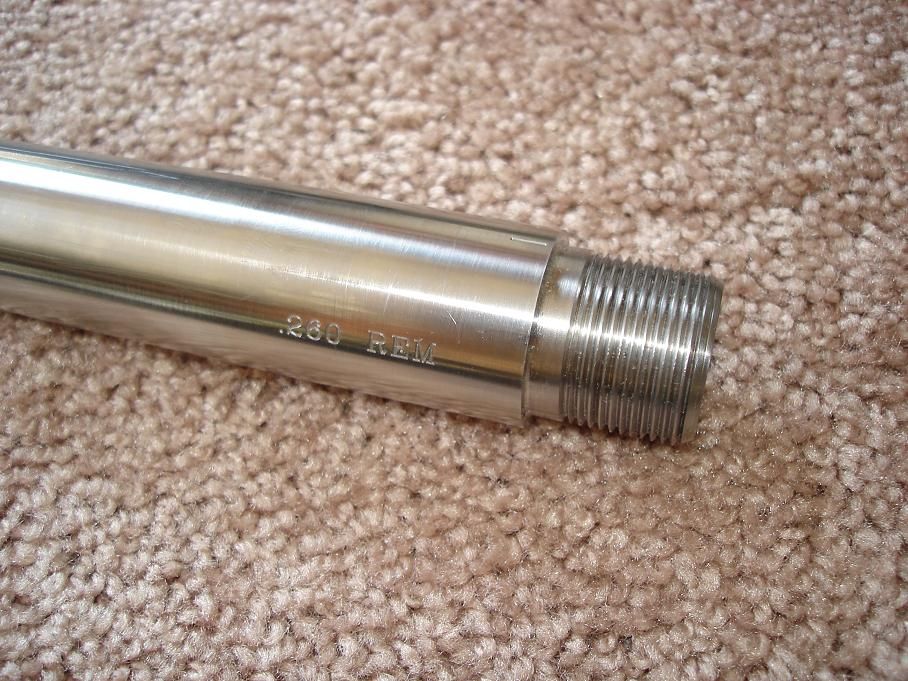
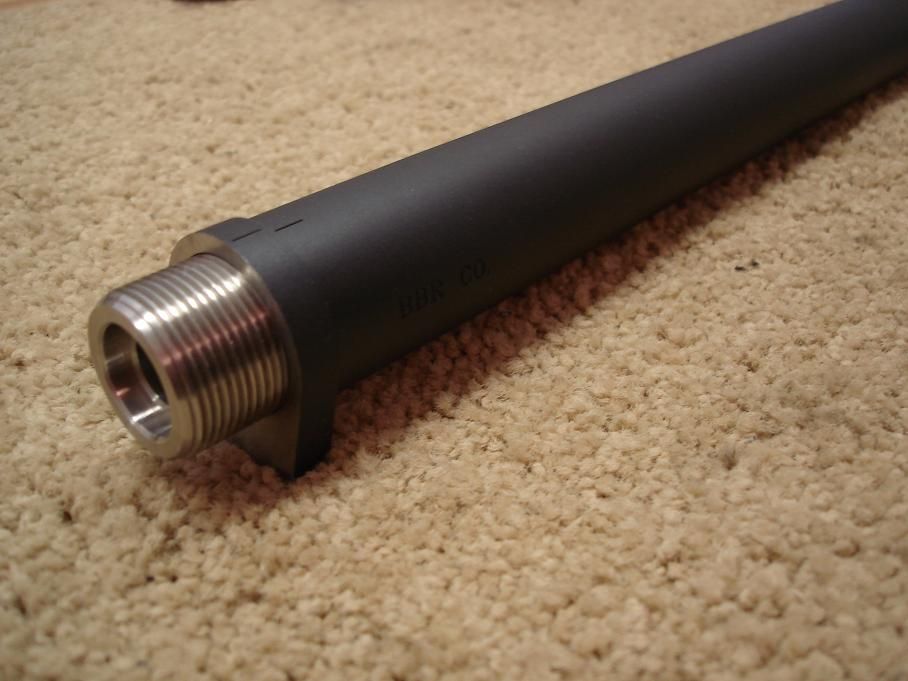
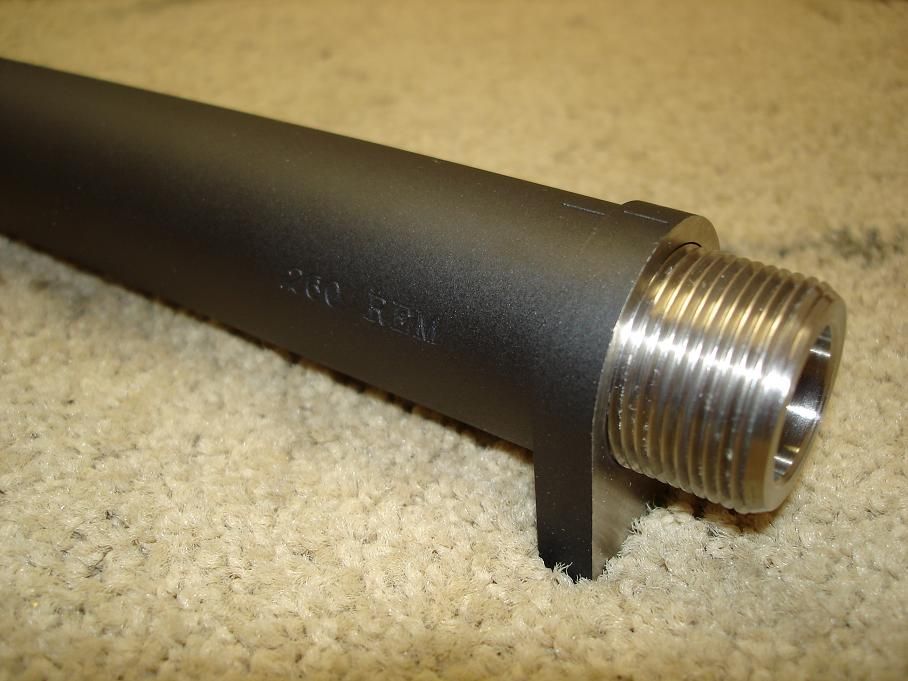
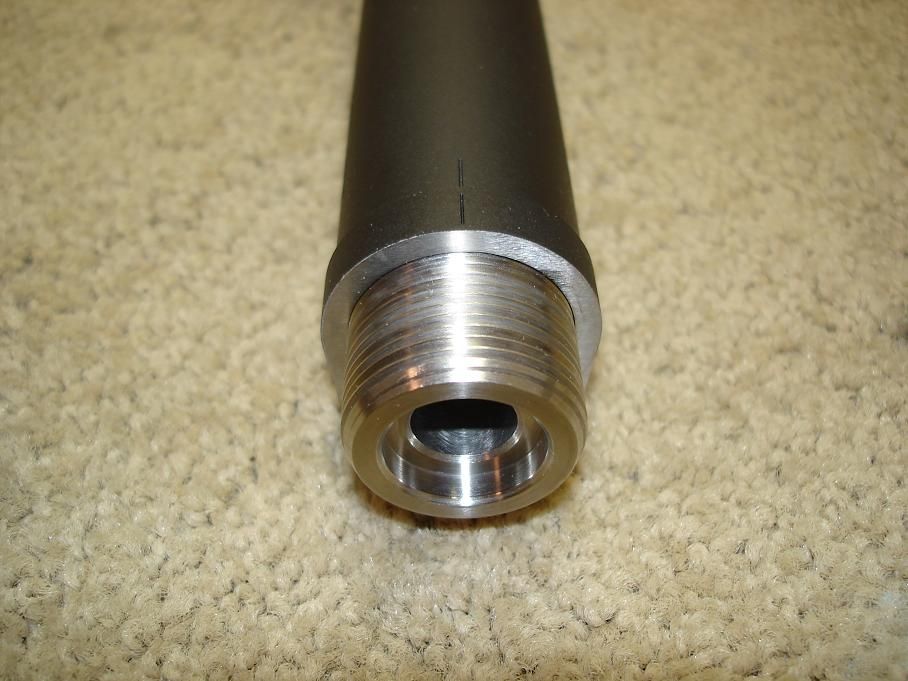
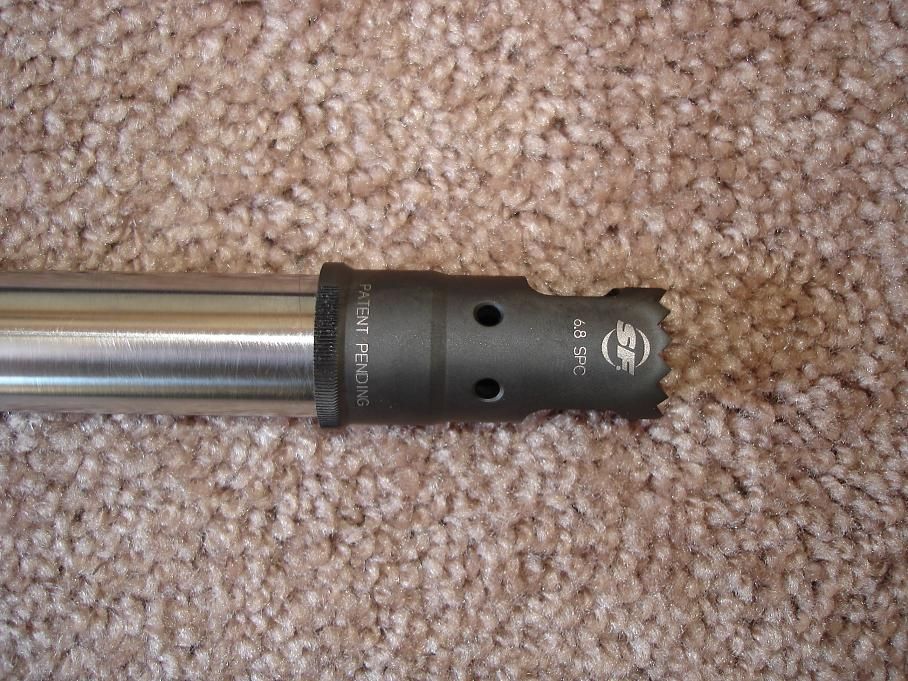
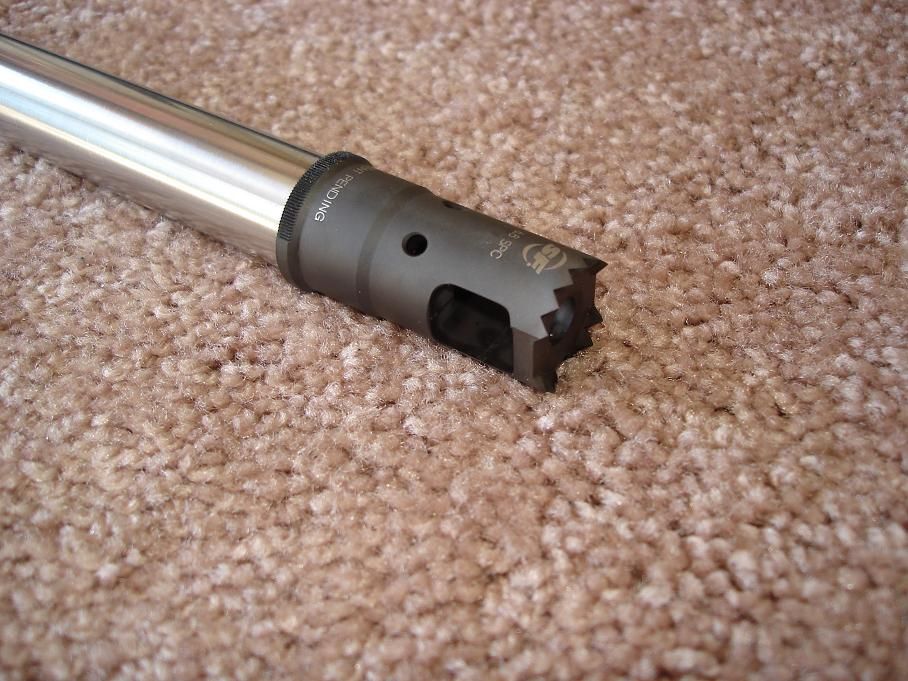
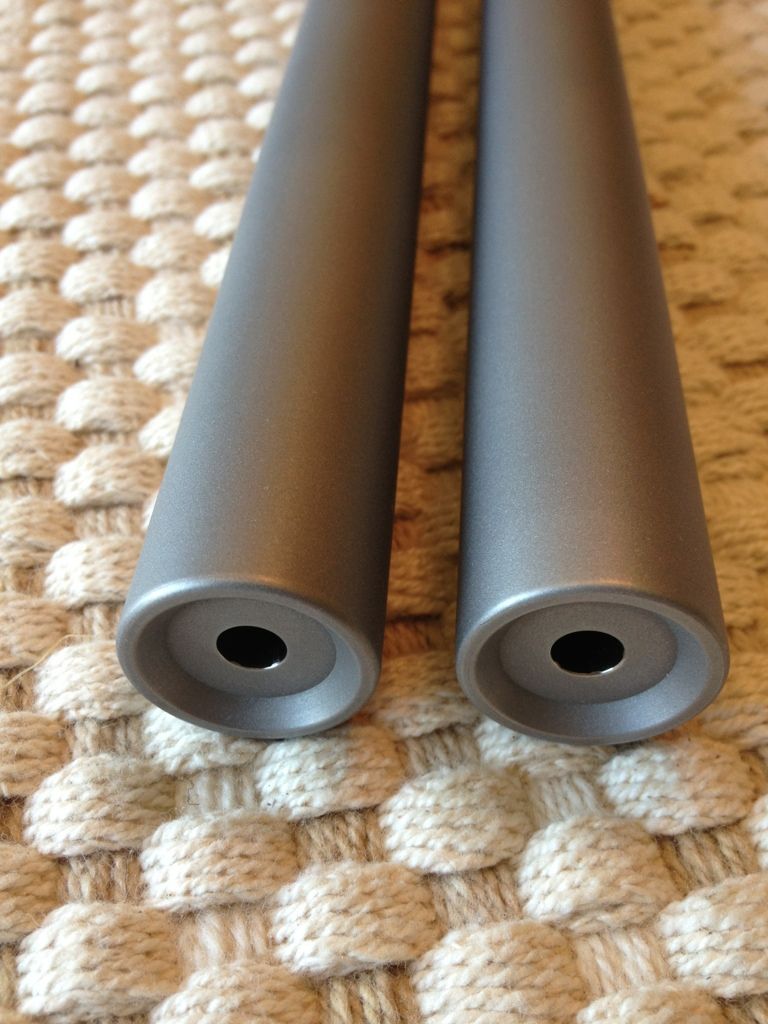
a quick muzzle thread job this morning.
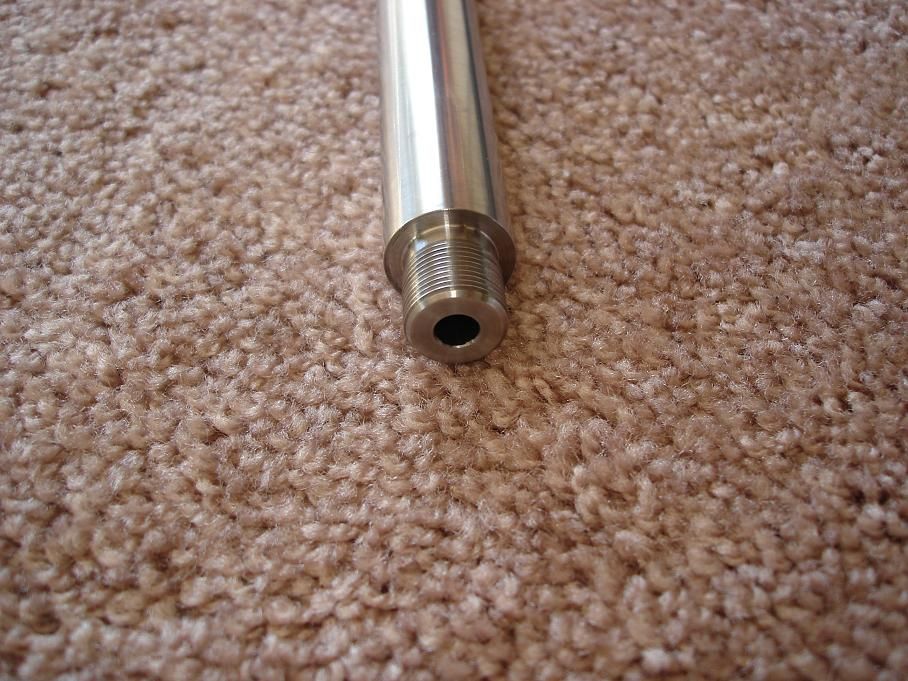

i timed the barrel shoulder instead of using shims to index the surefire brake/adapter.
a quick muzzle thread job this morning.
i timed the barrel shoulder instead of using shims to index the surefire brake/adapter.
Re: just some pictures from this weekend's shop time.
How do you like that tormach? I have been thinking about getting one for home use, but the stepper drives are scaring me a little bit.
How do you like that tormach? I have been thinking about getting one for home use, but the stepper drives are scaring me a little bit.
Re: just some pictures from this weekend's shop time.
I have known 300sniper for a long time and shot against his rifles. As always, awesome work bud!
I have known 300sniper for a long time and shot against his rifles. As always, awesome work bud!
Re: just some pictures from this weekend's shop time.
Bert,
Nice as usual. If your ever get sick of Ca, I'll make room in my shop.
Get a damn FFL and get to work!
C.
Bert,
Nice as usual. If your ever get sick of Ca, I'll make room in my shop.
Get a damn FFL and get to work!
C.
Similar threads
- Replies
- 20
- Views
- 895
