I wouldn't recommend pulling the sear. Its is a little more complicated than some would be comfortable with. Also, it isn't very hard to damage the receiver getting the pins out and back in.I did not remove the sear itself because it appears to be a more complicated procedure and just polishing the transfer borrow with sufficient to get better than what I had hoped for
Join the Hide community
Get access to live stream, lessons, the post exchange, and chat with other snipers.
Register
Download Gravity Ballistics
Get help to accurately calculate and scope your sniper rifle using real shooting data.

Install the app
How to install the app on iOS
Follow along with the video below to see how to install our site as a web app on your home screen.
Note: This feature may not be available in some browsers.
You are using an out of date browser. It may not display this or other websites correctly.
You should upgrade or use an alternative browser.
You should upgrade or use an alternative browser.
Official (DTA) SRS, HTI, Covert, Hunter Thread
- Thread starter patches
- Start date
Yes agree...I wouldn't recommend pulling the sear. Its is a little more complicated than some would be comfortable with. Also, it isn't very hard to damage the receiver getting the pins out and back in.
The pins are a VERY tight fit and you need to make a "pilot" pin to extract the main. You also need to make a guide to re insert the pin so you do not damage the receiver on re install of the pins. The domed head on the pins allows a normal pin punch to "slip" and damage the receiver.
Well, my factory 308 barrel didn’t disappoint with federal 168gr T308T ammo. Shot 5 at 100yds and 3 at 200yds before the rain came down. Next to test is the factory 338 lapua barrel. I’ve got a box of 270gr Hornady ELDX & a box of 250gr S&B match to test. Anybody have experience what factory ammo they recommend that shoots well out of the 338?


The horny 285ELD – M has shot good in several of my 338 barrels. The 338 can really test your fundamentals so build a good shooting position before you start and make sure your trigger is tuned up good.
Hornady 285 ELD. I roll my own, but am actually fairly happy with all the Hornady Precision Hunter line. Single digit SD's, ES ~20. Little wider in cold weather. More than sufficient. Used it for Moose, elk, and smashing steel. They're all a hoot to shoot. You'll want a brake on the 338LM; I went for a Area 419 on all those. Recoil is actually very tame. Look into a SAC 223 conversion to round it out. Roll your own pills for a much tighter SD and ES; With 6.5 Creedmoor and Staball, I used 43gr to average 2878 FPS out of desert tech brass with SD of 5.3 and ES of 12... 1 hole groups became truly 1 barely ragged hole. Factory barrels for the 6.5 and 338LM; Proof Research CF for the 6.5 stubby, and I don't know what but whatever SAC gives for 223. I can always chase more accuracy, but, I've never really had to track an animal; they're all just *down*. The bullets just go where you tell them to with this platform.
Mag catch problem solved. I might just have a lemon, but if anyone else runs into this in the future, let me know and I can probably help you out.
Long story short, though the factory skins I have look fine, the molded hole for the left side mag release had tolerances about 1mm too large, which allowed the bolt catch to be slightly torqued rearward by the mag catch spring. This caused only a small portion of the mag catch to touch the magazine, which led to magazine retention issues as I move from position to position.
Before, note the angle that the mag catch gets torqued to, essentially only the rear corner holds the magazines in. Fine for prone shooting but not running around doing positional stuff.

After, note how the mag catch is much closer to square (when I went more than this, it required too much force to insert a mag). Sure I could file the bottom of the catch, but this allows for a non-permanent modification and solves the problem completely.

I wanted a non-intrusive and non-permanent solution, and simply 3d printed a variety of mag release buttons with the shaft offset at varying distances.


I played Goldilocks a bit, as 0.6mm was so much retention the mag insertion was troublesome, and 0.2mm was only slightly improved. 0.4mm was perfect, and the 3D printed PPA-CF should hold up as good as the original.
Doesn't look too bad.
.jpg")
If anyone ever runs into this issue I would be happy to send you a few mag catches for the cost of parts and shipping to see if it solves your issue, just reach out.
Final solution is a 3d printed bolt catch with an M6 stud to replace the original.

Long story short, though the factory skins I have look fine, the molded hole for the left side mag release had tolerances about 1mm too large, which allowed the bolt catch to be slightly torqued rearward by the mag catch spring. This caused only a small portion of the mag catch to touch the magazine, which led to magazine retention issues as I move from position to position.
Before, note the angle that the mag catch gets torqued to, essentially only the rear corner holds the magazines in. Fine for prone shooting but not running around doing positional stuff.
After, note how the mag catch is much closer to square (when I went more than this, it required too much force to insert a mag). Sure I could file the bottom of the catch, but this allows for a non-permanent modification and solves the problem completely.
I wanted a non-intrusive and non-permanent solution, and simply 3d printed a variety of mag release buttons with the shaft offset at varying distances.
I played Goldilocks a bit, as 0.6mm was so much retention the mag insertion was troublesome, and 0.2mm was only slightly improved. 0.4mm was perfect, and the 3D printed PPA-CF should hold up as good as the original.
Doesn't look too bad.
If anyone ever runs into this issue I would be happy to send you a few mag catches for the cost of parts and shipping to see if it solves your issue, just reach out.
Final solution is a 3d printed bolt catch with an M6 stud to replace the original.
Last edited:
^ glad you were able to fix this.
But this is what pisses off even those of us who really like this platform: DT’s poor quality control. You should not have to 3-D print parts to fix a $4000 rifle chassis. Full stop.
Or at the very least you ought to be able to send it in no questions asked and have it fixed or a new one sent to you and they can sell the old one as a factory second.
This is also why I say, despite it being my favorite every day, shooting platform, I would never take it to war with me. Couldn’t possibly trust it if your life depended upon it.
Last edited:
I completely agree. The extraction issues and mag retention are enough to be laughable at their quality control, the forend missing 2 x screws from factory just makes it worse. What is most frustrating is though they did offer to have the gun shipped back (its currently my only high end bolt gun, so that isnt an option right now), they required me to pay for a new extractor for the extraction issues. That should be a warranty coverage.
I am going to reach back out to them and let them know mag issue to see what they will offer to do just out of curiosity. Will update.
I am going to reach back out to them and let them know mag issue to see what they will offer to do just out of curiosity. Will update.
Can you share your step file ?Mag catch problem solved. I might just have a lemon, but if anyone else runs into this in the future, let me know and I can probably help you out.
Long story short, though the factory skins I have look fine, the molded hole for the left side mag release had tolerances about 1mm too large, which allowed the bolt catch to be slightly torqued rearward by the mag catch spring. This caused only a small portion of the mag catch to touch the magazine, which led to magazine retention issues as I move from position to position.
Before, note the angle that the mag catch gets torqued to, essentially only the rear corner holds the magazines in. Fine for prone shooting but not running around doing positional stuff.
View attachment 8744006
After, note how the mag catch is much closer to square (when I went more than this, it required too much force to insert a mag). Sure I could file the bottom of the catch, but this allows for a non-permanent modification and solves the problem completely.
View attachment 8744005
I wanted a non-intrusive and non-permanent solution, and simply 3d printed a variety of mag release buttons with the shaft offset at varying distances.
View attachment 8743995View attachment 8743996
I played Goldilocks a bit, as 0.6mm was so much retention the mag insertion was troublesome, and 0.2mm was only slightly improved. 0.4mm was perfect, and the 3D printed PPA-CF should hold up as good as the original.
Doesn't look too bad.
View attachment 8744009
If anyone ever runs into this issue I would be happy to send you a few mag catches for the cost of parts and shipping to see if it solves your issue, just reach out.
Final solution is a 3d printed bolt catch with an M6 stud to replace the original.
View attachment 8744010
Do you want a parametric file that you can adjust the shaft offset, or would you like 3 different mag catches with different offsets (0.2mm,0.4mm and 0.6mm is what I tested). Either will take 5 min so its no issue either wayCan you share your step file ?
If you're going to do this you need M6 Heat set insert, a length of M6 threaded rod (its going to be shorter than the original overall length of the mag catch. Youll just need to install the heat set insert, install the threaded rod with some loctite and then file the rod to match the OAL of the original.
I’ll send you a PMDo you want a parametric file that you can adjust the shaft offset, or would you like 3 different mag catches with different offsets (0.2mm,0.4mm and 0.6mm is what I tested). Either will take 5 min so its no issue either way
If you're going to do this you need M6 Heat set insert, a length of M6 threaded rod (it’s going to be shorter than the original overall length of the mag catch. Youll just need to install the heat set insert, install the threaded rod with some loctite and then file the rod to match the OAL of the original.
There is going to be a fix for that small amount of clearance on the SRS-M2 very soon.Just wanted to update y'all that this may not be something to look into. I came to an embarrassing revelation today while scratching up a barrel during a barrel change.
The handguard isn't centered top to bottom about the barrel, and the barrel sits towards the top of the handguard. Well, the 3x factory m-lok screws for the top pic rail extend past the tnut about 3mm.
When I first installed my comp contour barrels I filed them down about 1mm and ensured there was about 1mm of barrel clearance--- while the gun was on bipods.
I was working on the rifle on a tripod this week and noticed one of those top pic rail screws touching the barrel. Thought I was losing my mind and then I thought about my issue. - I zero prone on bipods, then when I'm shooting positional stuff, with the rifle supported in the middle, it has a 0.4 mil shift.
It's not wla weak barrel mounting solution like on the MRAD. The issue was the fact that when I zeroed while prone, the force on the bipods must flex the forend just enough for the screw not to touch, then when I no longerer apply that pressure the screw is touching, causing a poi shift.
-chalk 1 of my issues up to a dumb user who didn't fully analyze his rifle modification, and not a desertech issue. Just wanted to make that correction for anyone who was interested. I'll run some barricade drills this week and if y'all don't hear back assume the poi shift was 100% my fault.
Still annoyed AF with ejection and mag retention issues.
Figured out that there is forward/rearward play of just under 1mm in the skin where the left side mag release sits. This play allows the mag release to be torqued rearward by the spring pressure and makes the mag catch not sit square in the magwell. Only the front corner of it catches a mag, which quickly wears the thin mags and I develop an issue where a properly loaded mag falls out when it should not.
I'm going to try to deep dive some solutions that don't require permanent modification of the skins this week and see if I can fix it
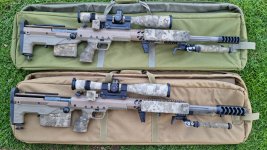
In the photo is a full length 0 moa top rail with a diligent defense Enticer S inside with about 3mm of clearance and built in threaded flush mount screws. No more M lock nuts sticking out hitting barrels or anything like that.
Attachments
There is going to be a fix for that small amount of clearance on the SRS-M2 very soon.
In the photo is a full length 0 moa top rail with a diligent defense Enticer S inside with about 3mm of clearance and built in threaded flush mount screws. No more M lock nuts sticking out hitting barrels or anything like that.
I am super stoked to see this. I built this arca rail / bag rider section that attaches to the 1/4-20 screw point in front of the trigger guard and I love it - the only slightly annoying aspect is that due to the forend arca being so much higher, I can't make a straight shot connection to the main rail.
Your setup looks like you could run arca all the way back to the trigger guard. Are you the designer? Id love to throw some ideas at you to solve more problems than it's already solving if so.
Sidebar note on my rear bag rider complaint earlier, I cranked out a rear bag rider that retains functionality of the monopod. Still testing it but so far I'm loving it.
In addition to sitting better on a bag, using the micro/macro monopod adjust while using a rear bag adds another tool if you need it.
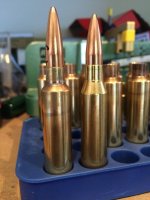
Wow, tried a box of Norma golden target 338 lapua 250gr bthp and shot a 1/2 moa 5 shot group on the bottom orange sticker, top is a 3 shot 308 group with 168smk’s. 338 is definitely for the big boys, had to really settle into the the rifle and get it shoulderd properly. Was also using a silencerco 36m suppressor and the sound was no worse than my 300wm. Very impressed with my M2 so far!

^that's excellent shooting, kudos!
I'm on my 4th 338 barrel in this platform since 2012. (She's a 34" hammer on a K&P blank by E-S Tactical.)
I've always gotten them to shoot, despite some growing pains along the way. Things like top rail was loose, false pressure signs from neck sizing and inadequate shoulder bump, etc.)
But one thing that was always a big variable in the equation was shooting fundamentals, because any fundamental error was magnified by the recoil.
It's one of the reasons that despite having a 338 Ultra, I have a Gen 2 RR version on order.
Anyway, keep up the good work, mitigate recoil, and solidify fundamentals.
Looks like you have a shooter on at least one end of the rig.")
I'm on my 4th 338 barrel in this platform since 2012. (She's a 34" hammer on a K&P blank by E-S Tactical.)
I've always gotten them to shoot, despite some growing pains along the way. Things like top rail was loose, false pressure signs from neck sizing and inadequate shoulder bump, etc.)
But one thing that was always a big variable in the equation was shooting fundamentals, because any fundamental error was magnified by the recoil.
It's one of the reasons that despite having a 338 Ultra, I have a Gen 2 RR version on order.
Anyway, keep up the good work, mitigate recoil, and solidify fundamentals.
Looks like you have a shooter on at least one end of the rig.
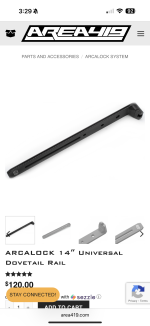
Agreed, and believe me, lessons were learned  . First, my original scope mount couldn’t take the recoil and the scope was moving between shots. Second, my standard arca bipod connection was sliding from the recoil. Third, I was shouldering the butpad too high and it was hitting my collarbone and recoil was really painful. My solutions were a badger max scope mount, area419 arcalock bipod adapter, and really getting comfy with the butpad lower on my chest. Too bad it cost me about $200 in ammo to figure all that out
. First, my original scope mount couldn’t take the recoil and the scope was moving between shots. Second, my standard arca bipod connection was sliding from the recoil. Third, I was shouldering the butpad too high and it was hitting my collarbone and recoil was really painful. My solutions were a badger max scope mount, area419 arcalock bipod adapter, and really getting comfy with the butpad lower on my chest. Too bad it cost me about $200 in ammo to figure all that out I must be a boy338 separates boys and amateurs from men and experts for sure

One of the guys here 3d prints a Pachmyer recoil pad adapter. That makes it downright pleasant to shoot. Puts the pad a lot lower.Agreed, and believe me, lessons were learned
338 separates boys and amateurs from men and experts for sure
I’m improved…
Attachments
Damn! An uncircumcised Lapua! They are still out there among us...I’m improved…

Does DT sell the 30MOA M2 top rail in black? On the website they say they do but I can only find Tungsten and FDE links. I emailed sales about a week ago. I called today and left a message. Nothing.
Nothing is what to expect.
Customers service is not a word
But nepotism is.
Customers service is not a word
But nepotism is.
"Black Ice" hehe
 www.bisontactical.com
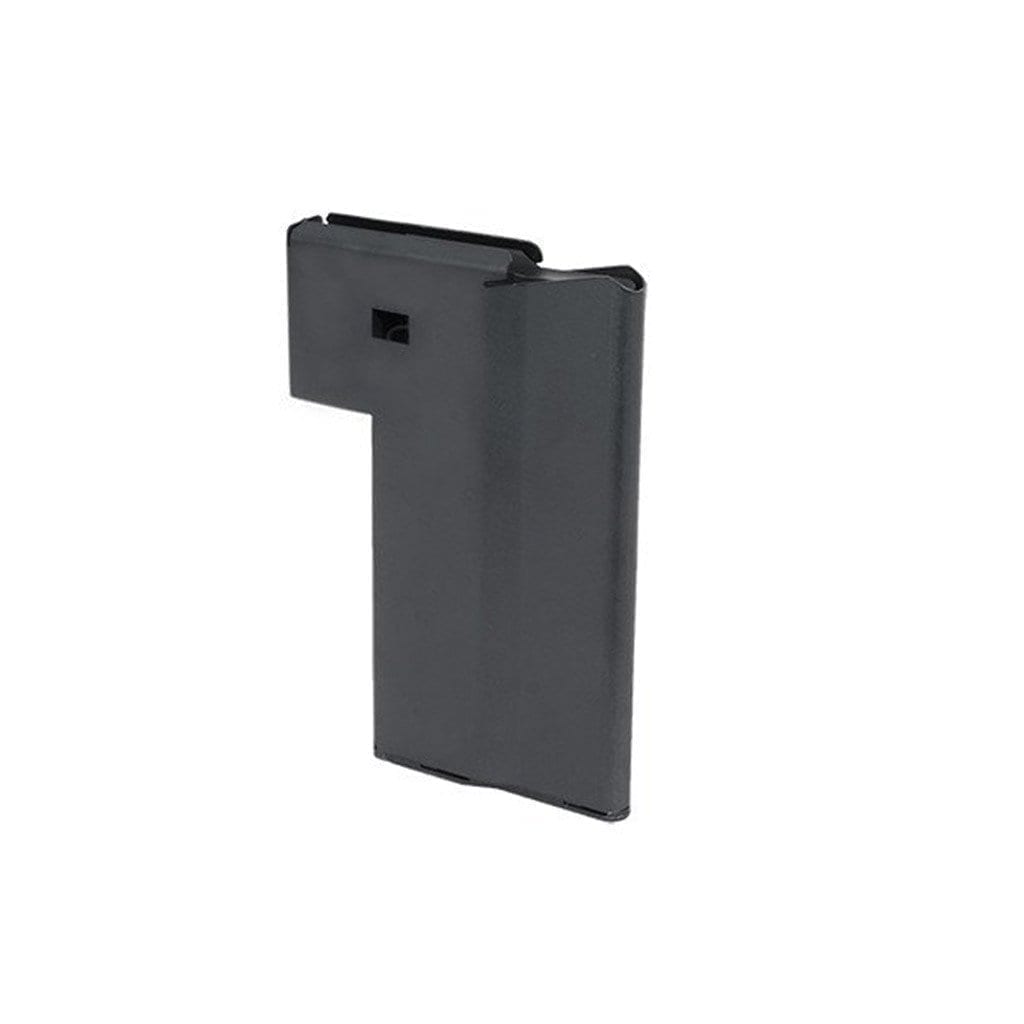
Desert Tech SRS Magazine - Bison Tactical - 6-round, 8-round & 10-round
Click here to buy any of the Desert Tech SRS Magazines made by Desert Tech for the SRS-A2 or SRS-A1 series rifles (not HTI Mags). 6.5 Creed
Those are still the same mags you get from DT.
I picked up a used Vortex Impact 4k and put mounts for it on both my SRS and HTI, I also mounted the remote on the butt stock to operate with my thumb when shooting. I tried this setup out yesterday and it sure feels good, have any of you tried one of these on your DT's?


I've always stuck my wmlrf remote where I can reach it with my trigger finger. Side of the magwell on most rifles and on top of the barrel clamp bolts on the dta. No doubt it works well there for prone shooting but it doesn't look useful for positional, tripod or when there's movement. I use diving boards on spuhr mounts but with the heavier units it does throw off the whole feel and balance of the rifle
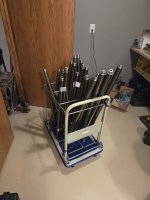
“Barrel cart.”There's about 40 of them on my barrel cart , there's 6 to 10 30 cal 8, 8.5 and 9 twist if you get in a bind
That is a good problem to have!
I like the barrel cart!
Does anyone have a scope mount cart with a Sphur SP-4808 on it? I really would like to find one to match my two DT's, I got scammed on another site last week. I also found that they are probably ITAR items and can't import / export them privately. Any information would be helpful.
Does anyone have a scope mount cart with a Sphur SP-4808 on it? I really would like to find one to match my two DT's, I got scammed on another site last week. I also found that they are probably ITAR items and can't import / export them privately. Any information would be helpful.
I thought you got hold of one ??I like the barrel cart!
Does anyone have a scope mount cart with a Sphur SP-4808 on it? I really would like to find one to match my two DT's, I got scammed on another site last week. I also found that they are probably ITAR items and can't import / export them privately. Any information would be helpful.
I have 3 i am not using..
I have just ask my friend who owns "Delta Tactical" here in Aus if he is able to ship to you without any drama....will let you know...
Thank you!I thought you got hold of one ??
I have 3 i am not using..
I have just ask my friend who owns "Delta Tactical" here in Aus if he is able to ship to you without any drama....will let you know...
The other guy is a scammer, I disputed the charge with visa, hopefully that works out.
I certainly will take one of yours if it can be shipped.
Holy moly... What's the barrel maker? Cut rifled?There's about 40 of them on my barrel cart , there's 6 to 10 30 cal 8, 8.5 and 9 twist if you get in a bind
From my dealer/friend...Thank you!
The other guy is a scammer, I disputed the charge with visa, hopefully that works out.
I certainly will take one of yours if it can be shipped.
Attachments

That's great news!From my dealer/friend...
How do you want payment, and how much do you want for one of these mounts?
PM me your number and i will give you a call.... ( what US sate are you in)That's great news!
How do you want payment, and how much do you want for one of these mounts?
will be tomorrow though as i am just about to leave today for a trip..
Similar threads
- Replies
- 27
- Views
- 2K
