I have been toying with the idea of texturing a few stocks, so I figured it was time to give it a go. I decided to get some detailed photos of the process, maybe it will help some of you tackle a similar project.
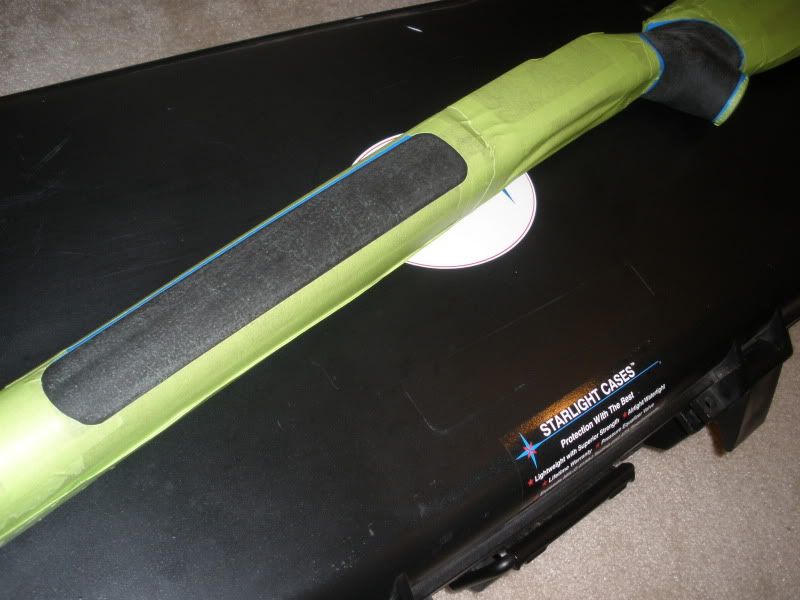
First step is to get a shape laid out on the stock, I used a picture of a McMillan A5 just to get a basic idea if where I wanted texture. Lay out masking tape on the stock where you want the texture, as well as protecting areas you dont. I found using 1/8" thin blue vinyl pin striping tape (auto body supply store) works well due to its flexibility, you can lay down a continuous tape line until you get the desired shape. Here is a pic of the stock ready for texture, patern laid out and surface cleaned and prepped, the surface was lightly sanded to promote adhesion.
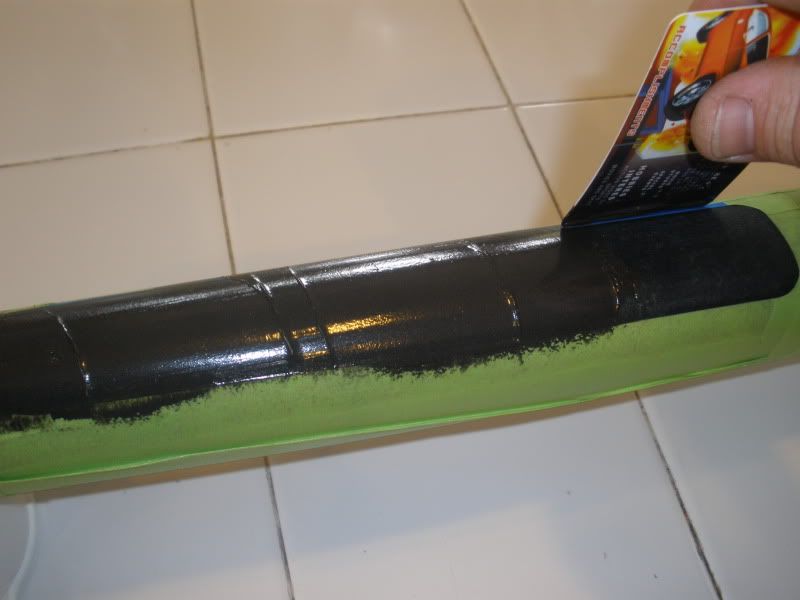
Next step is to prepare your epoxy. I used marine Tex, but remember, your not bedding an action here so JB Weld or similar epoxies will work, just make sure not to get a quick cure epoxy, you want plenty of work time before it starts its curing process. Here in the pic, I am laying down a very tin layer of epoxy, just about the thickness of the tape.
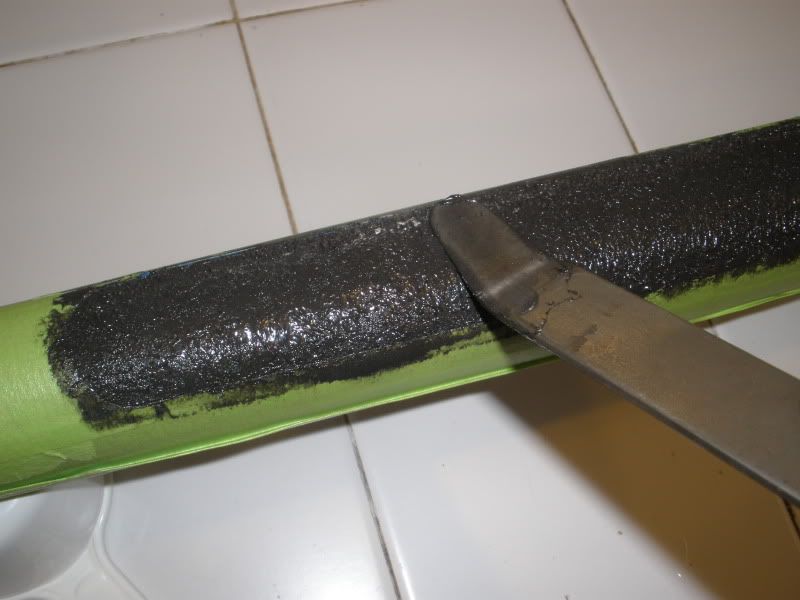
After you have applied the epoxy to all the pattern areas, its time to pull up the epoxy to get the desired texture. Here you can see the use of a flat tool or popsicle stick, this will give a coarse texture as seen here
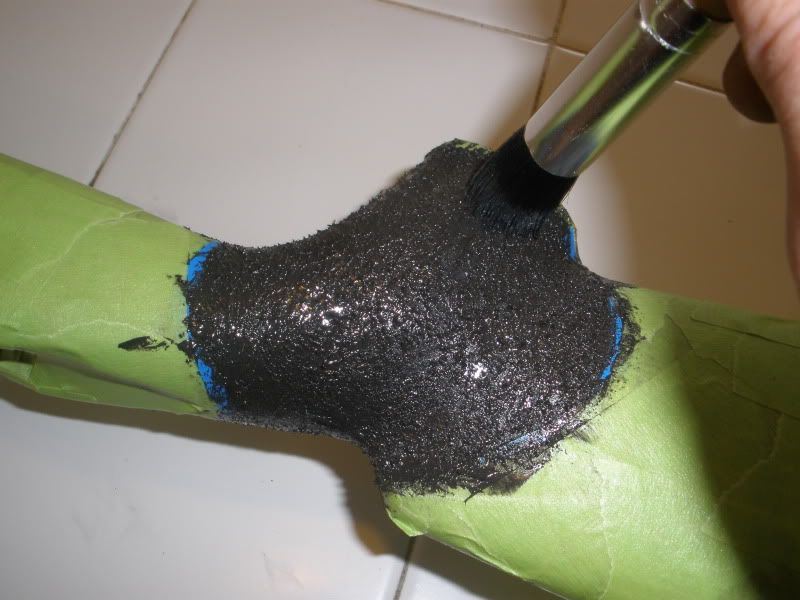
Or use a brush to get a finer texture as seen here.
Remember, you have about 45 minutes of work time allowing you to try different techniques to get the desired texture and repair any mistakes. Once you have got your desired texture, its time to put the stock up for a few hours to allow the curing process to start. I waited approx. 2 hours. Leave a sample of the unused epoxy close by to check how the curing was coming along. You want to be able to touch the epoxy without having it stick to your finger, but your finger should leave an imprint. Once the epoxy is at this stage of curing, gently remove the tape.
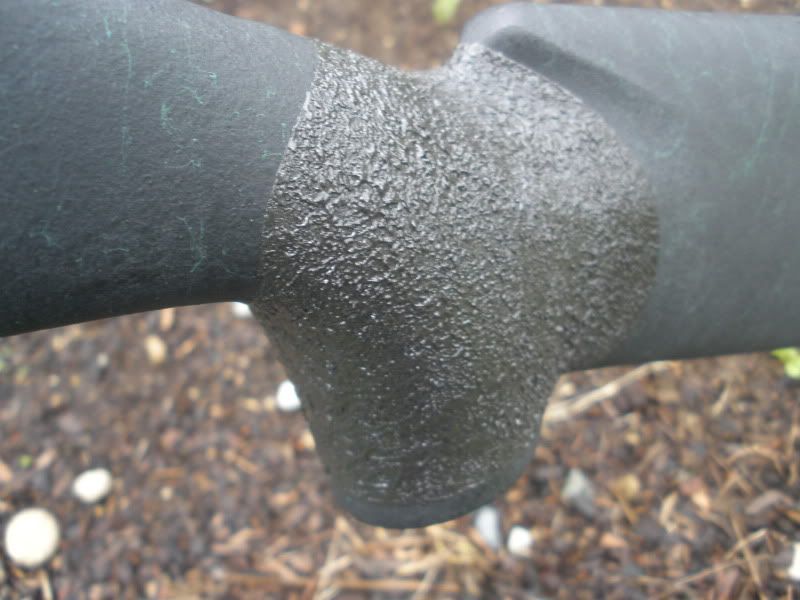
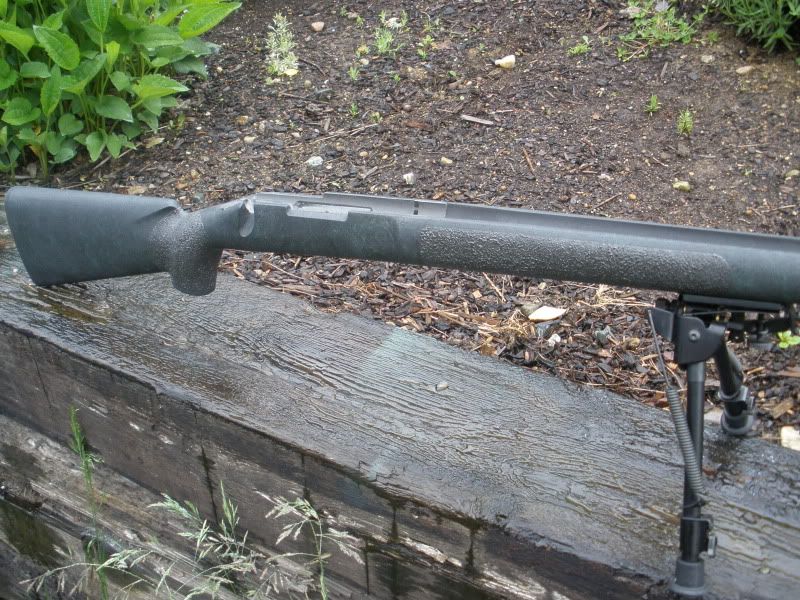
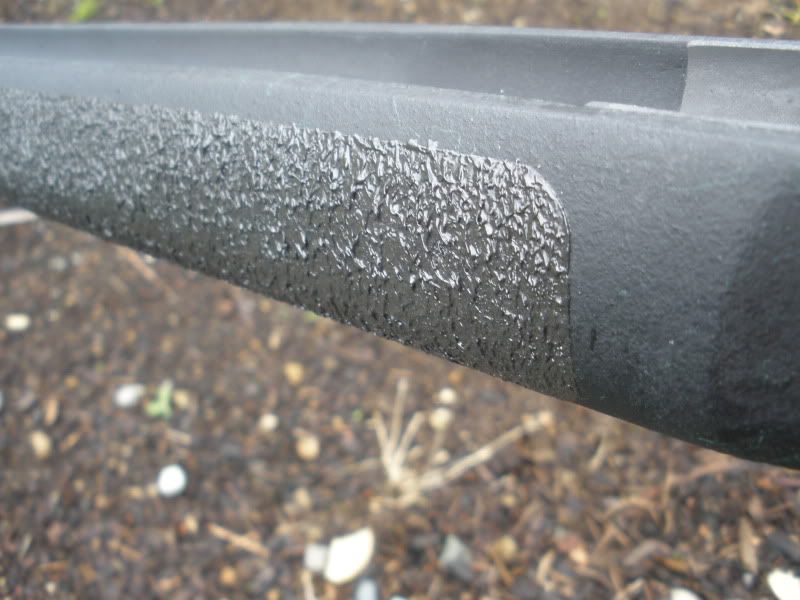
After the tape is removed, wet your finger and gently tap the high spots, you can also gently run your finger along the outside tape edge of the epoxy to smooth out the transition, wetting your finger will have better results. Put the stock up overnight to allow the epoxy to set up, and your done. Here is the finished product.
I would consider this a fairly simple project, I found it easy to get the look and texture I was trying to achieve with little effort, so if your considering it give it a shot!
Enjoy
Kirk R
First step is to get a shape laid out on the stock, I used a picture of a McMillan A5 just to get a basic idea if where I wanted texture. Lay out masking tape on the stock where you want the texture, as well as protecting areas you dont. I found using 1/8" thin blue vinyl pin striping tape (auto body supply store) works well due to its flexibility, you can lay down a continuous tape line until you get the desired shape. Here is a pic of the stock ready for texture, patern laid out and surface cleaned and prepped, the surface was lightly sanded to promote adhesion.
Next step is to prepare your epoxy. I used marine Tex, but remember, your not bedding an action here so JB Weld or similar epoxies will work, just make sure not to get a quick cure epoxy, you want plenty of work time before it starts its curing process. Here in the pic, I am laying down a very tin layer of epoxy, just about the thickness of the tape.
After you have applied the epoxy to all the pattern areas, its time to pull up the epoxy to get the desired texture. Here you can see the use of a flat tool or popsicle stick, this will give a coarse texture as seen here
Or use a brush to get a finer texture as seen here.
Remember, you have about 45 minutes of work time allowing you to try different techniques to get the desired texture and repair any mistakes. Once you have got your desired texture, its time to put the stock up for a few hours to allow the curing process to start. I waited approx. 2 hours. Leave a sample of the unused epoxy close by to check how the curing was coming along. You want to be able to touch the epoxy without having it stick to your finger, but your finger should leave an imprint. Once the epoxy is at this stage of curing, gently remove the tape.
After the tape is removed, wet your finger and gently tap the high spots, you can also gently run your finger along the outside tape edge of the epoxy to smooth out the transition, wetting your finger will have better results. Put the stock up overnight to allow the epoxy to set up, and your done. Here is the finished product.
I would consider this a fairly simple project, I found it easy to get the look and texture I was trying to achieve with little effort, so if your considering it give it a shot!
Enjoy
Kirk R