Unlike those more fortunate I do not have a mill/lathe/arc welder at home for my personal projects, so I decided how well of a stand I could make with only a Dremel, for as little money, that fit my needs.
Requirements:
Transportable - must fit in back of SUV and disassemble to take up as little space as possible
Rapid assembly/disassembly - put together/taken apart in under 5 min requiring minimal/no tools
Rugged - must be able to take hits without being destroyed, not fall apart/over during normal use.
Modular - regular use will be in rocky/hilly terrain, and needs to be stable
This is what I came up with:
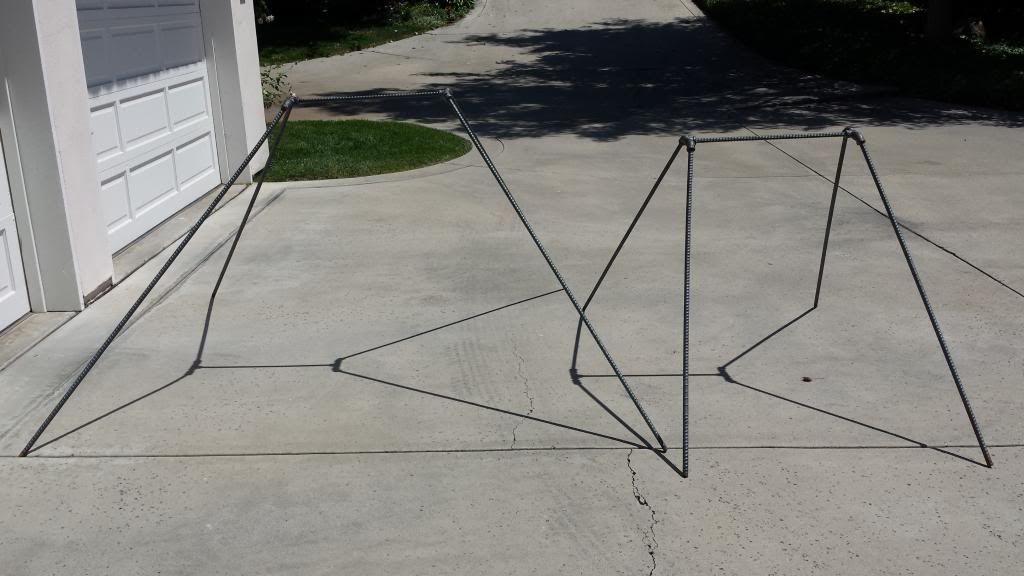
The basic design is a cross bar with 4 legs, all rebar, held together by plumbing fittings. The added benefit of the plumbing fittings is that the legs can be rotated such that on a steep incline, the back legs can be rotated outwards, so that their height is decreased, which allows you to keep even weight distribution between the front and back, which adds to stability. Past stands I made didn't have this feature, and the weight was primarily on the front legs. When shooting small plates, the amplitude of their swinging oscillations were so large that they took the legs out from under the stands.
Home depot shopping list:
2x 10' 5/8" rebar
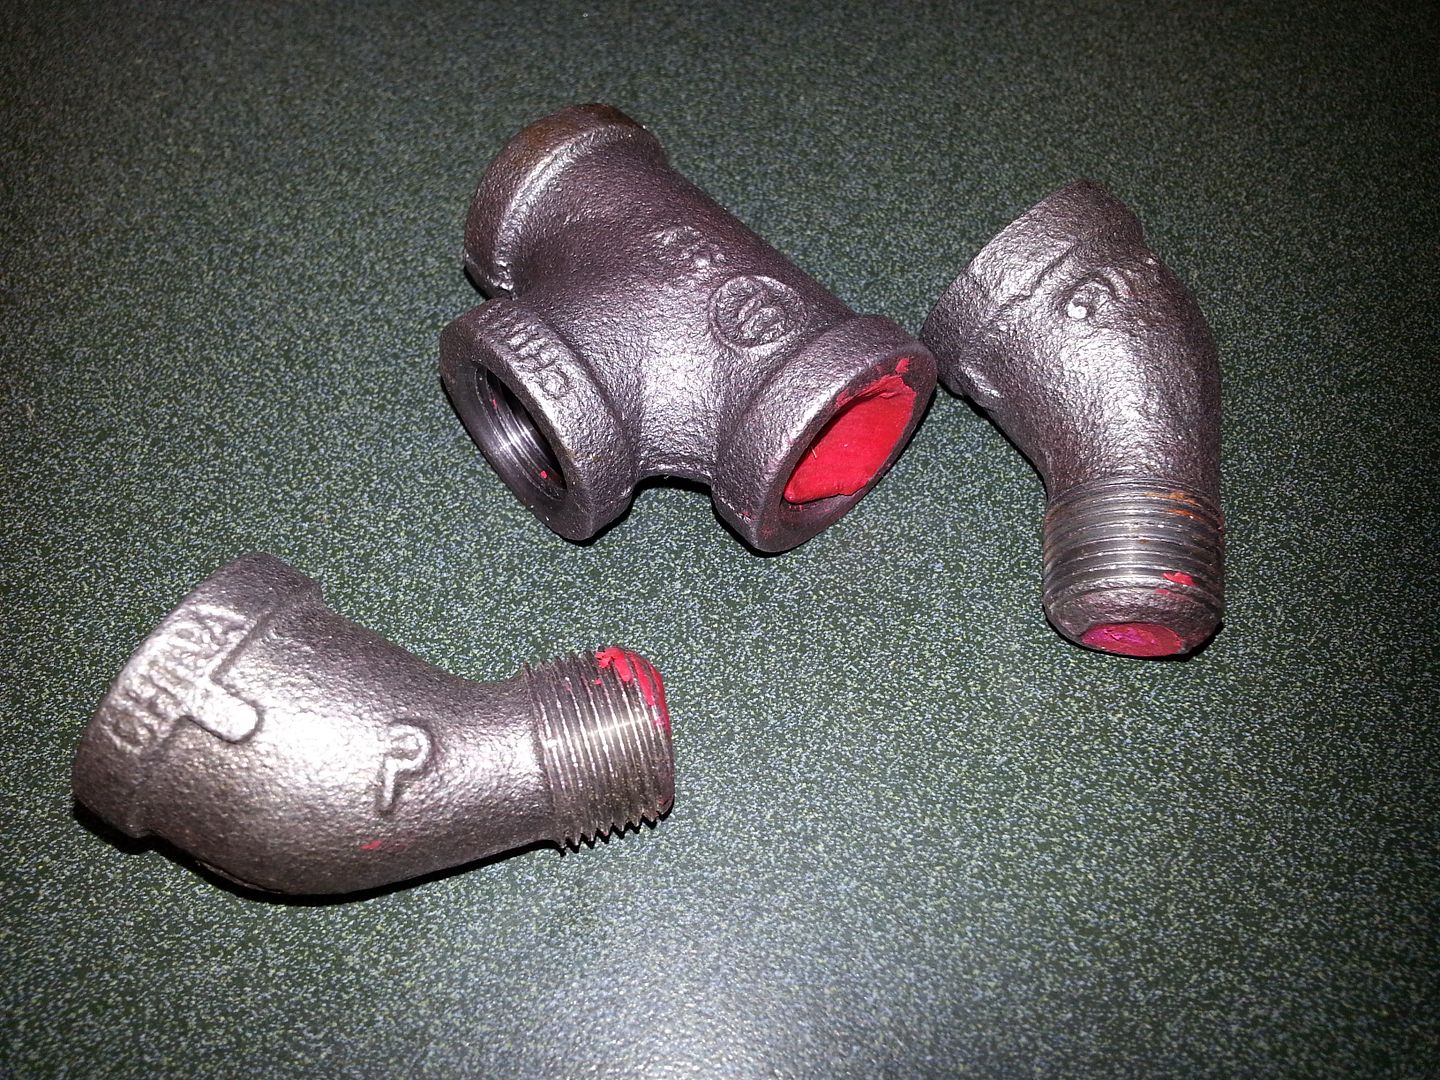
2x 1/2" tee plumbing fittings, black iron or galvanized steel
4x 1/2" double-ended threaded nipples, "
4x 1/2" 45 degree elbows, "
4oz JB Weld steel-reinforced epoxy
This should come out to about $25. The JB Weld is the most expensive part, relatively speaking. If you have something you think will be as effective by all means use it. Without it the build is $16 and change.
Tools/supplies:
Dremel tool with heavy duty cut-off wheels, or other metal cutting device
paper towels
blue painters tape
plastic cups
many plastic knives
disposable gloves, preferably nitrile
acetone
newspaper
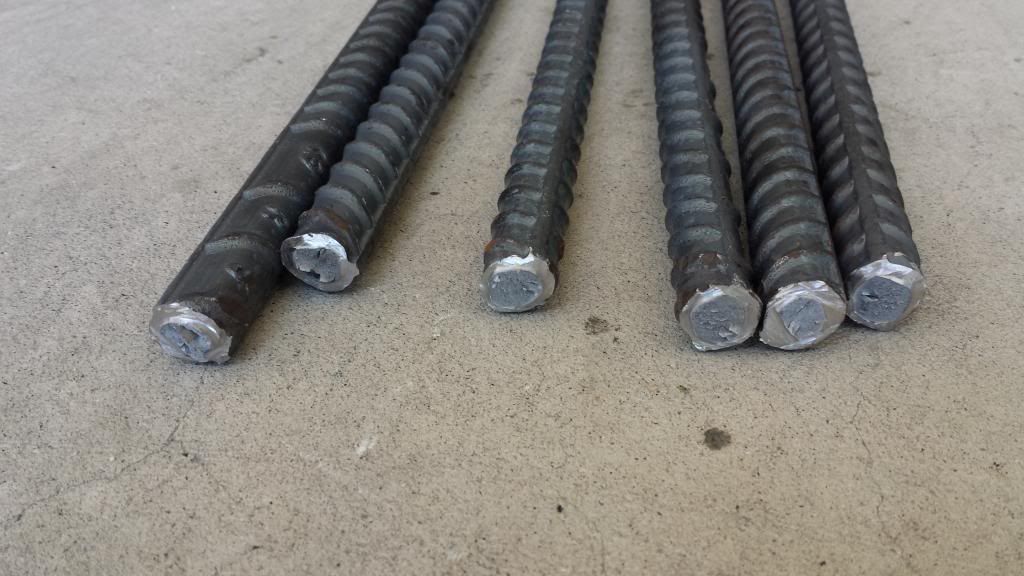
Step 1: Cut rebar
The lengths are up to you. I made 2 stands, 2' cross bars for both, 4' legs for one, 5' legs for another. This way there were no leftovers. Mark your sections and cut away. You don't need to cut all the way through, maybe a little more than 1/8". Once I got this deep all around, I simply bent the ends apart like a lever. Make sure you support both sides near the cut, and cut deep enough, or you'll bend the sections. Here's a pic to show about how deep I cut.
Step 1.5: Fit rebar to pipe fittings
I didn't have an issue with the rebar not fitting, but if you do you may need to trim the ends
Step 2: Clean rebar and fittings
Clean the inside of the fittings and ends of rebar for better adhesion to the JB Weld. Try not to clean the areas you don't want JB weld to stay, as most likely some will seep in an you'll need to clean it up.
Step 3: Plug holes in fittings to dam JB Weld
This is the most important step, and you want to make sure the fittings are very snug. The basic design of the plugs is half of a paper towel folded into 1.5-2" strips and rolled up, wrapped cylindrically with blue tape, then capped at the end with 2 plies of painters tape.


Simply thread them into the fittings, and pack them into the recesses of the fittings. I'd push them maybe 1/4" further than I wanted them, then packed them in with the shank of a screwdriver. The more room you take up the less JB Weld you'll need. Here's some pics to illustrate.
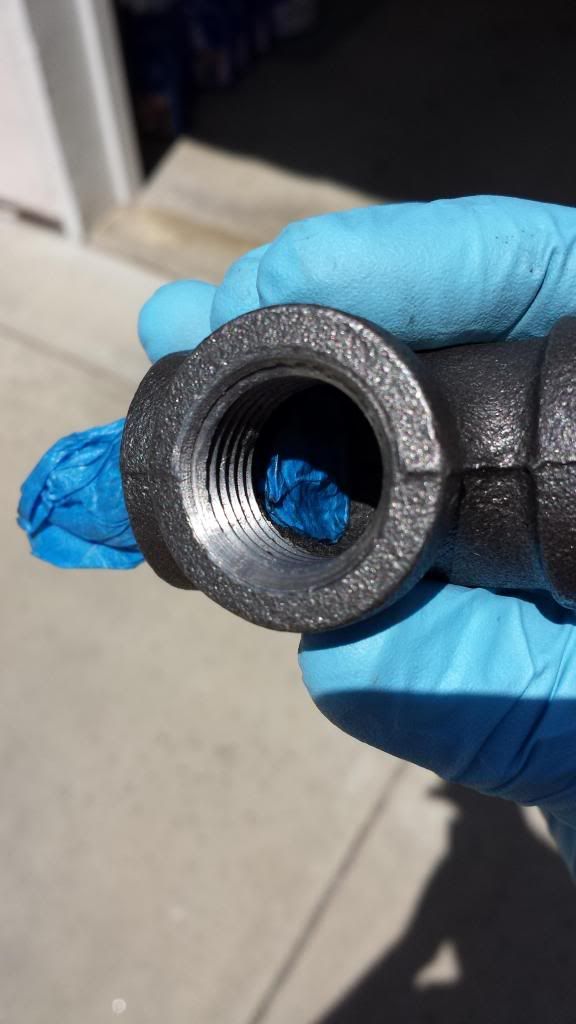

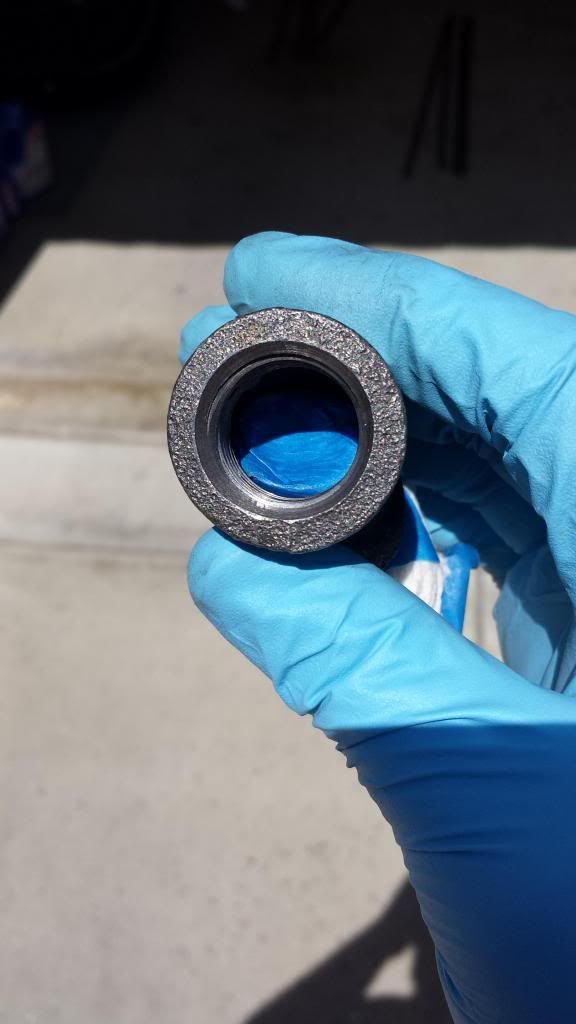
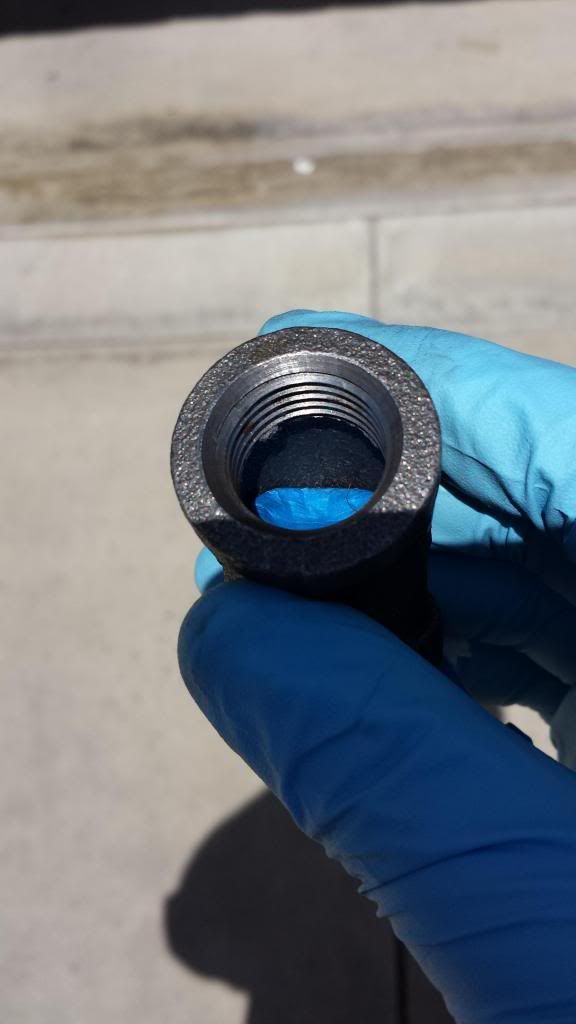
Make sure you cap them well and that they're snug or JB weld will seep past into the threads and/or into the paper towels and becomes a pain to pull out. Give yourself a handle to work the plug out.

Requirements:
Transportable - must fit in back of SUV and disassemble to take up as little space as possible
Rapid assembly/disassembly - put together/taken apart in under 5 min requiring minimal/no tools
Rugged - must be able to take hits without being destroyed, not fall apart/over during normal use.
Modular - regular use will be in rocky/hilly terrain, and needs to be stable
This is what I came up with:

The basic design is a cross bar with 4 legs, all rebar, held together by plumbing fittings. The added benefit of the plumbing fittings is that the legs can be rotated such that on a steep incline, the back legs can be rotated outwards, so that their height is decreased, which allows you to keep even weight distribution between the front and back, which adds to stability. Past stands I made didn't have this feature, and the weight was primarily on the front legs. When shooting small plates, the amplitude of their swinging oscillations were so large that they took the legs out from under the stands.
Home depot shopping list:
2x 10' 5/8" rebar
2x 1/2" tee plumbing fittings, black iron or galvanized steel
4x 1/2" double-ended threaded nipples, "
4x 1/2" 45 degree elbows, "
4oz JB Weld steel-reinforced epoxy
This should come out to about $25. The JB Weld is the most expensive part, relatively speaking. If you have something you think will be as effective by all means use it. Without it the build is $16 and change.
Tools/supplies:
Dremel tool with heavy duty cut-off wheels, or other metal cutting device
paper towels
blue painters tape
plastic cups
many plastic knives
disposable gloves, preferably nitrile
acetone
newspaper
Step 1: Cut rebar
The lengths are up to you. I made 2 stands, 2' cross bars for both, 4' legs for one, 5' legs for another. This way there were no leftovers. Mark your sections and cut away. You don't need to cut all the way through, maybe a little more than 1/8". Once I got this deep all around, I simply bent the ends apart like a lever. Make sure you support both sides near the cut, and cut deep enough, or you'll bend the sections. Here's a pic to show about how deep I cut.

Step 1.5: Fit rebar to pipe fittings
I didn't have an issue with the rebar not fitting, but if you do you may need to trim the ends
Step 2: Clean rebar and fittings
Clean the inside of the fittings and ends of rebar for better adhesion to the JB Weld. Try not to clean the areas you don't want JB weld to stay, as most likely some will seep in an you'll need to clean it up.
Step 3: Plug holes in fittings to dam JB Weld
This is the most important step, and you want to make sure the fittings are very snug. The basic design of the plugs is half of a paper towel folded into 1.5-2" strips and rolled up, wrapped cylindrically with blue tape, then capped at the end with 2 plies of painters tape.


Simply thread them into the fittings, and pack them into the recesses of the fittings. I'd push them maybe 1/4" further than I wanted them, then packed them in with the shank of a screwdriver. The more room you take up the less JB Weld you'll need. Here's some pics to illustrate.


Make sure you cap them well and that they're snug or JB weld will seep past into the threads and/or into the paper towels and becomes a pain to pull out. Give yourself a handle to work the plug out.

Last edited: