• Watch Out for Scammers!

    We've now added a color code for all accounts. Orange accounts are new members, Blue are full members, and Green are Supporters. If you get a message about a sale from an orange account, make sure you pay attention before sending any money!

Gunsmithing Thread Protector experiment....Pictures!

Mgordon

Gunny Sergeant
Commercial Supporter
Full Member
Minuteman
Nov 29, 2007
1,792
320
40
Wellington, Ohio
www.shortactioncustoms.com
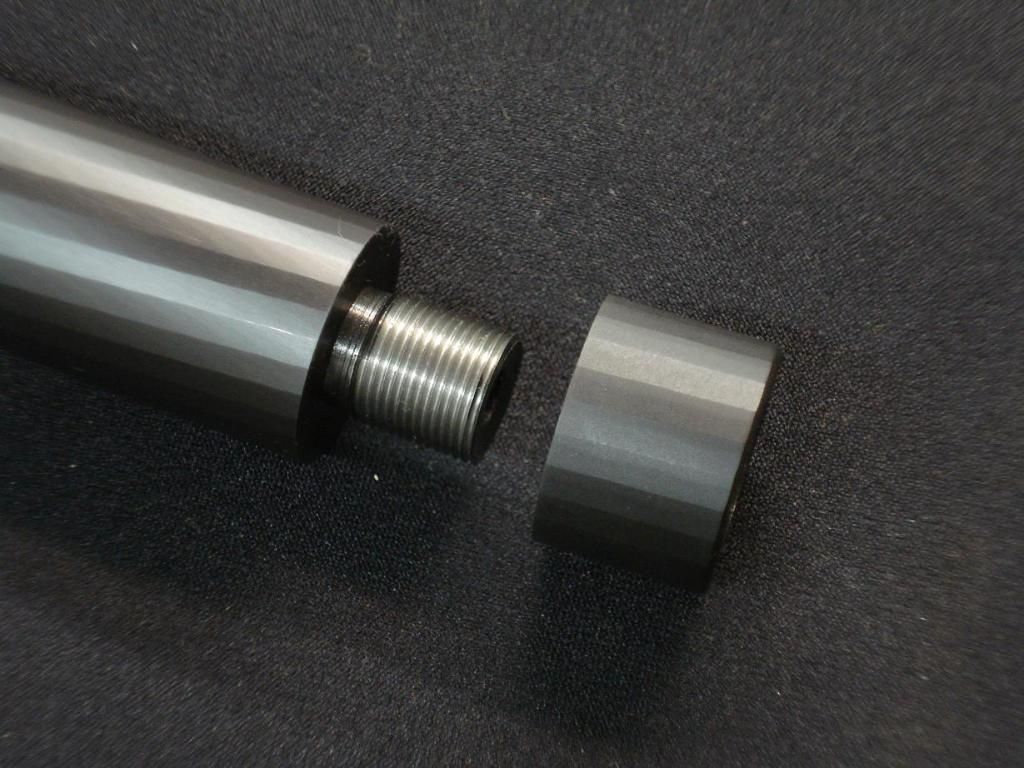
Hey Gents, I needed to make a thread protector for a customers Ruger 10/22 with a spiral fluted barrel. I just happened to own the same Ruger 10/22 but mine had a blued spiral fluted barrel, customers was black.

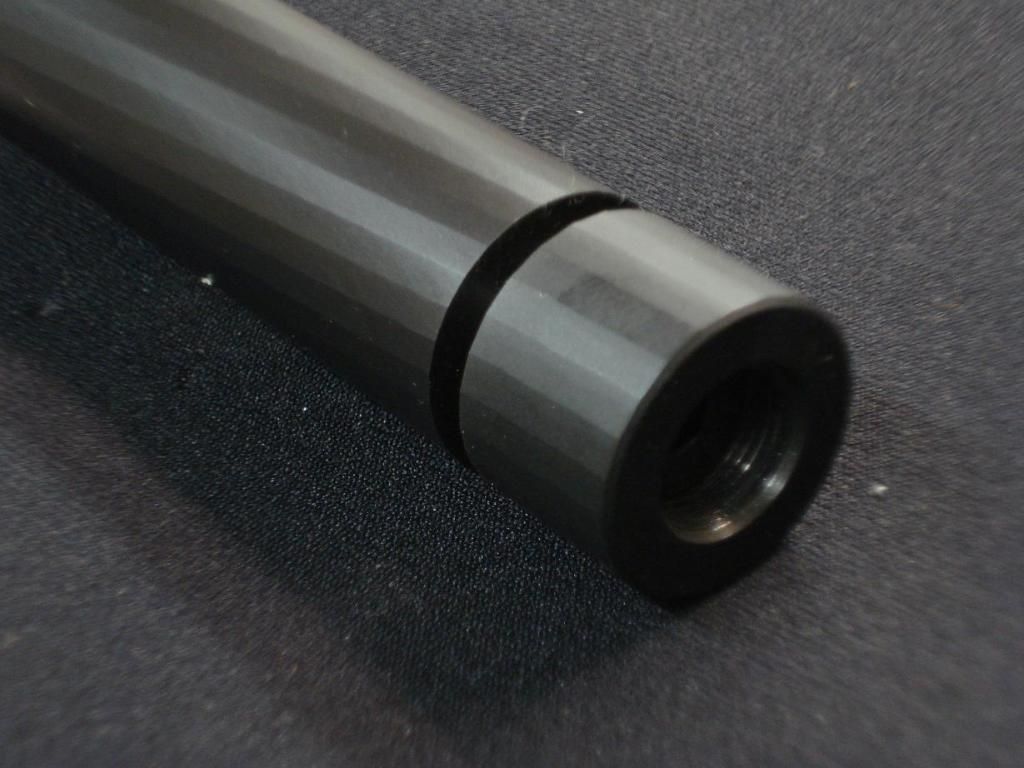
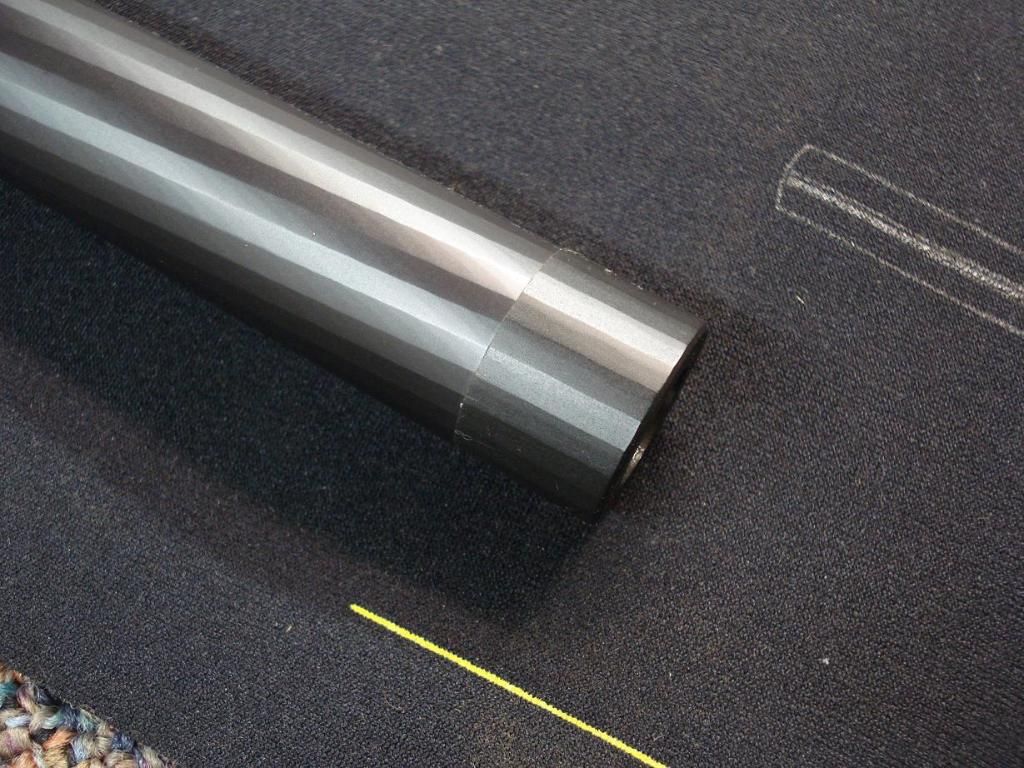
Anyway, I could not think of a way of making a thread protector that would look good. Possibly knurling, but I figured this would work out just fine. Since my barrel is not his barrel, the fluted did not match up like I hoped they would have, but I think it still looks ok. Every time I tried to time the flutes, one side would match up very well, then the other was off. I KG Gunkoted the thread protector because it matches the Ruger Factory black pretty close.

DSC04816.jpg


DSC04820.jpg


DSC04822.jpg
 
Re: Thread Protector experiment....Pictures!

I would keep it smooth and a contrasting colour it won't time right (flutes different). When colours and textures don't match exactly but are close, they look wrong/off to most eyes. A contrasting colour and texture, however, often ads points of interests, style, etc. and appeals more. IMO.
 
Re: Thread Protector experiment....Pictures!

I would tend to agree. It appears as though the flutes on the protector are slightly wider, causing the timing issue. Aren't they supposed to be hammer forged barrels? And the spiral on them is from the hammering? I don't know for sure, but I would think that would make the spirals inconsistent and tough to duplicate with a mill.

Other than that, it is sure close and looks like awesome work!
 
Re: Thread Protector experiment....Pictures!

How about cut an 1" off the end of the existing barrel and then use it for a thread protector? Use part of the existing barrel? Or just but some kind of simple brake.
 
Re: Thread Protector experiment....Pictures!

Just asking, but was that protector cut from the same barrel? Dont know if I read your post wrong. Would be real nice if it timed up perfectly.
 
Re: Thread Protector experiment....Pictures!

Well, my barrel was a 20" and the customers was a 16". So I could not take any off of his.

I am sending him the pictures and I will let him decide. If he wants a smooth or a knurled protector, I will keep this one for my barrel when I crown and thread it.

I would agree with you guys though. You never know until you try!
 
Re: Thread Protector experiment....Pictures!

The picture with the gap looks better, maybe use a black washer to seperate the thread protector from the barrel, so the flutes not matching won't be so noticable.
 
Re: Thread Protector experiment....Pictures!

I"m not a smith but I would say a cross hatch pattern would be the way to go. In black it would not be an eye sore, and it would make it much easier to take off. But then again I'm not the one paying for it.
 
Re: Thread Protector experiment....Pictures!

I like the fluted look to it but like others have said, if the fluting doesn't time up it takes away from the look of it. I think that if you would round out a section about 1/4" where the thread protector meets the barrel and knurled it or made some sort of design to break the fluting up it would look even better.
 
Re: Thread Protector experiment....Pictures!

Yep, I just had to do it and see.

Now let me ask you this. Because the nature of the fluting, and lets say I use something flat like a round thread protector. There is going to be a pretty noticeable seam with touch and sight from the difference. So when you run your fingers across it, you will feel the difference between the two.

Would this be an acceptable compromise as long as it looks pleasing? In your opinion of course.
 
Re: Thread Protector experiment....Pictures!

<div class="ubbcode-block"><div class="ubbcode-header">Originally Posted By: US Handgunner</div><div class="ubbcode-body">Yep, I just had to do it and see.

Now let me ask you this. Because the nature of the fluting, and lets say I use something flat like a round thread protector. There is going to be a pretty noticeable seam with touch and sight from the difference. So when you run your fingers across it, you will feel the difference between the two.

Would this be an acceptable compromise as long as it looks pleasing? In your opinion of course.

</div></div>

Yes. There are limitations, both cost and benefit, that not only you but the owner must realize. If not don't even do it to begin with.

It would either be smooth with a different color then the barrel or put knurling on the protector. I don't like knurling so smooth with or without a different cap color.
 
Re: Thread Protector experiment....Pictures!

Its to bad his barrel is already 16". Before I had my lathe I had Jim See at center shot rifles cut down and thread a savage model 12 stainless fluted and had him use part of the cut off piece to make a thread protecter out of it. I think it will look alright using part of your barrel like you did or put a brake on it,like one of those levang comps/brake.Anyways here are some pics of that savage.
rem700groups005.jpg

rem700groups006.jpg
 
Re: Thread Protector experiment....Pictures!

I"ve been very happy with all the work Jim has done for me, my son and his buddy that hunts with us!!
I'll be headed up that way soon and maybe do some coyote hunting with him.
 
Re: Thread Protector experiment....Pictures!

Jim is building some of the nicest rifles around IMO. He is just one of those guys that wont let something leave his shop unless it is damn near perfect. I would say perfect ,but nobody is perfect.
 
Re: Thread Protector experiment....Pictures!

how about making up a few different flat washer type spacers out of different materials. make some with with knurling in different thicknesses and maybe some with ridges like on a dime or a quarter. even some from different color plastic just to give an idea of how they look. then you could make them from anodized aluminum if you liked the look of the color. like someone said, if you have that space between the two parts, you wont notice the timing issue. its gonna be hard to get it exactly flush, but the knurled and ridged edge will make taking it off a little easier. just a thought
 
Re: Thread Protector experiment....Pictures!

<div class="ubbcode-block"><div class="ubbcode-header">Originally Posted By: AXEMAN</div><div class="ubbcode-body">how about making up a few different flat washer type spacers out of different materials. make some with with knurling in different thicknesses and maybe some with ridges like on a dime or a quarter. even some from different color plastic just to give an idea of how they look. then you could make them from anodized aluminum if you liked the look of the color. like someone said, if you have that space between the two parts, you wont notice the timing issue. its gonna be hard to get it exactly flush, but the knurled and ridged edge will make taking it off a little easier. just a thought </div></div>

Axeman, that is a good idea, but you will have to have the internal diameters extremely close for them to index correctly with the outside diameter...you know what I mean? If you have any movement then its going to show up on the outer diameter. I think its a good idea, and I might try something like that soon.
 
Re: Thread Protector experiment....Pictures!

if you face some off the barrel protecter it should clock around just face alittle at a time sneak up on it .005 to .010 thou at a time
 
Re: Thread Protector experiment....Pictures!

i wasnt thinking or typing correctly. my thoughts were you could make up the items i mentioned and use them just too see what looks good. then when you or the customer decide to can permanently attach it to the protector. maybe on the base of the protector, the side that meets the barrel body, machine a small step in from the edge. then on the spacer machine in a cup so that the protector sets into the spacer like the bottom of a coffee cup into the recessed cup on a saucer. does that make any sense?

hell it may be easier to just do the edge work or knurling to the protector and not even make it a separate item. but maybe just use some other stock as practice before you do it to the actual protector. am i making any sense?
 
Re: Thread Protector experiment....Pictures!

<div class="ubbcode-block"><div class="ubbcode-header">Originally Posted By: AXEMAN</div><div class="ubbcode-body">i wasnt thinking or typing correctly. my thoughts were you could make up the items i mentioned and use them just too see what looks good. then when you or the customer decide to can permanently attach it to the protector. maybe on the base of the protector, the side that meets the barrel body, machine a small step in from the edge. then on the spacer machine in a cup so that the protector sets into the spacer like the bottom of a coffee cup into the recessed cup on a saucer. does that make any sense?

hell it may be easier to just do the edge work or knurling to the protector and not even make it a separate item. but maybe just use some other stock as practice before you do it to the actual protector. am i making any sense? </div></div>

10-4