
Jay, a client of ours sent in a Wby Vanguard to be barreled for the upcoming "huntin n killin" season.
These actions are a bit different than what's common. Because of it different tools are required to pull the receiver off the barrel, etc.
I have these tools. I made them in house so that we can safely tinker on these buggers. Let this be some friendly advice to those who also aspire to fiddle with this action. Either MAKE or BUY the right tool for the job. The receivers are weak and they won't put up with heavy hands and clumsy tools. It'll avoid this kind of crap.
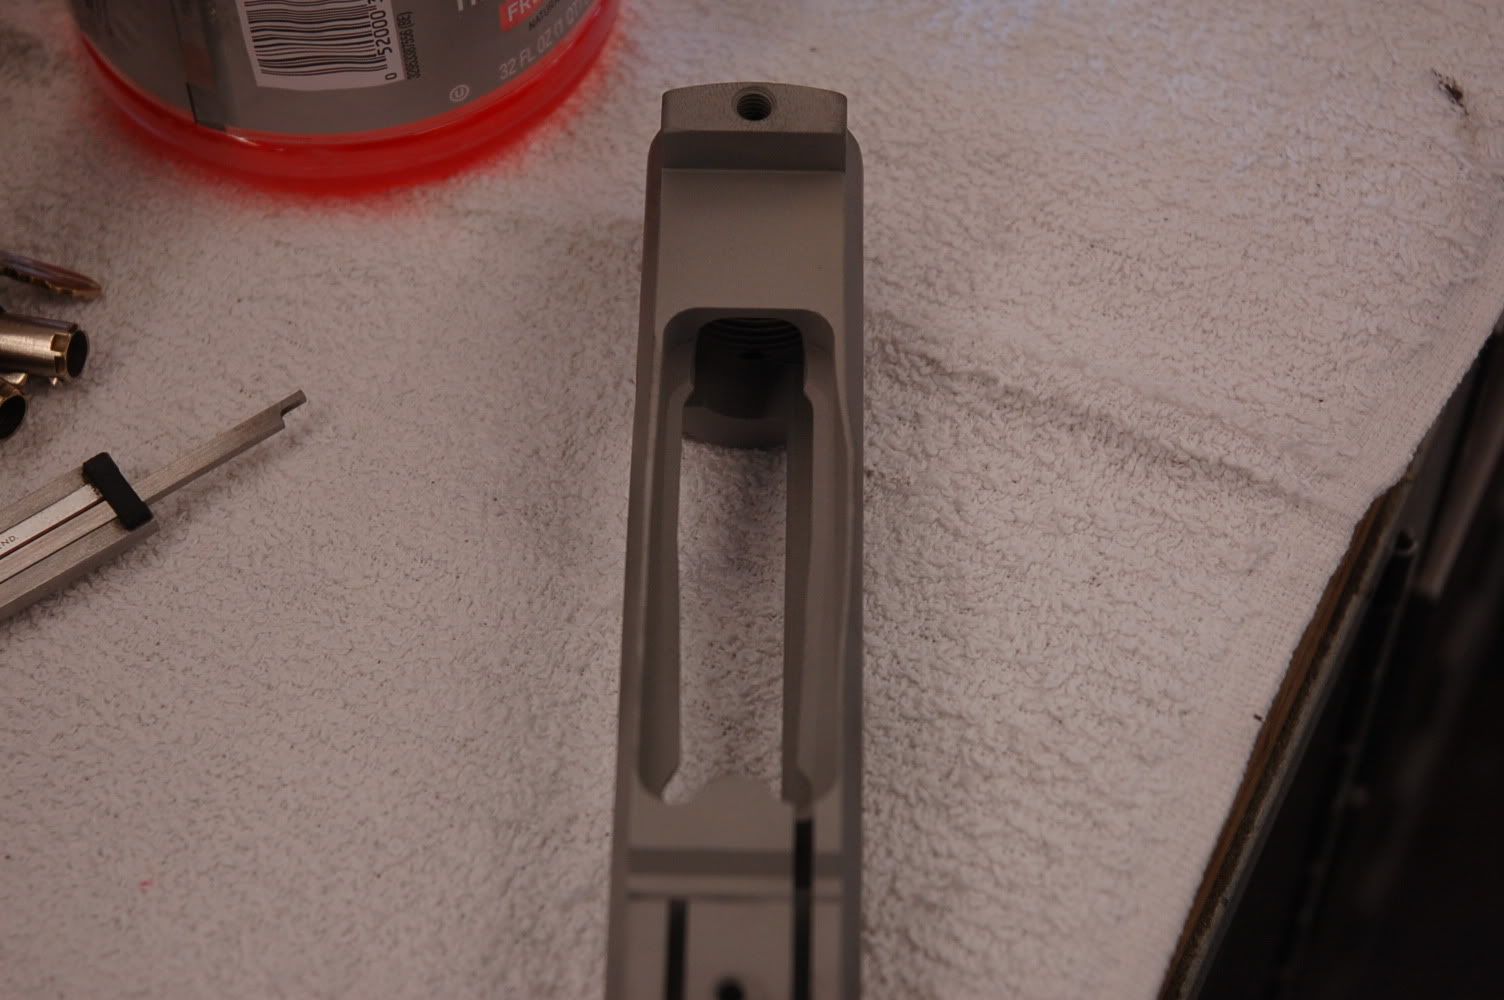
Somebody thought it'd be an ok idea to screw the receiver onto the barrel using a bar shoved between the magazine well and the ejection port. It ended up putting hips in the action and cracking the receiver along the feedlips. Stuff like this irritates the hell out of me. It was readily evident what was done by all the chipped/burnished coating (duracoat by the looks of it) along the magwell edges where he laid on the stuff with a soup ladle (Wagner power roller?) in the attempt to hide it.
Anyway. . .
We contacted the customer and told him what had been done to his gun. We decided that at this point there's nothing to lose and since he does a fair amount of business with us, I'd take a stab at repairing it and would only charge if it was successful.
Jay it looks like I get to take your money.

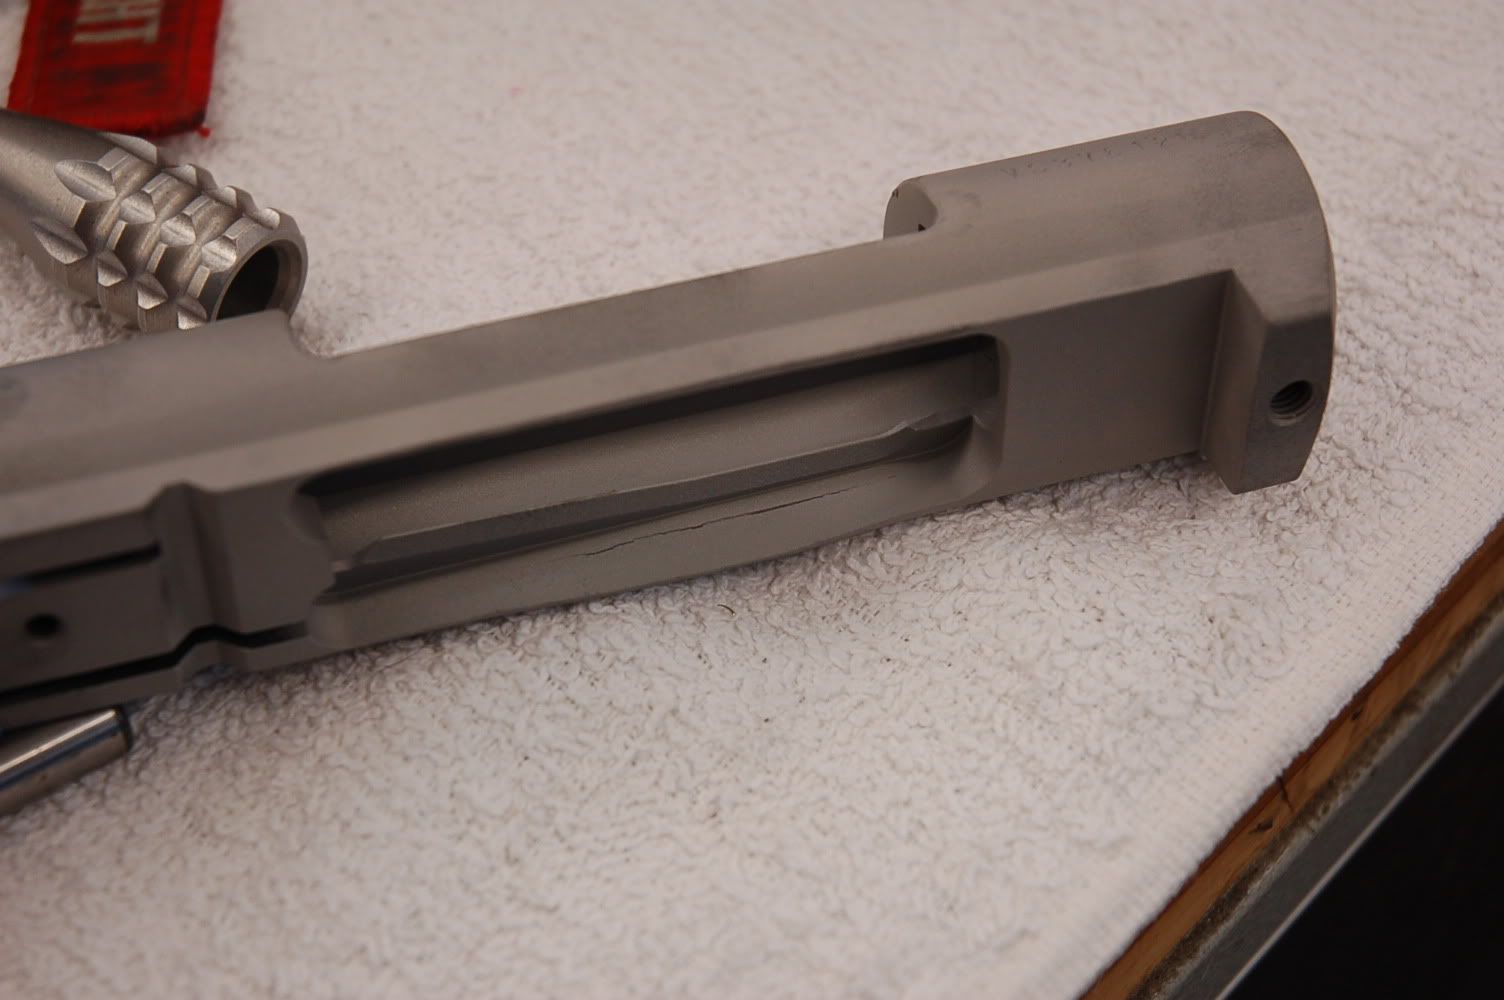
We got the bulk of the distortion out by clamming up the receiver rails in the vise and bending it straight again. The wavy stuff was beaten straight with a little forging tool I whipped up from some chunks of AL.
Hammer time!
I then puddle welded the crack on both sides using the TIG and some cerrated type tungsten that's supposed to reduce contamination. I didn't use any filler rod. As part of the prep work I packed the front of the action with heat sink clay to mitigate any annealing going on. Thankfully it only took 20 amps so the heat was well contained.
Garrett is barreling her up now and were pretty optimistic that we got it sorted out. Since the owner had been unaware of the problem and had been shooting the old barrel for awhile I don't think we'll have any issues here.
Back to work!
C.
These actions are a bit different than what's common. Because of it different tools are required to pull the receiver off the barrel, etc.
I have these tools. I made them in house so that we can safely tinker on these buggers. Let this be some friendly advice to those who also aspire to fiddle with this action. Either MAKE or BUY the right tool for the job. The receivers are weak and they won't put up with heavy hands and clumsy tools. It'll avoid this kind of crap.
Somebody thought it'd be an ok idea to screw the receiver onto the barrel using a bar shoved between the magazine well and the ejection port. It ended up putting hips in the action and cracking the receiver along the feedlips. Stuff like this irritates the hell out of me. It was readily evident what was done by all the chipped/burnished coating (duracoat by the looks of it) along the magwell edges where he laid on the stuff with a soup ladle (Wagner power roller?) in the attempt to hide it.
Anyway. . .
We contacted the customer and told him what had been done to his gun. We decided that at this point there's nothing to lose and since he does a fair amount of business with us, I'd take a stab at repairing it and would only charge if it was successful.
Jay it looks like I get to take your money.
We got the bulk of the distortion out by clamming up the receiver rails in the vise and bending it straight again. The wavy stuff was beaten straight with a little forging tool I whipped up from some chunks of AL.
Hammer time!
I then puddle welded the crack on both sides using the TIG and some cerrated type tungsten that's supposed to reduce contamination. I didn't use any filler rod. As part of the prep work I packed the front of the action with heat sink clay to mitigate any annealing going on. Thankfully it only took 20 amps so the heat was well contained.
Garrett is barreling her up now and were pretty optimistic that we got it sorted out. Since the owner had been unaware of the problem and had been shooting the old barrel for awhile I don't think we'll have any issues here.
Back to work!
C.
