• Watch Out for Scammers!

    We've now added a color code for all accounts. Orange accounts are new members, Blue are full members, and Green are Supporters. If you get a message about a sale from an orange account, make sure you pay attention before sending any money!

  • The site has been updated!

    If you notice any issues, please let us know below!

    VIEW THREAD

Annealing method discussion

vman

Gunny Sergeant
Full Member
Minuteman
Nov 23, 2009
3,711
5
40
Australia
www.google.com
Gday Fellas.

I got thinking today about case annealing after reading through various articles on the web and noticed a fair lack of consistency regarding the temperatures people like to reach whilst annealing, in particular the Tempilaq indicator used.

For example, whilst reading an annealing article on 6mmBR.com aka accurateshooter, I stumbled across some information regarding Hornady releasing their annealing kit with different forms of tempilaq indicator across the board... this got me thinking.

People must obviously use different temp indicators for different areas of the case... But which one is the best?

Clearly there must be a general answer to this question regardless of the case.

Is it 475 degrees 1/4" below the shoulder as sufficient?
or is it 700 degrees 1/4" below the shoulder as sufficient?

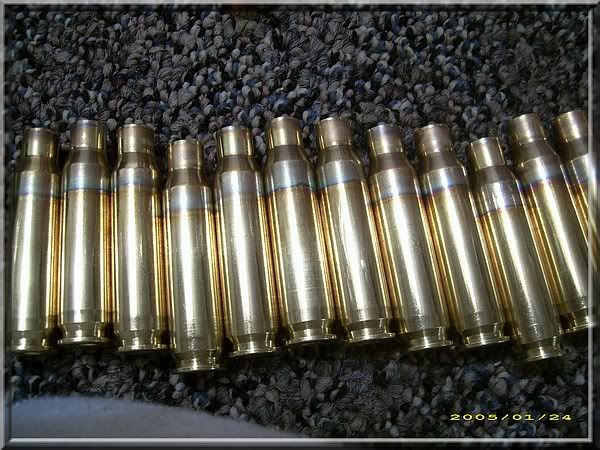
Im sure those of us out there using indicator pastes/pens have discovered at what point you achieve that nice looking "blue yet shiney" perfectly annealed case.

So i guess in a nut shell, how do you guage this indication of "properly annealed" AND if you do use Tempilaq which version do you use and at what part of the case do you like to use it on.

Let the discussion begin
smile.gif
 
Re: Annealing method discussion

This is a good question. Hopefully someone will answer that actually does this. I have heard that you can put the cases in water up to the line where you want to start the annealing and use the over at a certain tempature to do the job? I have 338 Kirby Allen cases that need annealed so I am very interested in what people are doing.
 
Re: Annealing method discussion

Well Tazman, Im using the 475 degree Tempilaq that I received in a Hornady annealing kit.

I paint the body of the case about 1/4" below the shoulder. I find a thin quick little application is perfect. Too much and it melts onto the case and takes a little longer to melt.

I also find it is important to use the inner cone of the flame (theres 2 cones, the bright inner cone and the faint blue outer cone) at the tip of flame againt the neck only as this means im not burning the Tempilaq and less conductive heat from the flame itself is acting on the indicator. I find using the tip of the flame in this manner is what gives me that annealed look. I have done this before using different areas of the flame and acheived a different look, more of a gold without any blue.

I have also tried using Tempilaq 700 on the inside of the neck however I find noticing the indicator change is difficult and distinguishing between burning and melting is also hard.

Curious to hear on what others feel is best.

I would love to have a machine to do all of this on.
 
Re: Annealing method discussion

I'm new to annealing but I've tried reading as much material as I could. I had a lot of mil surp, old lapua, and winchester brass to experiment on.

I settled on using a sinclair power case holder in a cordless drill.

I used a 450 deg F tempil stick crayon halfway up on the cartridge to gage my timing and to make sure I wasn't heating up the case head during the annealing process.

In addition to using that 450 tempil mark halfway down the case body I experimented using 450, 650, and 750 tempil stik marks 1/4" from the shoulder.

I also experimented using different flame lengths (how much heat) from my propane torch.

For me, I found that what worked best was actually using a high flame, rotating the drill speed at a moderate speed (I don't know the specific RPM) and heating the necks until the blue flame color just barely turned to an orange color and I would pull the brass out. I can't remember but I think this corresponded with the 650 deg F tempil mark at 1/4" below the shoulder.

The 450deg F tempil mark halfway down the case body didn't change any color so I at least knew that no more heat than 450 deg F reached the case head.

I don't use the tempil stik on the shoulder any more, I just go by the color change of the flame in a darkened room.

The color of my brass seems to match well to new lapua brass. When I anneale the milsurp brass it matched very well to new milsurp brass (where the blue shine starts and ends on the case)

I'd like to get a ken light machine one day if I can scrounge up the funds..That sure would make it a lot easier.
 
Re: Annealing method discussion

My gunsmith turned down a titanium rod to a .30 cal stud on one end, and .22 cal on the other end. I put the rod in a vise, put a torch on the rod just off the turned down stud, wait for it to glow red (takes about a minute or two), and slide the case mouth over the stud. The stud is only about 1/4" or so in length. It takes about 4 or 5 seconds to turn the proper color, and you can see the annealing process start at the case mouth and "grow" toward the neck junction. Once the color change is at the junction, I pull the brass and drop it into metal bucket.

Wash, rinse, wipe hands on pants, repeat. Thanks to Unsichtbar for the tip.
 
Re: Annealing method discussion

I look for three factors now that I have done tens of thousands of cases:

Keep the flame color blue, if it turns orange you are going too far.

Keep the base of the case cool to the touch, this requires a lot of heat but for a short duration on the neck.

Look for the consistent anneal “ring” around the case. If you just speed up a tiny bit from the flame turning orange you are there.

Click on the photos below for videos of the process.

Note in the first video the flame color and that the case is not hot immediately after annealing.

The 2nd video is a machine built by someone that bought the blade and plans from be but decided to use a water quench. Note the flame turning orange, he could have sped the advance wheel up a bit and prevented the need to quench, to keep the base from getting too hot.


Re: Annealing method discussion

Interesting pic suasponte.

It proves yet again that others anneal in very different manner.
 
Re: Annealing method discussion

I have annealed a few cases..... way to many actually.....

I use nothing special other than a torch, bucket of water, and a dark room. Ok, also a shell holder to stop the fingers from burning!!

Each time I do a run on cases, I practice once on a rubbish shell just to get my eye in.

Completly dark room, turn cases by hand in the flame at light blue tip right until I see the flame go from blue to red.. I mean right at that point I drop it in the water.

Here are some 20VT cases made from 221FB Rem.... I dont have any pictures of the 20VT I made from the 223Lapua... Darn!!

IMG_1164800x600.jpg

IMG_1167700x525.jpg

-0407.jpg


You know they are annealed right the next time you seat a projectile.. it is very smooth and consistant in pressure when seating.

I had 20 6mmPPC cases that had over 40 firings on them. They were annealed 5 times from memory. The necks were so work hardened that the inline seater struggled to seat the bullet. After annealing like new....

Cheers
 
Re: Annealing method discussion

<div class="ubbcode-block"><div class="ubbcode-header">Originally Posted By: vman</div><div class="ubbcode-body">Interesting pic suasponte.

It proves yet again that others anneal in very different manner. </div></div>
cg4c1f8e34057cc.jpg
 
Re: Annealing method discussion

I got one of these from the woodchuck den:

rbrassburner.jpg


It clamps on the end of your propane nozzle. It's not perfect but it does eliminate the need to spin the brass. You can rotate enough with just your fingers -- 20° or so -- to even out the heating. It also cools down the flame so much that it takes significantly longer to reach proper temperature so I switched to MAP gas. With the MAP gas, a single piece of brass takes 10-15 seconds (depending on the caliber) to melt a dot of 650° Tempilaq placed on the body just beneath the shoulder.
 
Re: Annealing method discussion

I use the new aluminum case holding blocks sold here on the hide to hold the brass I intend to anneal:
http://www.snipershide.com/forum/ubbthreads.php?ubb=showflat&Number=2063813&page=1

I then put the block in ice water while annealing the necks for 5 seconds each.

The aluminum blocks acts like a giant heatsink and cooling it helps me create a temperature differential which protects the head and body of the case. This keeps the annealed area to the necks and shoulder.

Fast, easy, and cheap without the oxidization of putting the cases in water.
 
Re: Annealing method discussion

I have felt that after annealing, accuracy suffers for the first reload. after that, accuracy returns. It's possible that it is all just me. I guess this leading up to another excuse to get a annealing machine for better consistency.
myerfire
 
Re: Annealing method discussion

I have used the following method .. just twice so far on Lapua Brass

Used the normal "Benzomatic" propane torch (for the first effort) that everyone owns for plumbing work.. and have since upgraded the nozzle to the pencil flame version (cost approx. $16 inc shipping from Amazon)that has a MUCH smaller flame.

Place brass pieces upright in a metal tray with approx. 3/4" depth of water. Heat neck area for a count of 1000, 2000, 3000 and then knock over the piece you heated.
I found that you could feel the difference when reloading and the rounds seemed to be more consistent when shot. No data to support either comment.

This is not a super accurate way of annealing but it does seem to work "just fine".. make sure you count consistently... too little heat won't hurt much... but too much and you'll lose the zinc from the brass and make scrap..

RJ
 
Re: Annealing method discussion

for the most part I have it down.the brass that I have annealed is shooting better.and it looks like a new Lapua case does when they come to me.but my thing is this.do we need to let the cases air cool or drop them into water.my reason for asking is that most if not all video's show the brass going into some sort of pail.but most if not all write ups say drop them into water.so which one is it.water/air cool?
 
Re: Annealing method discussion

Theres about 258 ways to skin the cat when it comes to annealing, and IMO the most important aspect in what ever of the 258 ways you choose is to have as much control and repeatability as humanly possible.

Ill share how I skin the cat....

Materials:

- Any single stage press mounted on a work bench (you should already have this)

- Mini-Ductor Induction Annealer

-Tempurature Indacator, I use Tempil Tempstik Test Kit

- Any electrical timer with a power shut-off. Its good to get one with tenth second resolution. (Not sure what mine is called, and Im currently fairly liquored up, so I wont be driving out in town to take pictures of my set-up until later)

OK, we all know that the key to success in the annealing world is control and repeatability of a good result. "How the fuck do we do that?" you may ask...

Well, brass anneals at 750*-800* for a few seconds. It anneals at 450* for more than several seconds. You want to anneal the neck/shoulder. You dont want to anneal the body more that maybe 20% of its length down from the shoulder.

So, "How the fuck do we do that?!?"
Well, Im glad you asked (Takes another sip of his Smirnoff and Arnold Palmer 1/2 n' 1/2).

Set up your Mini-Ductor so its small coil rests just slightly above the top of your press, where the body of any die would be when installed in your press....(Sip Sip)

Hook your Mini-Ductor up through your timer and plug your timer in.
Grab and 1/2 dozen of the cases you wish to anneal, that you dont mind ruining, and bust out your Tempil test kit....(Sip Sip)

OK everyone, grab your 450* crayon out of your test kit, and draw a vertical line from the shoulder/body junction...ALL THE WAY DOWN to the web of the case....good job! (Sip Sip)

Now kids, grab your 700* & 800* crayon's and draw 2 lines from the tippy tip top of the neck down to about 40% of the body past the shoulder/body junction! GOOD JOB! The reason we use both crayon kids, is that Tempil doesnt include a 750* crayon in your kits, so thurough melting of 700* and no/partial melting of 800* is a good indicator of 750*

Kiddies, lets set the duration of power on our timers for about 4 seconds!

Now kids, can anyone tell me what results we will be looking for to tell us that we have found the perfect <span style="font-weight: bold">time exposure/case height into the coil</span> for our cases?

(Sip Sip)
<span style="font-weight: bold">THATS RIGHT!!!</span>
-We want to see our 700* mark melt all the way down to the shoulder/body junction...
-We want to see out 800* mark having changed in color, but not melted like a teenager in the cround of a Justin Bieber concert.
-We want to see our 450* mark having melted at the top of the shoulder, but still intact and UNMELTED from about 10%-20% down.

(Sip Sip)

IF your cases were too hot (Jusin Bieber Meltdown of 800* on neck and shoulder, along with 450*) your cases were just plain too hot! Turn down the duration on your timer you idiot. (Go with .2 second adjustments either down or up, unless you need to do some blatent adjustment)

Heating too far down (700* melted on neck, 800* not melted on neck, 450* melted too far down the body) can either mean your cases stayed at the right temurature for TOO long, OR, your cases were sent too far up into the coil.

(Sip Sip)...

Heres where things get shady. If you think your case didnt get hot enough, two things may have occured:
1: Your case infact didnt get hot enough!
2: Your case did get hot enough, but wasnt heated far enough down!

Remember kiddies, what have we learned in reloading 101?
THATS RIGHT! Only change one variable at a time!

Play with this until you get that perfect melting creshendo of crayons apon a shimering brass case, and you my friend, have spent about $500.00 in marterials, and will for ever have perfectly annealed cases!

OH!, and it doesnt make a God damned bit of difference weather you let them air dry or quench them in water. I dont personaly want to have to dry wet cases, so air dry them!

(Sip Sip)...Your Welcome.
 
Re: Annealing method discussion

you can buy a dedicated annealing machine for what the MINI-DUCTOR cost
 
Re: Annealing method discussion

There is a fellow over on Saubier that is making Stainless Steel Mandrel's to use while annealing. There are two sizes, and the mandrel fits into the primer flash hole. It can be spun by a drill, or by hand(small knurled knob on mandrel. They are relatively inexpensive, and work well for the average guy without spending a ton of money. Pretty fast system, for a decent price.

I bought a set of them. Good fair deal. And very well made. Plus a nice guy to deal with. Tom.

http://www.saubier.com/forum.html
 
Re: Annealing method discussion

<div class="ubbcode-block"><div class="ubbcode-header">Originally Posted By: 427Cobra</div><div class="ubbcode-body">you can buy a dedicated annealing machine for what the MINI-DUCTOR cost </div></div>

True, but it lends itself to alot more precise control. Its ALOT smaller. Its alot safer (no open flames).
 
Re: Annealing method discussion

Well, I tried my hand at annealing today. I used 650 Tempilaq on the inside of the case neck, and put a line down the side of the case just past the shoulder. Also put the 450 Tempilaq from the shoulder down a 1/2 in or so, so I was sure not to over heat the body. I used a cordless drill and a 12mm socket to rotate the brass, with my propane set on a pretty low setting.

I noticed my brass has very little color at all, just barely a rose colored hue to it, the 475 Tempilaq melted about 1/8 inch below the shoulder while it looked like the 650 just quit melting right at the shoulder, or slightly below it.

Do I need to put a little more heat in this or is this about right? Sorry, no pics.

I also read, that if your brass is coming out with the pretty blue, you've gone too far, is this correct?
 
Re: Annealing method discussion

<div class="ubbcode-block"><div class="ubbcode-header">Originally Posted By: vman</div><div class="ubbcode-body">So i guess in a nut shell, how do you guage this indication of "properly annealed" AND if you do use Tempilaq which version do you use and at what part of the case do you like to use it on. </div></div>

I use 750 tempilaq on the inside of the neck. Apply heat and rotate, when it changes your done.