• Watch Out for Scammers!

    We've now added a color code for all accounts. Orange accounts are new members, Blue are full members, and Green are Supporters. If you get a message about a sale from an orange account, make sure you pay attention before sending any money!

Gunsmithing DIY savage bolt lift kit...

Re: DIY savage bolt lift kit...

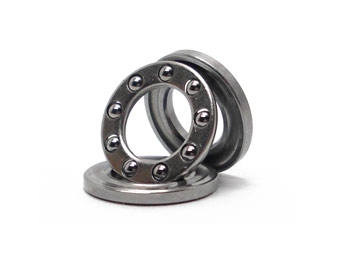
for that matter the indicator could be turned down enough to still act as an indicator and be small enough in diameter to go thru the thrust washers... it would be thinner, maybe an "O" ring in there to keep the inside sealed, maybe not. but it would still be an indicator, just skinnier
 
Re: DIY savage bolt lift kit...

Or another option might be to cut off the indicator where it enters the BAS. Turn down the remainder to 1/8" then thread it. Drill and tap a 1/4" rod then screw it back onto the indicator that was threaded after the bearing is installed.

Personally I think AXEMAN's idea would be the best even if there was a gap. The gap would hardly be noticeable my most and I do not believe debris or dirt would be an issue.

Turning down the firing pin extension would center the bearing and prevent walking.

From the thread on another site a guy found these:
http://www.avidrc.com/product/13/thrust-...t-bearings.html
Seems better than mine because it does have tracks for the bearing to ride in. He said they worked well for him and I don't think there would be the same issues of the plastic carrier potentially reacting with cleaning agents or lubricants.

Dolomite
 
Re: DIY savage bolt lift kit...

<div class="ubbcode-block"><div class="ubbcode-header">Originally Posted By: LeeH</div><div class="ubbcode-body">If you want to get Rowdy about it, You can cut/grind
off the indicator down to the shoulder.
It will be the same length as the old pins.
The indicator is just a extension of the firing pin.
You will just have a hole in the BAS, no big deal. </div></div>

I agree with Axeman also....
I did some measuring and I think the other bearing with the groves "might" work.
At the most you might have to file/stone just a tiny tad out of the center hole.
BUT I think that reducing the dia of the indicator might work best.
I Do think that the 6x12x4 bearing would work a little better
if you don't want to reduce the dia of the indicator.

YMMV
 
Re: DIY savage bolt lift kit...

So we decided that if you do trim the BAS, trim it the thickness of the 38spl rim and the protrusion of the bearing right? Not the total thickness
 
Re: DIY savage bolt lift kit...

<div class="ubbcode-block"><div class="ubbcode-header">Originally Posted By: jmtyndall</div><div class="ubbcode-body">So we decided that if you do trim the BAS, trim it the thickness of the 38spl rim and the protrusion of the bearing right? Not the total thickness </div></div>

Yes, that's correct.
 
Re: DIY savage bolt lift kit...

Much of the same ideas but also machined a spot and pressed in a bearing to the BAS so bearing rides on bearing. Very smooth and after hundreds of cycles they ride centered and of course no wear. Machined a spacer to the same thickness as cartridge head+amount two bearing protrude. Plenty of thread engagment, same spring tension.

5151577365_6e25380ff3_m.jpg

5152186830_1ea980fbbf_m.jpg

5152186794_0d2342061c_m.jpg
 
Re: DIY savage bolt lift kit...

<div class="ubbcode-block"><div class="ubbcode-header">Originally Posted By: khronoscide</div><div class="ubbcode-body">Much of the same ideas but also machined a spot and pressed in a bearing to the BAS so bearing rides on bearing. Very smooth and after hundreds of cycles they ride centered and of course no wear. Machined a spacer to the same thickness as cartridge head+amount two bearing protrude. Plenty of thread engagment, same spring tension.

5151577365_6e25380ff3_m.jpg

5152186830_1ea980fbbf_m.jpg

5152186794_0d2342061c_m.jpg
</div></div>


nice job there man. thats looking good.


i never trimmed my BAS and it was only done after the action was sent to SSS for a T&T. worked fine untrimmed
 
Re: DIY savage bolt lift kit...

I didn't do the case head method, I got a thrust bearing similar to the bearing mentioned at the RC shop. I machined up a washer that was .001" short of the thickness of the bearing assembly and reassembled the bolt and this is a huge improvement in a brand new box stock bolt.

Thanks from yet another SH lurker for some good guidance.

Tony
 
Re: DIY savage bolt lift kit...

has any body looked into the cocking ramp of the Savage bolt to make the lift easyer and smoother?


Rick
 
Re: DIY savage bolt lift kit...

<div class="ubbcode-block"><div class="ubbcode-header">Originally Posted By: Savageman110</div><div class="ubbcode-body">has any body looked into the cocking ramp of the Savage bolt to make the lift easyer and smoother?


Rick </div></div>

I polish mine with a dremel.
 
Re: DIY savage bolt lift kit...

thats why we float it to the surface every so often. my longest hobby i guess has been photography. so taking the right pictures to show what im doing is a goal.

TJ, i didnt know someone had the thrust bearings in stock. cool.
 
Re: DIY savage bolt lift kit...

Axeman,

Just wanted to thank you and others who have helped refine this mod.

I acquired a 5x12x4 thrust bearing and installed it in my 10FP. I'm having an "O" spacer machined to dress things up properly, again taking from your lead.
 
Re: DIY savage bolt lift kit...

sweet. if you will, for the guys with a savage 10pc or anyother with a cocking indicator, would you mind taking some pics and listing the parts numbers and place where you got the thrust bearing. it will help fill out that bit which i know nothing about. any pics would help too. glad you got some use out of the thread
 
Re: DIY savage bolt lift kit...

My 10FP is the original non-Accu anything 20" bbl flat top receiver from 1998, so no cocking indicator to worry about. I simply liked the notion of a thrust bearing in lieu of the single ball bearing approach. This bearing is said to work just fine with cocking indicator receivers FWIW. I got mine here for $3 + postage:
http://www.avidrc.com/product/1/bearings/192/5x12x4-Thrust-Bearing-F5-12M-bearings.html
large_192_Thrust_Bearing.jpg


Sorry, didn't take any pix of the installation process... but its the same as what you've done above.
Here's the weapon with SSS competition trigger, SSS bolt handle, and SSS thumbhole - 2.5" forend bedded stock, fitted with a Leupold VM3 4-16x50 Mil-Dot side focus (Mark 4 predecessor) scope.

FP10_M8500a.jpg
 
Re: DIY savage bolt lift kit...

I do mine totally different. I drill, ream and tap the main screw .250 X 28tpi. I insert a grade 8 cone point set screw inside the main screw. I make a steel shouldered cap with a center indent. I put a dab of grease under the cap and in the center indent. The screw can be screwed in to adjust the firing pin screw externally with an allen wrench. The cone poin gives about .060" of contact with the main screw. Being center indented it keeps the firing pin center alighned. I also clean up the cocking ramp.
Nat Lambeth
 
Re: DIY savage bolt lift kit...

<div class="ubbcode-block"><div class="ubbcode-header">Originally Posted By: AXEMAN</div><div class="ubbcode-body">sweet. if you will, for the guys with a savage 10pc or anyother with a cocking indicator, would you mind taking some pics and listing the parts numbers and place where you got the thrust bearing. it will help fill out that bit which i know nothing about. any pics would help too. glad you got some use out of the thread </div></div>

I have the 10PC with the cocking indicator. I ordered the 5 x 12 x 4 thrust bearing from www.avidrc.com/ Sorry no pics.

The cocking indicator was about .053 to big, so we turned it down .054. We also removed the thickness of the bearing assembly from the collar. It made a nice difference it the way it cycles. I still need to polish the bearing surfaces that come into play when it cycles.

One question I had was; is there a need to adjust the spring pressure, and if so how do you know whats correct?
 
Re: DIY savage bolt lift kit...

i didnt even trim the big bolt assembly screw (BAS) on mine. i would just leave the spring as is or trim the BAS the thickness of whatever you add to equalize the whole thing. know what i mean?

Nat, sounds like a nice fix. good approach
 
Re: DIY savage bolt lift kit...

I am tagging this one for the thrust bearing and washer!!

Thanks "bald1"!!

DK
 
Re: DIY savage bolt lift kit...

OK I am going to bring this back from the dead. I have a 10FP and was thinking about doing the thrust bearing idea. I have been looking at the different ways to do this for awhile now. What I can't seem to find is will i have to trim or polish the BAS if I use the RC bearing idea?
 
Re: DIY savage bolt lift kit...

I trimmed the cocking sleeve.

IIRC there wasn't enough threads exposed in the bolt body to get the screw started with the cocking sleeve at stock length with the bearing in there.

HTH,
LM
 
Re: DIY savage bolt lift kit...

So you can do it with a little polishing of the BAS with the 38 case method but you have to trim if you use the bearing correct?
 
Re: DIY savage bolt lift kit...

I used the thrust bearing on my lift kit, and it works like a charm. I didn't take anything off the BAS either. Even with the thrust bearing and plates in there, I have had ZERO issues with any of my rounds firing.

I did however, cut off the cocking indicator. I didn't need it, so it is gone. Functions as it always has... except the lift is considerably better.

DK
 
Re: DIY savage bolt lift kit...

I didn't trim the sleeve either. The ONLY modifications that I did was to add the thrust bearing, and to cut off the indicator.

DK
 
Re: DIY savage bolt lift kit...

Yea my 10fp doesn't have the indicator and is the newer style bolt with the BAS.

Rat you had the 10PC right?
 
Re: DIY savage bolt lift kit...

5/32 works out to .156, a BB is supposed to be .177, is that 'close enough'?
 
Re: DIY savage bolt lift kit...

<div class="ubbcode-block"><div class="ubbcode-header">Originally Posted By: Greg Langelius *</div><div class="ubbcode-body">5/32 works out to .156, a BB is supposed to be .177, is that 'close enough'? </div></div>

I did the 357 casehead + 5/32 ball bearing mod this evening. It is a solid improvement. Then I polished the crap out of the cocking ramp/helix - another improvement but smaller. Together it was a worthwhile mod that cost me an hour and $0.14 out the door. I also stoned the face of the BAS, then polished. After working the bolt 50 times or so I pulled it apart. The ball bearing had already begun to brinell the face of the BAS. The torrington bearing approach is probably better. I may try that next.

To your question greg: The primer pocket is .173", so the bb will require a press fit. Thats ok I think, but the surface finish of a bb is crap. I would assume the copper wash on the bb would wear right off, and the bb/bas interface would probably burnish in. That said, to me it makes more sense to use a ball bearing, which is centerless ground and already has a very fine surface finish.
 
Re: DIY savage bolt lift kit...

OK, and thanks for taking the time to address my idea.

Greg
 
Re: DIY savage bolt lift kit...

<div class="ubbcode-block"><div class="ubbcode-header">Originally Posted By: SmokinAce</div><div class="ubbcode-body">Rat you had the 10PC right? </div></div>

Yep... mine is the 10PC.

DK
 
Re: DIY savage bolt lift kit...

I think the next time around, I might just try to take the indicator down a bit in diameter. If that doesn't work out like I want, then I can just cut that one off as well.

DK
 
Re: DIY savage bolt lift kit...

That modification will be on my Predator MAX1, but it is still the same type receiver and bolt details.

DK
 
Re: DIY savage bolt lift kit...

<div class="ubbcode-block"><div class="ubbcode-header">Originally Posted By: z71rat</div><div class="ubbcode-body">That modification will be on my Predator MAX1, but it is still the same type receiver and bolt details.

DK </div></div>
I hear those Predator MAX1 are nice. I have yet to see one in person.
 
Re: DIY savage bolt lift kit...

Took my rifle out today with the 38 special mod.

It really did make a nice improvement. You get a much better feel when your prone, in position actually shooting than you do sitting at your workbench.
 
Re: DIY savage bolt lift kit...

<div class="ubbcode-block"><div class="ubbcode-header">Originally Posted By: SmokinAce</div><div class="ubbcode-body">
I hear those Predator MAX1 are nice. I have yet to see one in person. </div></div>

I have held 2 so far, and I really liked them. The 1 that I have on it's way to me now, I got for an absolute steal. So much so, that I gave up several other things for it. I am going to REALLY like it once my Manners T3 (BLING) gets here too. It should be happening sometime (I HOPE) in the next month. It has been 14 weeks and counting so far...

The wait is killing me!!

DK
 
Re: DIY savage bolt lift kit...

Well I got a 5/32 bearing last night when I called the 7th ACE to find the 1/8" bearing to replace me lost detent for my extractor so I might do the 38 special version first since it cost me .32 cents and a scrape 38 I have around. I really think I will end up going with the bearing setup listed above though.
 
Re: DIY savage bolt lift kit...

Just finished four (04) of the .38 case versions with a 10x32 set screw with fine point. Made very noticeable difference in all four rifles. Polished the BAS with 400 and the cam surfaces with dremel. 10FLP .308 / 10FLP .223 / 110FP 300WM / 12FV .204. Had the parts/screws for it left over from another project and had wanted to try this for a while. Off to the range tomorrow. Thanks for all the info and pics.
 
Re: DIY savage bolt lift kit...

Feeding the Zombie thread
wink.gif


I did the thrust bearing method and decided to post some pics while I went through it.

Picked up the thrust bearing from the link earlier to Avid and measured the thickness of it all
255t8g0.jpg


Then went down to Coast to Coast Hardware and picked up two 14ga. Machine bushing washers that measure 1/2" I.D x 7/8" O.D
Here's what their total thickness was
11hb628.jpg


Here's the complete package
6tfmfm.jpg


Took about 10 minutes total to use black Krylon Camo paint to put a few coats on the washers and used the hair dryer between and after the coats to speed up the drying time.
aywp37.jpg


Install the thrust washer set with the first plate having the groove facing up, then the bearing and finally the the last plate with the groove facing down towards the bearing.
e704rq.jpg


To put the BAS in I hold the bolt upright on a table while putting downwards pressure on the allen wrench and BAS and give it enough of a turn to catch the threads then its easy to finish up tightening the BAS. Here's what it looks like put together.
106y8wg.jpg


And the finished bolt lift installed
mrqxs5.jpg


Thanks again to everyone who's worked on the different options and to Axe for getting this going !


Re: DIY savage bolt lift kit...

<div class="ubbcode-block"><div class="ubbcode-header">Originally Posted By: AtOne</div><div class="ubbcode-body">Feeding the Zombie thread
wink.gif


I did the thrust bearing method and decided to post some pics while I went through it.
</div></div>

So did you notice a large improvement?
 
Re: DIY savage bolt lift kit...

Between some polishing thrust bearing and a little grease its a huge imrovment.
Not as smooth of a lift as my 700 but getting closer.
 
Re: DIY savage bolt lift kit...

Ok so I tried the bearing mod on my 10fp. First off 1" washers are to large they catch on the safety when you try and put the bolt back in. So I removed them. When I put the BAS back in with the bearing system in the bolt the BAS went all the way back in. Functions fine it helps a little with the cocked bolt lift but it makes the fired bolt lift feel like nothing. I have yet to put rounds through it but this to me seems a bit odd as everyone else couldn't get the BAS back in all the way. I took it back apart and see nothing wrong with the setup. Anyone have any thoughts?