Re: Installing seekins base
This is a copy and paste from another site, asking a similar question.
A couple more tips, Don't use an epoxy with metal in it. acraglass gel works best because it will thin out really well where it schould and stay in place in the "gap" to form a shim.
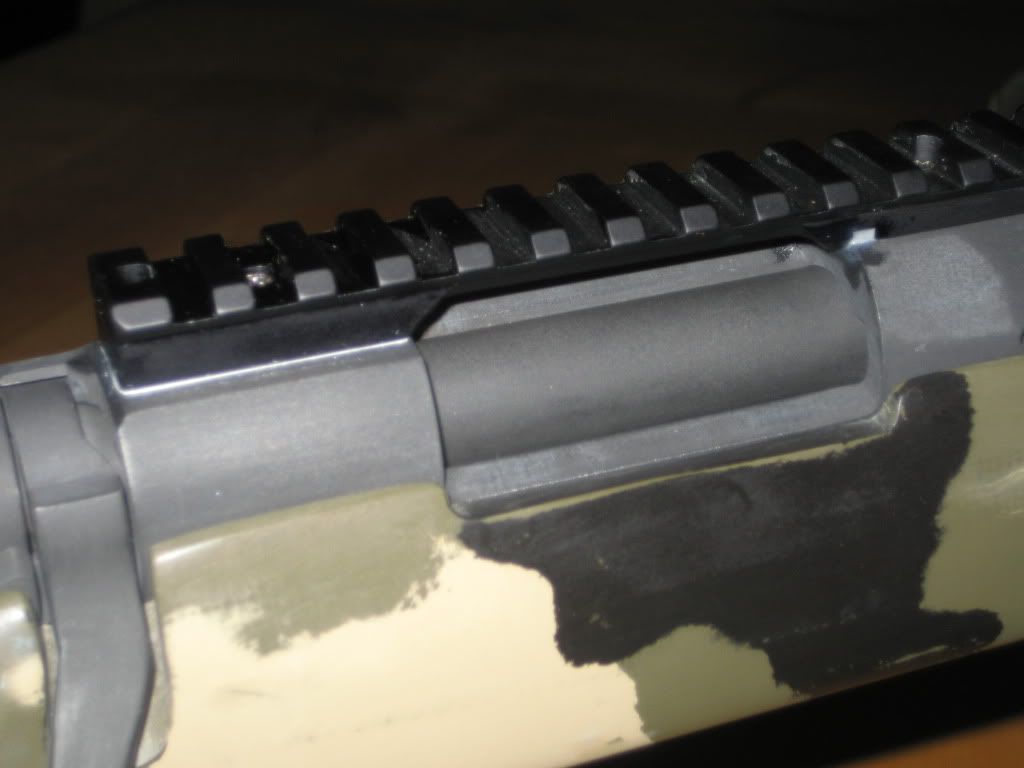
A reciever (especially a factory reciever) built in one shop and a rail built in another will never have perfect dimensional fit. Remingtons are notorious for tailing off on the rear reciever ring, to the right and rear. A precision ground parralell is perfect for detecting rail twist or flex, before and after bedding. --------------------------------------------------------------------------------
Here's how I set up a new gun in the shop.
90% of the rifles get a picatinny rail. They are epoxy bedded to the reciever and shimmed if necessary so that the rail does not "bend" to conform to a reciever that is not dimensionally accurate, during the bedding process the screws are waxed but the rail and reciever are clean so the epoxy bonds them but the screws can be removed degreased and lock tited the next day. You must first find a front and back screw that will hold the base in the proper positon to equal out the tolerance differences and use those 2 screws when setting the epoxy, (usually the middle two screws work best.) snug them down so you get metal to metal contact. Do not overtighten or you will twist the rail. The goal is to keep the rail FLAT so that the two rings when mounted are in the same axial plane. The epoxy acts as a shim so after it sets and the screws are reinstalled it tourques up without twisting or putting stress into the system. If the base twist that offset will be magnified into the rings when they are set. If you don't think the reciever to base fit can possibly be ascew set a rail on a remmy and tourqe down the far rear base screw with no others installed. The front of the rail will lift off the reciever and point skyward around .005-.015"
The Tac rings are then set on the base in the proper position for the scope/eye relief that will be needed. The rings are torqued to the rail, while paying attention to their alignment. The ring tops stay off for now. The easiest way to tell if the rings are truelly aligned is to take your lapping bar charge it and do a quick lapping, clean off the paste and check the rings. If everything was done properly up to this point and your rings are of high quality it should take very little lapping.
Once the rings are lapped true, I determine weather the ring tops need to be lapped, Usually I do not lap the tops, unless there was a serious alignment problem with the bottoms,(ussually the cheaper the ring base set up the more lapping is sometimes required)
The only time I lost clamp on a set of rings was on some POS ruger factory rings that were seriously f'ed. After lapping I milled off a little material on the ring bottoms where the screw tappings are, to give it clearance to clamp.
Leveling the scope is the easy part. I drew 2 lines with a 4' level on the far wall of the shop. Level the gun in a clamp with a level acrost the bolt race way, where the bolt handle cutout is or on the rear lang flat. Then rotate the scope until the hairs line up with your plumb line on the wall. double check and tourqe, double check after tourqing tight, attention to detail gets it right. Putting a anti-cant level on the tube in this set-up works well also.
You can confirm by placing a target at 100 yards draw a perfectly verticle line on the target. Aim at the bottom of the target on the line, holding your cross wire perfictly verticle with your line, shoot a group. Put 20 minutes of ellevation on the scope and shoot again, your second group should be straight above the first (20"), if you held your cross wire perfectly verticle. If not Rotate the scope until it does.
__________________
Jim See
Center Shot Rifles llc.
Making Rifles Accurate
www.centershotrifles.com