• Watch Out for Scammers!

    We've now added a color code for all accounts. Orange accounts are new members, Blue are full members, and Green are Supporters. If you get a message about a sale from an orange account, make sure you pay attention before sending any money!

Maggie’s Machining and woodworking for guns

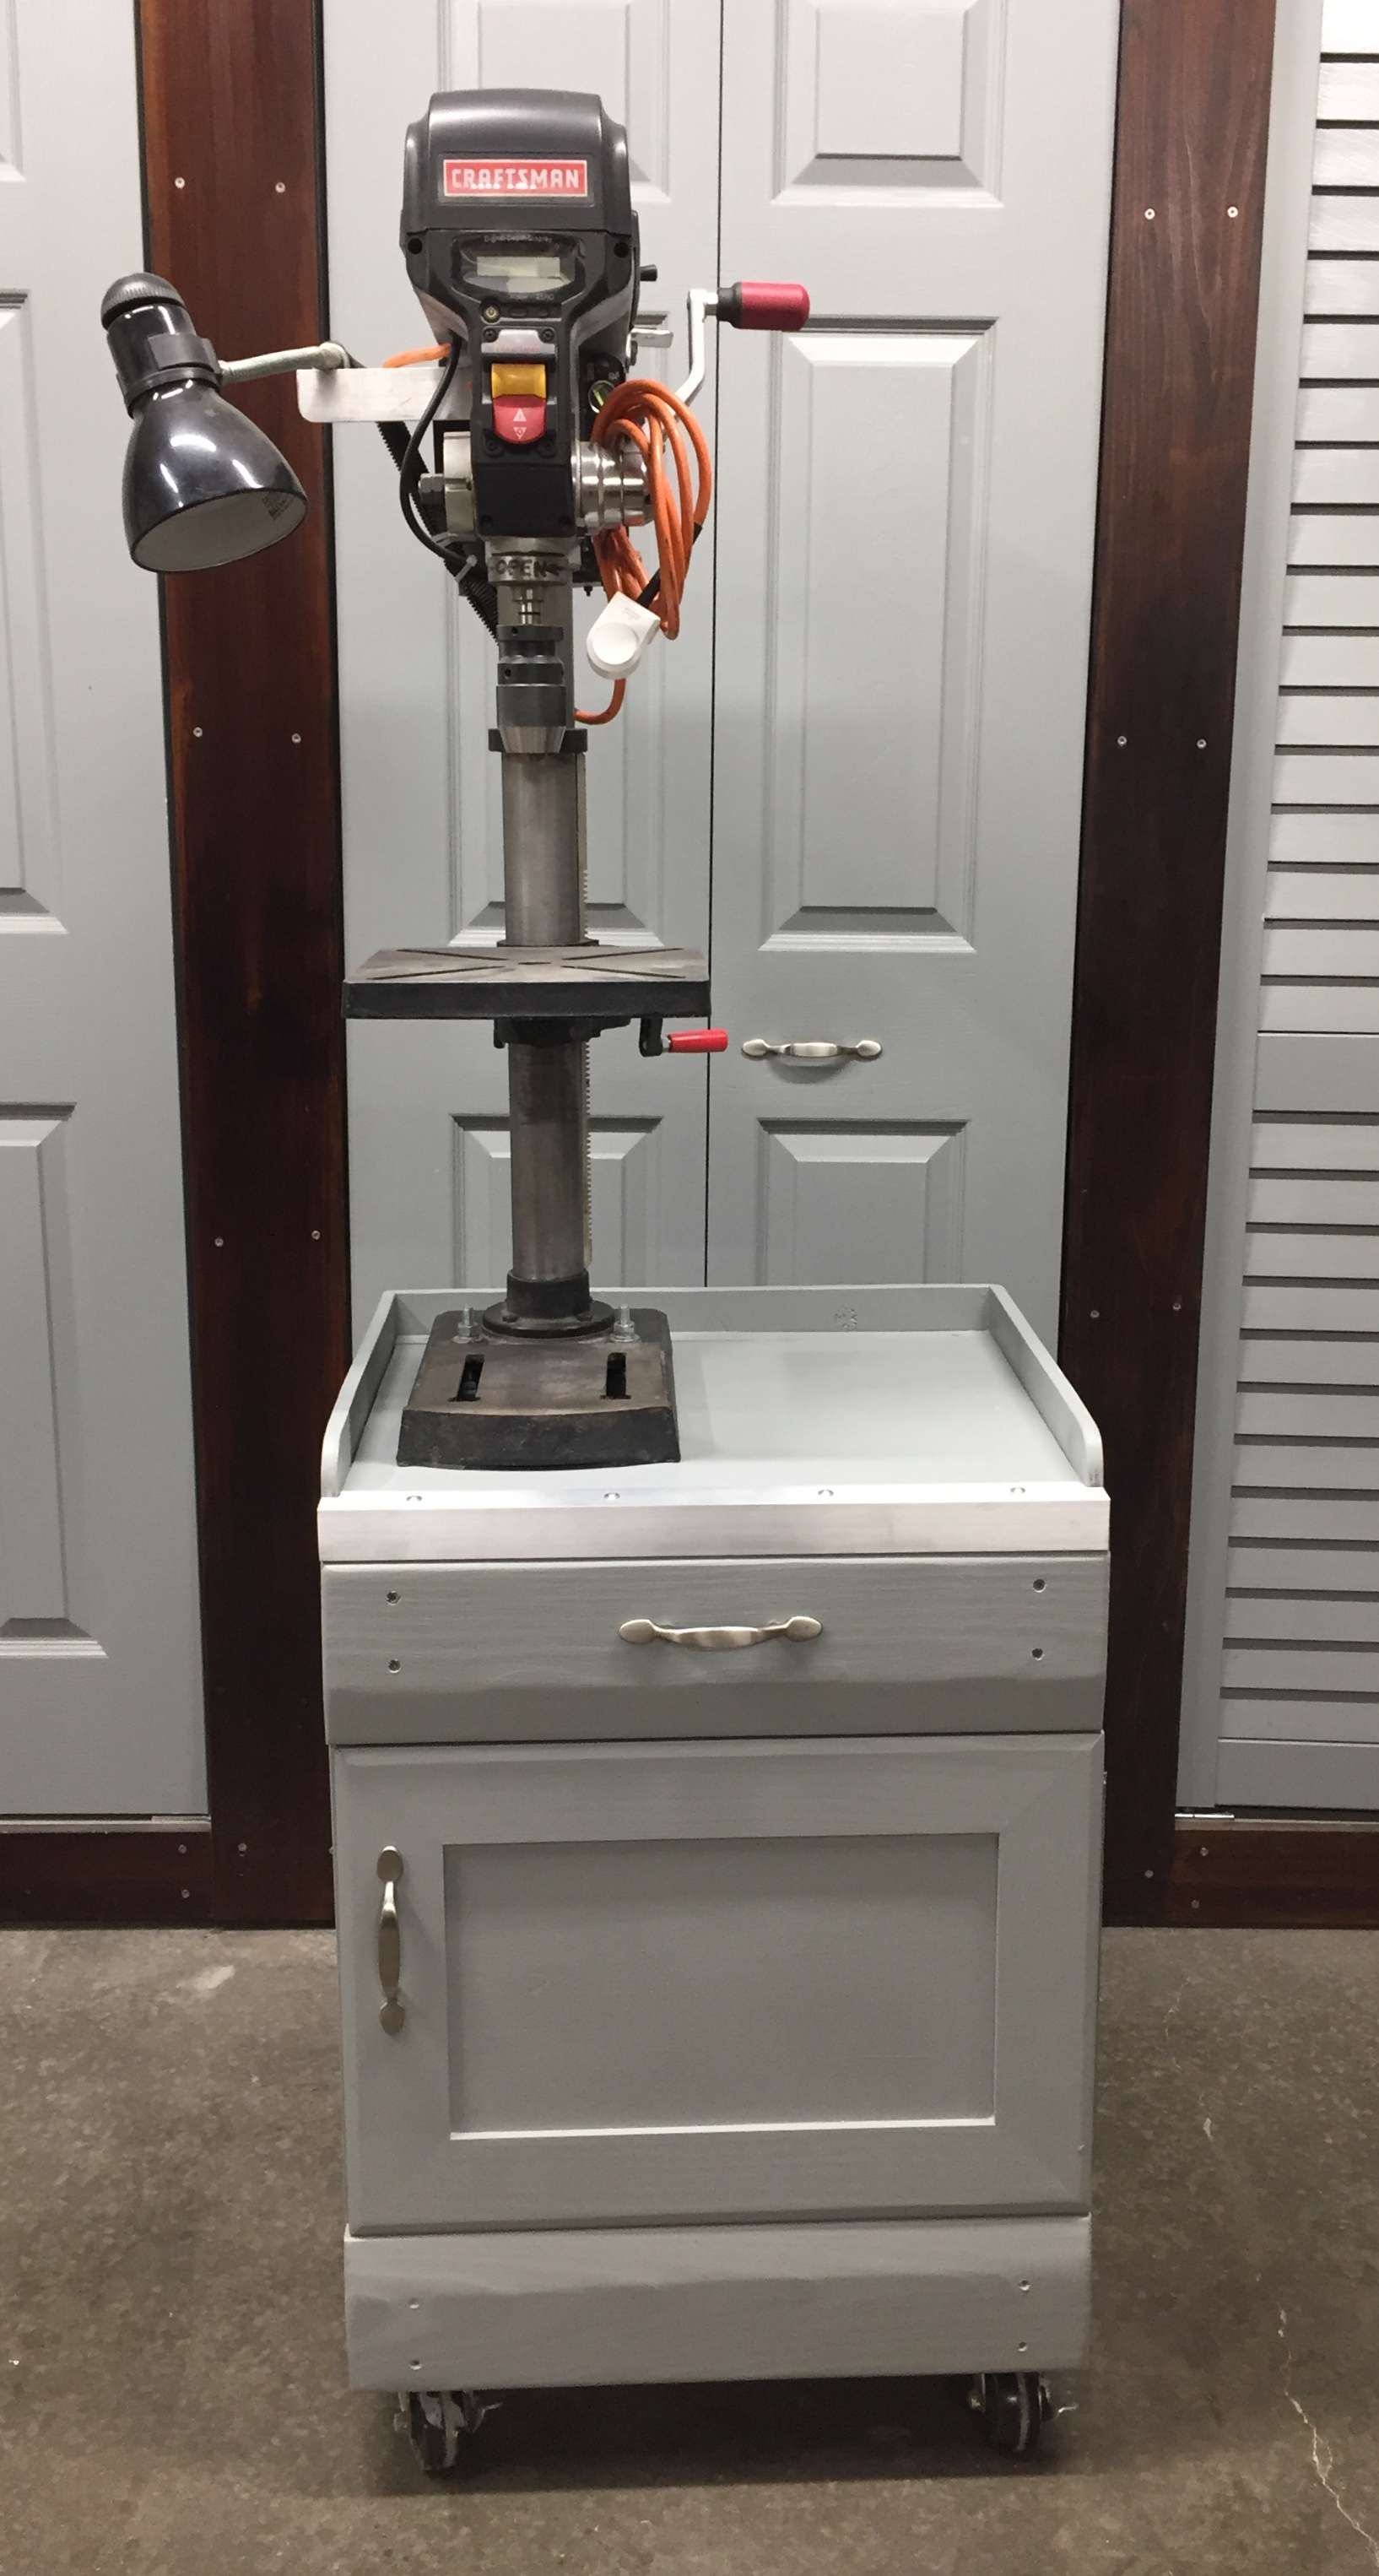
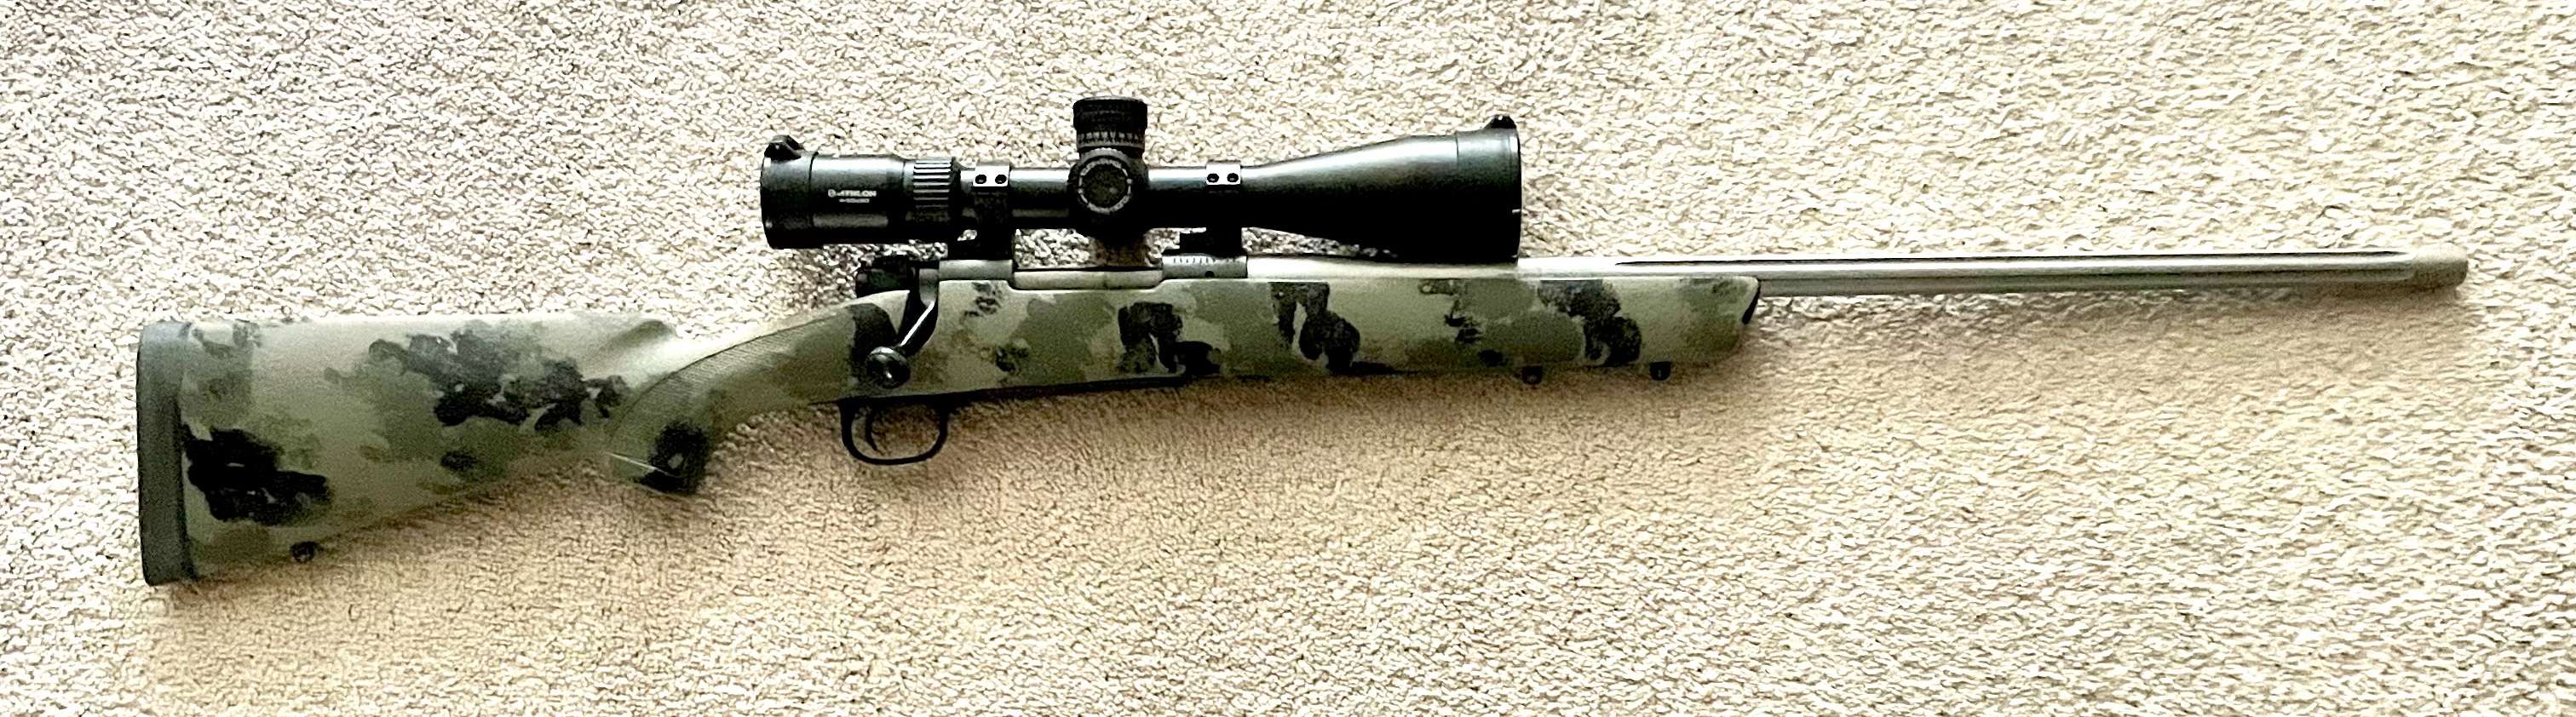
Well I've finished a couple of projects and thought I'd put up a few pictures. I was able to get started learning how to anodize aluminum and had pretty good luck with it so 3 of the aluminum stocked guns got finished. The two bolt action pistols, red in .22 and blue in .17 mach 2 are finally finished . I need to do some ammo testing on both of them but so far I'm happy with them I did make a tuner for the .22 and plan on making one for the blue one also .
0.jpg


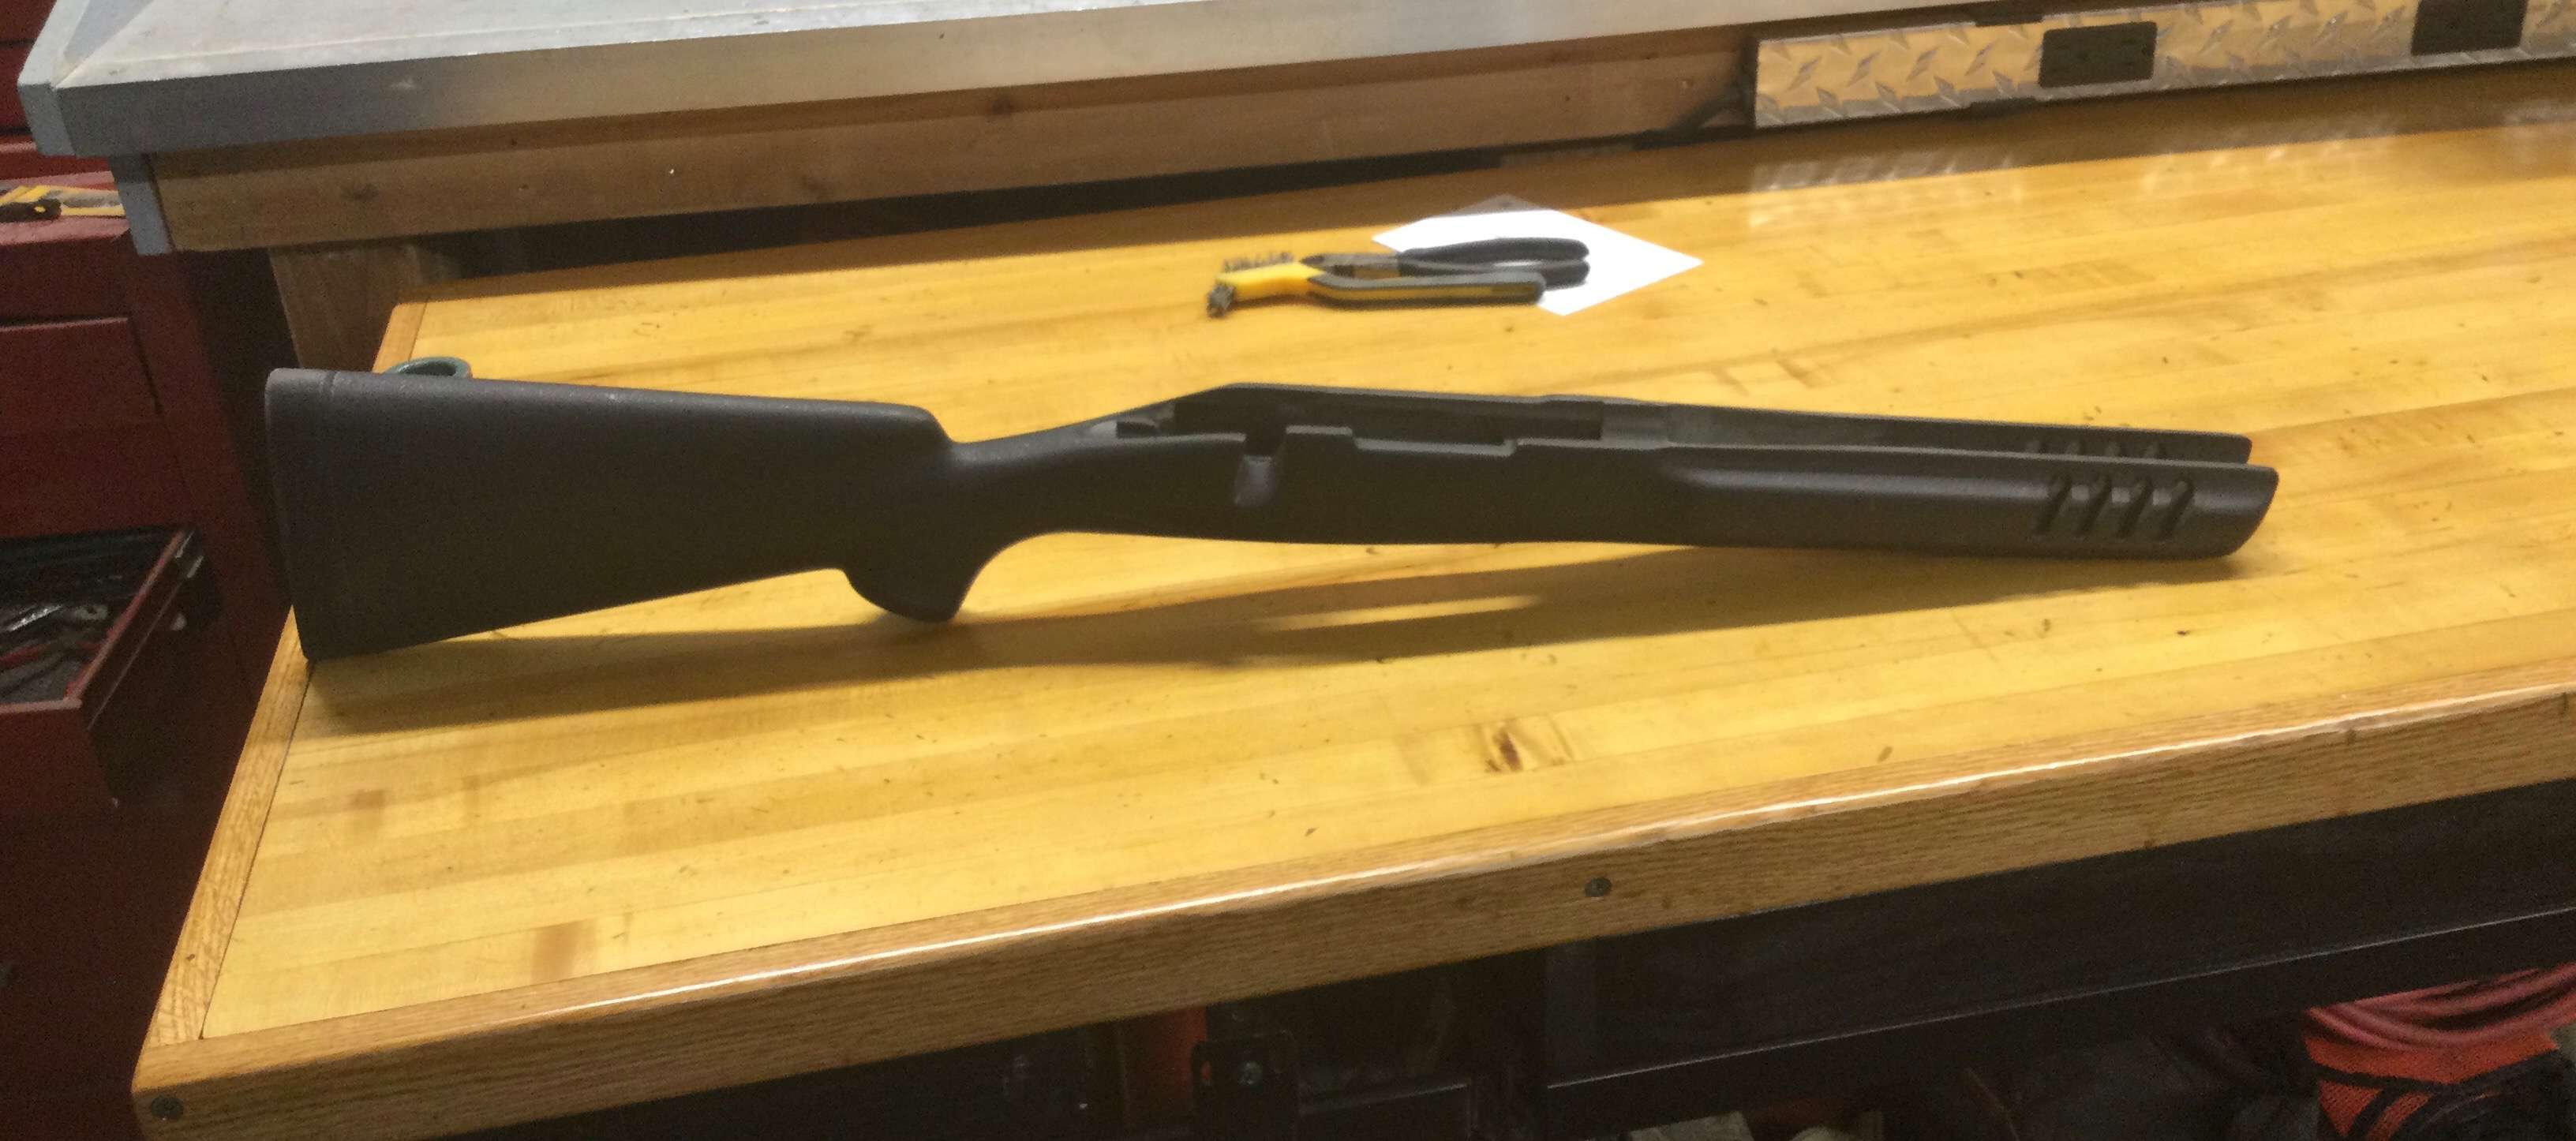
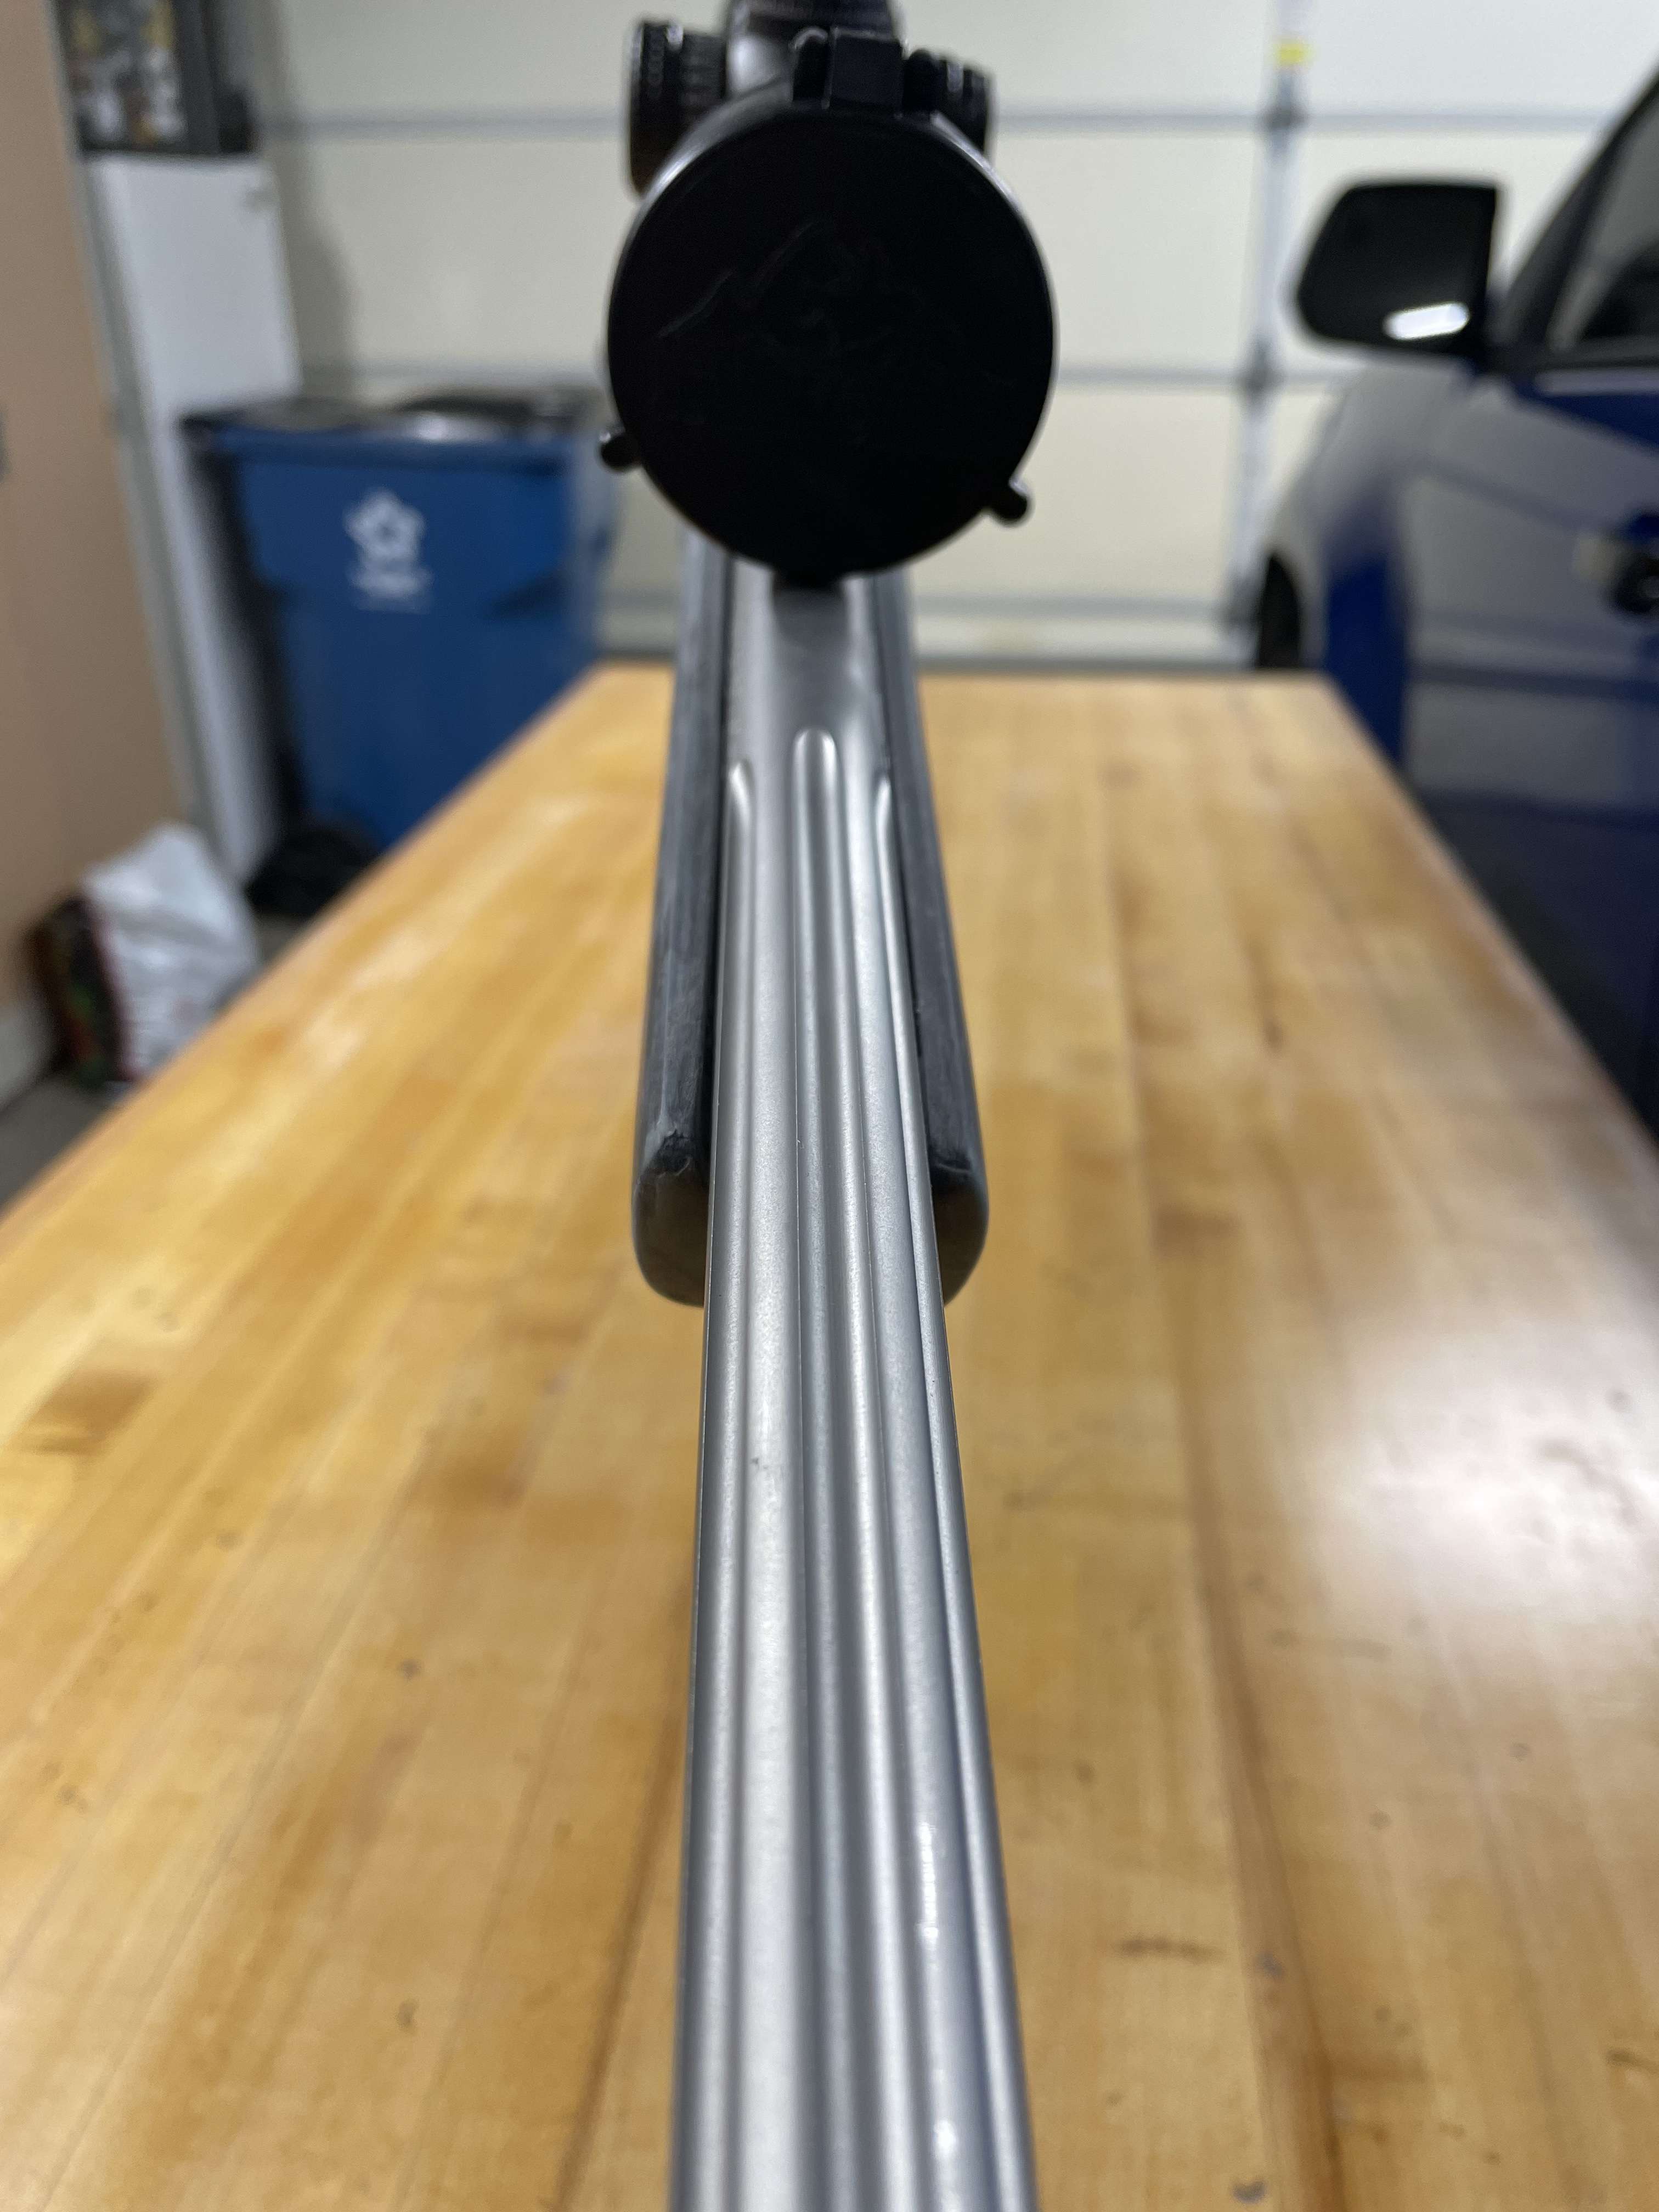
The .17 wsm went through a couple of revisions having started as a .17 HMR and ending up as a .17 WSM. I'll say one thing that is pretty impressive for a rimfire. It's better than 1/2 inch at 50 yards but subject to ammo quality just like every other rimfire. I did make a tuner for it so hopefully I can tune some of the vertical out of it
IMG_0556 (2).JPG


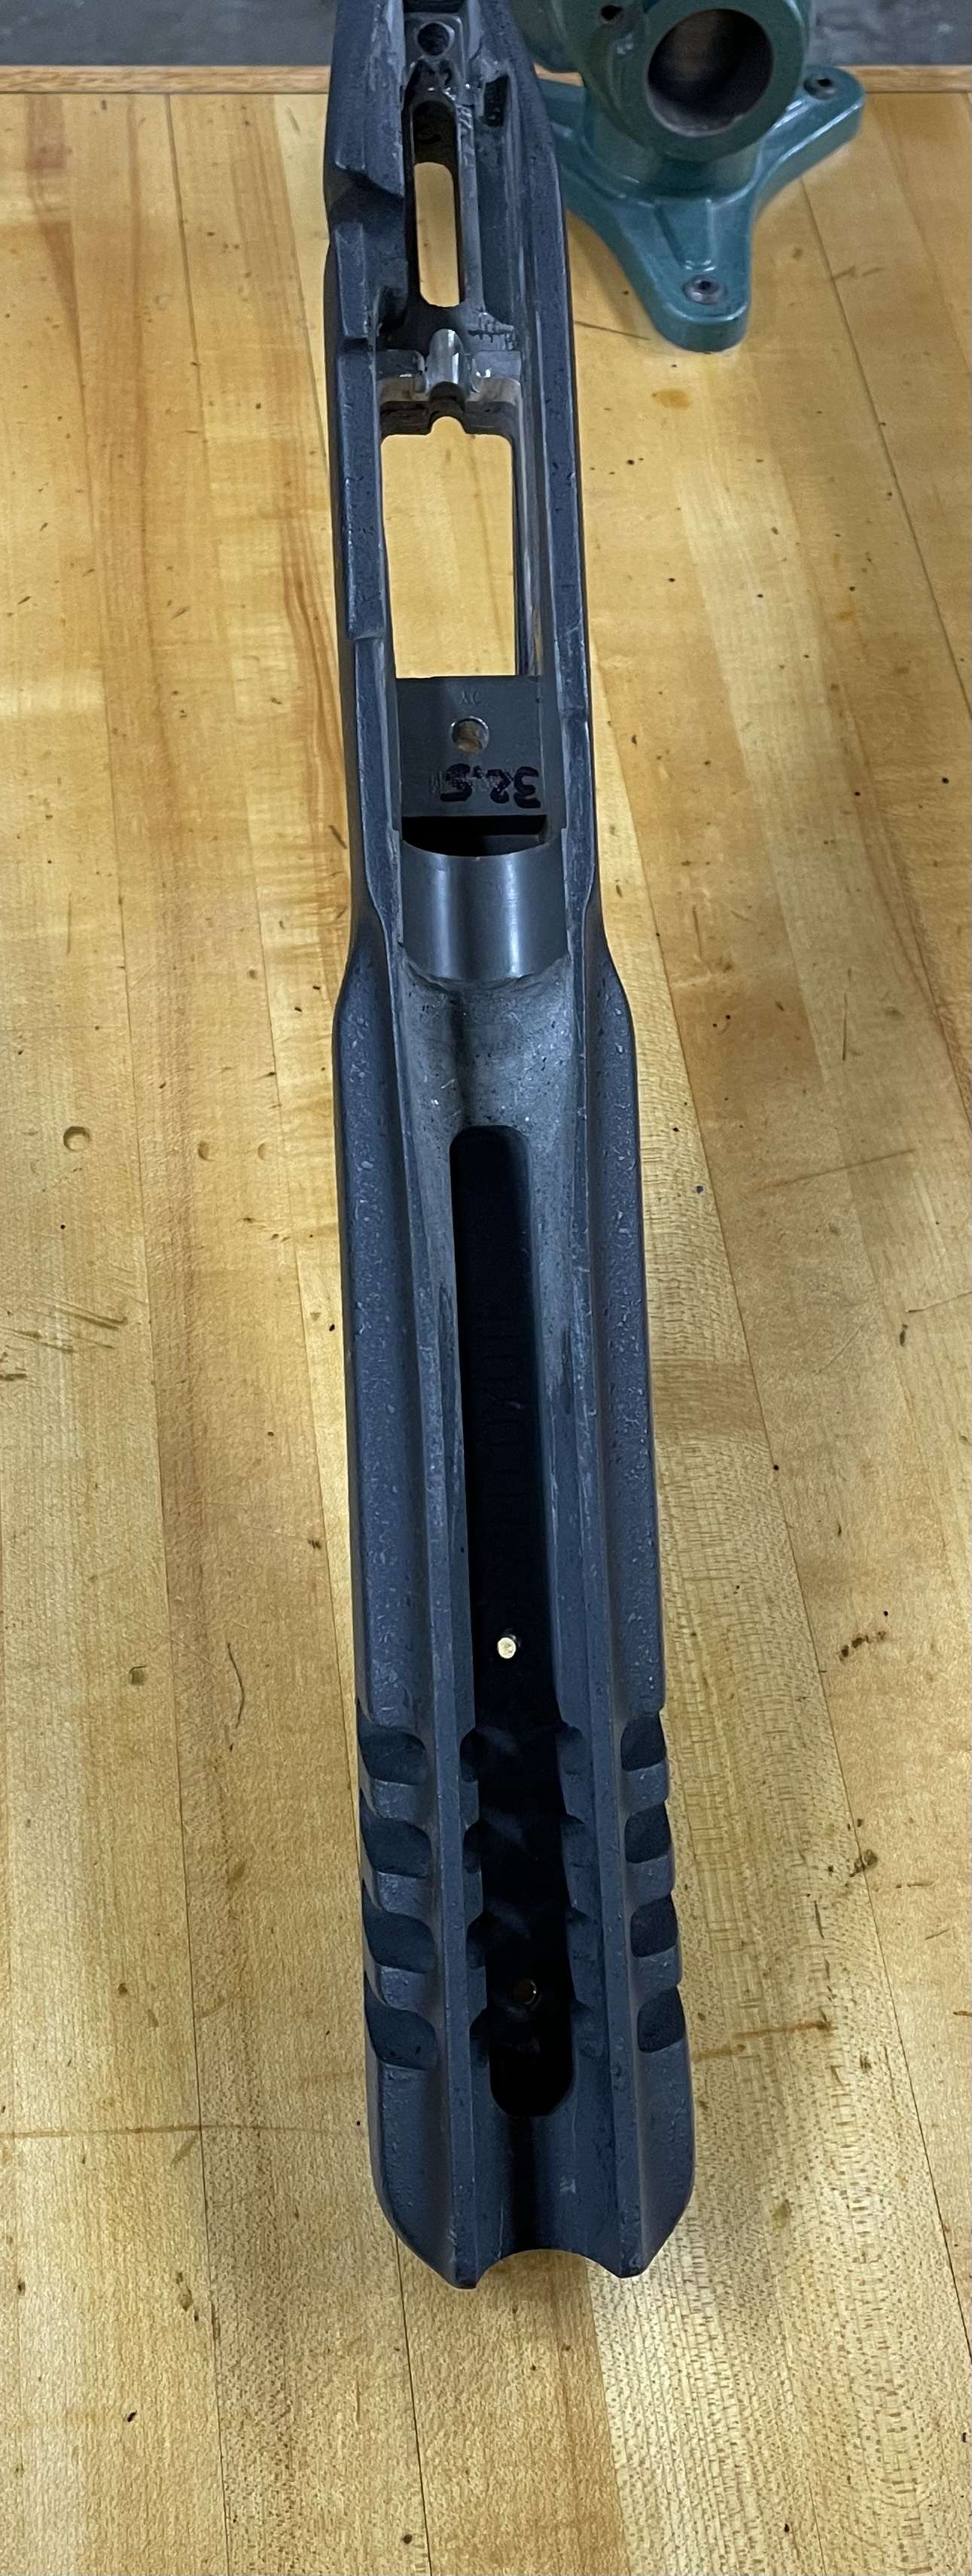
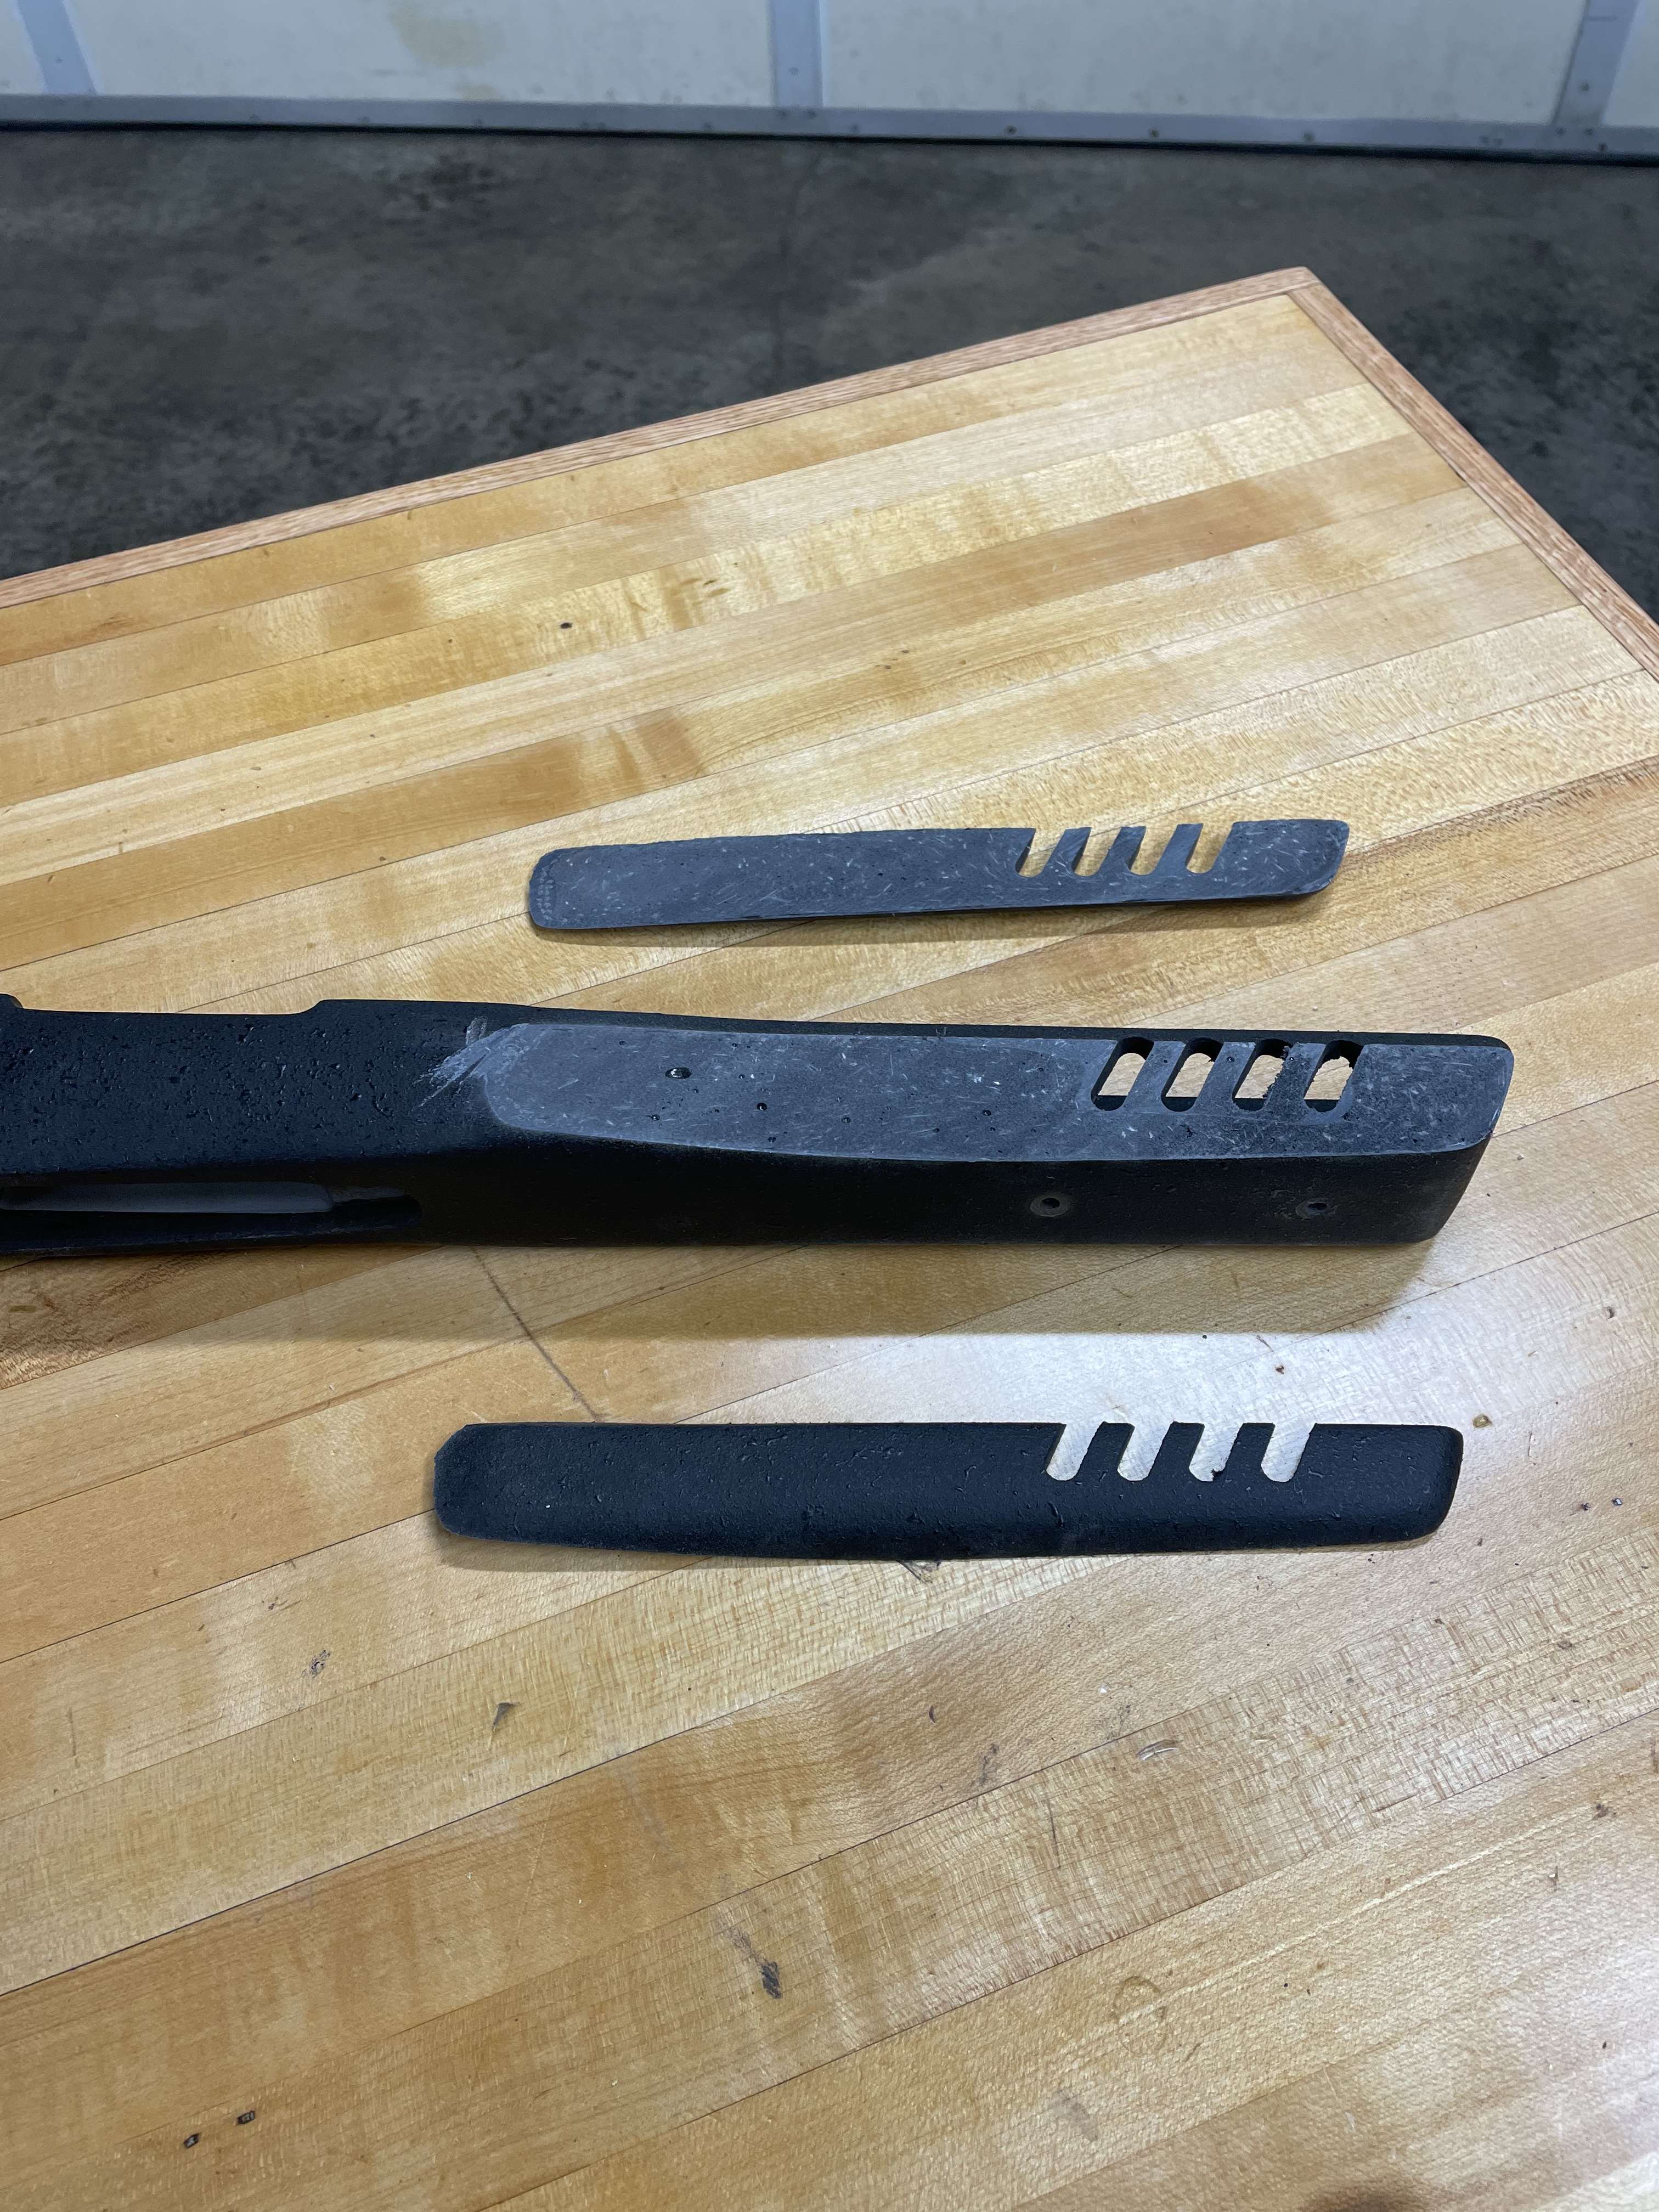
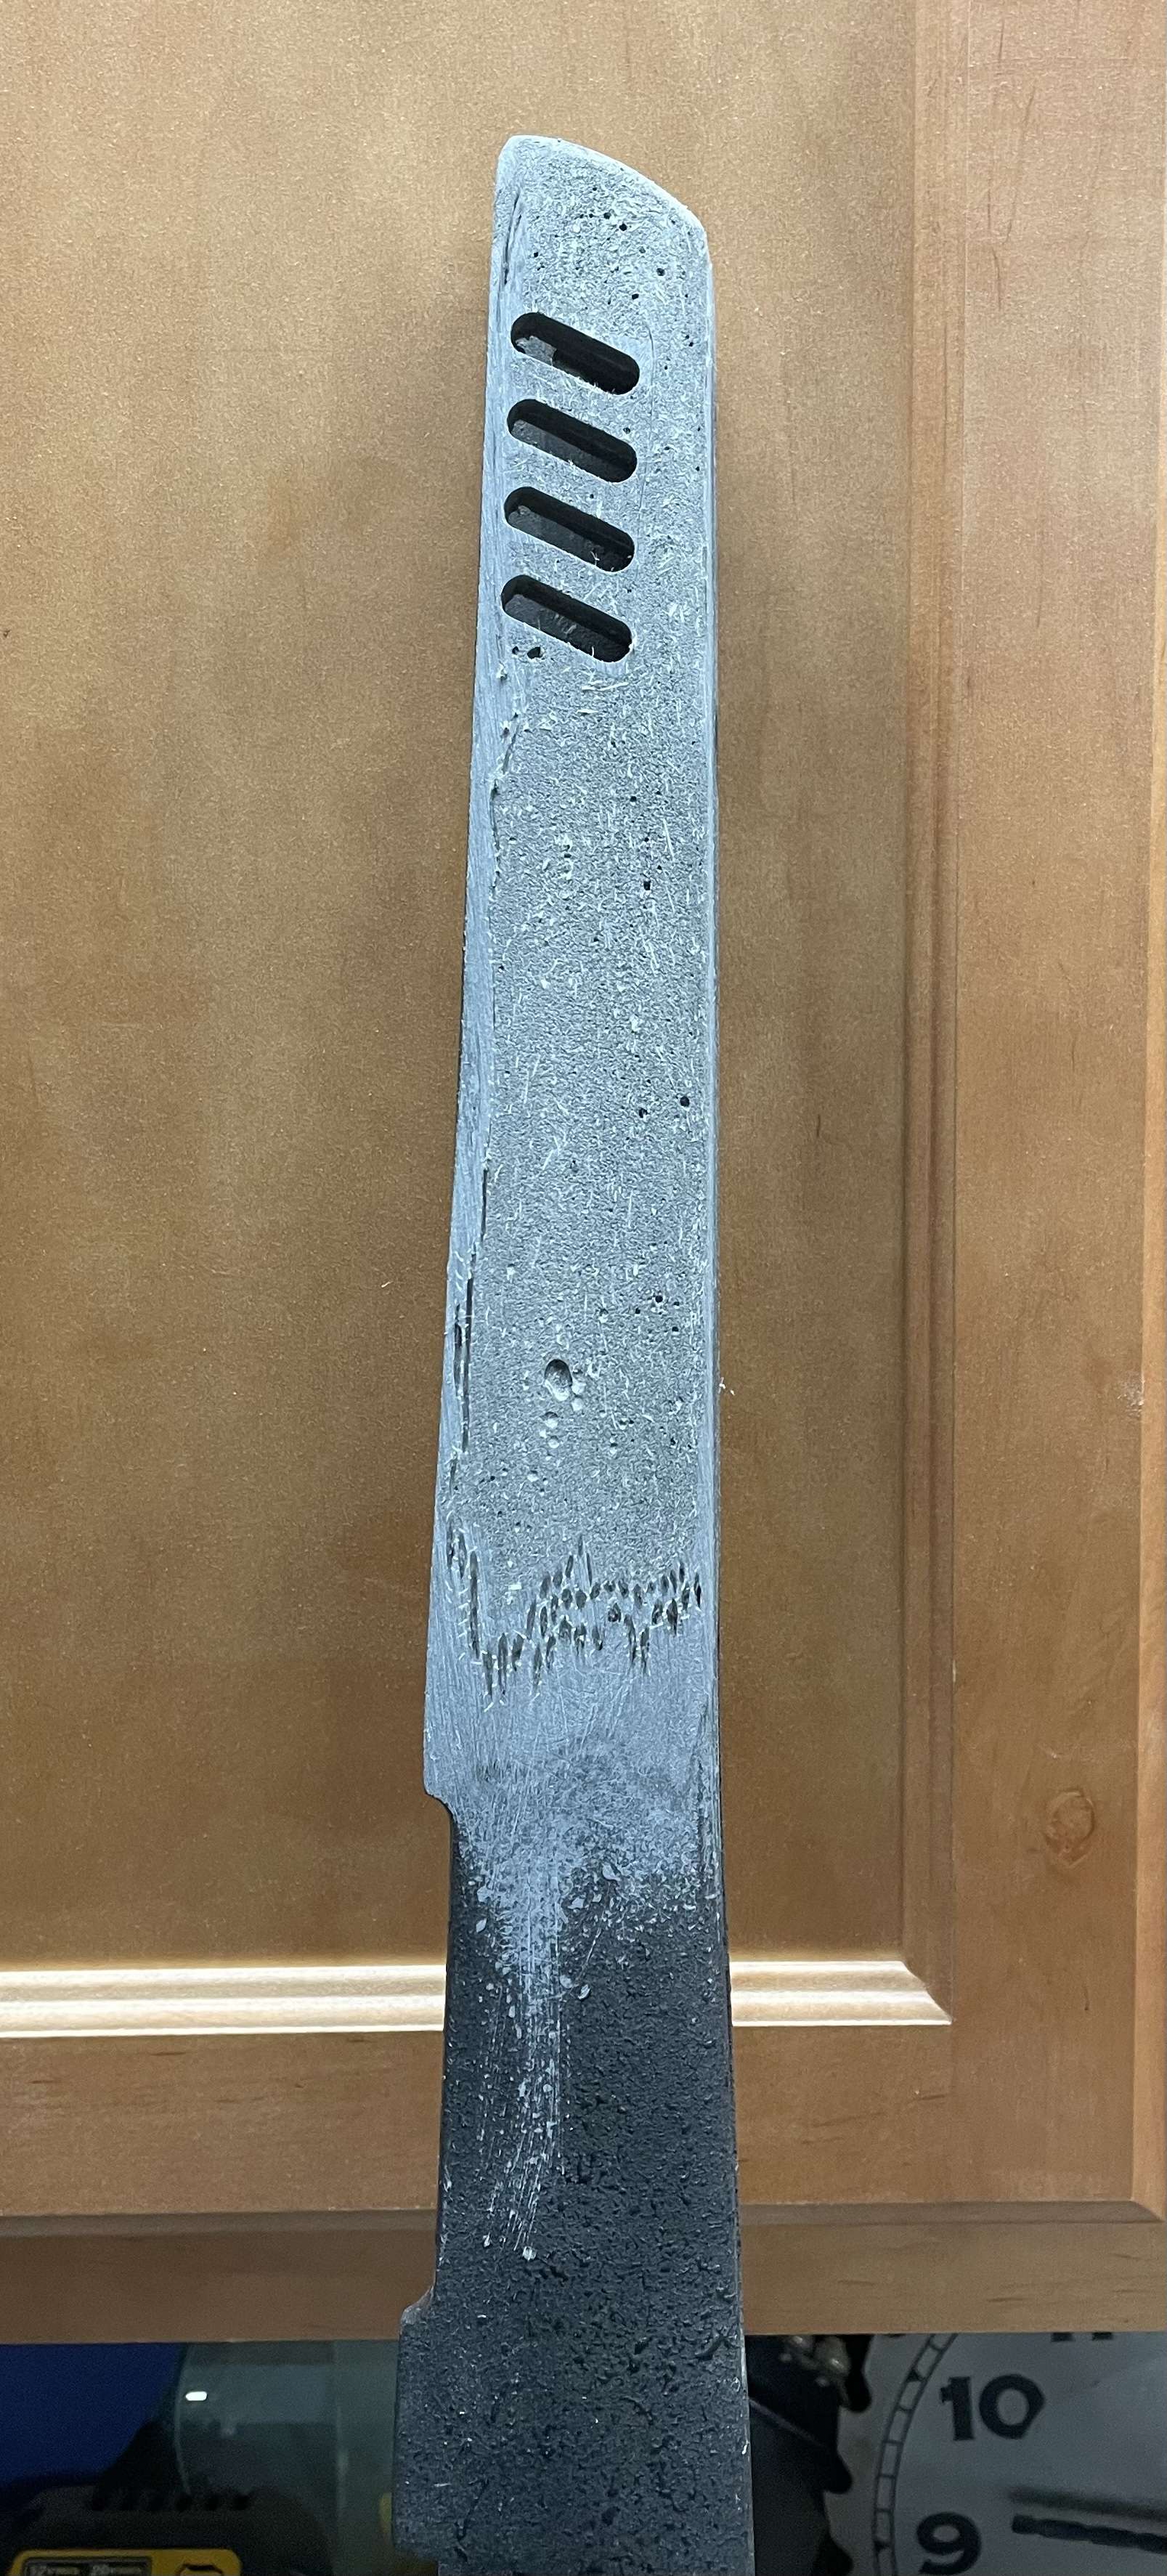
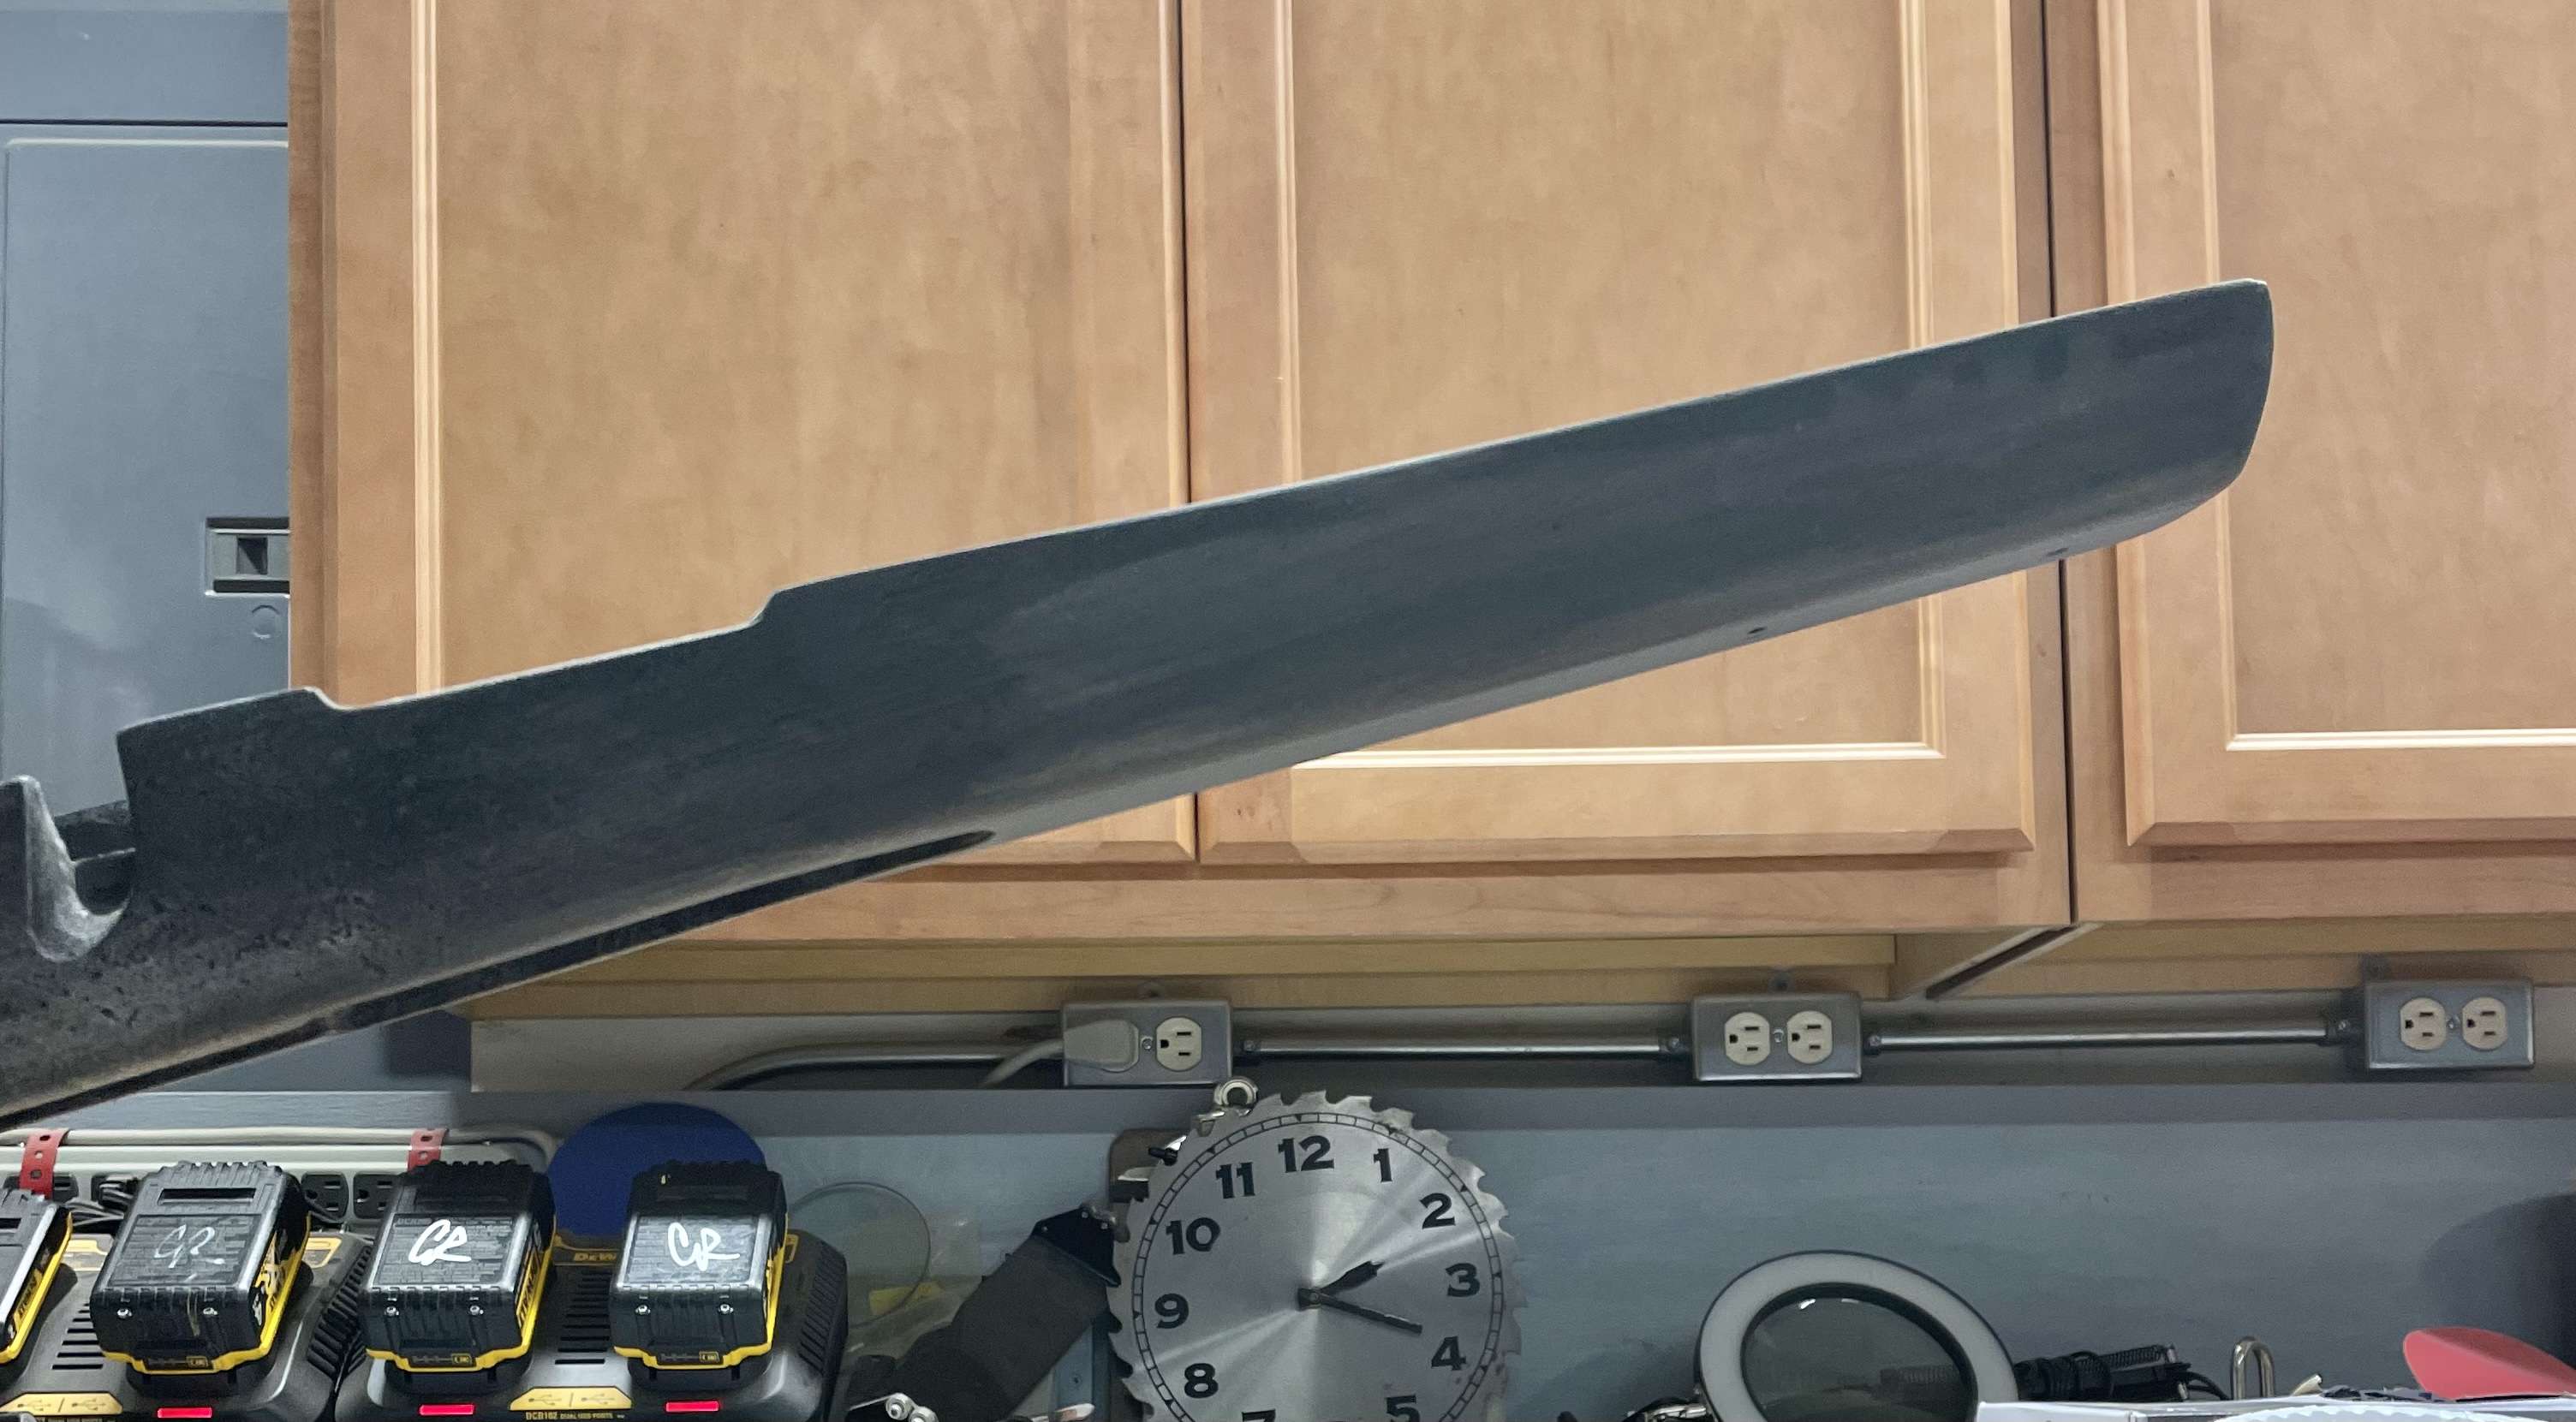
It started as a 0% ar-15 forging both upper and lower and has a 3 lug bolt action single shot inside. The fake magazine comes out and holds 4 extra rounds.
 
All masked up. Nice and colorful, lol. I use the 3M yellow electrical tape for the parts I’ll be sanding or filing near. It is strong, and will catch low grit paper and file teeth and pull away instead of letting it cut through like regular masking tape.
B4D29C91-E48D-4FC1-ADF0-0A3FE8471F26.jpeg

E3594BAC-E198-4087-8826-7BF1D84E4E26.jpeg


Tools oiled and time to watch some TV.
5D32527B-6BCE-4904-8CCF-EC087F688E9F.jpeg
 
Gorgeous. It's inspired me to try my hand at making a set for my dad's new revolver. I'll post progress when I start.
 
  • Like
Reactions: 458win
Holy shit! They are worth more than the pistol.
These are a one off and done entirely with hand tools. Coping saw, rasps, files, a block plane, and sand paper.

When I was making grips regularly; between the bandsaw, belt sander, and oscillating spindle sander, I could go from a blank to almost ready for finishing in about 6 hours.
 
Had to make a file/rasp stand. Tired of them hiding in a drawer, and when all on the bench they hog up the bench top:

B13862D4-B6C7-4E53-9590-FC6738523FAD.jpeg

Much better:
51107DAC-9B7D-4704-B940-91DF6F2808D2.jpeg
32A8A333-6551-45B0-A024-DF744AB09FAD.jpeg

I made it two sided so it has files on one side and Rasps on the other. Thought about making it a lazy Susan, but didn’t feel like putting in the effort:
E72C3C8D-CA1F-4F01-8D40-838D57121BE7.jpeg

Made from scrap from old projects. Will get two coats of blue milk paint and a water based polyurethane. This is so much better!! Throw the rack on the bench for projects and then put that shit away!
 
I have some exceptional tiger rosewood I've been contemplating making some grip panels out of.
Only problem is it is so incredibly hard to work.....I've cut 1095 that is easier to manipulate with a file or grinder.
Yes it's the now banned Brazilian stuff.
I did a custom floor of it up in Couere d' laine (sp?) Idaho years and years ago and being no dummy I saved every piece of short worth keeping.
Material cost for that 10'x14' floor was right at 130k but the lady insisted.
The thought of stepping on that stuff still makes me cringe.
I have made a few knife scales of it and good lawd it's beautiful when it's a 3d shape, the 2d shape of a floor didn't do it justice.
In case anyone wants serious high end wood (and where I got this stuff) is Austin Hardwoods in SoCal, they have every kind of hardwood you've never heard of. (no, I have nothing to do with them, it's in case someone is looking for the good or rare stuff).
I'll try and get some pics up. I have probably 10-12 foot linear of 1x4 size.
No, I do not want to know what it would cost these days, it would make me not want to make grips of it.
 
  • Wow
Reactions: LeftyJason
I have some exceptional tiger rosewood I've been contemplating making some grip panels out of.
Only problem is it is so incredibly hard to work.....I've cut 1095 that is easier to manipulate with a file or grinder.
Yes it's the now banned Brazilian stuff.
I did a custom floor of it up in Couere d' laine (sp?) Idaho years and years ago and being no dummy I saved every piece of short worth keeping.
Material cost for that 10'x14' floor was right at 130k but the lady insisted.
The thought of stepping on that stuff still makes me cringe.
I have made a few knife scales of it and good lawd it's beautiful when it's a 3d shape, the 2d shape of a floor didn't do it justice.
In case anyone wants serious high end wood (and where I got this stuff) is Austin Hardwoods in SoCal, they have every kind of hardwood you've never heard of. (no, I have nothing to do with them, it's in case someone is looking for the good or rare stuff).
I'll try and get some pics up. I have probably 10-12 foot linear of 1x4 size.
No, I do not want to know what it would cost these days, it would make me not want to make grips of it.
Rotary rasps in an el cheapo drill press. Use the cheapo drill press, because the side load will fuck up a drill press, lol.


Back when I made grips regularly, about twice a year I’d get a request to make single action grips from desert ironwood. Beautiful wood, but as you said, about like working metal.

Any who, cut as close to your pencil line as possible, contour with the rotary rasps. I also used an oscillating spindle sander with 80 grit drums, and a disk sander with 80 grip for initial shaping and contouring.

The oily wood loads the paper fast, keep a cleaning block handy.

Did I mention get as close to your pencil lines, and do as much contouring as possible on the power tools? Yeah, you aren’t moving much wood once you get to 120 grit paper, lol.

Here is a set of dark desert ironwood I’m making for someone’s Ruger New Vaquero right now.

2B21A9C9-0DD5-4B3D-AA33-A084E34DABD0.jpeg

Finishing is really just polishing with the hard oily woods. If you WANT to put an oil coat on, wipe with acetone and as soon as it flashes off apply the oil.

Tips for working with woods like this:
1) Ensure all cutting tools are SHARP!! Dull tools will cause the wood to literally chip like porcelain.
2) WATCH GRAIN DIRECTION! You should be doin it anyway, but woods like this will break out bad.
3) Easy on the pressure on the power tools. You can burn the wood really quick.
4) Wear a Kn95 mask or respirator.
5) Careful with the low grits when you get close, as these woods are a mofo to get 80 grit scratches out of, lol.
6) Boggs can sharpen files, lol.
 
Last edited:
  • Like
Reactions: Ravenworks
Rotary rasps in an el cheapo drill press. Use the cheapo drill press, because the side load will fuck up a drill press, lol.


Back when I made grips regularly, about twice a year I’d get a request to make single action grips from desert ironwood. Beautiful wood, but as you said, about like working metal.

Any who, cut as close to your pencil line as possible, contour with the rotary rasps. I also used an oscillating spindle sander with 80 grit drums, and a disk sander with 80 grip for initial shaping and contouring.

The oily wood loads the paper fast, keep a cleaning block handy.

Did I mention get as close to your pencil lines, and do as much contouring as possible on the power tools? Yeah, you aren’t moving much wood once you get to 120 grit paper, lol.

Here is a set of dark desert ironwood I’m making for someone’s Ruger New Vaquero right now.

View attachment 7817023

Finishing is really just polishing with the hard oily woods. If you WANT to put an oil coat on, wipe with acetone and as soon as it flashes off apply the oil.
No, I've worked plenty of this wood and know how it likes to play.
It will wear out a carbide burr real quick. I hate to admit it, but I've found the best way to rough shape is with a bench grinder and about a 200-300 grit wheel.
Yea, not kidding.
It's much tougher then ironwood, last winter when I snowbirded in Az, I used ironwood in my woodstove/heater. A cordless sawsall with a carbide tipped blade will cut ironwood easily (well, relatively easily). That same setup will hardly touch this rosewood.
I also have a bunch of purpleheart, and although tough, it's easier to cut than this stuff.
If you've used cocobolo before....I would say it's about the same in toughness give or take a tad.
Like I said, I'll get some pics up....when my back's feeling good enough to go digging :/
Interesting. Olneya Tesota (Desert Ironwood) has a Janka hardness of 3,260. Cocobolo is in the same neighborhood.

Granadillo is close too, but multiple places have it below 3,000.
 
I'm certain you understand how those hardness tests work. It has little to do with how the stuff cuts or grinds.
The best test I know is to use a exacto knife with a curved blade and make a cut, if the cut spot is shiny like glass you're in for a world of hurt shaping the wood.
Ebony, Purpleheart, Bubinga, Rosewood, Cocobolo, and Kingswood are all a real bitch. Interestingly, none of those woods actually need a finish...just sand out and then buff with 600 or 1000 grit sandpaper and they will be fine, nothing else required.
But....some old fashioned crystalized shellac and they really come to life.
Old trick, does the wood sink if put into water ? I *think* purpleheart might float, but the others sink.
Ironwood floats. Try it.
 
  • Love
Reactions: SmolPP
I'm certain you understand how those hardness tests work. It has little to do with how the stuff cuts or grinds.
The best test I know is to use a exacto knife with a curved blade and make a cut, if the cut spot is shiny like glass you're in for a world of hurt shaping the wood.
Ebony, Purpleheart, Bubinga, Rosewood, Cocobolo, and Kingswood are all a real bitch. Interestingly, none of those woods actually need a finish...just sand out and then buff with 600 or 1000 grit sandpaper and they will be fine, nothing else required.
But....some old fashioned crystalized shellac and they really come to life.
Old trick, does the wood sink if put into water ? I *think* purpleheart might float, but the others sink.
Ironwood floats. Try it.
A71A08AF-683D-4AAE-97A9-2C0197C349E9.jpeg
5C8D19EB-7B21-4771-A67E-FC3AAF6078DC.jpeg

87D9209D-1C6C-4B78-93F6-223AD4F881DB.jpeg
 
  • Like
Reactions: Ravenworks
Huh.
Most of it I've tried floats, but then again I scavenged it in the Az desert and it was probably less than 2% moisture content due to it being in...well, the desert.
I know there's about 10-15 different ironwoods too...soo...
Northerners call Osage Orange 'ironwood' and also (trying to remember, forgive if mistaken) henge, or wenge ?
Anywho, those are some nice burl pieces there and should look real nice no matter what you do with them.
 
Finally after 5 coats of thinned oil the finish is building. This maple was THIRSTY!!

On the 5th coat the coat actually leveled out on 100% of the panels. From here I’ll change the ratio of thinner: oil to favor the oil side.

The chatoyance is coming out and it shimmers like tiger’s eye in the sun
.3B71C108-6A0C-4F50-9C0B-BCC204D1B601.jpeg
0E935D21-21C2-4A52-AC93-EB6DA9B20CE7.jpeg
0ABAABDD-DF91-48CC-95BB-2913EB8584DC.jpeg
 
Last edited:
So one of the things I wanted on my MRAD was a wood PSG-1 style grip. Unfortunately, noone is making one specifically for the MRAD. So found the next best thing, which is an AR-grip made by Karl Nill in Germany. Stunning walnut checkered PSG-style grip.

Comes fully-inletted and ready to fit to an AR-15, but the Barrett trigger guard rear is larger and so the grip won't quite fit on.


mrad grip 1.jpg


Here is the grip 'from the factory' and you can see that it won't quite slide on. The ears need to be opened up slightly as well as cut back. And the area around the middle finger finger groove needs to be relieved just a bit.
mrad grip 2.jpg


First got into the ears with a X-acto blade and shaved back some wood. Followed by some file work. This gets the grip sliding further on.
mrad grip 3.jpg


Once the ears are relieved, then this ledge/ridge has to get removed. Used an x-acto saw and blade again.
mrad grip 4.jpg


Final fitting was sliding it on and off looking for shiny spots where it was rubbing and carefully shaving those down. So grip has no looseness, but also not so tight that it will split.
mrad grip 5.jpg


Last step was to re-contour the ears so they don't extend inside the trigger guard. This was just scribing inside and then cutting/filing to the right shape. A couple of drops of oil finish sunk into the wood nicely and the factory finish is matched perfectly.
mrad grip 6.jpg


The palm rest fitted up and adjusted. Nice and comfy! Grip fits like it was made for me, but I actually ordered off-the shelf. They will make a grip for you based on a hand-tracing if you want.
mrad grip 7.jpg


Finished MRAD... ready for spring. Probably be able to shoot in a couple of weeks. Right now it's just miserable out.
mrad grip 8.jpg


Anyway, a simple modification of an off-the-shelf grip for anyone who wants to give it a shot. It's possible that someone will start making an exact fit for the MRAD. But if you don't want to wait, the woodworking on this was dead simple. Less than an hour... and careful X-acto work. Anyone can do this conversion easily.

Oh and here is the link to Nill Griffe.... https://www.nill-griffe.com/Pistol_Grips_30.html

Cheers,

Sirhr
 
Last edited:
So got this knife as a birthday gift a few years ago. It's a gorgeous Damascus blade. Had horn scales, however, and they don't like dry weather... and our winters are beyond dry. The scales almost immediately started cracking. So decided to strip them off and put on new scales that will hold up better.

purd knife 1.jpg


This was an original scale. Drilled out. You can see red liners (which were nice, but I left them off on the restoration. You can see all the cracks on the scale. Only one side cracked.

purd knife 2.jpg


The new scales are camel bone. Never worked with it before, but it is really dense and machines and shapes great! Going to use German Silver pins and run a new copper tube in it for a dummy cord. It originally had much smaller brass pins. Interestingly, for such a 'fancy' knife, the damascus in the hilt was very soft. The whole knife is really soft compared to most. But I can get a nice edge on it.

purd knife 3.jpg


Scales glued and pinned. I'll let it cure overnight and then shape and polish tomorrow. It will be interesting how the 'marrow' areas that will be exposed at the end will polish. The marrow area in camel bone is incredibly dense!

Be like having a new knife when I'm done! But can't let a special gift go to waste!

Cheers,

Sirhr
 
  • Like
Reactions: scasa
So got this knife as a birthday gift a few years ago. It's a gorgeous Damascus blade. Had horn scales, however, and they don't like dry weather... and our winters are beyond dry. The scales almost immediately started cracking. So decided to strip them off and put on new scales that will hold up better.

View attachment 7831058

This was an original scale. Drilled out. You can see red liners (which were nice, but I left them off on the restoration. You can see all the cracks on the scale. Only one side cracked.

View attachment 7831059

The new scales are camel bone. Never worked with it before, but it is really dense and machines and shapes great! Going to use German Silver pins and run a new copper tube in it for a dummy cord. It originally had much smaller brass pins. Interestingly, for such a 'fancy' knife, the damascus in the hilt was very soft. The whole knife is really soft compared to most. But I can get a nice edge on it.

View attachment 7831060

Scales glued and pinned. I'll let it cure overnight and then shape and polish tomorrow. It will be interesting how the 'marrow' areas that will be exposed at the end will polish. The marrow area in camel bone is incredibly dense!

Be like having a new knife when I'm done! But can't let a special gift go to waste!

Cheers,

Sirhr
Can’t wait to see the finished product!

I need to finish those grips I started, but contrary to my plan to focus on grips this year, I’m currently knuckles deep in building a hall bench and will follow that with another woodworking bench, lol.
 
  • Like
Reactions: sirhrmechanic
These are some 1911 grips I did about 10 years ago for a trade school project. I cnc milled the fixture and 3 axis cnc milled the grips. The wood is scrap from my other exotic wood working business. The first ones are Honduran rosewood burl. The others are Ebony, Bubinga, resin impregnated blue curly maple, and a Rosewood I don't remember the exact species of.


1648080111383.jpeg

1648080131373.jpeg

1648080152113.jpeg

1648080177522.jpeg
 
I see that Ka-Bar came out with new versions of the EK knife - shorter blade, more useful than the 7 inch swords....

7203427f-d7c6-972e-8fbb-3a345d7b85cd.jpg


The plastic handles on these things suck but the steel makes good utility blades. Looks like they are coating these now rather than parkerizing - gay.

Maybe I should get this shorty and find some use for my coping saw and some sweet maple blanks I was gifted....


This guy needs a little brother.....

image-jpg.7615543


but how many knives must one dude own?
That’s a great idea!!
 
Just do like the original E.K. Knives. Grab any piece of scrap on the shop floor, cut it to sort of the same length, and attach!
I see that Ka-Bar came out with new versions of the EK knife - shorter blade, more useful than the 7 inch swords....

7203427f-d7c6-972e-8fbb-3a345d7b85cd.jpg


The plastic handles on these things suck but the steel makes good utility blades. Looks like they are coating these now rather than parkerizing - gay.

Maybe I should get this shorty and find some use for my coping saw and some sweet maple blanks I was gifted....


This guy needs a little brother.....

image-jpg.7615543


but how many knives must one dude own?
 
Cutting rough stock for grip blanks. Only got one good book match set so the rest I’ll put back on the bandsaw and make veneer. These are all 5/8 thick:1387FB3A-C67C-4A41-A548-A34D640225B2.jpeg
0F42787C-C9B1-404E-82DC-7293F85D4AB0.jpeg

More walnut I have to cut into blanks. Real pretty stuff:
C698CE11-345C-43EA-962C-3E7624801A8D.jpeg
E85D09A5-E45B-4786-84FE-8891608A42C9.jpeg
E90D6C39-C575-4202-A05E-2AEC1D6762B9.jpeg
ED7DD179-2062-47BF-A6EE-38BFA3868C25.jpeg
A8759185-1CC0-41B0-B96C-DD0C2C72B399.jpeg96C30911-8B3D-4367-BE5E-CCD426109881.jpeg
AA964A25-7B86-41DB-8710-09E0D0EFED61.jpeg48B6E4E4-B596-417B-834A-130F03B08651.jpeg

@pmclaine needs some of this hot wood on his knife.
 
Last edited:
That is some NICE stuff. I'm making some new handles for a bro of mine's knife. Actually, it was his dad's many years ago. When it's done, it'll be in a shadow-box to hang on the wall.

They were 'maple' slabs, but unfortunately someone ran it through the dishwasher FAR too many times. I'm putting micarta scales on it, with brass rivets.
 
Winchester for whatever reason used this wide ass forend with a sporter butt on their Coyote Lite rifle series. Like the rifles, hated the stocks. So since they weren’t gonna see any use in factory form it was time to try a mod on them.

Factory stock Bell and Carlson…
n2JKM0.jpg

pvnnvw.jpg

HXDpBL.jpg


Beavertail removed.
DRPFvZ.jpg


Sanded and shaped.
NJm6eI.jpg

3thCU8.jpg


Sealed, filled and primed.
Pc7zVs.jpg

7dGt7C.jpg

I know some are thinking that the integrity of the stock was ruined when the shell was cut. These stocks have an aluminum rail that runs all the way up the front end. They don’t flex at all.
FWIW, superglue gel seals the raw fiberglass ends beautifully. The filler used is a glass fiber infused body filler.

Gave both stocks a coat of bedliner then they got a base coat of Brownells Alumahyde Coyote. The top stock was then sponge painted with od green and flat black Aumahyde.
The bottom stock got the coyote base then od green and dark earth AH….

zH2tnM.jpg

3YUZHR.jpg
 
Last edited:
So doing some fun work on a ‘pipe tomahawk including silver wire work for the first time. Also more poured pewter.

So far so good! Hope to finish tomorrow. Started with some wire work. Made the 'wire' myself by running .050" german silver round wire through a roller a couple of times. Then made tools. Went slick... just like the books said it would! And a YouTube Video.

A350B0C5-DBC3-45A9-8DC4-108F96D2DA42.jpeg


Also cut out for some poured pewter bands and inlays. That is a bit of ebony dowel in the center of the pewter. To match the 'war club' I made last year.

C7713293-D8D0-4DD6-9DC5-FF606072704F.jpeg


Pewter poured. Note it is so low-temp melting point that my 'mold' dams are made from card stock and masking tape.

A768EC56-0C5E-494E-A66A-5FCC4DE29B57.jpeg


Here is the whole thing ready for final sanding and finishing.

B09197CF-8A39-4A3E-BD0D-D43EE3A41E92.jpeg


And the details of the wire work after cutting it back with a file and sandpaper.

98D2245B-70FF-4642-B1F5-6A4FB1F3054B.jpeg


And the two 'techniques' of poured pewter and wire together.

ED0F1244-FD9B-40BC-9D46-59D2918E3BBE.jpeg


Tomorrow I'll turn up an end plug, probably out of some scrap ivory. And finish the head with some filing, polishing and maybe even a bit of inlay on the head.

Basically a replica of one that George Washington gave as a presentation piece. But with some of my own flourishes. The 'shield' will have a Federal Eagle engraved on it. And may get a GW initials engraved on the head. Tribute that it is!

Cheers,

Sirhr
 
Last edited:
Going to run the macuahuitl through the planer. It's 1 1/2" thick right now, and I'm going to take it down to 1 1/4". It's such an unbalanced, forward heavy weapon. There's really no way to shift the balance point on it. Never seen one in real life so flying by the seat of my pants on this one.

Shaping the handle:
DC20FD9E-74F3-4350-9AB8-71D98A42409E.jpeg
 
Last edited: