Howdy All,
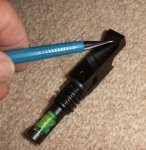
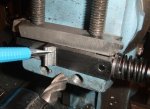
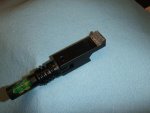
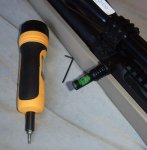
I have been hearing a lot lately about how important it is to have the whole rifle/scope rig level when trying to shoot accurately and this is something I have pretty much known since I started shooting about 50 years ago and I tend to naturally keep everything pretty darn level. BUT...so many of the folks that are good shots in the matches I shoot in have been speaking highly of levels that are mounted on the scope/rail/rifle rig somehow and that how having a level has added a few points to their scores. Seems to me to be just more monkey business stuff to look at when trying to shoot, but I thought I'd give it a try. First off, I wanted to try the Vortex level that is mounted to the scope and also the Wheeler one that is mounted to the rail so I could see which works best for me for whatever reasons I might discover. Rifle is a Savage .308 in a Chaote stock, rail is a Blackhawk 20 MOA Extended multi slot base, Rings are Weaver Pn 48359 Tactical 1" HIGH (.400" from top of rail to bottom of the "saddle" where the bottom of the scope sits) and the scope is a 1" tube Leupold. So...I started with the Wheeler Anti Cant device that attaches to my Picatinny rail and immediately discovered that the level interfered with the bottom of the scope and, therefore, could NOT be leveled as in the directions that came with it. I looked carefully at what the problem was and could see that the angled part of the piece ( the part the set screw goes against the outer side of) that crosses the rail was hitting the scope, causing it to be impossible to raise the right end with the set screw far enough to get the bubble to indicate level when the scope was level. I did a little TLAR (that looks about right) style measuring and headed out to the shop to machine off some material to make it work and decided to take some pictures along the way. The pics (you can click on them to make them bigger) are posted below and the end result was enough clearance to be able to get the bubble to indicate level when the scope was level. I just set the mount up in my milling attachment and grabbed the handiest mill, which I mounted in a collet. Not having the "correct" mill handy, I had to make an extra cut or two to get the job done. I would think that anyone that is handy with a file could do the same job with a file and a vise....but anyway here goes: first picture the pencil indicates where material will be removed; second picture shows setup and cuts being made in milling device on lathe; third pic shows how it looks after cuts are made and just before installation; fourth pic shows it all installed and bubble showing level.
Now it works right and I can try it out to see if I like it or not. It does fold back in against the rail sort of and I think it still sticks out too much, but we will see. Will also try out the Vortex one when I get it!


