• Watch Out for Scammers!

    We've now added a color code for all accounts. Orange accounts are new members, Blue are full members, and Green are Supporters. If you get a message about a sale from an orange account, make sure you pay attention before sending any money!

New from MDT: Unimount

MDT_OFFICIAL

Official Account of Modular Driven Technologies
Supporter
Commercial Supporter
Full Member
Minuteman
Mar 20, 2019
895
1,181
mdttac.com
Hello Everyone,

We've been hard at work this year at MDT, and we wanted to show you our latest release! Based on shooter feedback, we developed our one-piece Unimount! Heres a list of highlights for the mount and we've also included a link to a video from one of our team MDT shooters doing his best to try and make it shift. The Unimount is in stock and ready to ship just in time for summer shooting season!

Torture test video.

  • Designed for ultimate precision and strength
  • 50mm (1.968”) of lateral contact with scope tube
  • 134mm (5.286”) of lateral contact with mounting rail
  • Bottom rail interface is machined at the same time as the scope clamp interface, guaranteeing all rings are square and parallel
  • CMM checked to 1.5 millionths of an inch precision
  • Machined from Billet 6061-T6 Aluminum
  • Extra thick, single-piece clamp system will never bend, fatigue, or become loose with use
  • Integral recoil lug built into underside interface to ensure ultimate repeatability and strength under recoil
  • Uses a stepped base-to-cap interface allowing the fasteners on one side to be tightened before making final scope alignment adjustments
  • Four cross bolts machined to interface with Picatinny lugs and provide extreme clamping force
  • 0 MOA cant built into the mount for ambidextrous use
 
Thanks. I’ll keep my eyes open. Good luck with the new product. If it’s anything like the rest of your products I own, it’s going to be great.
 
I was seconds away from pulling the trigger on a Spuhr (again...) when I realized MDT just released this mount. I ordered one and I'm happy it will fill my need for a lot less money! The design seems really good, like everything from MDT. An integrated bubble level would have been great though. I'll report back after a bit of use.
 
I was seconds away from pulling the trigger on a Spuhr (again...) when I realized MDT just released this mount. I ordered one and I'm happy it will fill my need for a lot less money! The design seems really good, like everything from MDT. An integrated bubble level would have been great though. I'll report back after a bit of use.

Thank you for your trust in our product and brand! Regarding the bubble level, we do plan on coming out with one that will be attached to the mount in the future.
 
Received my new MDT 34MM 1.18" Low Unimount and got it installed yesterday. Put my Vortex 4.5-27x56 Razor Gen2 in it for testing. I had my Razor mounted on my 220TB/Origin/MDT ACC setup in Vortex 34MM PMR 1.0" rings. I removed the rings and installed the new MDT Unimount on the Origin as per the included instructions. Set the Unimount on the scope base and hand tighten cross bolts. Remove caps from Unimount and set scope into mount. Adjust Unimount position on scope base and scope position in the mount until you have the scope where you want it for proper eye relief. Now torque the cross bolt nuts to 65in lb in the order noted. Each nut is labeled 1 through 4. I torqued the nuts to 65in lbs using my Fat Wrench in the shop.

I installed the ring caps as per the instructions torquing to 15in lbs with my Fat Wrench. The scope was already zeroed on this rifle so I knew it should be close and would just need to be fine tuned. On the below target, I marked the 1st, 2nd and third shots when zeroing. I only had to adjust zero 2 times before I was good with it.

After firing shots 3 and 4, I loosened the 4 cross bolt nuts and completely removed the Unimount/optic from the rifle as shown below then put it back on the Origin, tightened the nuts by hand then torqued them again to 65in lbs this time using the 65in lb torque limiter from my Fix-It Sticks kit. I then fired shots 5, 6, & 7 to complete the 5 shot group. That group measured 0.291" @ 100yds. Not too shabby. It was raining and gusting wind off and on the entire time I was testing. Pouring and windy for 15min, then sunny, 91 and 89% humidity for 30min then rain and wind all over again. It was just lovely outside. lolol. I feel like this is the conditions every time I go to the range the past 2 months..

After shot 7, which completed the first 5 shot group after zero, I removed the MDT Unimount/scope from the Origin again. I put the scope back on the rifle and torqued the nuts to 65in lb with my Fix-It Stick limiter. I shot 2 more shots, then remove the Unimount, then re-installed it again the same way I did before and shot the last 3 shots of this second 5 shot group. POI was the same for both 5 shot groups and all the shots fell within the group. The second group was bigger than the first but at that point, with the temps and humidity, the barrel and can were smoking hot and weather was off and on nasty. At times it was pouring making the orange dot not as clear to aim at.

My final conclusion, the MDT Unimount is rock solid and the zero is repeatable when removing and re-installing every time. Big thank you to @MDT_OFFICIAL for sending me one of these to test. It is built like a tank, super easy to install and most importantly it does exactly what its advertised to do at a very competitive price point. Another great product by MDT!


Last edited:
@padom did you torqued one side of the ring caps before leveling the scope? I read on MDT site that can torque one side, level the scope, then torque the other side. Just wondering if it's actually practical to do so.
 
@padom did you torqued one side of the ring caps before leveling the scope? I read on MDT site that can torque one side, level the scope, then torque the other side. Just wondering if it's actually practical to do so.

Yep, that's exactly how I installed the scope which is in the installation directions.
 
Way too heavy and no bubble level built in. If you’re going to try and compete with Spuhr then you actually have to compete with them by matching features, weight options etc.
Thank you for your feedback! Our Unimount has wider base by 3/4", four evenly spaced cross bolts, six screw caps, and 0 gap mounting system. Which all leads to less to no point of impact shift even when exposed to significant side trauma. Check out the video above!
 
I have had great experiences with MDT products so far, and I think it's great to see a new entry in the unmount market. However, at only $80 cheaper than Spuhr, with no can't options and no bubble level, there is no way I'd consider this.
 
I have had great experiences with MDT products so far, and I think it's great to see a new entry in the unmount market. However, at only $80 cheaper than Spuhr, with no can't options and no bubble level, there is no way I'd consider this.
Thank you for your feedback. It is a new product for us so we will see what the future holds for it! Here is a quick rundown of some of things that we offer on our mount! Our Unimount has wider base by 3/4", four evenly spaced cross bolts, six screw caps, and 0 gap mounting system.
 
One thing I like about the Spuhr mount is the built-in scope leveling system. I have the Arisaka wedge deal that does basically the same thing when using rings, but I doubt it's going to fit between the erector housing & the mount. I'd like to see some solution there, personally. Even so, still considering picking one up, I like everything else about it.
 
I got mine and mounted it up about 2 weeks ago. It's a solid unit, easy to install. I think people need to keep in mind that it's a brand new product so new accessories will be rolled out for it over time based on demand. Accessory caps, possibly units with built in cant, all based on demand so if you're looking for something specific, just let MDT know.
 
  • Like
Reactions: MDT_OFFICIAL
I got mine and mounted it up about 2 weeks ago. It's a solid unit, easy to install. I think people need to keep in mind that it's a brand new product so new accessories will be rolled out for it over time based on demand. Accessory caps, possibly units with built in cant, all based on demand so if you're looking for something specific, just let MDT know.
We're so happy to hear you like the mount! And yes, it's a brand new product so we will be adding accessories in the future! Customer feedback is essential for us so if you have suggestions reach out to us here, on Facebook, Instagram, or our support portal on our website! Feedback and requests are how we continue to innovate and grow as a company!
 
I like 0 moa for clip ons

Are you going to offer a top rail mount so we can mount a radius on the scope?

Like this:
image.jpg

Sorry for bad pic it's the only one I have handy.
 
  • Like
Reactions: MDT_OFFICIAL
I like my MDT one piece mount a lot. It's really solid piece of gear. I had a bit of misfortune though and I think it needs to be pointed out. One side of the crossbolts are sloted so they can engage in the pic rail. It's needed because these are massive bolts. They can be inserted in the mount in two positions. The right one, and 180 deg off. I didn't noticed that at first, my bad, and had one rotated 180 deg. I installed the mount on my Atlas and it damaged the pic rail a bit. So be careful to have all the four crossbolt in the right position before you apply torque.

There's room for improvement there. A small dot to indicate the right side, like for the top ring, would be intuitive. Having the crossbolts sloted on both sides would be bullet proof.

But again, I could have inspected it better before installing it. Overall I'm pleased with this mount. So in the actual version, just a little caution is needed to avoid this error.


20190818_162232.jpg
 
I like my MDT one piece mount a lot. It's really solid piece of gear. I had a bit of misfortune though and I think it needs to be pointed out. One side of the crossbolts are sloted so they can engage in the pic rail. It's needed because these are massive bolts. They can be inserted in the mount in two positions. The right one, and 180 deg off. I didn't noticed that at first, my bad, and had one rotated 180 deg. I installed the mount on my Atlas and it damaged the pic rail a bit. So be careful to have all the four crossbolt in the right position before you apply torque.

There's room for improvement there. A small dot to indicate the right side, like for the top ring, would be intuitive. Having the crossbolts sloted on both sides would be bullet proof.

But again, I could have inspected it better before installing it. Overall I'm pleased with this mount. So in the actual version, just a little caution is needed to avoid this error.


View attachment 7132419
Thank you for your feedback! We will pass this on!
 
can you expand on this or provide a link? I’m thinking of using one with my s and b hunting scope.

It depends on what S&B you have and where the illumination module is located. For some unknown reason, they decided to put the illumination controls in front of the ocular housing and along the main tube body on the PMII, which interferes with the mounting geometry of the MDT One Piece Mount. Realistically, what is required is two sections of the main scope tube that are both available for mounting on, each must be at least 25 mm (1") wide and be about 4.5" apart. I can get more accurate numbers for you tomorrow if you'd like.

Long story short, the mount is longer than standard to provide the utmost rigidity and will maintain your zero better. Unfortunately, this comes at a price of it not being compatible with some scopes, however, we are looking at options to remedy that still.

Josh
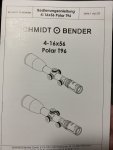
Ah thanks, that would apply to my polar t96 then.

:(
 

Attachments

  • image.jpg
    image.jpg
    352.6 KB · Views: 28
  • Like
Reactions: MDT_Josh
Ah thanks, that would apply to my polar t96 then.

:(

Yes, unless you have over an inch between the illumination and your turrets and able to have the front ring 4.5" forward of that rear ring section. S&B tend to have a shorter maintube which can make it difficult to get this spacing.