
Townsend Whelen was quoted as saying that “only accurate rifles are interesting” and that’s one phrase I can certainly relate to. To be able to take a relatively small bullet and place it at will on a target that might be at a range that’s difficult for most people to grasp is truly satisfying. Everyone that gets into long range shooting wants a rifle that can be called a “shooter”, a “tack driver”, or one that “can shoot bugholes”, but whatever the euphemism may be the intent is always the same. The path to such accomplishments is not necessarily an easy one though and it most certainly isn’t cheap but with some thrifty spending one can get there on a reasonable budget. I recently put together a new long range rig starting from the bottom up and making upgrades as time and funds allowed to get to a top notch rifle system. I decided to write this to sort of chronicle the gear I chose and why I chose it to hopefully help others that are on the same path I found myself on.
This whole project started simply because I wanted another rifle, however I didn’t have the funds to go for another full on custom build, at least not to do it all at once. I had a reasonable budget to start out with and some basic objectives like the rifle had to utilize AICS magazines, have an enlarged bolt knob, and provide reasonable accuracy to do well at a class or competition when running match grade ammunition. I knew that I wanted to use the Remington 700 as the basis for this build because I was familiar with the action and there are literally a ton of options available. Remington 700’s also have a solid reputation from years of use in most long range shooting circles and with a little effort can be tuned up to provide some pretty exceptional accuracy. Remington’s are not for everyone though so there are plenty of other good options for those that are doing their own budget builds like some of the Savage Model 10’s, Tikka’s T3’s, and Howa 1500’s. Those rifles also have solid reputations for accuracy and dependability as well as a fair assortment of accessory options.
The Rifle
In looking at the available Remington 700’s that would be suitable candidates for my project I had quite a few options and calibers to choose from. I toyed with the idea of building off of a Remington 700 Varmint in .243 since I’d never owned one and the option for higher BC bullets with less recoil was starting to look appealing. The only downside to the .243 Varmint from Remington is the twist is relatively slow at 1:9.25” so handling some of the really high BC 6mm bullets would be a challenge, a 105 AMAX may have been the upper limit. I even considered a .223 rifle slinging 69 SMK’s as an option that my wife and daughter could enjoy shooting on occasion if they wanted to come out with me. However, towards the end of 2012 as many of us know the shooting world went berserk and anything gun related became high demand, nary a box of .22LR was to be found anywhere. With that my dream of loading up some 105 AMAX’s in a Remington 700 Varmint disappeared as I could find no rifles chambered in .243 or any components to go along with it. So I turned to the tried and true .308 Winchester, which I already loaded for and had plenty of components to get me started.
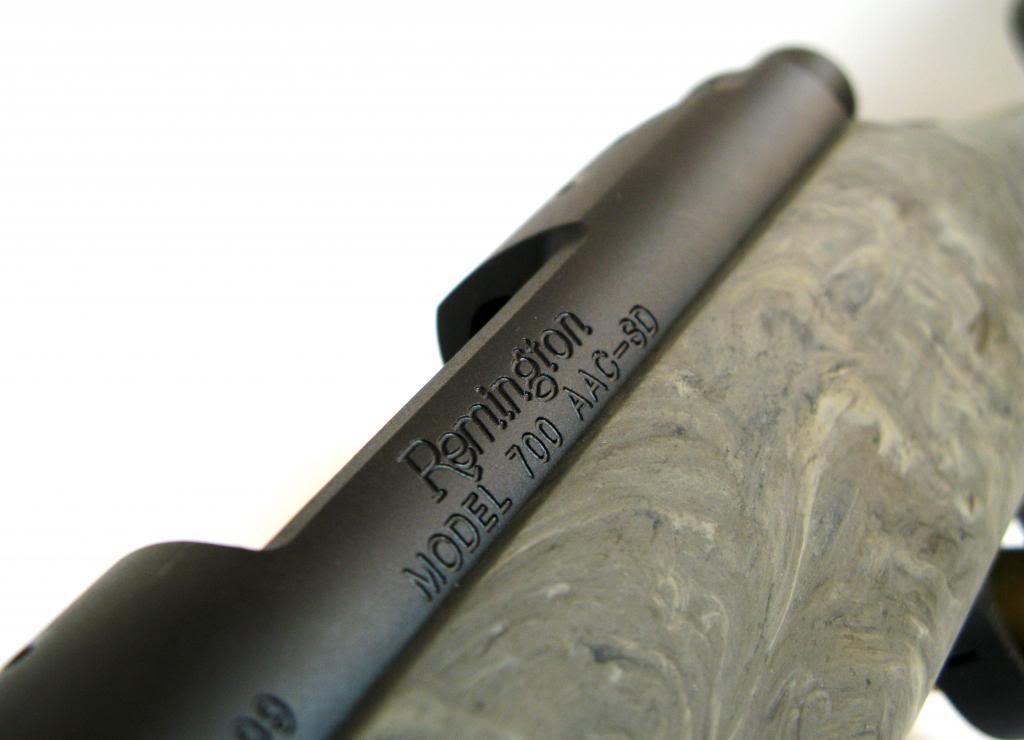
Around this time I also decided that I wanted a rifle that was a little different from my other one and I thought it was high time to go with a shorter, 20” barrel for the .308. I knew that the 20” barrel would still provide sufficient velocity for long range shooting in most of the conditions that I’d be shooting in and would also probably end up being a good bit lighter too. Remington has a few options to choose from that have 20” varmint contour barrels but the SPS Tactical and AAC-SD were the ones that are more readily available locally than just about any of the others. I had planned on getting the SPS Tactical based on the price alone but when the local shop said they could let me have an AAC-SD for only $10 more I jumped on it. The AAC-SD is from the SPS Tactical line with a 20” barrel but it has a 1:10 twist and a muzzle threaded 5/8-24 for suppressors or other muzzle devices. To me these features added value to the build since it meant I wouldn’t have to rebarrel for a faster twist or have a gunsmith thread the muzzle down the road.
Phase 1
Phase one was more or less just a baseline upgrade in my build project that showed the rifle with a basic stock upgrade and a couple accessories thrown in for good measure. To be perfectly honest I could’ve stopped the project right there with it in that basic configuration and had a perfectly capable rifle that would’ve been good enough for a majority of the shooter’s out there. It would’ve saved me a ton of money too but in the end I doubt I would’ve been entirely happy with it. I wanted to see what I could get for every penny of my budget and eventually where it would evolve from there.
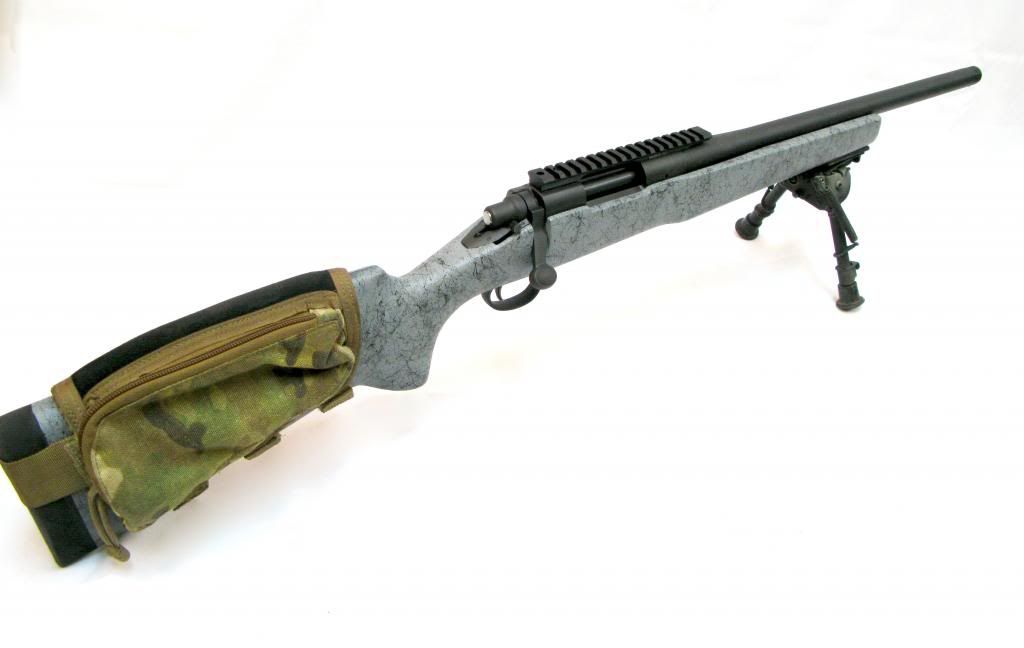
I chose the Bell and Carlson M40-style stock for this project based on my experiences with B&C’s Light Tactical stock, with which it shares many similar features. The M40-style stock has a similar profile more akin to McMillan’s A1-3 stock and I’ve found it to be very comfortable to shoot in the prone and improvised positions. It has an aluminum bedding block that extends from the forend through the pistol grip of the stock to create a very rigid stock. The bedding block theoretically negates the need for bedding, however sometimes an action benefits from being skim bedded to reduce stress on the action. It’s best to shoot a rifle first if the stock has a bedding block to see what kind of accuracy it has, since sometimes bedding it has no effect whatsoever. Some of the other features that I like about this stock are the very comfortable recoil pad, three swivels studs as standard, and a comb height that’s made about perfect when using a stock pack.
As brief as Phase One was it did lay the groundwork for the rest of build and got some of the basic things out of the way. For example, the Weaver 20 MOA base that I bought at the same time as the rifle had to be bedded to the action to keep it from flexing when the base screws were torqued down. The Weaver base wasn’t junk though because it had to be bedded, I’ve had to bed steel Badger Ordnance bases and even a Seekins Precision base before. You can tell when a scope base has to bedded on a Remington action by tightening the front base screws and observing if there is any airspace between the action the base at the back. If there is daylight between the two then it’s a really good idea to bed it so that the top of the base is flat for its entire length. I also swapped the factory X Mark-Pro trigger for an old style Remington 700 trigger that I picked up for a reasonable price on the Sniper’s Hide classifieds section. Despite what some may say about these triggers they are pretty easy to tune up as long as you are safe about it and don’t try to go with a crazy low trigger pull weight or ultra crisp break. A common issue that I see guys make with these triggers is that they set the sear engagement too low in an attempt to get a nice crisp break. The problem with this is that too little sear engagement can cause an accidental discharge if the rifle is dropped, the safety disengaged, or the bolt run too hard. For this reason I typically set my triggers at about 2.5 to 3 pounds and test the sear engagement thoroughly with a drop test and slamming the bolt home a few times in an attempt to get the firing pin to drop. The factory X Mark Pro can be made into workable solution but short of changing springs out some results have been inconsistent.
Phase 2
Almost as soon as the rifle was put together for pictures to show the completion of Phase One it was disassembled and prepped to start Phase 2. The stock went directly to GA Precision so that they could inlet it for the PTG DBM bottom metal that I had purchased from Midway USA shortly after I had bought the stock. The B&C stock comes ready to accept standard Remington BDL trigger guards but anything that’s larger has to be milled out for the proper profile and depth for ensure reliable functioning. The PTG DBM trigger guard has the same inlet pattern as the Badger Ordnance M5 DBM so it’s familiar to most gunsmiths and utilizes the same proven AICS pattern magazines. Some people have inletted their stocks themselves using different hand tools however I left that kind of work to the professionals at GA Precision. While I was sending the stock to GA Precision I decided to throw my bolt in as well to have a Badger Ordnance enlarged bolt knob installed.
While my parts were at the GAP getting worked on I had a new Super Sniper 10X scope come in that would find its first home on my budget precision rifle build. Shooters that are just getting into precision rifle shooting actually have it pretty good now since there are a lot of really good options for long range shooting. The Super Sniper 10X has reasonable optical performance for a $300 scope along with a nice mil-based reticle, mrad adjustments, a lot of internal adjustment, and adjustable parallax settings. In short it has a lot of features that long range shooters are looking for and it’s versatile enough to be at home on rifles of varying calibers. I had decided to get the 10X Super Sniper because the magnification is enough to see and shoot reasonably sized targets at distance but still low enough that I could transition between targets with relative ease. SWFA, the manufacturer and distributor for the Super Sniper line, also makes a 12X scope that could also be a good option but going much higher in magnification could cause issues with mirage. To mount the scope up I used Burris tactical rings based on my experiences with them on another project and felt that they proved themselves to be a good value. While the rings do not have the fit and finish of more expensive brands I can’t say that I ever experienced a situation where they damaged or inhibited the function of the riflescope in any way. The last piece of my optics solution was Holland’s 30mm bubble level that I picked up for a pretty good deal in the Sniper’s Hide classifieds section.
Almost exactly four weeks after I sent my parts to GA Precision to have the stock inletted and bolt knob installed they were back in hand. The work that GA Precision performed was flawless and even though their lead-time was longer than some of their competition it was money and time well spent in my opinion. When I got the barreled action back into the stock to test out the new bottom metal it fed perfectly from all of my AI magazines and Alpha 10 rounders. I also got the scope set up for proper eye relief and made some adjustments under the Eagle stock pack to make sure the cheek height was good too. Instead of stacking pieces of foam or mouse pad under the stock pack I used strips of Velcro underneath to build it up until I was satisfied with the height.
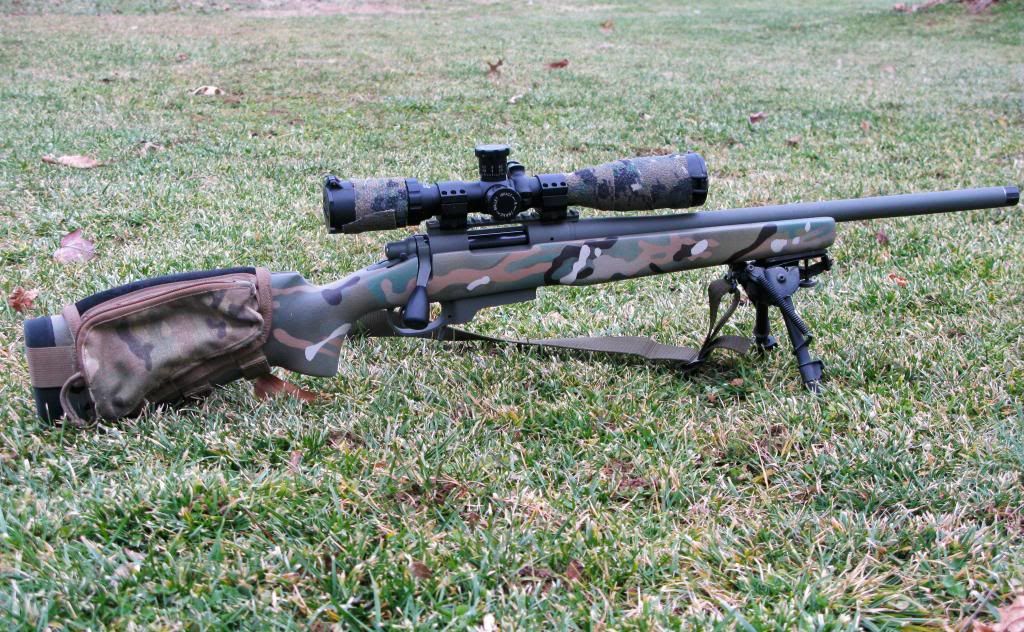
I ended up taking the whole rifle completely apart again because I decided that I wanted to paint it, paint it something cool. Since I was on the cheap and couldn’t really afford get the stock painted or dipped in the Multicam pattern wanted I turned to the tried and true rattle can finish. Although it’s difficult to perfectly match Crye’s Multicam pattern with just off the shelf cans of spray paint, there are enough options at the local hardware to pull off a convincing copy. For this project I used:
Krylon River Rock
Krylon Camo Brown
Krylon Camo Khaki
Rustoleum Nutmeg
Rustoleum Camo Green
Rustoleum Spruce Green
Rustoleum Oregano
To recreate the distinctive patterns as best I could I made templates from blue painter’s tape applied to both sides of a piece of wax paper and cut out the hand drawn patterns with an exacto knife. I started with River Rock as the base color and adding small templates and then moving to brown before using the larger templates as I applied more of the light browns and greens in diagonal passes to create the blending effect. After pulling off all of my templates I finished everything off with a top coat of Krylon clear matte to give it some durability. One note if you use this stuff, do not touch it for at least four hours and even then let it cure all the way. I found that out the hard way when I was practicing on a different stock, I touched it too early and smeared it all over the stock leaving great fingerprints in the process. I thought it came out pretty good though.
Remington 700 AAC-SD
Badger Ordnance Bolt Knob
Weaver Tactical 20 MOA Base
Super Sniper 10X42 Mil/Mil
Holland’s 30mm Bubble Level
Burris Tactical Rings
B&C M40 Style Stock
PTG Stealth DBM
Eagle Stock Pack
Harris Bipod
Mountain Shooter Sling
By the time that I finished Phase Two, effectively wrapping up my “budget build”, I had met every goal I set out to accomplish and did it all still coming in just $15 shy of my budget for out of pocket expenses. I had a fairly reasonable budget to work with, however promotions like the Midway USA discount codes and some of the deals that I found on Sniper’s Hide contributed greatly to accomplishing my goals. I think it’s important to point out that while I was collecting parts to complete this phase I wasn’t going for the cheapest available product. Being on a budget can mean different things to different people and to me it meant getting the best value for my dollar while still providing quality and functionality. Products like the Weaver 20 MOA base, PTG Stealth DBM, and Super Sniper displayed great value for my money and I would recommend them to anyone doing their precision rifle build.
Range Report
I actually didn’t shoot the rifle very much in this configuration with the fixed 10X Super Sniper Scope but when I did it certainly turned out some respectable groups, especially for some basic upgrades. Since at the time I didn’t have any factory match ammunition to shoot through the gun I loaded some rounds up based off what I use for my other rifle. I had to make some adjustments to the sizing die but other than that it was a Winchester case stuffed with 44.9 grains of Varget pushing a 175 SMK. I had two groups that measured right around .8 MOA for 5 shots and one last 5-shot group measured about .5 MOA when I really paid attention to my fundamentals. All in all not a bad start for a budget system using a fixed 10X scope and I felt like I could’ve definitely done worse with the whole thing.
The top two 3" Shoot N C targets were shot using a different charge of Varget powder.
Phase 2.5
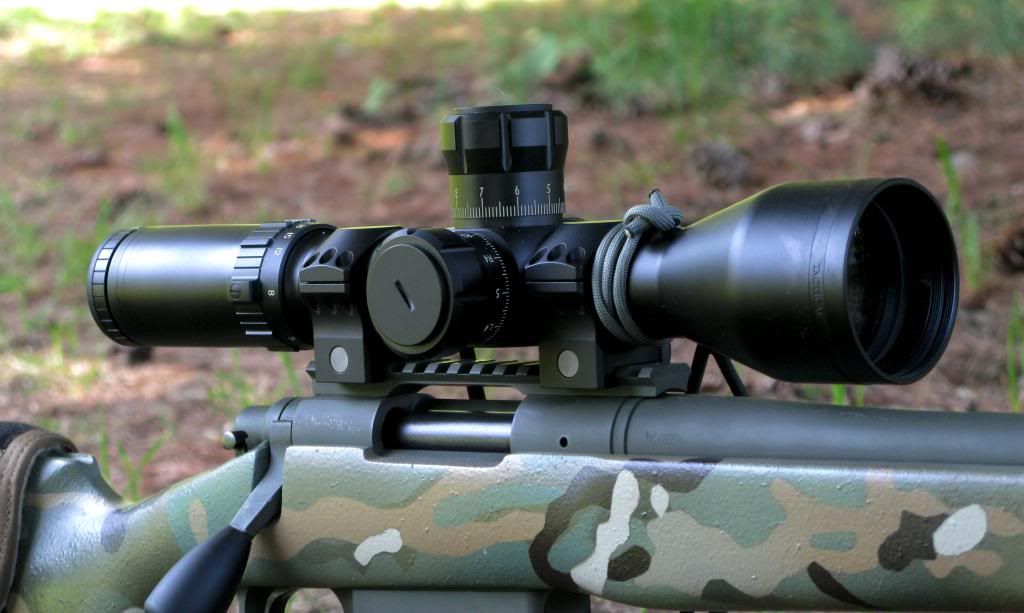
From the very start of this build project I knew that the 10X Super Sniper was only temporary, as I’d actually intended that scope to go on my Ruger 10/22 to make it a better trainer. I’d always had my eyes set on the Bushnell HDMR because I liked it’s compact size, useful magnification range, and good track record amongst some of the best shooters in the country. I had also considered scopes from Vortex and Leupold that had similar features and were with in the same price bracket but I was continuously drawn back to the HDMR. I ended up deciding to buy the Bushnell ERS 3.5-21, a version of the HDMR that has the G2DMR reticle and zero stop system on the elevation turret. At the same time I purchased the scope I also bought a set of Nightforce UltraLite 34mm rings to mount the scope in. I went with these over some of the other really good ring options primarily because of my great experiences with the 30mm NF rings I’ve used in the past.
Range Report
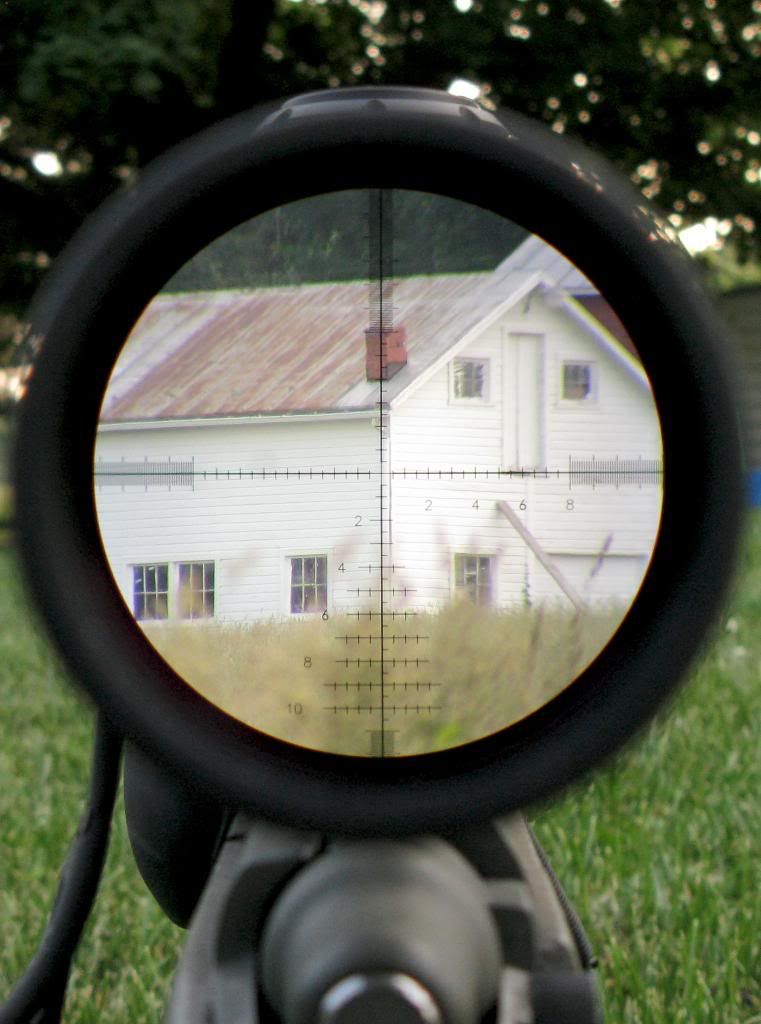
It’s pretty much a universal goal in precision rifle shooting that components and accessories should improve the accuracy, comfort, and performance of the rifle. The Bushnell was certainly an improvement over the Super Sniper it replaced and despite the “stigma” of being a Bushnell I don’t feel that I’ll be replacing it anytime soon. The scope was easy to zero on the rifle given that the turrets and reticle were matched so it was as simple as dialing in the correction as I saw it through the scope. What I thought was amazing after getting down behind it was how generous the eye relief and field of view was. It seemed like I could get into the gun in nearly any position and I was immediately greeted with a perfect view of the reticle without the need to crowd the gun or pull my head back to make it work. In shooting the rifle a little with the new scope at 100-300 yards I’m hesitant to say that there was a definite increase in accuracy. I did seem to be a little more consistent though and the increased magnification was certainly welcome. Using M118LR the rifle was proving to be a ¾ MOA shooter on average when shooting five shot groups at 100 yards and consistently hitting specific points on the steel plates at 200 and 300 yards.
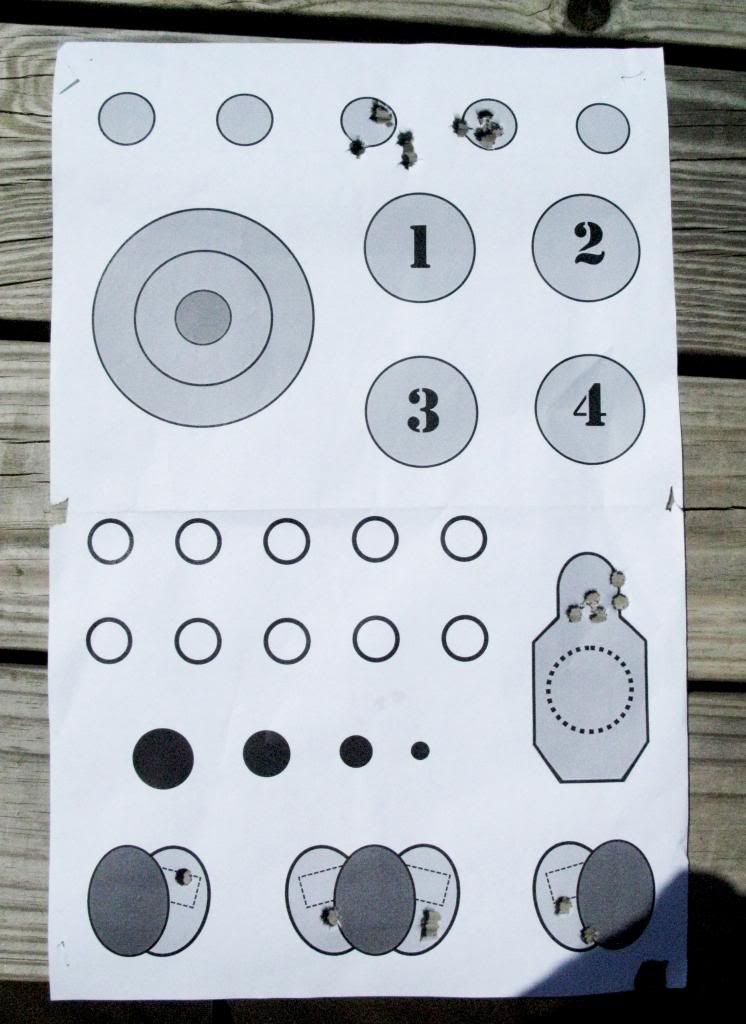
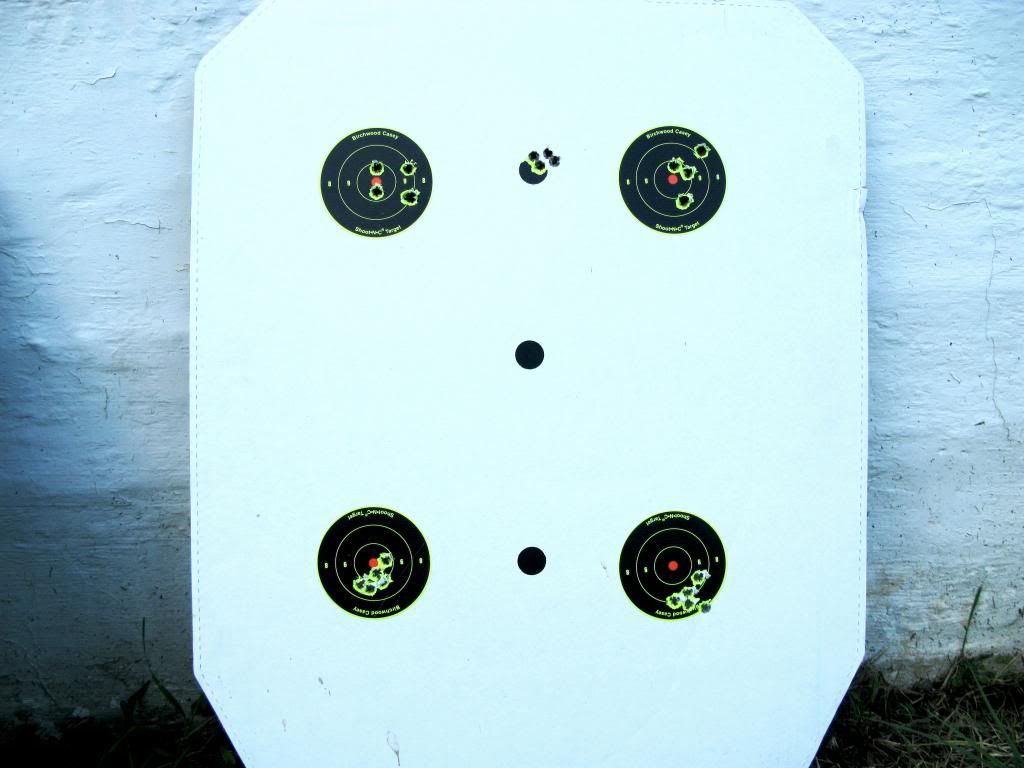
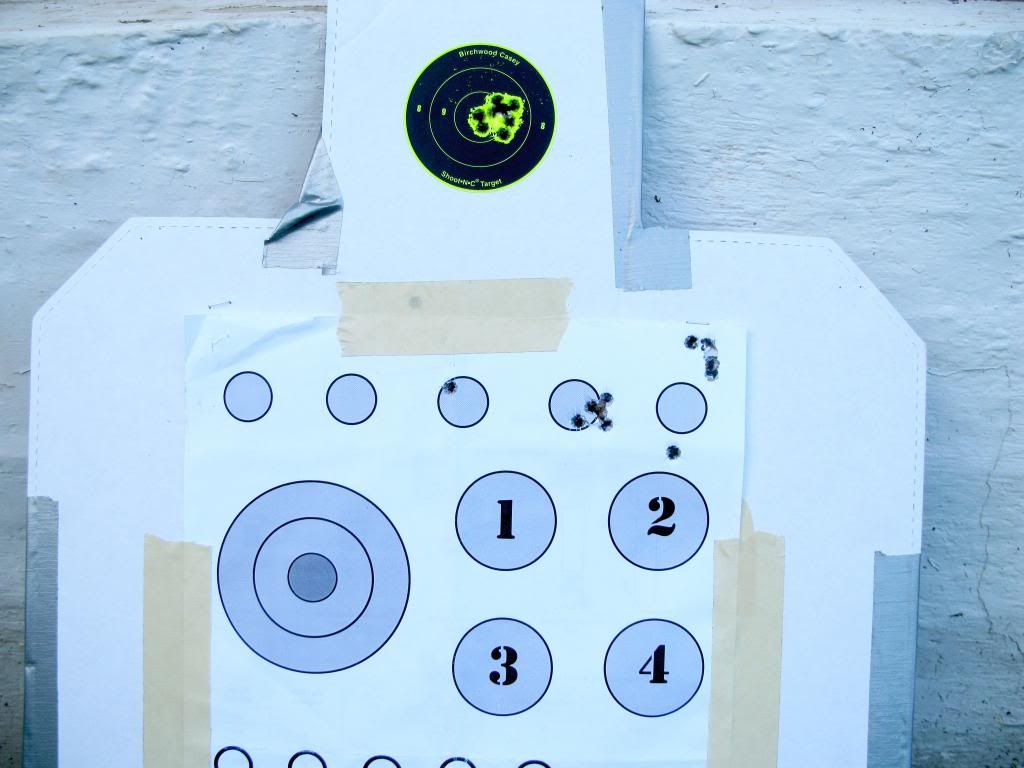
My 100 yard zero target after first getting the ERS mounted up and zeroed. The second dot from the right was cold bore and four following shots, the target to the left was actually shot with 175 GMM while a guy next to me wanted to shoot his braked SBR. The five shots in the face of the Laroo target just didn't go the way I wanted them to.
Phase 3.1
<a href="http://s917.photobucket.com/user/ShootingVoodoo/media/IMG_4748_zps1ba56ef0.jpg.html" target="_blank"><img src="http://i917.photobucket.com/albums/ad20/ShootingVoodoo/IMG_4748_zps1ba56ef0.jpg" border="0" alt=" photo IMG_4748_zps1ba56ef0.jpg"/></a>
I want to say this is the last phase but we all know that’s probably not true, however it is the one that’s put the rifle in its current configuration and it will be this way for the immediate time being. Torn down and rebuilt around Accuracy International’s AX chassis system the rifle gained a bit of weight but in the process some capabilities that it didn’t have before. While I’ve written before that I’m not much of a chassis guy I’ve found that I actually shoot better behind the AX chassis compared to just about any other stock I’ve tried. I can partially attribute this to the stock’s ability to adjust the length of pull and cheek height to perfectly accommodate a shooter’s body type. I also feel that the design features of the stock from the shape of the pistol trip, to the soft recoil pad, to the weight of the system just work for me and my shooting style. The AX’s unique forend makes it very easy to configure the placement of rails just where they need to be for the attachment of bipods, sling mounts, or other accessories with a 4mm hex wrench. While the chassis is heavier than some other stocks and more expensive I think one advantage that the AI products have over other brands is out and out availability. When I bought the AX chassis it was at my door two doors later and while you can get other stocks that have similar features, be prepared to wait weeks to get it in some cases. Call it instant gratification if you want but I believe it still has some merit. While all chassis systems have limitations in one regard or another the only one that I felt really worth mentioning was that because of the tubular forend surrounding the barrel, the scope requires taller rings in order to clear properly.
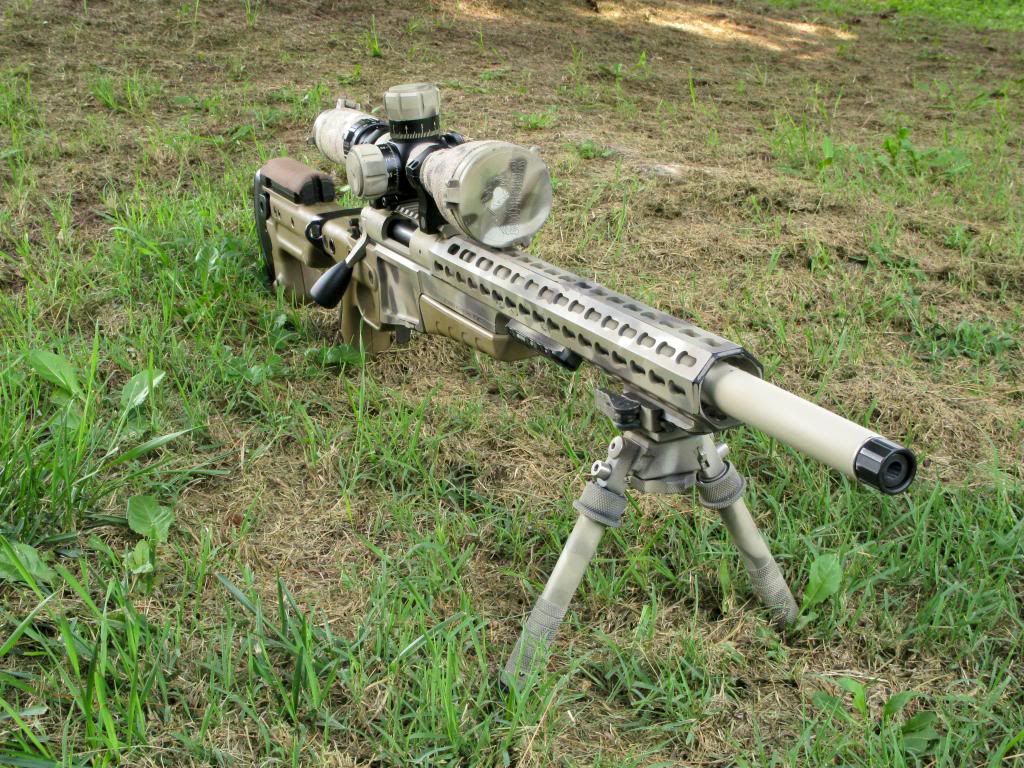
I’ve also thrown an Atlas bipod on this rifle to replace the Harris bipod that I’ve been using since basically the beginning of time. I’ve only been using the Atlas a short time however I’ve found it to be a very versatile piece of equipment. In additional to being able to cant from side to side like the Harris bipod it can also pan from side to side for easier transition from target to target or for movers. The version that I have uses a quick detach lever mount so that I can easily swap it among rifles with a Picatinny rail without the need for tools. The bipod is also easier to “preload” compared to the Harris bipod because of a little play in the bipod legs. Preloading the bipod simply means pushing forward on the rifle so there is a little constant tension pushing on the bipod to help with recoil control and follow through. Really the only downside that I can see after using this bipod for a little while is that the bipod legs are a little slower to deploy, which is a common complaint with the Atlas.
Range Report
When I initially went to zero the rifle in the AX stock I followed the Accuracy International instructions as closely as I could, which said to torque the action screws to 6 nm or 53 in/lbs. I used my Borka Tools torque driver to tighten the actions screws to torqued to 57 in/lbs since that’s what the action screws were torqued to in the B&C stock. I figured that since I got pretty accuracy in the B&C stock with this setting I should at least get equal that in the new stock. Well I was wrong, because Remington actions have a history of not being perfectly straight they can become stressed when they are bolted into another rigid object. This stress can do funny things with accuracy and in this particular stock it was causing my shots to impact erratically, some went high, some went low. Luckily I’d brought the Borka Tools kit with me so I broke it out and upped the torque value to 65 in/lbs based on my conversation with Mile High Shooting a few weeks before. After a quick sight in to get the scope re-zeroed I fired off a nice five shot group with all rounds except one touching. Truth be told I could’ve played with the torque settings a little more to try to finely tune the accuracy as some others have done but I prefer to use the same torque setting on the actions screws to keep it simple.
A few weeks later I was Peacemaker National Training Center’s 600-yard range to see how the rifle and scope performed at distance shooting M118LR. I shot both their electronic targets and the steel targets that they had set up on the range and afterwards I was completely satisfied with the rifle. At 600 yards on the electronic targets I fired a 10 shot group from the bench that measured 6.7” and another 5 shot group from bench that measured 5.3”, so all in all not too bad. However, when I got down in the prone position and cranked out my last five rounds of the day I was elated to see a tight 3.5” group on the display screen. I was actually kind of glad those were the last five rounds of the day because it would’ve been my luck that if I’d tried to repeat that performance I would’ve shot a group at least twice that size.
After an epic fluke during the Long Range Challenge held on PNTC’s Frontier Range I was back at the 100 yard range to zero the rifle and check tracking. To give a quick back-story I was on the first stage of the match when inexplicably the zero on the rifle was lost and rounds were impacting approximately 25’ below the line of sight on the 910 yard target. I removed myself from the match and after going over every inch of the rifle and triple checking the scope I could not find the cause. However, back at the range I had a few boxes of Federal 175 GMM and a fresh target to make doubly sure the scope and rifle functioned as one. Unfortunately the range was quite busy so I only was able to use up one box of ammo, but those 20 rounds went a long way towards restoring my confidence in the overall system. I made sure I gave the turrets a good work out going all the way up and down in adjustment to check tracking and the scope’s ability to retain zero. I had a 9 round group that was less than ¾ MOA, five of the shots were fired with 5 mrad dialed on the scope and holding low and another five shot group that was about .6 MOA. To be perfectly honest I was tickled pink, mostly because it looked like I didn’t’ have to send anything back.
I recently shot the Long Range Challenge that Peacemaker National Training Center holds at their Frontier range as a way to further put the rifle through its paces and check the dope. Stages 1 and 2 went very well and I was completely satisfied with how the whole system performed with targets going from about 545 yards to just under 700 yards. I had a few first rounds hits and a couple second round hits, even hitting the challenging Colt speed plate at 600 yards that was nearly camouflaged with the background. The longer range portions of the match where it stretched to just over 1000 yards was a little challenging but I did manage to connect a couple of times. I ended up hitting 14 out of 20 targets for the day but a few too many misses than I was comfortable with but that’s how it goes sometimes.
Final Thoughts
Now that my new precision rifle is for the most part complete I reflect back on my journey a little and realized how much fun this project was. From tracking down the best deal on the components, to the anticipation of them coming in, and ultimately the satisfaction of seeing how accurate the system was once it was all assembled. I can certainly see why these rifles are so addictive and I’m already hatching a plan for another one. One of the underlying goals of the project from the beginning was to get custom rifle performance and features without the big custom rifle price and I believe I achieved that. I think part of that is due to the great times we live in now where a person can assemble a precision rifle with off the shelf parts and its performance can come very close to rifles costing thousands more. It wouldn’t be hard to spend $1,000-$1,500 more to upgrade to a cut rifled stainless steel barrel, have the action trued, bedded, painted, and that still might just get me to ½ MOA performance, possibly a little better. I believe that just a decade ago it would’ve been hard to fathom that Bushnell optics would be spoken in the same breath as Nightforce or Leupold and that an all metal chassis system would be chosen over a bedded fiberglass stock. I think that’s why I find it a little humorous and a point of pride I suppose when someone walks up to me at the range and asks “who built your rifle?”
This whole project started simply because I wanted another rifle, however I didn’t have the funds to go for another full on custom build, at least not to do it all at once. I had a reasonable budget to start out with and some basic objectives like the rifle had to utilize AICS magazines, have an enlarged bolt knob, and provide reasonable accuracy to do well at a class or competition when running match grade ammunition. I knew that I wanted to use the Remington 700 as the basis for this build because I was familiar with the action and there are literally a ton of options available. Remington 700’s also have a solid reputation from years of use in most long range shooting circles and with a little effort can be tuned up to provide some pretty exceptional accuracy. Remington’s are not for everyone though so there are plenty of other good options for those that are doing their own budget builds like some of the Savage Model 10’s, Tikka’s T3’s, and Howa 1500’s. Those rifles also have solid reputations for accuracy and dependability as well as a fair assortment of accessory options.
The Rifle
In looking at the available Remington 700’s that would be suitable candidates for my project I had quite a few options and calibers to choose from. I toyed with the idea of building off of a Remington 700 Varmint in .243 since I’d never owned one and the option for higher BC bullets with less recoil was starting to look appealing. The only downside to the .243 Varmint from Remington is the twist is relatively slow at 1:9.25” so handling some of the really high BC 6mm bullets would be a challenge, a 105 AMAX may have been the upper limit. I even considered a .223 rifle slinging 69 SMK’s as an option that my wife and daughter could enjoy shooting on occasion if they wanted to come out with me. However, towards the end of 2012 as many of us know the shooting world went berserk and anything gun related became high demand, nary a box of .22LR was to be found anywhere. With that my dream of loading up some 105 AMAX’s in a Remington 700 Varmint disappeared as I could find no rifles chambered in .243 or any components to go along with it. So I turned to the tried and true .308 Winchester, which I already loaded for and had plenty of components to get me started.
Around this time I also decided that I wanted a rifle that was a little different from my other one and I thought it was high time to go with a shorter, 20” barrel for the .308. I knew that the 20” barrel would still provide sufficient velocity for long range shooting in most of the conditions that I’d be shooting in and would also probably end up being a good bit lighter too. Remington has a few options to choose from that have 20” varmint contour barrels but the SPS Tactical and AAC-SD were the ones that are more readily available locally than just about any of the others. I had planned on getting the SPS Tactical based on the price alone but when the local shop said they could let me have an AAC-SD for only $10 more I jumped on it. The AAC-SD is from the SPS Tactical line with a 20” barrel but it has a 1:10 twist and a muzzle threaded 5/8-24 for suppressors or other muzzle devices. To me these features added value to the build since it meant I wouldn’t have to rebarrel for a faster twist or have a gunsmith thread the muzzle down the road.

Phase 1
Phase one was more or less just a baseline upgrade in my build project that showed the rifle with a basic stock upgrade and a couple accessories thrown in for good measure. To be perfectly honest I could’ve stopped the project right there with it in that basic configuration and had a perfectly capable rifle that would’ve been good enough for a majority of the shooter’s out there. It would’ve saved me a ton of money too but in the end I doubt I would’ve been entirely happy with it. I wanted to see what I could get for every penny of my budget and eventually where it would evolve from there.

I chose the Bell and Carlson M40-style stock for this project based on my experiences with B&C’s Light Tactical stock, with which it shares many similar features. The M40-style stock has a similar profile more akin to McMillan’s A1-3 stock and I’ve found it to be very comfortable to shoot in the prone and improvised positions. It has an aluminum bedding block that extends from the forend through the pistol grip of the stock to create a very rigid stock. The bedding block theoretically negates the need for bedding, however sometimes an action benefits from being skim bedded to reduce stress on the action. It’s best to shoot a rifle first if the stock has a bedding block to see what kind of accuracy it has, since sometimes bedding it has no effect whatsoever. Some of the other features that I like about this stock are the very comfortable recoil pad, three swivels studs as standard, and a comb height that’s made about perfect when using a stock pack.
As brief as Phase One was it did lay the groundwork for the rest of build and got some of the basic things out of the way. For example, the Weaver 20 MOA base that I bought at the same time as the rifle had to be bedded to the action to keep it from flexing when the base screws were torqued down. The Weaver base wasn’t junk though because it had to be bedded, I’ve had to bed steel Badger Ordnance bases and even a Seekins Precision base before. You can tell when a scope base has to bedded on a Remington action by tightening the front base screws and observing if there is any airspace between the action the base at the back. If there is daylight between the two then it’s a really good idea to bed it so that the top of the base is flat for its entire length. I also swapped the factory X Mark-Pro trigger for an old style Remington 700 trigger that I picked up for a reasonable price on the Sniper’s Hide classifieds section. Despite what some may say about these triggers they are pretty easy to tune up as long as you are safe about it and don’t try to go with a crazy low trigger pull weight or ultra crisp break. A common issue that I see guys make with these triggers is that they set the sear engagement too low in an attempt to get a nice crisp break. The problem with this is that too little sear engagement can cause an accidental discharge if the rifle is dropped, the safety disengaged, or the bolt run too hard. For this reason I typically set my triggers at about 2.5 to 3 pounds and test the sear engagement thoroughly with a drop test and slamming the bolt home a few times in an attempt to get the firing pin to drop. The factory X Mark Pro can be made into workable solution but short of changing springs out some results have been inconsistent.
Phase 2
Almost as soon as the rifle was put together for pictures to show the completion of Phase One it was disassembled and prepped to start Phase 2. The stock went directly to GA Precision so that they could inlet it for the PTG DBM bottom metal that I had purchased from Midway USA shortly after I had bought the stock. The B&C stock comes ready to accept standard Remington BDL trigger guards but anything that’s larger has to be milled out for the proper profile and depth for ensure reliable functioning. The PTG DBM trigger guard has the same inlet pattern as the Badger Ordnance M5 DBM so it’s familiar to most gunsmiths and utilizes the same proven AICS pattern magazines. Some people have inletted their stocks themselves using different hand tools however I left that kind of work to the professionals at GA Precision. While I was sending the stock to GA Precision I decided to throw my bolt in as well to have a Badger Ordnance enlarged bolt knob installed.
While my parts were at the GAP getting worked on I had a new Super Sniper 10X scope come in that would find its first home on my budget precision rifle build. Shooters that are just getting into precision rifle shooting actually have it pretty good now since there are a lot of really good options for long range shooting. The Super Sniper 10X has reasonable optical performance for a $300 scope along with a nice mil-based reticle, mrad adjustments, a lot of internal adjustment, and adjustable parallax settings. In short it has a lot of features that long range shooters are looking for and it’s versatile enough to be at home on rifles of varying calibers. I had decided to get the 10X Super Sniper because the magnification is enough to see and shoot reasonably sized targets at distance but still low enough that I could transition between targets with relative ease. SWFA, the manufacturer and distributor for the Super Sniper line, also makes a 12X scope that could also be a good option but going much higher in magnification could cause issues with mirage. To mount the scope up I used Burris tactical rings based on my experiences with them on another project and felt that they proved themselves to be a good value. While the rings do not have the fit and finish of more expensive brands I can’t say that I ever experienced a situation where they damaged or inhibited the function of the riflescope in any way. The last piece of my optics solution was Holland’s 30mm bubble level that I picked up for a pretty good deal in the Sniper’s Hide classifieds section.
Almost exactly four weeks after I sent my parts to GA Precision to have the stock inletted and bolt knob installed they were back in hand. The work that GA Precision performed was flawless and even though their lead-time was longer than some of their competition it was money and time well spent in my opinion. When I got the barreled action back into the stock to test out the new bottom metal it fed perfectly from all of my AI magazines and Alpha 10 rounders. I also got the scope set up for proper eye relief and made some adjustments under the Eagle stock pack to make sure the cheek height was good too. Instead of stacking pieces of foam or mouse pad under the stock pack I used strips of Velcro underneath to build it up until I was satisfied with the height.
I ended up taking the whole rifle completely apart again because I decided that I wanted to paint it, paint it something cool. Since I was on the cheap and couldn’t really afford get the stock painted or dipped in the Multicam pattern wanted I turned to the tried and true rattle can finish. Although it’s difficult to perfectly match Crye’s Multicam pattern with just off the shelf cans of spray paint, there are enough options at the local hardware to pull off a convincing copy. For this project I used:
Krylon River Rock
Krylon Camo Brown
Krylon Camo Khaki
Rustoleum Nutmeg
Rustoleum Camo Green
Rustoleum Spruce Green
Rustoleum Oregano
To recreate the distinctive patterns as best I could I made templates from blue painter’s tape applied to both sides of a piece of wax paper and cut out the hand drawn patterns with an exacto knife. I started with River Rock as the base color and adding small templates and then moving to brown before using the larger templates as I applied more of the light browns and greens in diagonal passes to create the blending effect. After pulling off all of my templates I finished everything off with a top coat of Krylon clear matte to give it some durability. One note if you use this stuff, do not touch it for at least four hours and even then let it cure all the way. I found that out the hard way when I was practicing on a different stock, I touched it too early and smeared it all over the stock leaving great fingerprints in the process. I thought it came out pretty good though.

Remington 700 AAC-SD
Badger Ordnance Bolt Knob
Weaver Tactical 20 MOA Base
Super Sniper 10X42 Mil/Mil
Holland’s 30mm Bubble Level
Burris Tactical Rings
B&C M40 Style Stock
PTG Stealth DBM
Eagle Stock Pack
Harris Bipod
Mountain Shooter Sling
By the time that I finished Phase Two, effectively wrapping up my “budget build”, I had met every goal I set out to accomplish and did it all still coming in just $15 shy of my budget for out of pocket expenses. I had a fairly reasonable budget to work with, however promotions like the Midway USA discount codes and some of the deals that I found on Sniper’s Hide contributed greatly to accomplishing my goals. I think it’s important to point out that while I was collecting parts to complete this phase I wasn’t going for the cheapest available product. Being on a budget can mean different things to different people and to me it meant getting the best value for my dollar while still providing quality and functionality. Products like the Weaver 20 MOA base, PTG Stealth DBM, and Super Sniper displayed great value for my money and I would recommend them to anyone doing their precision rifle build.
Range Report
I actually didn’t shoot the rifle very much in this configuration with the fixed 10X Super Sniper Scope but when I did it certainly turned out some respectable groups, especially for some basic upgrades. Since at the time I didn’t have any factory match ammunition to shoot through the gun I loaded some rounds up based off what I use for my other rifle. I had to make some adjustments to the sizing die but other than that it was a Winchester case stuffed with 44.9 grains of Varget pushing a 175 SMK. I had two groups that measured right around .8 MOA for 5 shots and one last 5-shot group measured about .5 MOA when I really paid attention to my fundamentals. All in all not a bad start for a budget system using a fixed 10X scope and I felt like I could’ve definitely done worse with the whole thing.

The top two 3" Shoot N C targets were shot using a different charge of Varget powder.
Phase 2.5
From the very start of this build project I knew that the 10X Super Sniper was only temporary, as I’d actually intended that scope to go on my Ruger 10/22 to make it a better trainer. I’d always had my eyes set on the Bushnell HDMR because I liked it’s compact size, useful magnification range, and good track record amongst some of the best shooters in the country. I had also considered scopes from Vortex and Leupold that had similar features and were with in the same price bracket but I was continuously drawn back to the HDMR. I ended up deciding to buy the Bushnell ERS 3.5-21, a version of the HDMR that has the G2DMR reticle and zero stop system on the elevation turret. At the same time I purchased the scope I also bought a set of Nightforce UltraLite 34mm rings to mount the scope in. I went with these over some of the other really good ring options primarily because of my great experiences with the 30mm NF rings I’ve used in the past.


Range Report
It’s pretty much a universal goal in precision rifle shooting that components and accessories should improve the accuracy, comfort, and performance of the rifle. The Bushnell was certainly an improvement over the Super Sniper it replaced and despite the “stigma” of being a Bushnell I don’t feel that I’ll be replacing it anytime soon. The scope was easy to zero on the rifle given that the turrets and reticle were matched so it was as simple as dialing in the correction as I saw it through the scope. What I thought was amazing after getting down behind it was how generous the eye relief and field of view was. It seemed like I could get into the gun in nearly any position and I was immediately greeted with a perfect view of the reticle without the need to crowd the gun or pull my head back to make it work. In shooting the rifle a little with the new scope at 100-300 yards I’m hesitant to say that there was a definite increase in accuracy. I did seem to be a little more consistent though and the increased magnification was certainly welcome. Using M118LR the rifle was proving to be a ¾ MOA shooter on average when shooting five shot groups at 100 yards and consistently hitting specific points on the steel plates at 200 and 300 yards.

My 100 yard zero target after first getting the ERS mounted up and zeroed. The second dot from the right was cold bore and four following shots, the target to the left was actually shot with 175 GMM while a guy next to me wanted to shoot his braked SBR. The five shots in the face of the Laroo target just didn't go the way I wanted them to.
Phase 3.1
<a href="http://s917.photobucket.com/user/ShootingVoodoo/media/IMG_4748_zps1ba56ef0.jpg.html" target="_blank"><img src="http://i917.photobucket.com/albums/ad20/ShootingVoodoo/IMG_4748_zps1ba56ef0.jpg" border="0" alt=" photo IMG_4748_zps1ba56ef0.jpg"/></a>
I want to say this is the last phase but we all know that’s probably not true, however it is the one that’s put the rifle in its current configuration and it will be this way for the immediate time being. Torn down and rebuilt around Accuracy International’s AX chassis system the rifle gained a bit of weight but in the process some capabilities that it didn’t have before. While I’ve written before that I’m not much of a chassis guy I’ve found that I actually shoot better behind the AX chassis compared to just about any other stock I’ve tried. I can partially attribute this to the stock’s ability to adjust the length of pull and cheek height to perfectly accommodate a shooter’s body type. I also feel that the design features of the stock from the shape of the pistol trip, to the soft recoil pad, to the weight of the system just work for me and my shooting style. The AX’s unique forend makes it very easy to configure the placement of rails just where they need to be for the attachment of bipods, sling mounts, or other accessories with a 4mm hex wrench. While the chassis is heavier than some other stocks and more expensive I think one advantage that the AI products have over other brands is out and out availability. When I bought the AX chassis it was at my door two doors later and while you can get other stocks that have similar features, be prepared to wait weeks to get it in some cases. Call it instant gratification if you want but I believe it still has some merit. While all chassis systems have limitations in one regard or another the only one that I felt really worth mentioning was that because of the tubular forend surrounding the barrel, the scope requires taller rings in order to clear properly.

I’ve also thrown an Atlas bipod on this rifle to replace the Harris bipod that I’ve been using since basically the beginning of time. I’ve only been using the Atlas a short time however I’ve found it to be a very versatile piece of equipment. In additional to being able to cant from side to side like the Harris bipod it can also pan from side to side for easier transition from target to target or for movers. The version that I have uses a quick detach lever mount so that I can easily swap it among rifles with a Picatinny rail without the need for tools. The bipod is also easier to “preload” compared to the Harris bipod because of a little play in the bipod legs. Preloading the bipod simply means pushing forward on the rifle so there is a little constant tension pushing on the bipod to help with recoil control and follow through. Really the only downside that I can see after using this bipod for a little while is that the bipod legs are a little slower to deploy, which is a common complaint with the Atlas.
Range Report
When I initially went to zero the rifle in the AX stock I followed the Accuracy International instructions as closely as I could, which said to torque the action screws to 6 nm or 53 in/lbs. I used my Borka Tools torque driver to tighten the actions screws to torqued to 57 in/lbs since that’s what the action screws were torqued to in the B&C stock. I figured that since I got pretty accuracy in the B&C stock with this setting I should at least get equal that in the new stock. Well I was wrong, because Remington actions have a history of not being perfectly straight they can become stressed when they are bolted into another rigid object. This stress can do funny things with accuracy and in this particular stock it was causing my shots to impact erratically, some went high, some went low. Luckily I’d brought the Borka Tools kit with me so I broke it out and upped the torque value to 65 in/lbs based on my conversation with Mile High Shooting a few weeks before. After a quick sight in to get the scope re-zeroed I fired off a nice five shot group with all rounds except one touching. Truth be told I could’ve played with the torque settings a little more to try to finely tune the accuracy as some others have done but I prefer to use the same torque setting on the actions screws to keep it simple.
A few weeks later I was Peacemaker National Training Center’s 600-yard range to see how the rifle and scope performed at distance shooting M118LR. I shot both their electronic targets and the steel targets that they had set up on the range and afterwards I was completely satisfied with the rifle. At 600 yards on the electronic targets I fired a 10 shot group from the bench that measured 6.7” and another 5 shot group from bench that measured 5.3”, so all in all not too bad. However, when I got down in the prone position and cranked out my last five rounds of the day I was elated to see a tight 3.5” group on the display screen. I was actually kind of glad those were the last five rounds of the day because it would’ve been my luck that if I’d tried to repeat that performance I would’ve shot a group at least twice that size.
After an epic fluke during the Long Range Challenge held on PNTC’s Frontier Range I was back at the 100 yard range to zero the rifle and check tracking. To give a quick back-story I was on the first stage of the match when inexplicably the zero on the rifle was lost and rounds were impacting approximately 25’ below the line of sight on the 910 yard target. I removed myself from the match and after going over every inch of the rifle and triple checking the scope I could not find the cause. However, back at the range I had a few boxes of Federal 175 GMM and a fresh target to make doubly sure the scope and rifle functioned as one. Unfortunately the range was quite busy so I only was able to use up one box of ammo, but those 20 rounds went a long way towards restoring my confidence in the overall system. I made sure I gave the turrets a good work out going all the way up and down in adjustment to check tracking and the scope’s ability to retain zero. I had a 9 round group that was less than ¾ MOA, five of the shots were fired with 5 mrad dialed on the scope and holding low and another five shot group that was about .6 MOA. To be perfectly honest I was tickled pink, mostly because it looked like I didn’t’ have to send anything back.

I recently shot the Long Range Challenge that Peacemaker National Training Center holds at their Frontier range as a way to further put the rifle through its paces and check the dope. Stages 1 and 2 went very well and I was completely satisfied with how the whole system performed with targets going from about 545 yards to just under 700 yards. I had a few first rounds hits and a couple second round hits, even hitting the challenging Colt speed plate at 600 yards that was nearly camouflaged with the background. The longer range portions of the match where it stretched to just over 1000 yards was a little challenging but I did manage to connect a couple of times. I ended up hitting 14 out of 20 targets for the day but a few too many misses than I was comfortable with but that’s how it goes sometimes.
Final Thoughts
Now that my new precision rifle is for the most part complete I reflect back on my journey a little and realized how much fun this project was. From tracking down the best deal on the components, to the anticipation of them coming in, and ultimately the satisfaction of seeing how accurate the system was once it was all assembled. I can certainly see why these rifles are so addictive and I’m already hatching a plan for another one. One of the underlying goals of the project from the beginning was to get custom rifle performance and features without the big custom rifle price and I believe I achieved that. I think part of that is due to the great times we live in now where a person can assemble a precision rifle with off the shelf parts and its performance can come very close to rifles costing thousands more. It wouldn’t be hard to spend $1,000-$1,500 more to upgrade to a cut rifled stainless steel barrel, have the action trued, bedded, painted, and that still might just get me to ½ MOA performance, possibly a little better. I believe that just a decade ago it would’ve been hard to fathom that Bushnell optics would be spoken in the same breath as Nightforce or Leupold and that an all metal chassis system would be chosen over a bedded fiberglass stock. I think that’s why I find it a little humorous and a point of pride I suppose when someone walks up to me at the range and asks “who built your rifle?”
