• Watch Out for Scammers!

    We've now added a color code for all accounts. Orange accounts are new members, Blue are full members, and Green are Supporters. If you get a message about a sale from an orange account, make sure you pay attention before sending any money!

Gunsmithing Quick question about bedding and screw tension

Alabama556

Sergeant
Full Member
Minuteman
  • May 15, 2008
    555
    112
    49
    Birmingham, AL
    How tight do I need to have the action screws when bedding a remington 700 receiver in a McMillan stock. I can't find a consistent answer on the web.

    Thanks. I am ready to do my 1 st full action bed job today.

    I will post pictures of my project when I am done.
     
    Hi,

    I just snug them up so everything is where it is supposed to be. I clean squeeze out with a lot of q-tips and razor blades.

    I wait a day and clean up with a mill. I cut in where the little nubs left but the trigger pin slots are. Make sure you remove any material from the action screw holes or pillars. That will jack things up.

    If you have a mill you can cut a relief behind the lug and fill the area with some compound for a real strong out to action transition.

    I found this if it helps: Bedding a match bolt action rifle

    Good luck and post pics when you are done
     
    Here's some tips that have helped me along the way:


    Long standing arguments about whether to glue pillars in first, then bed over them -or- attach pillars to action and bed at one time.

    My way is to attach the pillars to the action. This way the entire assembly is static and I have zero risk of anything binding when I go about it. If it binds, I won't even be able to put it in the stock. I have to ensure it's completely inert before hand.

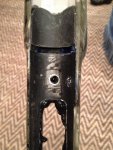
    First step in attaching the pillars. Get some 100 grit and wrap it tightly around your receiver. Rubber bands/tape helps. Now, lap your pillars till they match the contour. It's not easy, takes practice. If you have a mill, bore the arc first, then finish lap. Much easier this way.

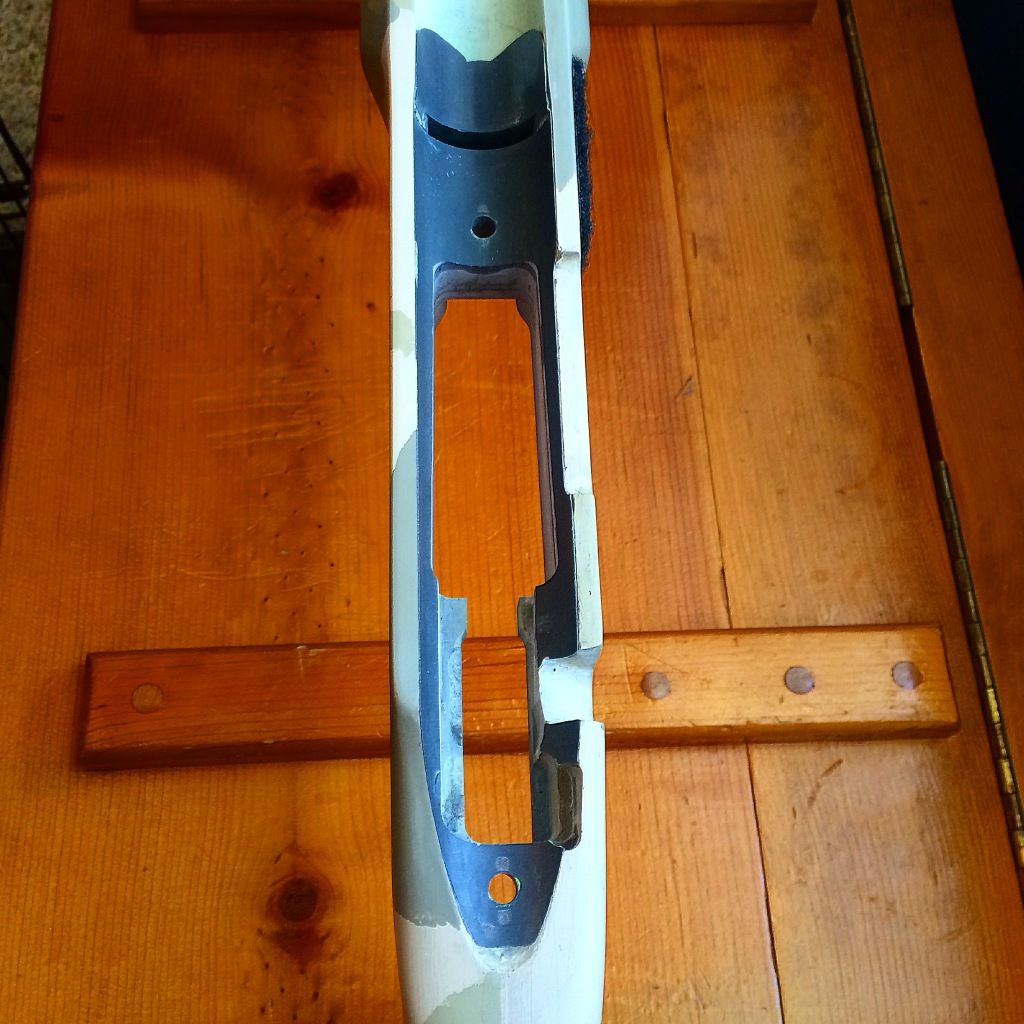
    Now, attach your pillars and screws. Ensure the whole barreled action will flop right into the stock's inlet. Use tape to support the barrel in the front and just ahead of the recoil lug. Adjust the windings till it sits perfectly level and at the correct depth. Remember, a 1.35" OD action has a radius of .675".

    So, "half in, half out" is what your striving for. If you go too deep, the bedding will creep over center and you'll have a devil of a time getting the action in/out of the stock. Too high and your trigger is in the wrong spot, magazine dbm setups don't work right, and your grip/stockwell will feel wierd.

    Half in/out. ensure its right before proceding.

    Parallelism. Long standing arguments on this too. For a traditional rifle used in the field. Laser straight with the showline is what you want. If your building a bag/bench type rifle there's a compelling argument to put a 1.5 to 2 degree rise on the barreled action. Has to do with bag tracking.


    Schmag up your stuff with your chosen resin and squash it in there. Keep the gun horozontal and level as it cures. Check it for about the first hour or two periodically. Little bubbles can appear on the showline edges. You can easily patch these by whipping up some more resin and squashing it in the little hole. Use the misses hair dryer and that stuff will draw right down into it. Save a lot of headaches later.

    Hope this helps.


    C.
     
    Thanks. The stock came with pillars already in it from mcmillian. I just did not want to compress the compound too much
     
    I attach the pillars to the action as Chad described but since yours are already installed just snug the action screws (basically until you have metal to metal contact of the action and pillars). Before bedding remember to verify that your action screws are centered in the pillars while using the BM, no need to do your best at bedding and have a screw that is being pulled off center due to a misaligned or off set pillar. Don't assume they are located correctly, verify it first.
     
    Thanks . I got some bolts that fit the thread of the action and cut the heads off. I screwed them into the action and then set in stock to make sure they were lined up,
     
    So far it looks good. I have bedding compound creeping out all around the action inside and out. My screws turn. Thanks for everybody's help and thank you Michael Rowe at tupelo custom weaponry for the tips.
     
    What did I do wrong. Bedding is real thin around action but there is a thick section in front of lug
     

    Attachments

    • image_zpsb96c2288.jpg
      image_zpsb96c2288.jpg
      48.4 KB · Views: 35
    What did I do wrong. Bedding is real thin around action but there is a thick section in front of lug

    nothings wrong unless you didn't tape the barrel with something to free float it. Even then it may still shoot fine but if you're getting weird stringing just sand down that bedding in front of the lug and see if that helps. A lot of people use a clay dam to make a clean cut there but it's purely cosmetic.
     
    photo2-5.jpg

    Here you can see in front of my recoil lug area it looks just like yours but I used 20 mil plumbers tape to free float the barrel so I just verified it wasn't touching and left it alone. I would just take your time to clean it up and see how it shoots. I hope everything works out for ya.
     
    That explains everything. The barrel was free floating when I put it in the stock before I bedded it. I need to wrap some tape around the barrel and elevate a hair.
     
    That explains everything. The barrel was free floating when I put it in the stock before I bedded it. I need to wrap some tape around the barrel and elevate a hair.

    slow down- you basically added a barrel pad. may not hurt anything. if you want to get rid of it wrap some sandpaper around a socket and remove it that way.

    Next time make a clay snake and throw it in front of the lug. If you are free floating, the only contact surface you need it the rear of the lug.

    If you throw some tape around the barrel and bed it again you will kinda ramp the action up into the air and have you bottom metal not parallel to the action any longer.
     
    There used to be quite a bit of "discussion" as to whether the barrel's free floating should begin immediately in front of the recoil lug, or if it should begin just ahead of the chamber area of the barrel. So far, the shops I have used, and the rifles I have bedded have all had some bedding compound just ahead of the recoil lug, but no further forward than the chamber area.

    If you are using Marine Tex, heat helps it cure faster if you are in a hurry to begin the clean up. The heat from a hair dryer will make the Marine-Tex more runny, then it begins to set quite fast. Some times, I find it handy to get the Marine-Tex more runny so it wipes off more easily. Then just as it gets to the consistency of taffy, you can trim quite a bit with a very sharp razor knife..obviously staying away from anywhere that you might risk unwanted cuts into the stock, or scratches on the metal surfaces.