Join the Hide community
Get access to live stream, lessons, the post exchange, and chat with other snipers.
Register
Download Gravity Ballistics
Get help to accurately calculate and scope your sniper rifle using real shooting data.

Install the app
How to install the app on iOS
Follow along with the video below to see how to install our site as a web app on your home screen.
Note: This feature may not be available in some browsers.
You are using an out of date browser. It may not display this or other websites correctly.
You should upgrade or use an alternative browser.
You should upgrade or use an alternative browser.
Gunsmithing Stock bedding tutorial
- Thread starter samson7x
- Start date
Look at the ozzie suarez series of videos on you tube. (there is a sticky thread at the top of this page).
He did one on bedding.
Also high speed shooting systems posted one on you tube as well.
Very similar in approach with minor differences.
Thirdly, Larry Potterfield of Midway USA did one with glass bedding that is informative as well.
Between all three, I think you'll have a pretty good idea how to proceed.
What exactly are you bedding? Some tutorials wouldnt necessarily apply to some actions.
http://www.accurateshooter.com/technical-articles/stress-free-pillar-bedding/
http://www.accurateshooter.com/technical-articles/stress-free-pillar-bedding/
What exactly are you bedding? Some tutorials wouldnt necessarily apply to some actions.
http://www.accurateshooter.com/technical-articles/stress-free-pillar-bedding/
Bedding a 700 action in a McMillan stock that has pillars already installed.
Hmm. A McMillan Stock with installed pillars is already a very good choice. I'd be surprised if glass bedding one will result in a vastly improved shooting performance.
Greg
Greg
I'm actually doing the very same this weekend: bedding a 700 action in an A5 with factory installed pillars. Here are a few links that should be useful;
http://rifleshooter.com/2013/07/skim-bedding-and-pillar-installation-on-a-remington-700/
http://www.theinsidershoops.scout.c...de/forums/5539-diy/13323843-stock-bedding-diy
http://rifleshooter.com/2013/07/skim-bedding-and-pillar-installation-on-a-remington-700/
http://www.theinsidershoops.scout.c...de/forums/5539-diy/13323843-stock-bedding-diy
I'm actually doing the very same this weekend: bedding a 700 action in an A5 with factory installed pillars. Here are a few links that should be useful;
http://rifleshooter.com/2013/07/skim-bedding-and-pillar-installation-on-a-remington-700/
http://www.theinsidershoops.scout.c...de/forums/5539-diy/13323843-stock-bedding-diy
Awesome, thanks for the links. I hope to start this weekend as well. Ordered everything today.
Here's what it looks like now. You can see how uneven the wear is.
http://i107.photobucket.com/albums/m...psguuplkez.jpg
http://i107.photobucket.com/albums/...B-D7FB-4CDE-81F5-D11CFD360BF4_zpswdc8swoj.jpg
http://i107.photobucket.com/albums/...1-0DEA-4AA5-B60C-E35B6E29136F_zpsdyg7wsdf.jpg
http://i107.photobucket.com/albums/m...psguuplkez.jpg
http://i107.photobucket.com/albums/...B-D7FB-4CDE-81F5-D11CFD360BF4_zpswdc8swoj.jpg
http://i107.photobucket.com/albums/...1-0DEA-4AA5-B60C-E35B6E29136F_zpsdyg7wsdf.jpg
Though I am not a pro at this, I've researched and dinked around enough with bedding various rifles to offer a few other thoughts in regards to the 700;
With the action screws tightened, place the rifle on a flat surface (on a bipod) so you can reach the action screws with the rifle supported. Loosen just the front screw and watch for any movement in the gap between the barrel and stock. In a perfectly stress-free situation, there will be zero movement. From what I have seen my 700 has not been stress-free in any of the stocks I have placed it in, which could also indicate a slightly out-of-round or warped receiver. Based on your photos, my bet is that you will also see some lateral movement of the barrel in barrel channel. The only way to fix this - whether it's an issue with the stock, the receiver or both - is with a 100% stress-free bedding job.
Take your time figuring out what is causing the uneven fit between receiver and stock, it will give you a clear understanding of what the bedding job needs to accomplish.
Ensuring stress-free bedding;
Go to your local hardware store and pick up two 1/4-28 X 2-1/2" (or longer) bolts and cut the heads off to create studs. You will use these instead of the action screws to hold the receiver aligned in the stock while the epoxy cures. Longer studs are better so they can be unscrewed using channel locks before removing the action after the epoxy has hardened.
With the studs installed in the receiver and tape wrapped around them for a snug fit in the pillars (to prevent epoxy from entering the pillars), place the action in the epoxy and use a cut up tire tube (or surgical tubing) wrapped around the receiver and stock between the two studs only to hold the action in place while the epoxy hardens. You should have also wrapped the barrel with tape near the front of the stock to hold it centered in the barrel channel. Doing it this way vs. using the actual action screws and bottom metal to pull the action down into the epoxy will help ensure you end up with truly stress-free bedding and the barreled action nicely centered in the stock.
Of course, liberal use of release agent - including on the tape around the studs and the stud threads where they screw into the action) is mandatory. In this regard, be sure to follow the advice given in the previous links provided.
Take your time prepping. Test fit the prepped action and stock, and triple check your application of release agent, making sure you have everything covered. Painters tape is your friend, use it everywhere you can to protect the stock's finish and to keep the epoxy from adhering to surfaces not in the bedding area, including inside the stock (magazine well, for example).
With plenty of forethought and careful preparation, great results can be achieved.
I have bedded a few stocks with no issue, but my struggle is with finish. I know Chad at LRI uses cnc to get such clean lines and incredible final product, but how do the DIYers like me end up with such clean lines around the inside of the magwell and trigger area. I have used a flush trim router bit to do a decent job, but because I cant keep everything perfectly square when using it, I end up with less than perfect lines. Doesn't affect functionality of course but far from pretty.
Any advice??
Any advice??
Anyone have a link or reference I can check out? This will be my first bedding job and I'd like a detailed reference before I begin. I tried the search function and it didn't turn up what I'm looking for.
Check out Score Hi gunsmithing for a lot of great tools, kits and tutorials;
www.scorehi.com
I have bedded a few stocks with no issue, but my struggle is with finish. I know Chad at LRI uses cnc to get such clean lines and incredible final product, but how do the DIYers like me end up with such clean lines around the inside of the magwell and trigger area. I have used a flush trim router bit to do a decent job, but because I cant keep everything perfectly square when using it, I end up with less than perfect lines. Doesn't affect functionality of course but far from pretty.
Any advice??
Considering that it was not that long ago that truly exquisite custom arms were crafted with only hand tools, it's really just a matter of taking the time and having the patience to make it look as good as you want. Operationally, as long as the errant epoxy does not interfere with the fit and function of other components - and the bedding job performs its intended function - it's purely unseen aesthetics. Unless you plan on regularly removing the action to show off your bedding job, it's not something IMO that's worth agonizing over.
I will use a variety of files, sandpaper, a Dremel tool, etc. to clean it up to my satisfaction.
Yea I don't really agonize over it, I'm the only one who sees it, or actually doesn't see it haha. Just something I thought I could improve on. Guess my patience doesn't allow me to have nice stuff haha
Guess my patience doesn't allow me to have nice stuff...
I think patience is one of those qualities that is primarily genetic, but like any other skill it can be learned. I have plenty of it, but my father did not. My son was much like my father when it came to patience, but now that he's turning into a perfectionist home owner, he seems to have developed the patience of a saint.
Think it through, plan each step then just take your time in the execution.
Hmm. A McMillan Stock with installed pillars is already a very good choice. I'd be surprised if glass bedding one will result in a vastly improved shooting performance.
Well, up until about an hour ago I thought differently.
I just got my freshly trued/re-barreled/Cerakoted 700 barreled action back a few hours ago and set it in the A5 for the first time. It drops in perfectly, with a perfectly centered barrel and a perfectly even gap at the front of the stock. There's just enough clearance allow a sheet of paper slide under the barrel all the way to the lug. Loosening the front action screw I can detect no movement at all between the barrel and the stock. Wow!
Since I already have a fresh batch of Marine Tex here I'll go ahead with a skim coat any way but I have to agree with Greg - I'm not sure if it will make much of a difference.
Now the new Badger Ordnance scope rail is a different story - tightening just the front two screws I can slide that same piece of paper clear through under the rear of the mount. I had the same issue with the previous rail and I bedded that one too.
I had an email exchange with Mike Bryant yesterday in regards to bedding a 700. He uses the same procedure I mentioned in post #10 with one exception: he does not use surgical tubing - only gravity - to hold the receiver in the stock while the epoxy cures.
The key to doing it this way is to precisely wrap the barrel at the front of the stock to hold the barreled-action level and centered in the stock, with no rocking or lifting of the receiver above the pillars. I have already wrapped the barrel this way and in combination with the tape-wrapped studs (made from 1/4-28 X 2-1/2" bolts) fitting snugly in the pillars, just the weight of the barreled action does indeed hold it perfectly straight, level and stable in contact with the pillars. When placing the action in the "mud" he gently seats the action by hand most of the way but then allows gravity to pull it down to the final position. He states that this is the only way he has consistently achieved a 100% stress-free bedding job.
I'll be taking photos of the procedure I am using this weekend and post them here for DIY informational purposes.
I had an email exchange with Mike Bryant yesterday in regards to bedding a 700. He uses the same procedure I mentioned in post #10 with one exception: he does not use surgical tubing - only gravity - to hold the receiver in the stock while the epoxy cures.
The key to doing it this way is to precisely wrap the barrel at the front of the stock to hold the barreled-action level and centered in the stock, with no rocking or lifting of the receiver above the pillars. I have already wrapped the barrel this way and in combination with the tape-wrapped studs (made from 1/4-28 X 2-1/2" bolts) fitting snugly in the pillars, just the weight of the barreled action does indeed hold it perfectly straight, level and stable in contact with the pillars. When placing the action in the "mud" he gently seats the action by hand most of the way but then allows gravity to pull it down to the final position. He states that this is the only way he has consistently achieved a 100% stress-free bedding job.
I'll be taking photos of the procedure I am using this weekend and post them here for DIY informational purposes.
That would be great, thanks.
My materials won't be here till next week, so I'd like to see your results.
I'll be taking photos of the procedure I am using this weekend and post them here for DIY informational purposes.
Plan it out or have a second person there to take pics. Once you get going in that mud with rubber gloves on a camera was the last thing I could focus on much less want to touch in the middle of it all.
I wanted to do the same thing but failed miserably at it lol.
Plan it out or have a second person there to take pics. Once you get going in that mud with rubber gloves on a camera was the last thing I could focus on much less want to touch in the middle of it all.
LOL, truth! I'll take detailed photos of all the prep work before the mud party begins.
So my freshly trued/re-barreled/Cerakoted action is now resting quietly in a bed of mud. ;-)
As promised, here are some captioned photos describing how I went about this;
Photo 1

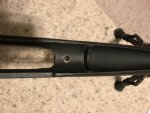
Here is the stock 99% prepped. The taping actually took quite a bit of time to get just right. As I mentioned earlier, the barreled action sat nearly perfectly in this new A5 stock. The first step of the taping process was to wrap the barrel at the front of the stock to match the already perfect gap. Basically with the action sitting in the stock, the tape held the barrel up in the stock so the tang sat normally in the rear while retaining contact between the receiver and both pillars (see Photo 2 below).
Because I let the barreled action sit in the mud held only by gravity, I did not want to use putty as a dam in front of the lug. So I created a dam with tape in the stock and around the barrel with a tiny gap in between to allow the excess mud in the lug recess to flow into. This will leave a straight, even line after the excess epoxy is trimmed away.
The bedding surfaces in the stock were roughed-up with a file to give the mud a little more grip. After this photo was taken compressed air was used to blow out the dust and the surface was cleaned with acetone before the mud was applied.,
Photo 2

Here is the barreled-action prepped and ready to be dropped into the mud. I used Meguiar's M8 Maximum Mold Release Wax as a release agent, applying many coats. The openings in the receiver in the bedding area were filled with plumber's putty and then I coated the putty with Brownell's Accraglass Release Agent.
Two 1/4-28 X 2-1/2" bolts were used to make the studs to align the receiver in the stock. The studs were wrapped with painter's tape so they fit snugly in the pillars. I used the Brownells release agent on the threads and inside the pillars.
The lug was taped on the sides, bottom and front with two layers of exterior painter's tape, which is made of vinyl instead of paper.
Immediately in front of the lug, the barrel was wrapped to create a dam in conjunction with the tape in the stock. More tape was applied on the barrel in front of that to protect it.
Photo 3

Here you can see the ring of tape toward the front of the barrel that is used to hold the barreled-action level and straight in the stock. You can also see in comparison to the barrel how shiny the receiver is from all the wax on it.
Photo 4

With the Marine Tex applied to the bedding surfaces in the stock, it was simply a matter of dropping the barreled action into the mud. It did take a little hand assistance to displace the mud out of the lug recess, and it flowed out the sides and forward through the gap in the tape just as planned. Once the barreled action was very close to being seated I let gravity do the rest, pushing out the last of the mud that had to be displaced. Once the oozing stopped a few minutes later, I knew that gravity had fully seated the action in the mud in a 100% stress-free manner.
Clean-up with Marine Tex is very easy with just water. I had some warm water, paper towels, Q-Tips and tooth picks handy to clean up the oozing mud.
Photo 5

Closer-up view of the finished (for now) clean-up job using only water. You can also see how I had to bed the rear of the scope rail a few days ago using JB Weld - with just the front two screws tightened a sheet of paper could slide straight through in the rear.
The Marine Tex is hardening on schedule, I will probably pop it out this evening. More photos coming...
As promised, here are some captioned photos describing how I went about this;
Photo 1
Here is the stock 99% prepped. The taping actually took quite a bit of time to get just right. As I mentioned earlier, the barreled action sat nearly perfectly in this new A5 stock. The first step of the taping process was to wrap the barrel at the front of the stock to match the already perfect gap. Basically with the action sitting in the stock, the tape held the barrel up in the stock so the tang sat normally in the rear while retaining contact between the receiver and both pillars (see Photo 2 below).
Because I let the barreled action sit in the mud held only by gravity, I did not want to use putty as a dam in front of the lug. So I created a dam with tape in the stock and around the barrel with a tiny gap in between to allow the excess mud in the lug recess to flow into. This will leave a straight, even line after the excess epoxy is trimmed away.
The bedding surfaces in the stock were roughed-up with a file to give the mud a little more grip. After this photo was taken compressed air was used to blow out the dust and the surface was cleaned with acetone before the mud was applied.,
Photo 2
Here is the barreled-action prepped and ready to be dropped into the mud. I used Meguiar's M8 Maximum Mold Release Wax as a release agent, applying many coats. The openings in the receiver in the bedding area were filled with plumber's putty and then I coated the putty with Brownell's Accraglass Release Agent.
Two 1/4-28 X 2-1/2" bolts were used to make the studs to align the receiver in the stock. The studs were wrapped with painter's tape so they fit snugly in the pillars. I used the Brownells release agent on the threads and inside the pillars.
The lug was taped on the sides, bottom and front with two layers of exterior painter's tape, which is made of vinyl instead of paper.
Immediately in front of the lug, the barrel was wrapped to create a dam in conjunction with the tape in the stock. More tape was applied on the barrel in front of that to protect it.
Photo 3
Here you can see the ring of tape toward the front of the barrel that is used to hold the barreled-action level and straight in the stock. You can also see in comparison to the barrel how shiny the receiver is from all the wax on it.
Photo 4
With the Marine Tex applied to the bedding surfaces in the stock, it was simply a matter of dropping the barreled action into the mud. It did take a little hand assistance to displace the mud out of the lug recess, and it flowed out the sides and forward through the gap in the tape just as planned. Once the barreled action was very close to being seated I let gravity do the rest, pushing out the last of the mud that had to be displaced. Once the oozing stopped a few minutes later, I knew that gravity had fully seated the action in the mud in a 100% stress-free manner.
Clean-up with Marine Tex is very easy with just water. I had some warm water, paper towels, Q-Tips and tooth picks handy to clean up the oozing mud.
Photo 5
Closer-up view of the finished (for now) clean-up job using only water. You can also see how I had to bed the rear of the scope rail a few days ago using JB Weld - with just the front two screws tightened a sheet of paper could slide straight through in the rear.
The Marine Tex is hardening on schedule, I will probably pop it out this evening. More photos coming...
Update
With the Marine Tex fully hardened, I removed the studs and the action popped loose with no drama. A bit of wiggling to free the lug and it came apart easily.
The mud job looks good, I got good flow into all the places it needed to be. Using a Dremel to remove most of the over flow then doing the final trimming with a variety of wood rasps (round and flat) and 1000 grit sandpaper, the clean-up went smoothly. The edges are not as clean as what the pros can do with CNC machinery, but I was satisfied with the results (see photo below).
Then the first big test - with everything cleaned up, the barreled action dropped smoothly into the stock. I then snugged both action screws. Closely observing the gap between the barrel and the end of the stock, I loosened and tightened the front screw repeatedly and could detect absolutely ZERO movement. Success - the action is sitting in the stock with no detectable stress! Additionally, the transition from the receiver to stock across the bedding looks great. In fact, the bedding is almost impossible to see and what can be seen is smooth and even.
Here is a photo of the bedding after clean up and after a fresh coat of Krylon OD green in the barrel channel. I will post photos of the fully reassembled rifle tomorrow.
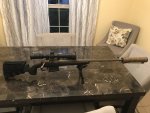
The rifle is back together and I'm quite pleased with the results! Here are a few shots showing the bedding (what can be seen of it);
[IMG2=JSON]{"data-align":"none","data-size":"full","src":"http:\/\/www.canonshooter.com\/photos2\/700custom-2.jpg"}[/IMG2]
[IMG2=JSON]{"data-align":"none","data-size":"full","src":"http:\/\/www.canonshooter.com\/photos2\/700custom-3.jpg"}[/IMG2]
[IMG2=JSON]{"data-align":"none","data-size":"full","src":"http:\/\/www.canonshooter.com\/photos2\/700custom-4.jpg"}[/IMG2]
Some shots of the complete rifle;
Trued 700 action with Holland bolt handle (TIG welded)
Bartlein 5R 1-10 twist SS barrel, M24 contour, 23"
Barreled action in Sig Dark Grey Cerakote
McMillan A5, pillars and bedded
Timney 510
Badger Ordnance M5 Enhanced bottom metal
Badger Ordnance 20 MOA steel scope rail with recoil lug
SWFA 10X42 HD scope
Seekins low rings
Holland 30mm level

[IMG2=JSON]{"data-align":"none","data-size":"full","src":"http:\/\/www.canonshooter.com\/photos2\/700custom-5.jpg"}[/IMG2]
[IMG2=JSON]{"data-align":"none","data-size":"full","src":"http:\/\/www.canonshooter.com\/photos2\/700custom-6.jpg"}[/IMG2]
[IMG2=JSON]{"data-align":"none","data-size":"full","src":"http:\/\/www.canonshooter.com\/photos2\/700custom-7.jpg"}[/IMG2]
Test drive to happen next weekend.
[IMG2=JSON]{"data-align":"none","data-size":"full","src":"http:\/\/www.canonshooter.com\/photos2\/700custom-2.jpg"}[/IMG2]
[IMG2=JSON]{"data-align":"none","data-size":"full","src":"http:\/\/www.canonshooter.com\/photos2\/700custom-3.jpg"}[/IMG2]
[IMG2=JSON]{"data-align":"none","data-size":"full","src":"http:\/\/www.canonshooter.com\/photos2\/700custom-4.jpg"}[/IMG2]
Some shots of the complete rifle;
Trued 700 action with Holland bolt handle (TIG welded)
Bartlein 5R 1-10 twist SS barrel, M24 contour, 23"
Barreled action in Sig Dark Grey Cerakote
McMillan A5, pillars and bedded
Timney 510
Badger Ordnance M5 Enhanced bottom metal
Badger Ordnance 20 MOA steel scope rail with recoil lug
SWFA 10X42 HD scope
Seekins low rings
Holland 30mm level
[IMG2=JSON]{"data-align":"none","data-size":"full","src":"http:\/\/www.canonshooter.com\/photos2\/700custom-5.jpg"}[/IMG2]
[IMG2=JSON]{"data-align":"none","data-size":"full","src":"http:\/\/www.canonshooter.com\/photos2\/700custom-6.jpg"}[/IMG2]
[IMG2=JSON]{"data-align":"none","data-size":"full","src":"http:\/\/www.canonshooter.com\/photos2\/700custom-7.jpg"}[/IMG2]
Test drive to happen next weekend.
Last edited:
Thanks for the pics! Looks like it turned out great.
Quick question: when you filed the surface to rough it up, you didn't relieve any material on the pillar correct? From my understanding, that dimension is left alone since my (and your) pillars are already installed.
Quick question: when you filed the surface to rough it up, you didn't relieve any material on the pillar correct? From my understanding, that dimension is left alone since my (and your) pillars are already installed.
invest in a decent drill press and an XY table or smooth talk someone with a manual mill into helping you. If you're doing it infrequently it shouldn't be too tough to find someone who will helpI have bedded a few stocks with no issue, but my struggle is with finish. I know Chad at LRI uses cnc to get such clean lines and incredible final product, but how do the DIYers like me end up with such clean lines around the inside of the magwell and trigger area. I have used a flush trim router bit to do a decent job, but because I cant keep everything perfectly square when using it, I end up with less than perfect lines. Doesn't affect functionality of course but far from pretty.
Any advice??
Thanks for the pics! Looks like it turned out great.
Quick question: when you filed the surface to rough it up, you didn't relieve any material on the pillar correct? From my understanding, that dimension is left alone since my (and your) pillars are already installed.
Correct, only roughed up the fiberglass.
Took the new rig for its first test drive today. Set up on front and rear bags on a reasonably steady bench, I fired a total of 17 rounds.
Since I had installed a new scope rail and bedded it for the full 20 MOA, my first two shots weren't on paper at 100 yards. I then fired three more into the berm as sighters to get me on paper.
With five rounds down the new barrel, I ran a few patches of Hoppe's #9, a few dry patches and then a patch of Hoppe's Copper Terminator to see if any copper fouling was evident. After letting it soak for ten minutes the next patch revealed little or no copper fouling at all. Based on Bartlein's written recommendations, I considered the barrel "broken in" at that point.
I used the next four shots to walk it in and establish a decent 100 yard zero. With a total of nine shots down the new barrel, it was time to see what this rig can do.
New target, shots 10, 11 and 12 looked liked this;

I then went for a group of five;

Shots 13, 14, 15 and 16 produced a bug hole measuring .327". The last shot of the day (#17) was out of the group at the top, opening the 5-shot group up to .552". Can't say for sure but based on the previous seven shots, it was probably operator error.
I have to say that I'm very pleased with this performance. I have no doubt this rifle is fully capable of my "consistent .5 MOA or better" goal. With that established, my next outing will be at 200 and 300 yards prone with a bipod and rear bag.
Since I had installed a new scope rail and bedded it for the full 20 MOA, my first two shots weren't on paper at 100 yards. I then fired three more into the berm as sighters to get me on paper.
With five rounds down the new barrel, I ran a few patches of Hoppe's #9, a few dry patches and then a patch of Hoppe's Copper Terminator to see if any copper fouling was evident. After letting it soak for ten minutes the next patch revealed little or no copper fouling at all. Based on Bartlein's written recommendations, I considered the barrel "broken in" at that point.
I used the next four shots to walk it in and establish a decent 100 yard zero. With a total of nine shots down the new barrel, it was time to see what this rig can do.
New target, shots 10, 11 and 12 looked liked this;
I then went for a group of five;
Shots 13, 14, 15 and 16 produced a bug hole measuring .327". The last shot of the day (#17) was out of the group at the top, opening the 5-shot group up to .552". Can't say for sure but based on the previous seven shots, it was probably operator error.
I have to say that I'm very pleased with this performance. I have no doubt this rifle is fully capable of my "consistent .5 MOA or better" goal. With that established, my next outing will be at 200 and 300 yards prone with a bipod and rear bag.
Took the new rig for its first test drive today. Set up on front and rear bags on a reasonably steady bench, I fired a total of 17 rounds.
Since I had installed a new scope rail and bedded it for the full 20 MOA, my first two shots weren't on paper at 100 yards. I then fired three more into the berm as sighters to get me on paper.
With five rounds down the new barrel, I ran a few patches of Hoppe's #9, a few dry patches and then a patch of Hoppe's Copper Terminator to see if any copper fouling was evident. After letting it soak for ten minutes the next patch revealed little or no copper fouling at all. Based on Bartlein's written recommendations, I considered the barrel "broken in" at that point.
I used the next four shots to walk it in and establish a decent 100 yard zero. With a total of nine shots down the new barrel, it was time to see what this rig can do.
New target, shots 10, 11 and 12 looked liked this;
I then went for a group of five;
Shots 13, 14, 15 and 16 produced a bug hole measuring .327". The last shot of the day (#17) was out of the group at the top, opening the 5-shot group up to .552". Can't say for sure but based on the previous seven shots, it was probably operator error.
I have to say that I'm very pleased with this performance. I have no doubt this rifle is fully capable of my "consistent .5 MOA or better" goal. With that established, my next outing will be at 200 and 300 yards prone with a bipod and rear bag.
Fantastic results. It never fails that I'll pull the last shot when I have a nice group going.
I do have another question with regard to relieving material for the mud. Did you leave a "shelf" at the rear of the tang as seen here: http://www.accurateshooter.com/technical-articles/stress-free-pillar-bedding/
Given that we already had pillars installed, I should relieve material all the way to the end of the tang since the pillars will be what my action rests on correct? Contact points would then be the 2 pillars as well as the tape on the end of the barrel to align it in the barrel channel vs shelf left on tang and tape on barrel (as in the article)?Just making sure I have a proper understanding and hopefully that made sense.
My main reason for roughing-up the fiberglass was to give the Marine Tex an little more surface area to adhere to - I wasn't concerned with a minimum thickness of bedding material. You could probably just use coarse sandpaper then wipe it down with acetone before applying the mud. Marine Tex is made to adhere to fiberglass.
I ended up with a thin layer of epoxy between the top of the pillars and the receiver.
Yes, those damned last shots that spoil good groups! :-(
I ended up with a thin layer of epoxy between the top of the pillars and the receiver.
Yes, those damned last shots that spoil good groups! :-(
I just wanted to follow up on this thread. Everything came out better than expected so I'll head to the range hopefully this weekend to test.
Attachments
Last edited:
http://erniethegunsmith.com/catalog/i139.html. Nice method to center the action screws in the pillars
Sent from my iPhone using Tapatalk
Sent from my iPhone using Tapatalk
Similar threads
- Replies
- 8
- Views
- 826
- Replies
- 11
- Views
- 438
