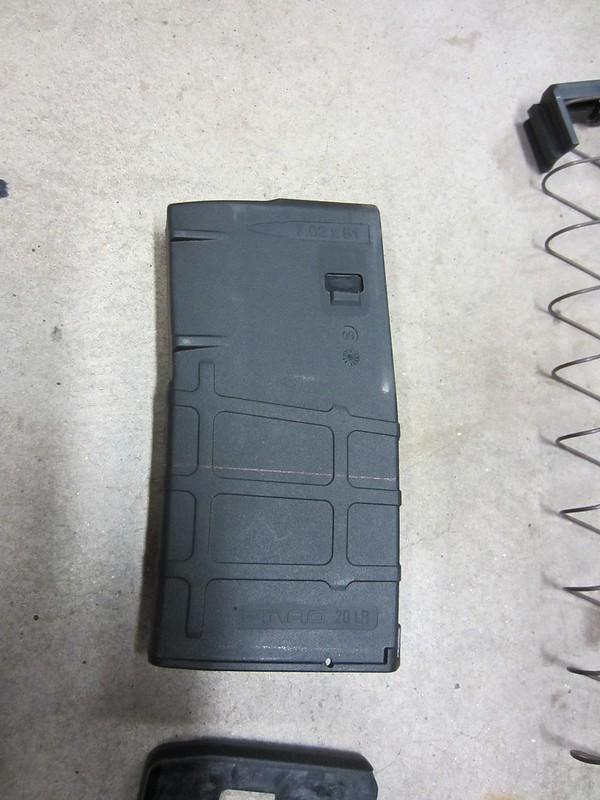
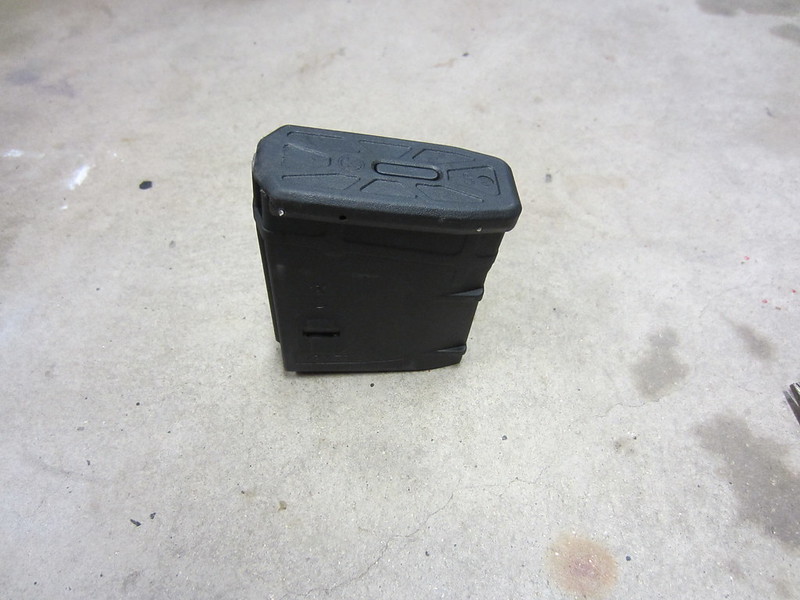
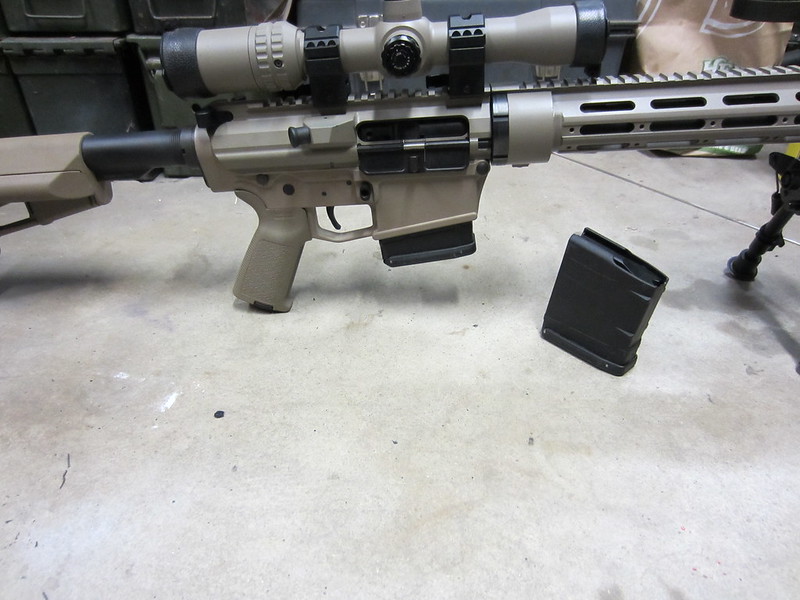
I wanted a shorter, lighter mag for my Specialized Dynamics .260 Remington for an upcoming wolf hunt, range use or shooting from prone position. Since no one makes a short polymer mag for the DPMS LR .308, I decided to make one.
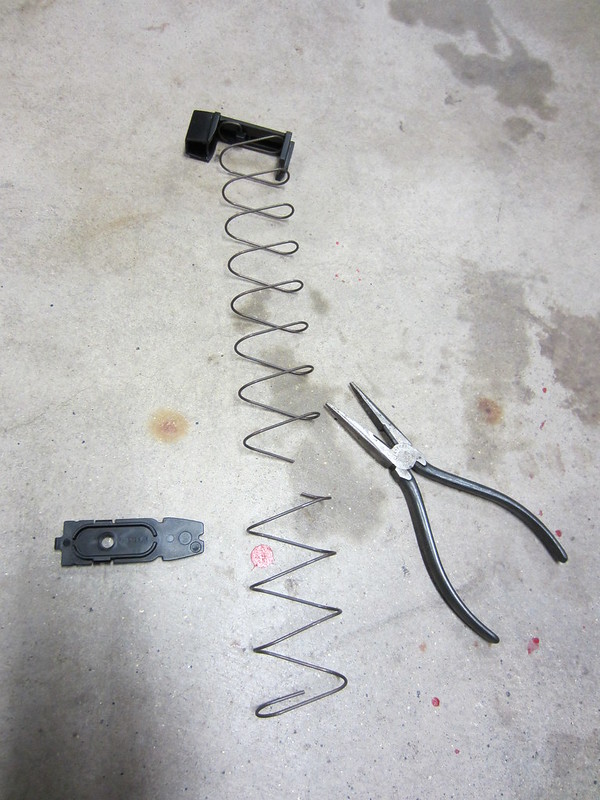
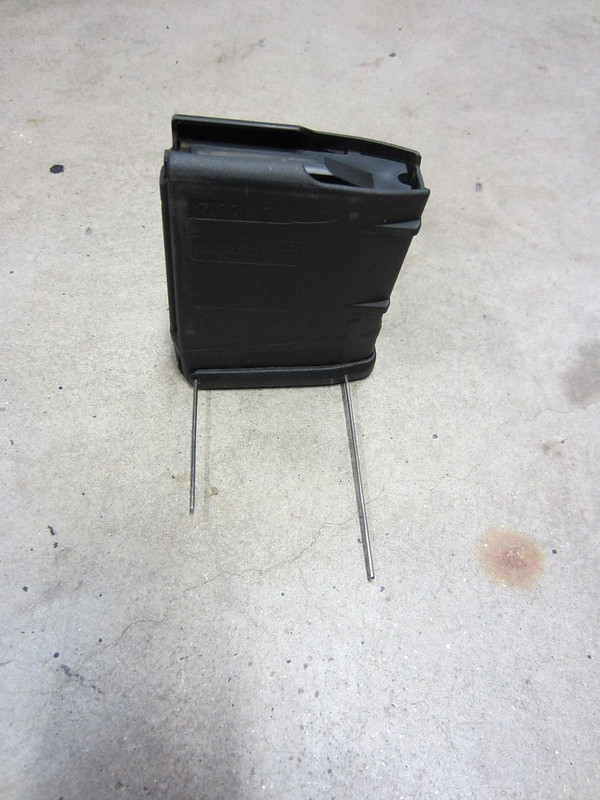
I started with a standard Magpul P-Mag LR 20 for the DPMS and cut two inches off the bottom with a stardard cut-off wheel. Then I cut two coils off the spring. All I had left to do was drill some 1/8th" holes and rivet the base plate back on. I finished by painting the rivets flat black to match. The whole project took about 30 minutes.


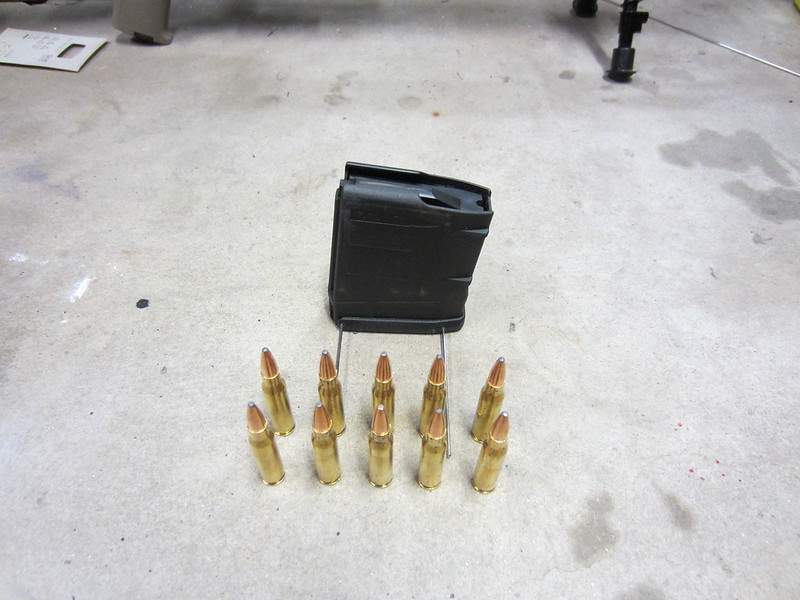
Voila! Now it's a full two inches shorter and still holds 12 rounds. It's the perfect size for long hikes and benchrest work. Magpul should offer these. Hint, hint!
I started with a standard Magpul P-Mag LR 20 for the DPMS and cut two inches off the bottom with a stardard cut-off wheel. Then I cut two coils off the spring. All I had left to do was drill some 1/8th" holes and rivet the base plate back on. I finished by painting the rivets flat black to match. The whole project took about 30 minutes.
Voila! Now it's a full two inches shorter and still holds 12 rounds. It's the perfect size for long hikes and benchrest work. Magpul should offer these. Hint, hint!