• Watch Out for Scammers!

    We've now added a color code for all accounts. Orange accounts are new members, Blue are full members, and Green are Supporters. If you get a message about a sale from an orange account, make sure you pay attention before sending any money!

  • Site updates coming next Wednesday at 8am CT!

    The site will be down for routine maintenance on Wednesday 6/5 starting at 8am CT. If you have any questions, please PM alexj-12!

Gunsmithing Your chambering/crown method?

ken226

Major Hide Member
Full Member
Minuteman
Sep 16, 2009
1,291
1,952
47
Washington
Just wanted to see how others are doing it?

I like to put the muzzle end in a 4 jaw and the chamber on a dead center, then indicate the muzzle end to within .0002.

With the chamber end on the dead center, I turn it to .001 above the desired diameter.

I then put the chamber end on a steady rest, double check concentricity to the bore and cut the tenon, bolt nose recess, set the bolt lug/nose clearances, then cut the chamber and headspace it.

Then for the crown I flip the barrel and put the chamber in the headstock, indicate to within .0002 and put the muzzle end on a dead center and check concentricity of the muzzle end with the bore. If it isn't perfect, I turn the muzzle end on the dead center to .001 above the desired diameter.

Then I put the muzzle end on the steady rest, double check concentricity and make sure its good to go.

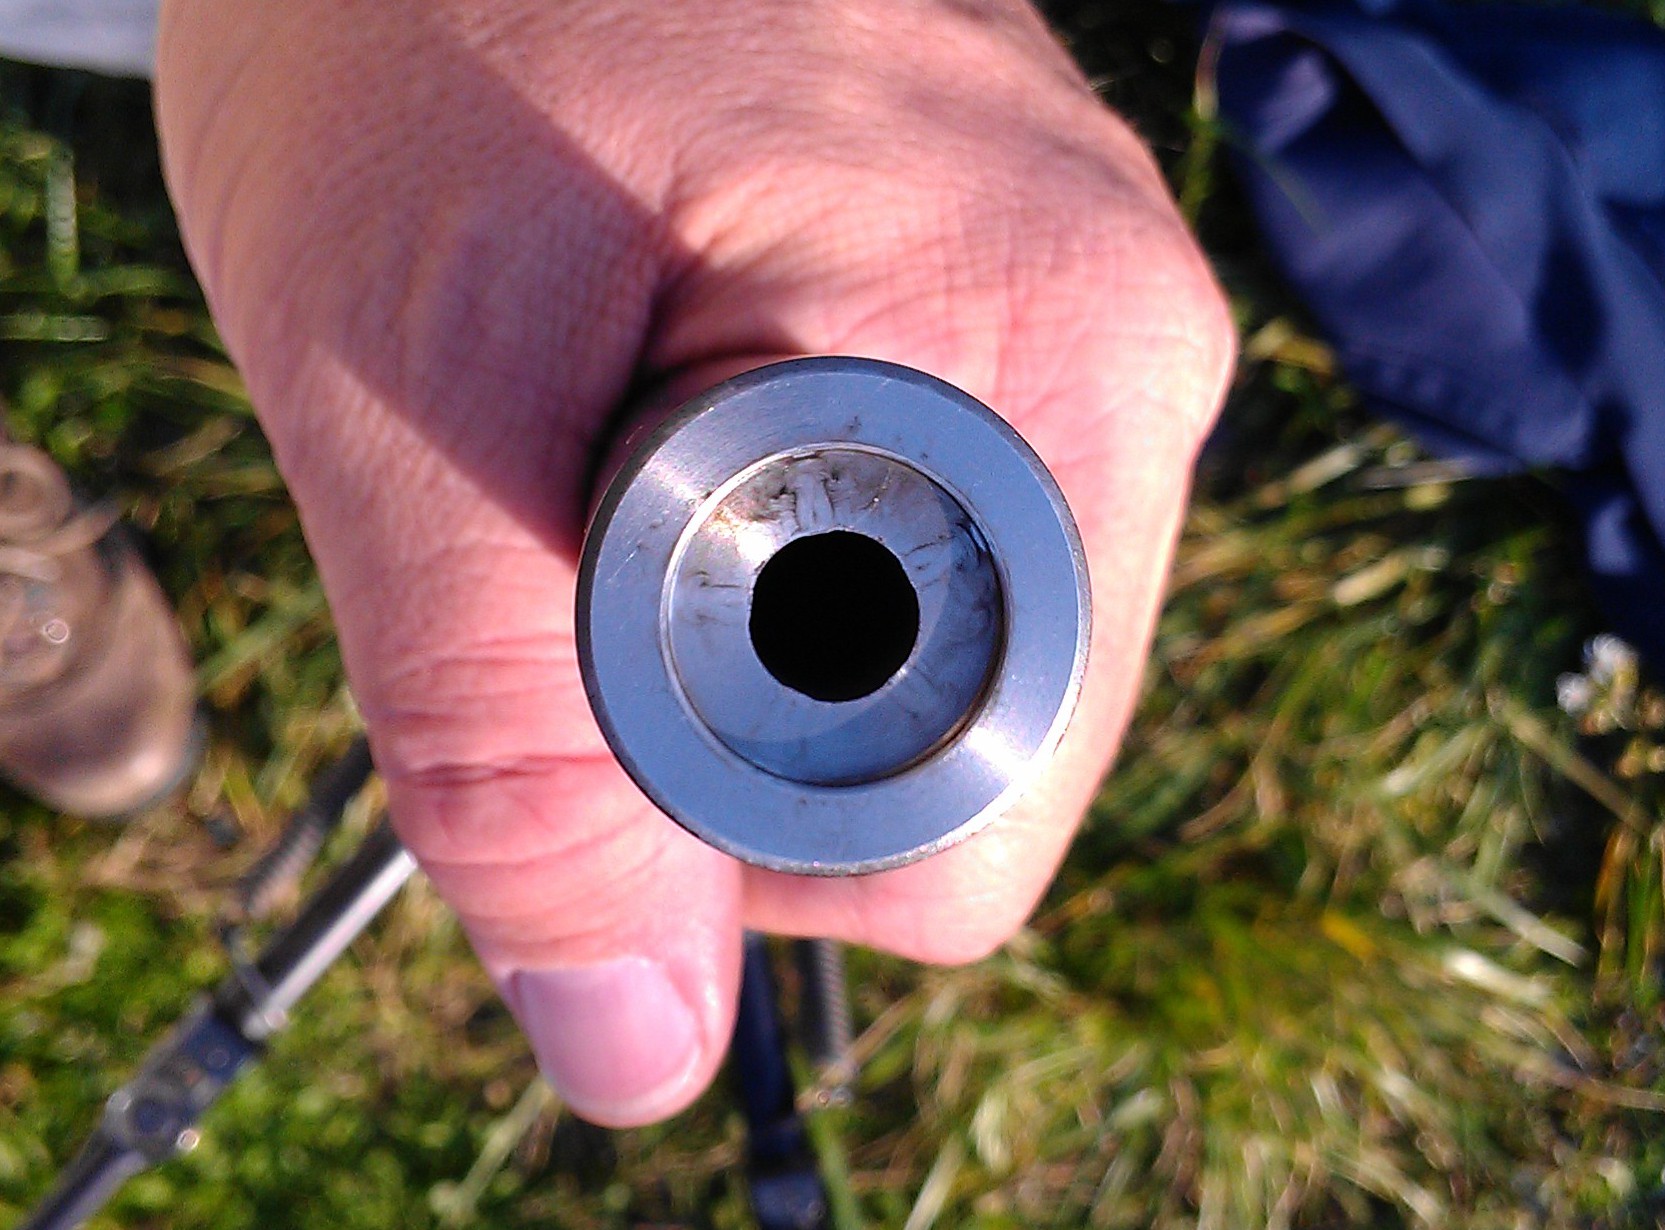
I make a clean face cut, then cut the muzzle face to the desired shape, ie 11 Degre, recessed, etc. My personal preference is a recessed crown.

Next i set the compound rest to 30 degrees, and while turning the headstock by hand, cut the actual crown, the end of the lands transition into the face of the muzzle, to a 60 degree chamfer.

The last thing i do is polish the barrel on the lathe with 400 grit sandpaper and oil.

I'm interested to hear how others do it? I ended up at my method through trial and error, and i admit that im spoiled by using Obermeyer blanks.

They are always very very close to concentric out of the box. The worst ever was .001 out at the muzzle end.

I've tried nearly every method there is, but this one seems to give me the best results on my machine.

 
Re: Your chambering/crown method?

I do everything through the headstock. Range rods and bushings.Try like hell to dial it in to .0001"
 
Re: Your chambering/crown method?

.0001 is tough, my needle jumps more than that when my headstock starts moving or stops, or if the speed im hand-turning it changes, or if theres a spec ot dust on the barrel
grin.gif


I changed my standard to .0002 out of frustration.
 
Re: Your chambering/crown method?

Lose the indicator rods and youll save yourself a ton of headache.....

Try this. Indicate your rod in to .0001 or whatever. Pull the rod out, put it back in, check your indicator.

Now, get yourself a long reach indicator. Put that baby right into the bore. You get the same amount of distance from contact surfaces as you do an indicator rod. But this time when you pull the indicator out and put it back in you are always getting the same reading. Only watch one side of the jump on the dial, takes a bit of practice but Ive found it to be 100 times better than rods. And if you havent bought rods and bushings it also saves you a ton of money and hassle.

As far as chamber and thread, use the above method but always through the headstock. If its going to be a short barrel I have an extension that gets torqued onto the action tenon to do muzzle work.
 
Re: Your chambering/crown method?

Jon,
I know what your saying and I have tried it that way. I literally get a headache watching the needle bounce around!
 
Re: Your chambering/crown method?

A "bestest" B/S indicator with a .00005" resolution (PN: 7033-5) goes a long way towards helping a lathe find the knats arse when centering a part.

DSC_0068-1.jpg


The bigger the dial the bigger the spaces between each graduation. Makes seeing it a lot easier.

Agree, ditch the witching rods. All your doing is stacking tolerances. Always try to read 1:1 with your part.

<span style="font-weight: bold">Sandvik PN: CXS-05T098-20-5210R Grade 1025</span> will make a crown that doesn't require a bit of polishing. They aren't cheap, about $30/per insert and the holder is another $130 bucks. You can run pressurized coolant to the insert if you want. Just rig up a line from the back of the tool holder and it'll spray right at the cutting surface. Get yourself a green wheel for grinding carbide. You can cut a relief on the back side so that it'll reach down to 17/20 cal barrels. Otherwise you have to get jiggy with your tool paths.

DSC_00822.jpg


If you pull from center out it'll cut a burr free finish. I glass all my crowns with a 20X eyeloop and you just see a clean break. 2000rpm is all you need. Just be sure the gibs are snug on your compound and the tool is cutting on center. This'll go a long way to improving surface finish.

IMAG1406.jpg

DSC04264.jpg


Re: Your chambering/crown method?

Ken226, your method works just fine, and I use to do something similar. What I think others might want to see is the results of your work. These results will help others who only believe in one method see that there's more than one way.

Just in case anyone wants to know, I use indicating rods and dial the first couple of inches to with in .0002. You can, and I have indicated to within .0001, but it doesn't make a bit of notable difference. Too many other factors make way bigger differences than that. It's just a good selling point for those that are in the business of selling them selves, which I also understand.
 
Re: Your chambering/crown method?

This was from my last range trip with a .260 I just finished. 100 yards with R-P brass, 42.0 grains of H4350, 140 Amax's loaded to 2.825 oal.

DSC_0563_zpsc7084b55.jpg


I did have one group with a called flyer, about .5 out from the rest of the group. But the camera malfunctioned when i snapped that photo
grin.gif


I know some guys on the internet could shoot groups like this all day long, at 800 yards in a 30mph wind, with thier 1911s. But this is pretty damned good for my twitchy old ass!!

I liked to hold the reamer by hand with a small tap holder and push it in with the tailstock. I made a pusher from 6061t6 aluminum, it has a nice big polished pushing face.

I put the pusher in the tailstock and use it to push the reamer in. Allowing the reamer pilot to find its center.

Holding the tap handle by hand lets me feel how much resistance there is. I can feel if the flutes fill with chips. Its not as dangerous as it sounds, i just keep the first joint of my big finger wrapped around the tap handle. If the reamer were to catch and start spinning, or my finger slip, which has happened countless times, the handle simply slips away and starts spinning.

In fact, when im ready to check the headspace, i just stop pushing the reamer for a sec, untill i cant feel it cutting any more, the release the tap handle and let it turn with the barrel. The i thread the action on and check headspace.

Some would say that holding the reamer in a wrench would introduce side a load and cut the chamber bigger than it should, and i suppose that makes sense, but in practice it hasn't. My reamer measures .470 just above the casehead, and so does my fired brass.


BTW, Thanks for the pics Scott. Thats some very nice work.
 
Re: Your chambering/crown method?

I try to do everything thru the head stock. Use range rods and bushing, dial into .0002 and start making chips. After I take measurements I cut the tenon, thread, cut counter bore and chamber. I chamber at 220 RPMs with coolant flowing on the cutter. When everything is done and barrel is torqued on and Im happy with it I flip it around and cut the crown the same method as Chad. If putting on a muzzle brake I will face the muzzle from inside to outside and start turning down to my major diameter then threading.


It has worked very well for me & guns seem to shoot. I'm always listening on how others do it & if there is a way to improve how I do things I will.

Kc