
When I first go into the long range game, I started with a Leupy MK4. I could tell the reticle was canted, and that got me wondering what else might be wrong with it. In order to do some testing, I made jigs and test targets and developed a little test protocol. Since having the scope level on the rifle is so critical, part of the protocol involves getting the scope mounted in the rings so it is dead level when mounted to the rifle.
I just bought another NF and also have a USO that showed up a few months ago. Yesterday I decided to drag out all the stuff and test both scopes.
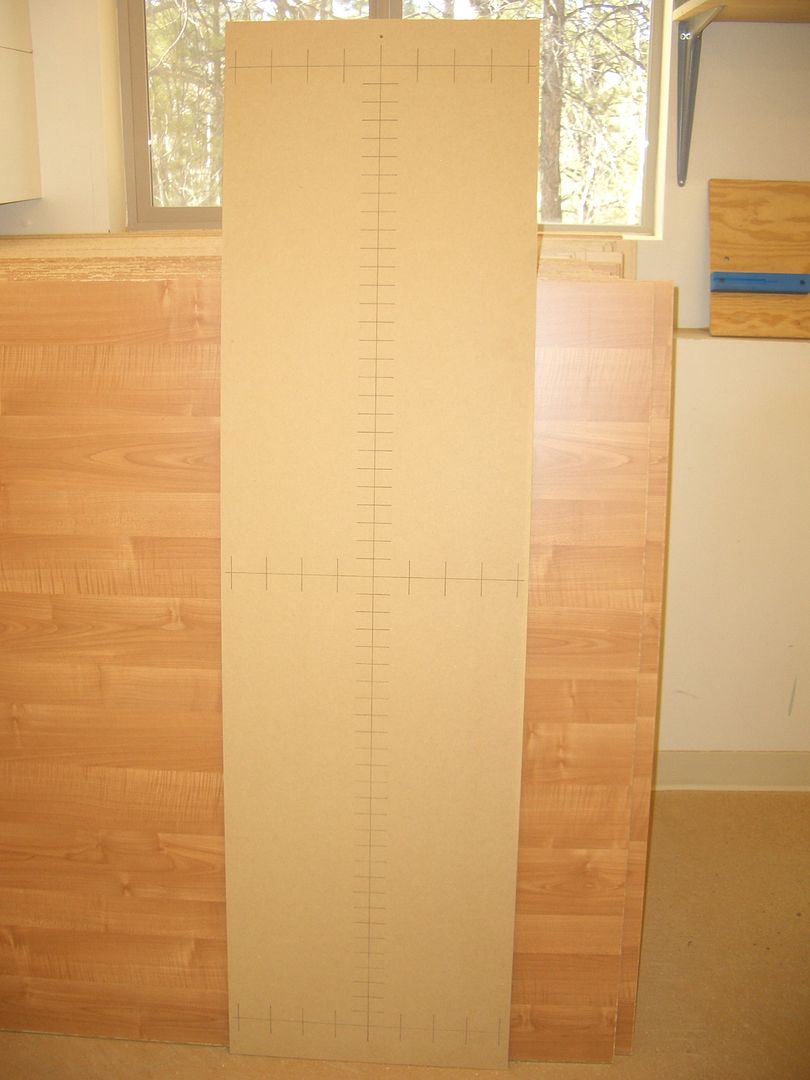
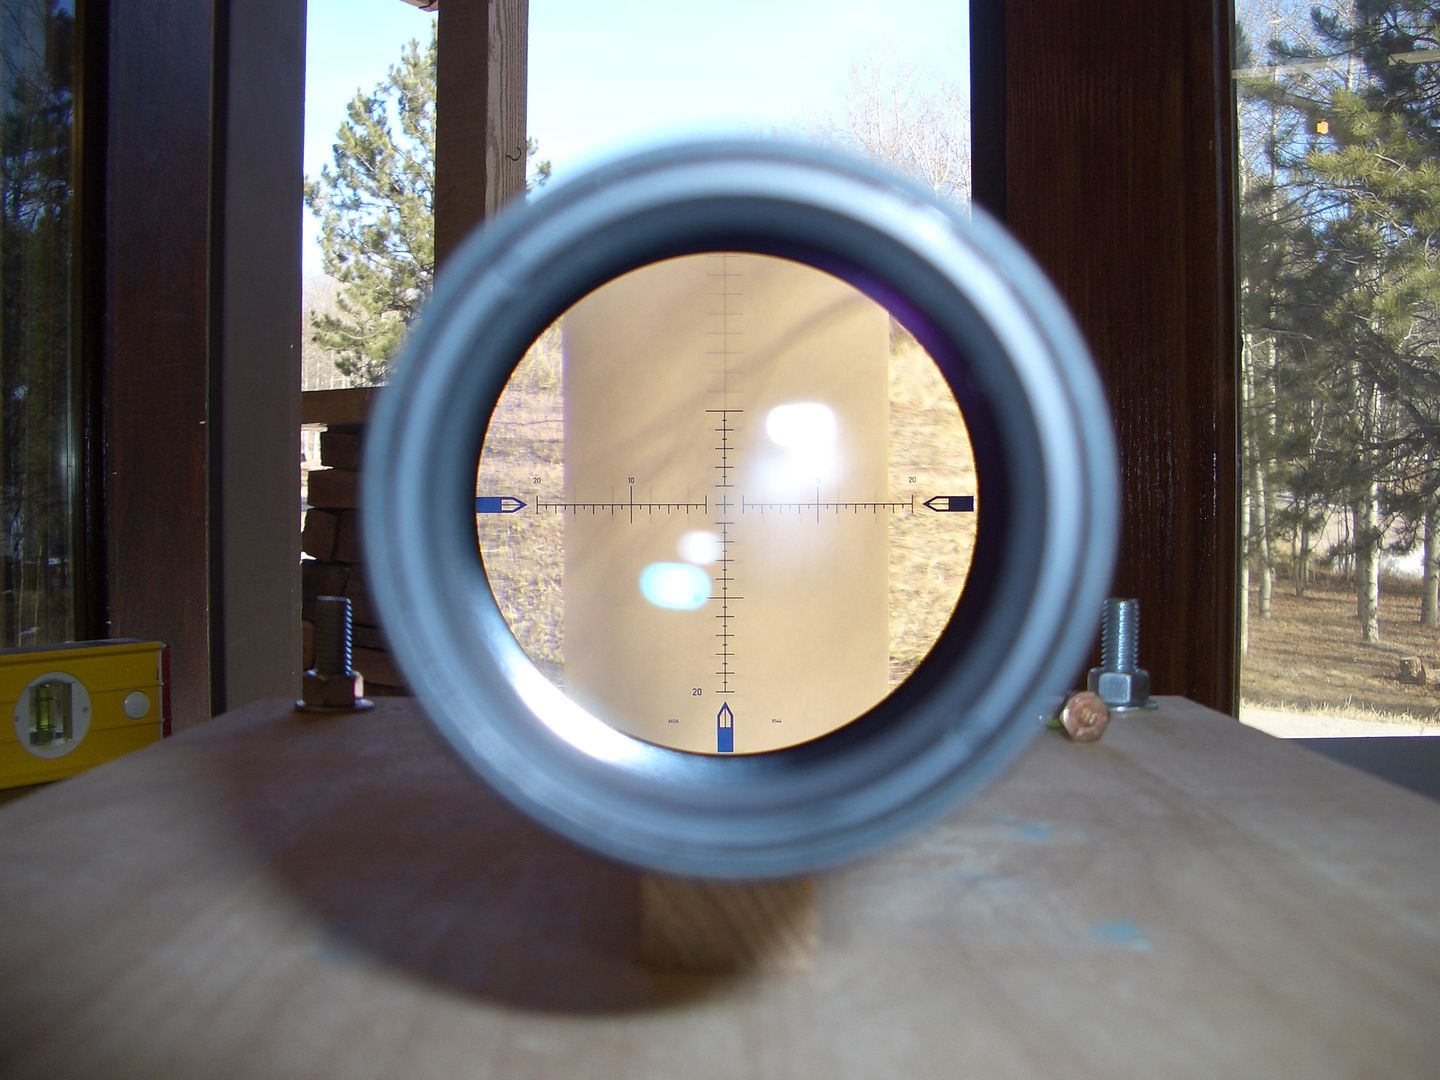
The test target is two sided. I used my CNC router to very precisely scribe lines representing MOA hash marks at 100 yards (1.047" apart). The other side is scribed with mil rads.
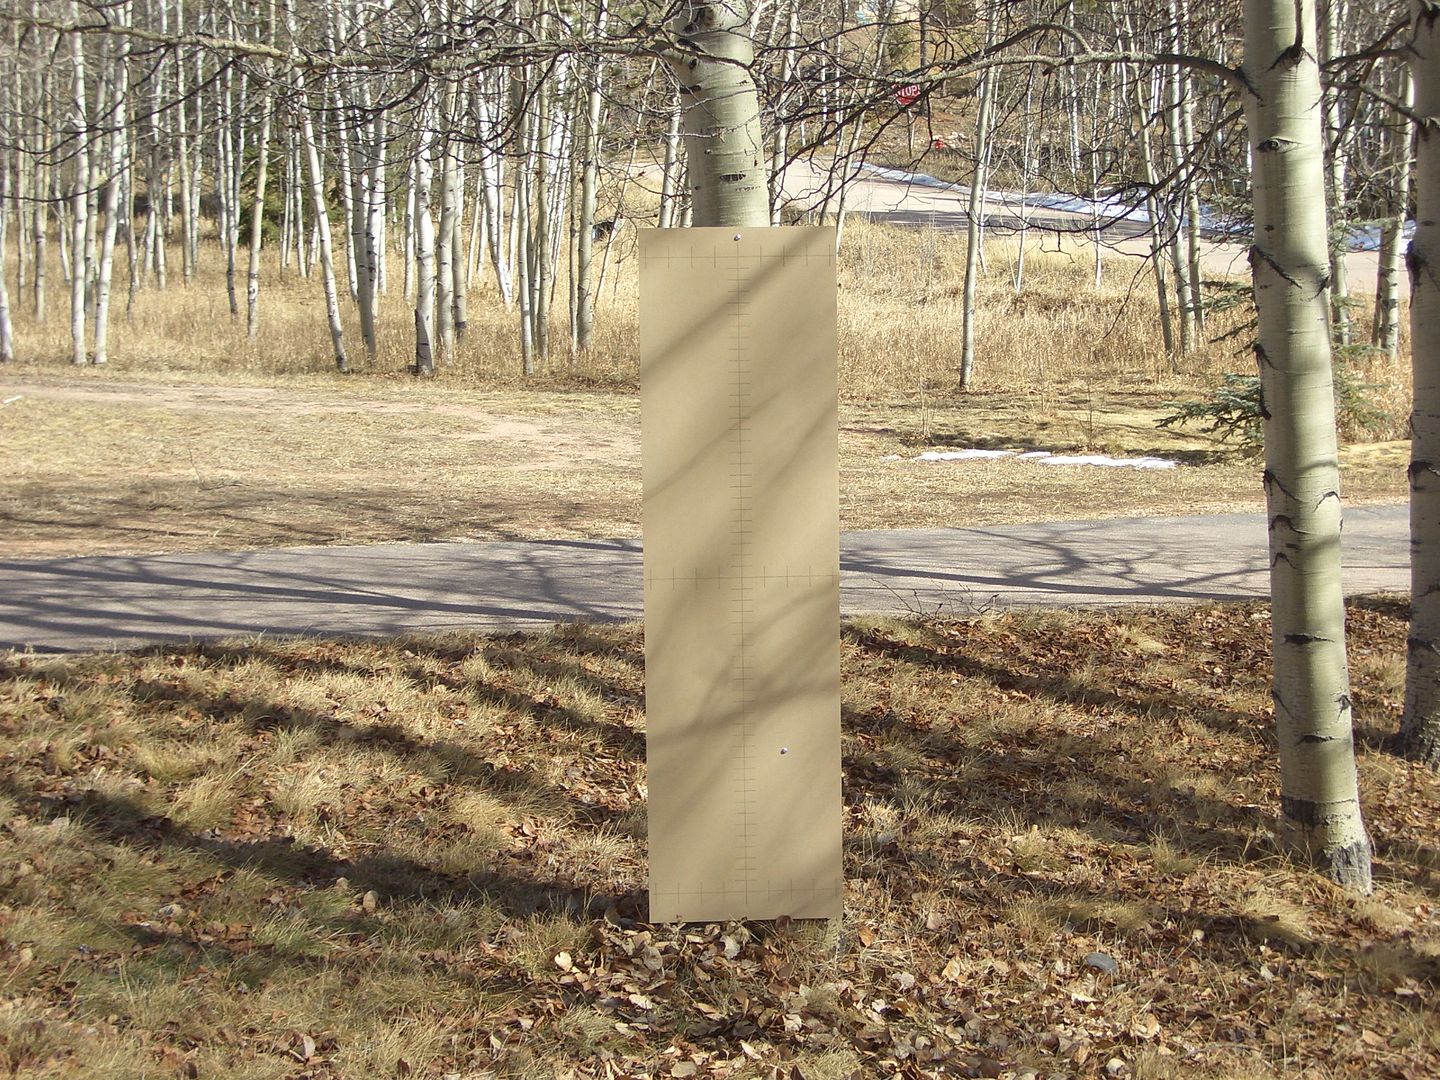
The target got hung perfectly plumb out in the yard at a range of precisely 50 yards. I can get to 100 yards, but it involves the scope being outside while testing and it was cold up here yesterday.
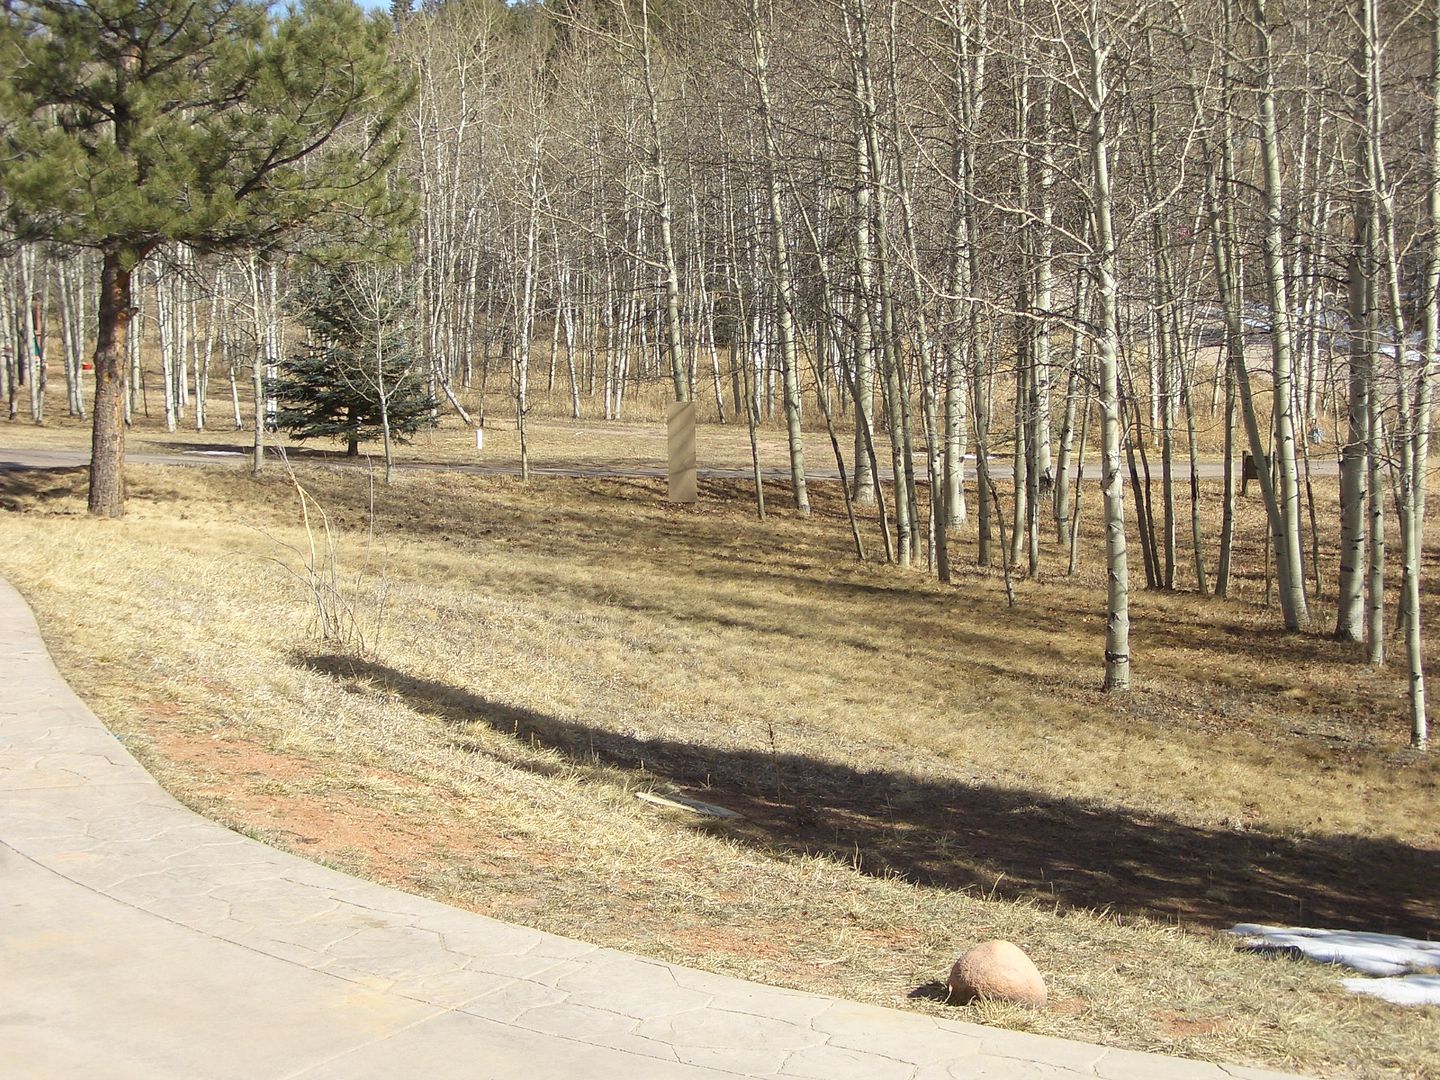
Here's a view from the test position.
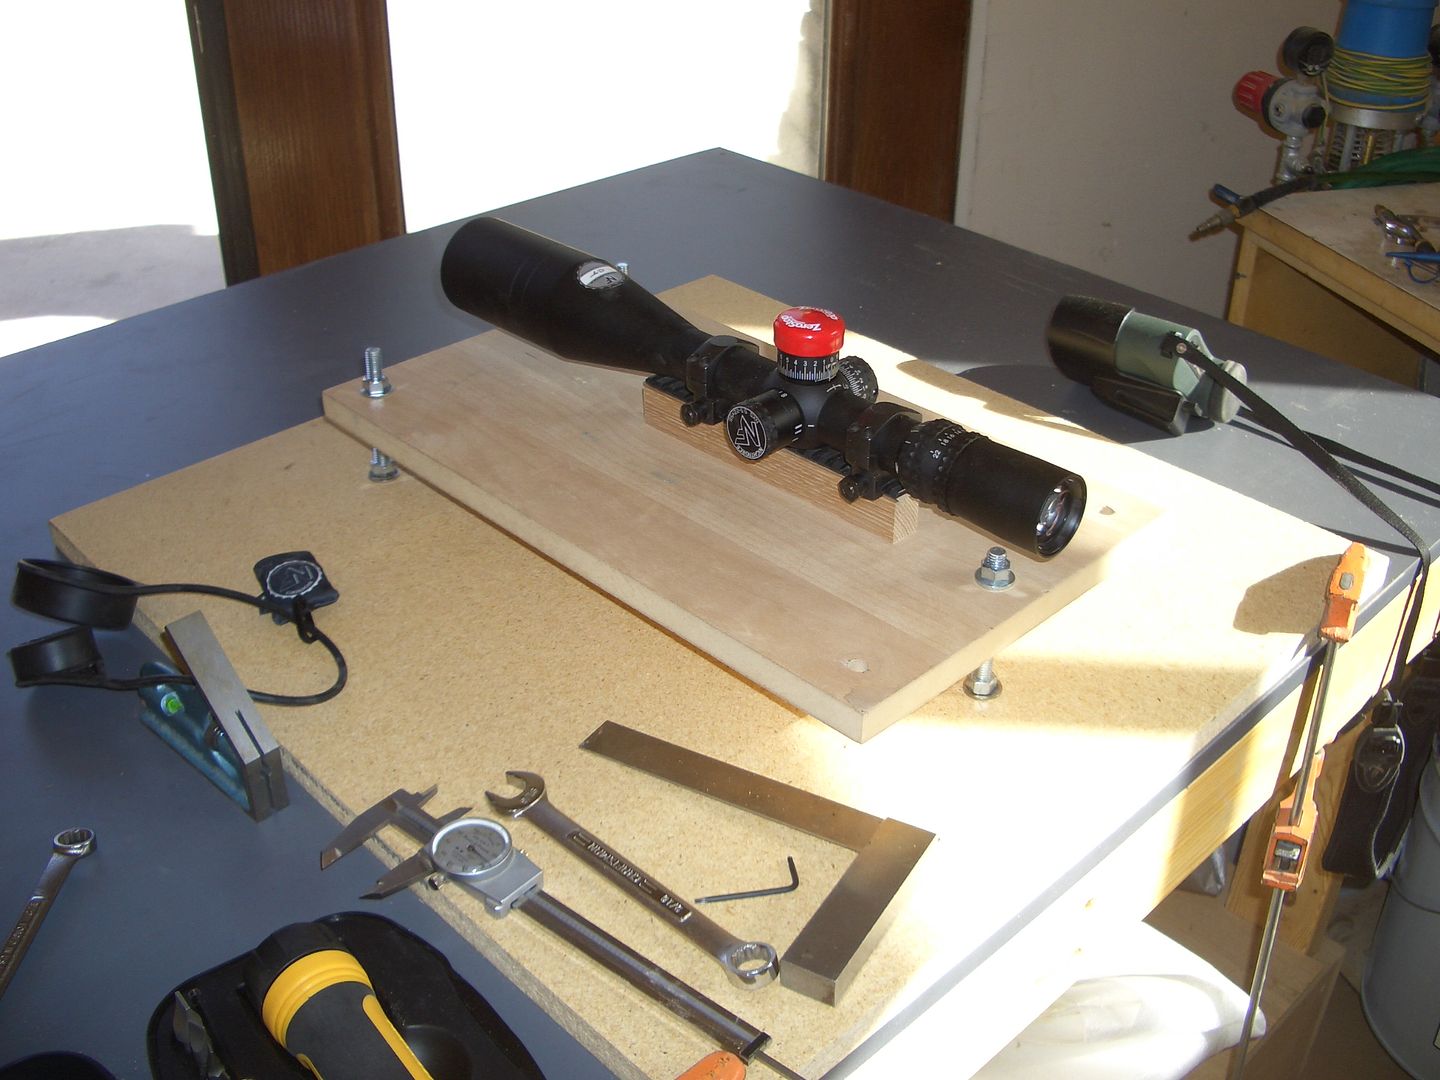
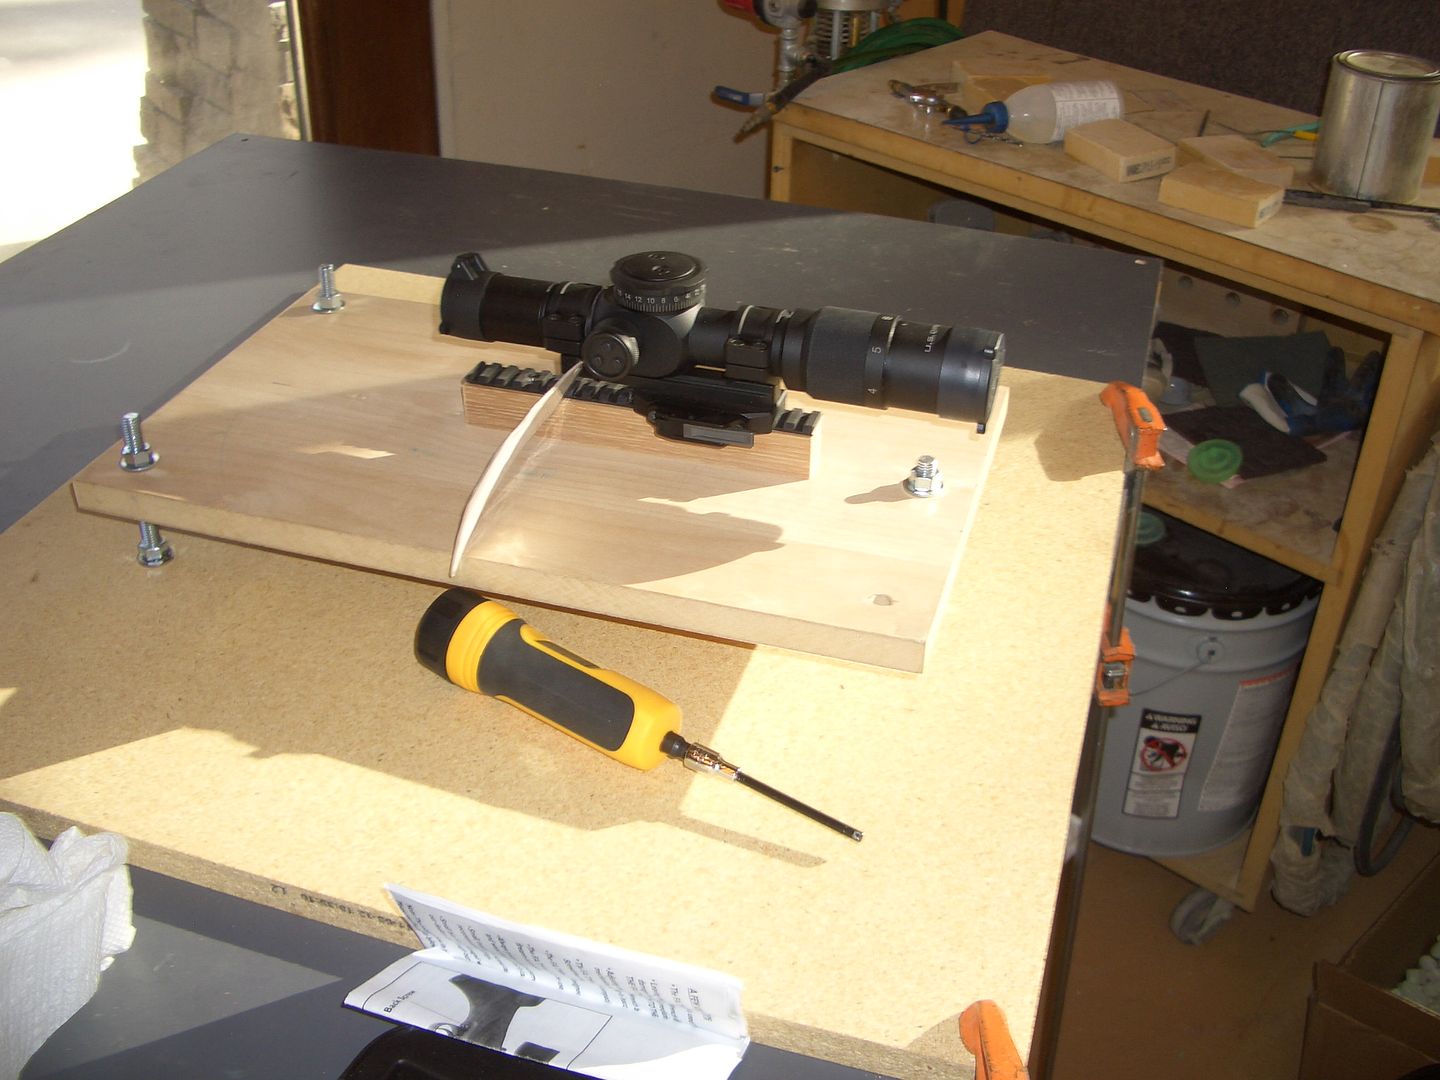
This is my test jig. The first step is to get it level and pointed at the target. I check it with both the carpenters level shown and a machinist's level.

Next, I install the scope on the rail section and aim it all precisely at the test target. At this time, I level the reticle by lining it up with the vertical line on the test target.
Once I have the scope level, I proceed to the actual testing. The fixture is extremely rigid, so I can crank away on the knobs without fear that the scope is moving. After cranking the knobs around, I do the following tests.
Box test - confirms the scope returns to zero.
Click value test - measure how much the reticle moves with knob movement and verify accuracy throughout the adjustment range.
Reticle calibration - confirms the reticle is properly dimensioned by comparing it to the test target.
Reticle cant test - moving the elevation knob should move the crosshairs up and down on the vertical line. Any divergence indicates that the reticle is not parallel to the erector.
Here'a a view through the scope.
A view of the test set up.

Finally, I put the USO up and ran it through the test. Interestingly, USO had mounted it in my Bobro mount after some warranty work. I specifically asked them to mount it with the reticle vertical to the mount, but I found it to be off by about a degree. Not huge, but enough to warrant loosening the rings and fixing it.
I've tested a half dozen scopes with this setup, and it appears to work well. Problems with scopes are extremely obvious. In the past I've found the following:
Reticle canted 5° - Leupold
Scope would not return to zero, 1/2 MOA of slop - Leupold
Click value advertised as MOA, was really IPHY - I forget which scope
Internal level out of whack - USO
Scope not mounted level in rings - every one I check
Scopes I've tested that have been perfect: 2 Nightforce NXS's, USO SN4 (once parallax was fixed and the internal level calibrated by the factory), Millett TRS-1.
Note, none of these tests address the quality of the glass, only mechanical function. I'll probably add some resolution testing or whatever is appropriate next time I run some testing.
I just bought another NF and also have a USO that showed up a few months ago. Yesterday I decided to drag out all the stuff and test both scopes.
The test target is two sided. I used my CNC router to very precisely scribe lines representing MOA hash marks at 100 yards (1.047" apart). The other side is scribed with mil rads.
The target got hung perfectly plumb out in the yard at a range of precisely 50 yards. I can get to 100 yards, but it involves the scope being outside while testing and it was cold up here yesterday.
Here's a view from the test position.
This is my test jig. The first step is to get it level and pointed at the target. I check it with both the carpenters level shown and a machinist's level.
Next, I install the scope on the rail section and aim it all precisely at the test target. At this time, I level the reticle by lining it up with the vertical line on the test target.
Once I have the scope level, I proceed to the actual testing. The fixture is extremely rigid, so I can crank away on the knobs without fear that the scope is moving. After cranking the knobs around, I do the following tests.
Box test - confirms the scope returns to zero.
Click value test - measure how much the reticle moves with knob movement and verify accuracy throughout the adjustment range.
Reticle calibration - confirms the reticle is properly dimensioned by comparing it to the test target.
Reticle cant test - moving the elevation knob should move the crosshairs up and down on the vertical line. Any divergence indicates that the reticle is not parallel to the erector.
Here'a a view through the scope.
A view of the test set up.
Finally, I put the USO up and ran it through the test. Interestingly, USO had mounted it in my Bobro mount after some warranty work. I specifically asked them to mount it with the reticle vertical to the mount, but I found it to be off by about a degree. Not huge, but enough to warrant loosening the rings and fixing it.
I've tested a half dozen scopes with this setup, and it appears to work well. Problems with scopes are extremely obvious. In the past I've found the following:
Reticle canted 5° - Leupold
Scope would not return to zero, 1/2 MOA of slop - Leupold
Click value advertised as MOA, was really IPHY - I forget which scope
Internal level out of whack - USO
Scope not mounted level in rings - every one I check
Scopes I've tested that have been perfect: 2 Nightforce NXS's, USO SN4 (once parallax was fixed and the internal level calibrated by the factory), Millett TRS-1.
Note, none of these tests address the quality of the glass, only mechanical function. I'll probably add some resolution testing or whatever is appropriate next time I run some testing.
